If you have ever looked at a bridge, roof frame, or old-school covered span and thought, “Why are there so many triangles in this thing?” welcome to the club. The answer is simple: triangles are the overachievers of the building world. They are stable, efficient, and surprisingly good at spreading loads around without asking for much attention. That makes a wood truss one of the best beginner-friendly ways to learn how structure, geometry, and woodworking all shake hands.
This guide shows you how to build a simple wood truss model in 15 clear steps. The project is perfect for a classroom demo, STEM activity, workshop display piece, or hands-on introduction to basic truss design. To keep things practical and safe, this article focuses on a small, non-structural demonstration truss made from light wood strips. In other words: this is for learning, not for holding up your garage, your treehouse, or your cousin’s ambitious hot tub dreams.
What Is a Simple Wood Truss?
A simple wood truss is a framed structure made from small wood members connected in a repeated triangular pattern. A typical truss includes a top chord, a bottom chord, and interior web members that connect the two. In a model truss, the joints are often reinforced with thin gusset plates, wood glue, and careful clamping.
For this project, you will build a straightforward truss with two matching side frames connected by spacer pieces. Think of it like building a mini bridge or demonstration beam. The result looks smart, teaches real structural principles, and gives you a satisfying “I made that” moment without requiring a full construction crew and three insurance forms.
Before You Start: Materials, Tools, and Safety
Recommended materials
- Light wood strips such as basswood, hobby wood, or straight poplar strips
- Thin plywood, hardboard, or cardstock for gusset plates
- Wood glue
- Sandpaper in medium and fine grits
- Wax paper or scrap paper to protect the work surface
Recommended tools
- Measuring tape or ruler
- Pencil
- Speed square or small try square
- Hand saw, miter box, or pre-cut hobby wood pieces
- Clamps or clothespin-style mini clamps
- Utility knife or scissors for gusset material
Safety first, because fingers are useful
Wear eye protection while cutting, sanding, or trimming. Work in a clean, well-lit space. If you are using powered equipment, do so only in a properly supervised shop and follow all school, shop, or manufacturer safety rules. Keep hands clear of cutting paths, secure the wood before cutting, and manage wood dust by sanding lightly and cleaning up as you go. If you are young or brand new to woodworking, using pre-cut wood strips is a smart move and still teaches the same structural lessons.
Project Example: A Good Beginner Size
A great starter truss model is about 24 inches long, 4 inches tall, and 3 inches wide. That size is large enough to see the geometry clearly, but small enough to build on a table without turning your room into a lumberyard. You can use a simple Warren-style or Howe-style layout. For beginners, fewer pieces usually means fewer opportunities to invent new vocabulary during assembly.
How to Build a Simple Wood Truss: 15 Steps
Step 1: Decide what kind of truss you want to build
Start with a simple pattern. A basic triangular web layout is easiest to understand and easier to assemble than a highly detailed decorative truss. Draw one side view first. If the design looks confusing on paper, it will absolutely become more confusing after glue gets involved.
Step 2: Pick the final dimensions
Choose the overall span, height, and width. A 24-inch span by 4-inch height works well for a demonstration piece. The width matters because you are building two side trusses and connecting them with spacer pieces. Keeping the dimensions modest makes the project more accurate, easier to clamp, and less likely to twist.
Step 3: Draw a full-size template
On paper or cardboard, draw the entire side truss at full scale. Mark the top chord, bottom chord, and the location of each diagonal or vertical web member. This template becomes your roadmap. It also prevents the classic beginner mistake of cutting first and “figuring it out later,” which is woodworking’s version of skydiving before checking the parachute.
Step 4: Select straight wood pieces
Pick wood strips that are straight, clean, and free from obvious warping, cracks, or badly damaged edges. A truss depends on alignment. Even a good design becomes sloppy if the parts are bowed like overcooked noodles. Small hobby strips are often easier to control than full-size boards, especially for beginners.
Step 5: Measure and mark every piece carefully
Use a ruler and square to mark your cuts. Label the top chord pieces, bottom chord pieces, end posts, diagonals, spacers, and cross braces. Marking each part saves time later and reduces mix-ups during assembly. Yes, “measure twice, cut once” is old advice, but it became old advice because ignoring it is expensive.
Step 6: Cut the chords and web members
Cut the long outer members first, then the shorter internal members. If your design uses repeating diagonals, cut one accurate piece and use it as a pattern for the rest. Keep cuts square or at the angle your plan requires. Clean, repeatable cuts are more important than speed.
Step 7: Sand the cut ends lightly
After cutting, smooth rough edges and fuzzy grain with sandpaper. Light sanding helps pieces sit flat at the joints and improves glue contact. Do not overdo it; you are refining the fit, not turning every strip into a tiny museum sculpture.
Step 8: Cut the gusset plates
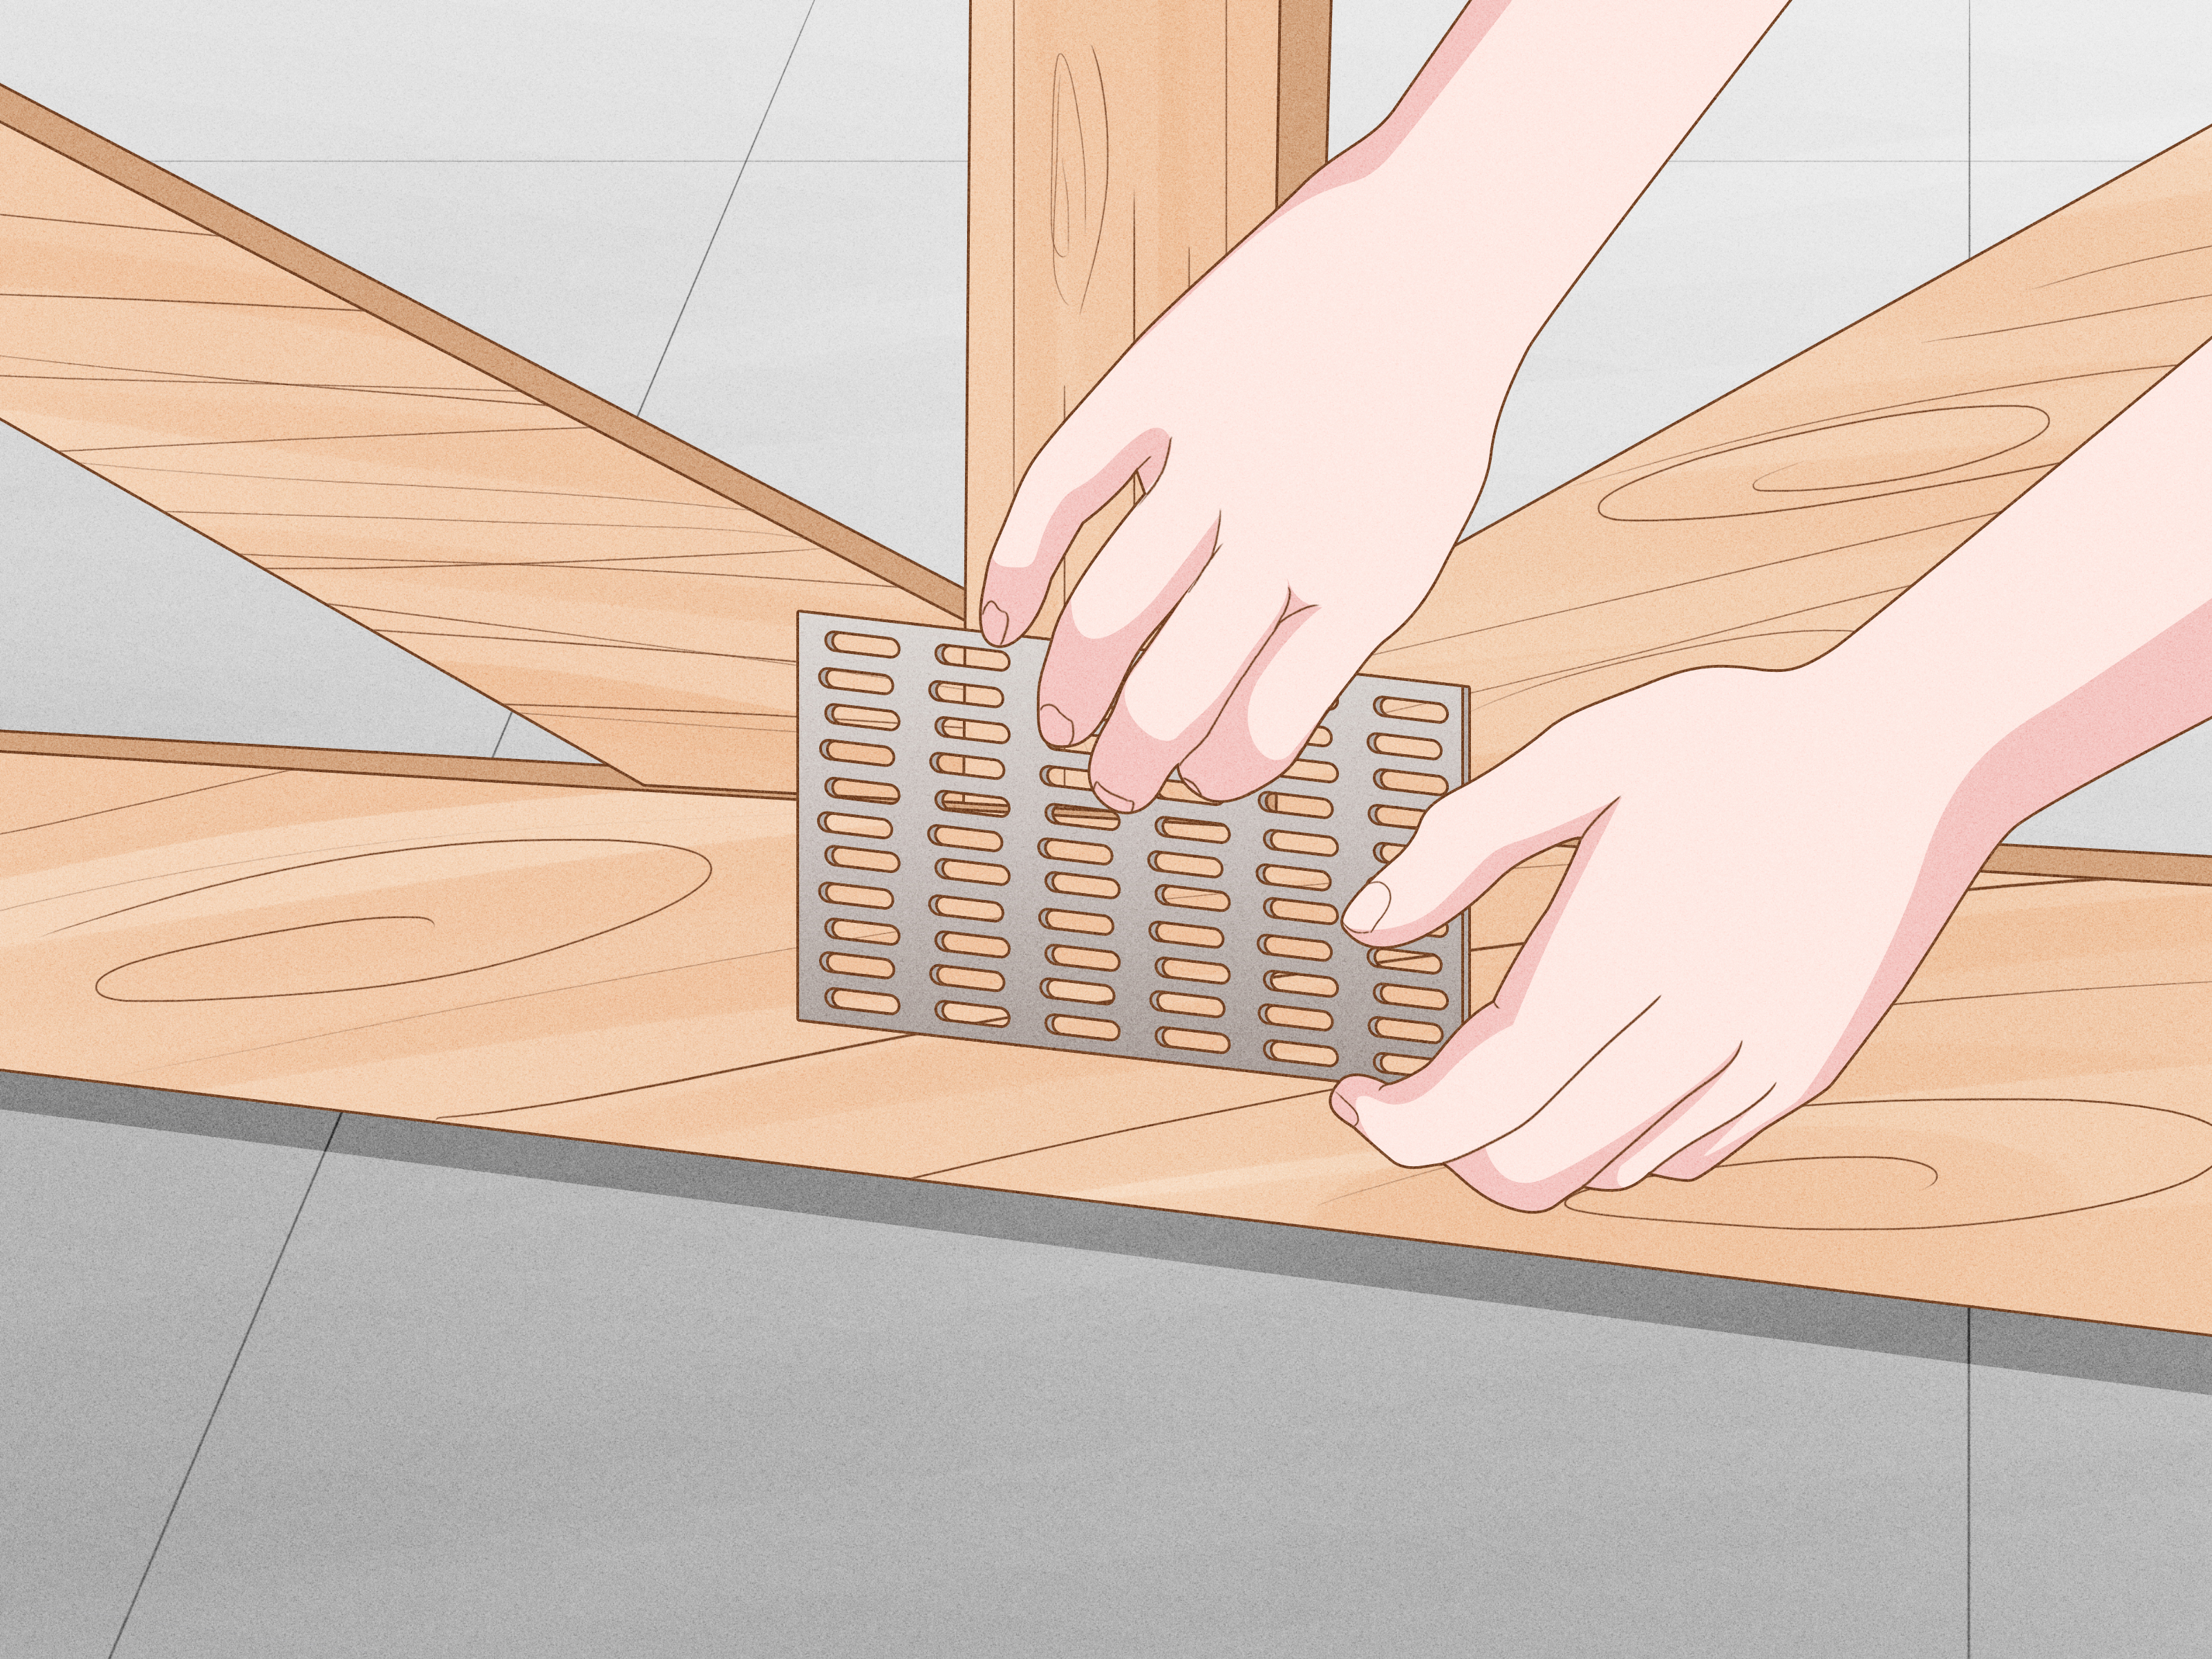
If you are reinforcing joints with gussets, cut small triangles, rectangles, or custom plates from thin plywood, hardboard, or sturdy cardstock. Gussets help hold the members together at the joints and make the structure more stable. Keep them consistent so the finished truss looks neat and balanced.
Step 9: Dry-fit one full side truss
Lay the pieces over your template without glue. Check that all joints meet cleanly, the diagonals sit where they should, and the overall frame stays symmetrical. This is where you catch small problems before glue turns them into permanent personality traits. If anything rocks, gaps, or refuses to line up, trim and re-test now.
Step 10: Glue and clamp the first side
Apply wood glue sparingly at the joints. Press the members together and add gussets if your design uses them. Clamp gently and evenly. Too little pressure may leave gaps; too much pressure can shift the pieces or squeeze out too much glue. Place wax paper underneath so your masterpiece does not become one with the table forever.
Step 11: Let the first side cure fully
Patience matters here. Let the glued side rest long enough for the adhesive to set properly according to the glue instructions. Rushing this step is the woodworking equivalent of taking cookies out of the oven because they “look emotionally finished.” They are not. Give the joints time to gain strength.
Step 12: Build the matching second side
Use the same template and process to make the second side truss. Compare it closely with the first one. Matching side frames are critical because they determine whether the final assembly sits square or twists like a pretzel. Small differences grow larger once the cross pieces go in.
Step 13: Add spacer blocks and connect both sides
Stand the two side trusses upright and connect them with evenly cut spacer blocks. Place one near each end and at least one or two in the middle. This establishes the width of the truss. Check alignment from the front, side, and top before the glue sets. If the assembly leans, fix it immediately while the joints are still adjustable.
Step 14: Install cross-bracing for stiffness
Add top lateral braces and, if your model design needs them, a few bottom cross members. These pieces help the truss hold its shape and resist racking. Even a simple model benefits from this three-dimensional stiffness. Without cross-bracing, a truss can look strong on paper but wobble in real life like a folding card table at a barbecue.
Step 15: Inspect, finish, and test lightly
Once the glue has cured, inspect every joint. Sand away rough edges, trim dried glue squeeze-out, and make sure the truss sits flat. For a classroom-style demonstration, you can place it across two supports and test it with a very light, gradual load such as small books or sandbags. Stop immediately if you hear cracking, see joint separation, or notice twisting. This is a model, not a stunt prop.
Tips for a Better Wood Truss Build
Keep your layout symmetrical
Symmetry makes the truss easier to assemble and easier to understand. When the left and right halves match, loads and visual balance usually make more sense too.
Use clean, flat bonding surfaces
Glue works best when the mating surfaces are smooth, flat, and free from dust and debris. A sloppy joint can weaken an otherwise solid build. Good structure often looks simple from the outside because the careful work happened before the parts ever touched.
Do not over-clamp
Clamps are helpful, but brute force is not the same thing as precision. Gentle, even pressure is the goal. If the parts start skating around on wet glue, back off and re-align them.
Build on a flat work surface
If the table is uneven, the truss may cure out of square. A sheet of plywood, MDF, or another flat panel works well as a temporary bench top for this project.
Label everything
When several diagonals are similar in size, confusion arrives fast. A few pencil labels can save you from assembling two left sides and wondering why the universe is against you.
Common Mistakes to Avoid
- Using warped or damaged wood pieces
- Skipping the full-size template
- Gluing before checking fit
- Rushing cure time
- Forgetting cross-bracing
- Testing the model too aggressively
- Assuming a hobby truss is safe for real structural use
Why This Project Is Great for Beginners
Building a simple wood truss teaches more than just cutting and gluing. It trains your eye to spot alignment problems, teaches you how load paths work, and shows why geometry matters in structure. It also introduces a valuable lesson that applies to almost every DIY project: strong work usually comes from planning, patience, and accuracy more than from muscle or expensive tools.
From an SEO perspective, readers searching for how to build a simple wood truss, wood truss model steps, DIY wood truss project, or beginner truss woodworking guide are usually looking for a practical tutorial that feels doable. That is exactly what this project delivers: a manageable build with real engineering logic and beginner-friendly techniques.
Conclusion
If you want a woodworking project that blends design, structure, and hands-on satisfaction, a simple wood truss is a smart pick. It is approachable enough for beginners, detailed enough to feel rewarding, and useful enough to teach genuine lessons about geometry, material behavior, and assembly technique. Start with a clean design, use straight wood, dry-fit everything, clamp with care, and let patience do its quiet heroic work.
Most of all, remember this: the goal is not just to finish with something that looks like a truss. The goal is to understand why it works. Once that clicks, every triangle in every bridge, roof, and frame starts making a whole lot more sense.
Builder’s Notes: Real-World Experiences and Lessons From Making a Simple Wood Truss
One of the most common experiences people have when building a simple wood truss for the first time is discovering that the design phase matters far more than expected. On paper, a truss can look almost too simple: a few long members, some diagonals, a handful of joints, done. But once the build starts, tiny details suddenly become very loud. A line that is off by even a little can throw the next piece out of position. One diagonal cut a touch short creates a gap. One side frame that dries slightly crooked makes the whole assembly wobble later. This surprises many beginners, and honestly, it is one of the best lessons the project offers.
Another common experience is realizing how important dry-fitting is before glue enters the story. Many builders expect glue to somehow fix minor errors. It does not. Glue is loyal, but it is not magical. It mostly preserves the fit you already have. If the pieces meet cleanly and the frame is square, glue helps lock in that success. If the layout is sloppy, glue simply turns “temporary problem” into “permanent feature.” That is why experienced builders often spend more time checking and adjusting than actually gluing.
People also tend to underestimate how much clamping pressure is enough. First-time builders often go in one of two directions: either they barely clamp at all, or they clamp like they are trying to negotiate with the wood through force. The sweet spot is gentler than many expect. Even pressure usually beats aggressive pressure. Once builders see how easily small parts can shift on wet glue, they start to appreciate calm, controlled assembly.
There is also a very satisfying moment that happens when both side frames finally match and the connecting spacers go in. Up to that point, the project can feel like a pile of sticks with ambition. But once the second dimension appears, the truss starts behaving like a real structure. It stiffens up. It becomes easier to visualize compression, tension, and load paths. This is often the point where the project stops feeling like simple craft work and starts feeling like engineering.
Many builders also learn that neatness is not just cosmetic. Clean joints, trimmed glue squeeze-out, and consistent gusset placement do make the truss look better, but they also help reveal whether the build was accurate. A tidy truss is often a well-planned truss. Messiness can hide problems for a while, but not forever. The first light test usually tells the truth.
Finally, nearly everyone comes away with more respect for triangles than they had before. That may sound funny, but it is true. A finished truss model makes structural logic visible in a way that textbooks sometimes do not. You can literally see how a few carefully arranged members create stiffness and stability. That hands-on understanding sticks. Long after the glue dries, people remember the moment the structure finally held shapeand that is what makes this project worth building.