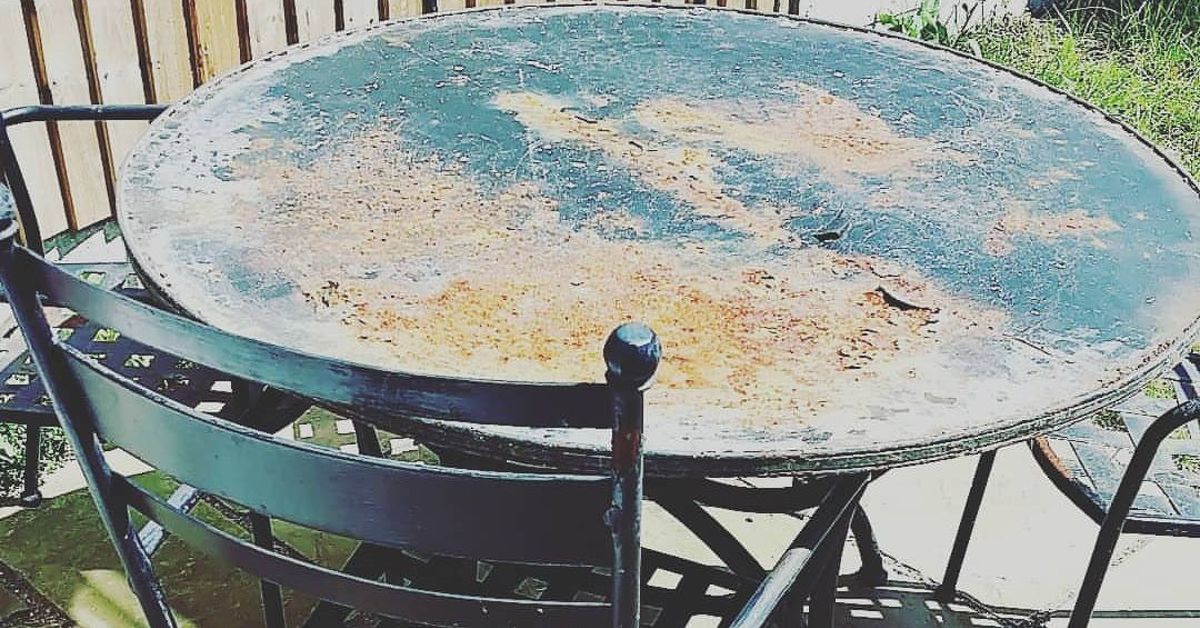
A plain garden table is useful. A DIY mosaic garden table is useful and dramatic enough to make your patio chairs sit up straighter. If you have an old metal, wood, or concrete table that looks like it survived three summers, two storms, and one suspicious barbecue sauce incident, a mosaic makeover can turn it into the centerpiece of your outdoor space.
The beauty of a DIY mosaic garden table transformation is that it blends art, recycling, and practical outdoor furniture repair. You can use ceramic tile, broken dishes, glass gems, porcelain scraps, stone pieces, or premade mosaic sheets. The project is beginner-friendly, but it rewards patience. Think of it as a puzzle with grout, except nobody can accuse you of losing a piece because “abstract design” is always available as a backup plan.
This guide walks through planning, materials, surface prep, tile layout, adhesive, grouting, sealing, and long-term care. You will also find practical examples, common mistakes, and a real-world experience section at the end to help you avoid the classic DIY moment where you whisper, “Well, that dried faster than expected.”
Why a Mosaic Table Makeover Is Perfect for the Garden
A mosaic tabletop works especially well outdoors because it is colorful, durable, and forgiving. Unlike a painted table that may chip or fade, a properly installed mosaic surface can handle sunlight, casual spills, and regular patio use. It also hides imperfections beautifully. A dent, scratch, or stain becomes part of the backstory instead of a reason to haul the table to the curb.
For small patios, a mosaic table can act as both furniture and decor. Blue-and-white ceramic creates a Mediterranean mood. Earthy terracotta and stone feel rustic. Bright glass tiles bring a playful cottage-garden look. Black, white, and gray patterns can make a thrift-store table look surprisingly modern. The design flexibility is one reason mosaic garden furniture remains popular with DIYers, crafters, and homeowners who want custom outdoor decor without paying custom-furniture prices.
Choose the Right Table Before You Start
Not every table is ready for tile. Before you buy adhesive, inspect the base and top. The frame should be sturdy, level, and able to support added weight. Tile, mortar, and grout can turn a lightweight table into a surprisingly serious object. If the legs wobble now, they will not suddenly become heroic after you add five pounds of ceramic.
Best Table Bases for a Mosaic Makeover
Metal patio tables, concrete tables, and sturdy wood tables are good candidates. Metal frames with a tray-style top are especially useful because a raised edge helps contain tile and grout. Concrete is naturally solid and works well when cleaned and prepared correctly. Wood can work too, but it needs extra care because outdoor moisture can cause swelling, warping, and movement beneath the mosaic.
If you are using a wood tabletop outdoors, consider adding a cement backer board or exterior-grade tile substrate before tiling. This gives the mosaic a more stable surface and helps reduce problems caused by seasonal moisture. For a long-lasting garden table makeover, stability matters more than speed.
Materials and Tools You Will Need
Gather everything before you begin. Mosaic work is fun, but it is not the ideal time to discover your sponge has retired to the garage dimension.
Basic Supplies
- Mosaic tiles, broken ceramic pieces, porcelain, glass, stone, or premade sheets
- Tile nippers or wheeled glass nippers
- Safety glasses and gloves
- Sandpaper or sanding block
- Outdoor-rated thinset mortar or suitable tile adhesive
- Notched trowel, putty knife, or spreader
- Sanded grout for wider gaps, or unsanded grout for delicate glass or narrow joints
- Rubber grout float
- Buckets, clean water, and sponges
- Grout sealer suitable for outdoor use
- Painter’s tape, pencil, ruler, and paper for planning
For an outdoor mosaic tabletop, choose products labeled for exterior use. Mortar holds the tiles to the surface; grout fills the spaces between tiles. They are related, but they are not the same job. Using grout as glue is like asking frosting to hold up a brick wall. Delicious idea, poor engineering.
Plan the Mosaic Design Before Touching Adhesive
Planning makes the difference between “handmade charm” and “tile tornado.” Start by measuring the tabletop and drawing the shape on paper. For round tables, trace the top onto kraft paper or tape sheets together. Sketch a simple border, central motif, or repeating pattern.
Beginner-Friendly Design Ideas
A sunburst pattern is great for round garden tables because the lines naturally radiate from the center. A checkerboard border adds structure to random broken-dish pieces. A floral design works well in cottage gardens, while waves or fish scales suit coastal patios. If you prefer a modern style, use square tiles in a grid with two or three colors.
Keep tile thickness as consistent as possible. A tabletop must be practical. If one tile sits much higher than the others, your iced tea may develop trust issues. Slight texture is fine, but large height differences make the surface harder to clean and less stable for cups, plates, and small planters.
Prepare the Tabletop Surface
Surface prep is not glamorous, but it is the secret handshake of successful tile projects. Clean the table thoroughly to remove dust, grease, rust, loose paint, and old sealers. Use mild detergent and water, then let the surface dry. Sand glossy surfaces so the adhesive has something to grip. Wipe away sanding dust with a damp cloth.
For metal tables, remove rust and use a primer if needed before adding tile. For wood tables, repair soft spots, tighten screws, and make sure the top is flat. If the wood is thin or flexible, reinforce it or attach a suitable tile backer board. For concrete, brush away grit and check for cracks. Small cracks can often be filled, but major structural damage should be repaired before the mosaic begins.
Dry-Fit the Tiles Like a Pro
Before applying adhesive, lay out your mosaic pieces on the tabletop or on your paper template. This is called dry-fitting, and it lets you adjust color balance, spacing, borders, and focal points. Leave room between pieces for grout. Mosaic grout lines are part of the visual design, not an afterthought.
Use tile nippers to shape pieces where needed. Always wear safety glasses because tiny tile chips can fly with impressive ambition. Smooth sharp edges with sandpaper, especially if the table will be used around kids, pets, or guests who gesture enthusiastically while telling stories.
Apply Adhesive and Set the Mosaic
Choose an adhesive based on your table material and outdoor exposure. For many outdoor tile projects, thinset mortar is a strong, moisture-resistant choice. Spread a manageable amount at a time using a notched trowel or putty knife. Do not cover the entire tabletop at once unless you have the speed and confidence of a professional tile setter with espresso in their bloodstream.
Press each tile into the adhesive with a slight wiggle. Keep the surface level and maintain consistent spacing. Work from the center outward if your design has a central motif, or from one edge across if you are using a grid. Clean adhesive squeeze-out before it hardens, especially in grout joints. If the gaps fill with adhesive, there will be less room for grout later.
Let the adhesive cure according to the manufacturer’s instructions. Many small mosaic projects need at least 24 hours before grouting, but outdoor conditions, humidity, temperature, and product type can change drying time. When in doubt, give it more time. The garden table is not going anywhere, unless your patio has raccoons with strong opinions about decor.
Grout the Mosaic Tabletop
Grouting is where the mosaic suddenly looks finished. Mix grout according to the package directions. For most broken-tile mosaics with wider gaps, sanded grout is a durable option. For narrow joints, polished stone, glass, or metal tile, unsanded grout may be better because it is less likely to scratch delicate surfaces.
Use a rubber grout float to push grout across the tabletop and into every joint. Hold the float at an angle and work diagonally across the tile lines. This helps pack the joints without dragging the grout back out. Cover the whole surface, then remove excess grout with the float.
Cleaning Grout Haze
After the grout begins to firm up, wipe the tile surface with a damp sponge. Rinse the sponge often and use light pressure. Too much water can weaken fresh grout or wash it out of the joints. Once the surface dries, a powdery haze may appear. Buff it away with a soft cloth after the grout has set enough to handle gentle cleaning.
Let the grout cure fully before sealing. The exact timing depends on the product, but rushing this step can trap moisture or reduce sealer performance. Read the label, follow the instructions, and resist the urge to host a garden brunch on your newly grouted masterpiece fifteen minutes later.
Seal the Table for Outdoor Durability
Sealing is essential for a mosaic garden table because grout is porous. Outdoor exposure brings rain, pollen, dirt, drink spills, and the occasional leaf that somehow turns into a stain. A penetrating grout sealer helps protect the joints and makes cleaning easier.
Apply sealer with a small brush, applicator bottle, sponge, or cloth depending on the product. Work it into the grout lines and wipe excess from the tile before it dries on the surface. Some sealers require two coats. Let the sealer cure before using the table. Reapply as recommended, especially if the table stays outside year-round.
Style Ideas for a Beautiful Garden Table
A mosaic table should look intentional, even if half the tiles came from a thrift-store plate and the other half came from the “I might use this someday” box. Use a limited color palette for a clean design. Three to five colors usually work better than seventeen, unless your theme is “confetti at a ceramic factory.”
Color Palettes That Work Outdoors
For a calming patio, combine white, soft blue, sage green, and sandy beige. For a vibrant garden, mix cobalt, yellow, coral, and emerald. For a farmhouse look, use cream, charcoal, brown, and terracotta. If your garden already has bright flowers, choose a simpler tabletop so the space does not become a visual shouting match.
Border Tricks
A border makes a mosaic table look finished. Use small square tiles, long ceramic strips, or repeated broken pieces around the edge. On round tables, a border helps hide irregular cuts. On square tables, it frames the design like artwork. It also gives the eye a place to rest, which is nice because mosaics are busy little overachievers.
Common Mistakes to Avoid
The first common mistake is skipping surface prep. Adhesive needs a clean, rough, stable surface. The second mistake is using indoor-only adhesive or sealer for an outdoor table. The third is mixing tile pieces that vary too much in height. The fourth is applying too much water while cleaning grout. The fifth is forgetting to seal the grout after it cures.
Another mistake is choosing a complicated pattern for a first project. A peacock, a map of Italy, or your dog’s face may be possible, but start simpler if you are new to mosaics. A geometric border, abstract garden pattern, or sunburst design is easier to finish and still looks impressive.
How Much Does a DIY Mosaic Garden Table Cost?
The cost depends on the table size and tile choice. A small side table can often be transformed with leftover tile, thrifted plates, grout, and sealer for a modest budget. A larger dining table with new ceramic or glass tile will cost more, especially if you need backer board, specialty tools, or premium grout.
To save money, look for tile remnants, broken china, clearance mosaic sheets, or leftover materials from previous home projects. Habitat-style reuse stores, garage sales, and thrift shops can be treasure caves for plates and ceramic pieces. Just make sure the materials are strong enough for outdoor use and not overly fragile.
Care and Maintenance
Clean the finished mosaic table with mild soap and water. Avoid harsh abrasives that can scratch tile or wear down sealer. Use coasters under plant pots, especially terracotta pots that may hold moisture underneath. If your winters are harsh, store the table indoors or cover it during freeze-thaw weather. Water that enters small cracks and freezes can expand, which may loosen tile over time.
Inspect the grout once or twice a year. If you see cracks, repair them early. Reapply grout sealer as needed. A little maintenance keeps the table looking fresh and prevents small issues from becoming weekend-long rescue missions.
Real-World Experience: Lessons From a Mosaic Table Makeover
The most useful experience from transforming a garden table is this: the project is more about rhythm than raw skill. The first hour feels slow because you are sorting pieces, second-guessing colors, and wondering whether the table is judging you. Then the pattern begins to form, and suddenly you are holding a chipped blue plate like it is a rare gemstone. That is the moment the makeover becomes addictive.
One practical lesson is to sort tile pieces by color and size before laying the design. Put small filler pieces in one container, border pieces in another, and special decorative pieces in a third. This prevents the frantic search for “that one perfect triangle” while adhesive is drying. It also makes the process calmer and cleaner.
Another lesson: do not underestimate the edge of the table. The center gets all the attention, but the border determines whether the final piece looks polished. A neat edge can make even a simple random mosaic look professional. If the tabletop has a lip, use it to your advantage. If it does not, plan a strong border with similar-sized tiles so the perimeter feels deliberate.
Grout color also changes everything. White grout can make colors pop, but it shows dirt faster outdoors. Gray grout is forgiving and works with many palettes. Charcoal grout creates drama but may overpower pale tiles. Before committing, place a few tiles on paper and draw grout lines with colored markers. It is not a perfect preview, but it helps you avoid surprises.
The mess is real, but manageable. Tile nipping creates sharp bits, so work over a tray or drop cloth. Grouting looks alarming at first because the entire table becomes a muddy blur. Do not panic. The sponge stage reveals the design again, and it feels a little magical, like archaeology but with patio furniture.
The biggest patience test is curing time. Once the table looks finished, you will want to use it immediately. Don’t. Let the adhesive cure, let the grout cure, and let the sealer cure. A mosaic garden table is meant to last, and those waiting periods are part of the structure, not optional pauses inserted by overly cautious label writers.
Finally, embrace small imperfections. Handmade mosaic has movement, texture, and personality. A slightly irregular line or unexpected color piece can make the table feel warmer than a factory-perfect surface. The goal is not to create a museum artifact. The goal is to create a beautiful, functional outdoor table where coffee cups, flowerpots, books, snacks, and summer conversations can land happily.
Conclusion
A DIY mosaic garden table transformation is one of the most satisfying outdoor furniture projects because it turns something tired into something personal, durable, and full of character. With the right surface prep, outdoor-rated adhesive, thoughtful tile layout, careful grouting, and proper sealing, an old table can become a patio centerpiece that looks custom-made.
Start with a sturdy table, keep the design manageable, use materials suited for outdoor conditions, and give each layer enough time to cure. The finished result will be more than a table. It will be proof that a few broken tiles, some grout, and a weekend of patience can turn garden furniture into functional art. Also, it gives you an excellent excuse to say, “Oh, that? I made it,” which is one of the finest sentences in the DIY language.