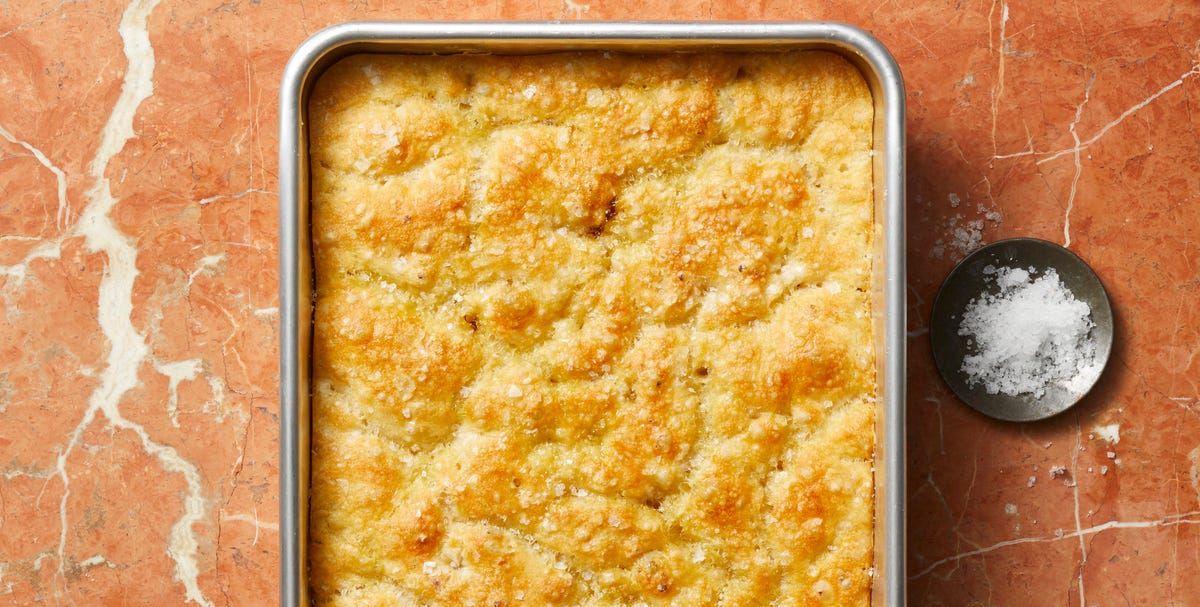
If bread had a “most likely to make you feel like a kitchen genius” award, focaccia would win it every year, probably while wearing olive oil like a designer jacket. This golden, bubbly Italian flatbread looks dramatic, smells like a bakery vacation, and tastes like something you should have to whisper a password to access. The good news? You do not need a wood-fired oven, a culinary degree, or an Italian grandmother standing behind you judging your flour technique.
This best focaccia bread recipe is designed for home bakers who want a crisp bottom, a soft and airy center, and those glorious dimples that hold olive oil, flaky salt, herbs, and tiny pools of happiness. It uses a simple no-knead method, a slow rise for deeper flavor, and easy toppings that make the bread look fancy without requiring the patience of a pastry chef sculpting sugar swans.
Whether you want homemade focaccia for sandwiches, soup night, a dinner party, or a “standing at the counter eating warm bread” situation, this guide will show you exactly how to make focaccia bread from scratch.
What Makes This the Best Focaccia Bread Recipe?
Great focaccia is all about balance. It should be rich but not greasy, chewy but not tough, fluffy but not dry, and salty enough to wake up the flavor without making you drink a gallon of water. The secret is not complicated: use enough water, give the dough time to rise, be generous with olive oil, and bake it hot.
This recipe leans on a high-hydration dough, which simply means the dough contains more water than a typical sandwich bread dough. That extra moisture creates big bubbles, a tender crumb, and the kind of airy texture that makes people say, “Did you buy this?” You may smile mysteriously and say, “No, I am just very gifted.” Totally acceptable.
Ingredients for Homemade Focaccia Bread
For the Dough
- 4 cups all-purpose flour or bread flour
- 2 teaspoons fine sea salt
- 2 teaspoons instant yeast
- 1 3/4 cups warm water
- 1 tablespoon honey or sugar
- 3 tablespoons extra-virgin olive oil, plus more for the bowl and pan
For the Topping
- 3 tablespoons extra-virgin olive oil
- 1 tablespoon fresh rosemary, chopped or left in small sprigs
- 1 teaspoon flaky sea salt
- Optional: thinly sliced garlic, cherry tomatoes, olives, caramelized onions, grated Parmesan, or cracked black pepper
Use good olive oil here. Focaccia is not the time for that forgotten bottle hiding behind the vinegar since last Thanksgiving. Olive oil gives focaccia its flavor, helps crisp the bottom, and creates the shiny, golden top that makes the bread look like it has excellent self-esteem.
Step-by-Step: How To Make Focaccia Bread
Step 1: Mix the Dough
In a large mixing bowl, whisk together the warm water, honey, and yeast. Let it sit for about 5 minutes. If the mixture becomes slightly foamy, the yeast is active and ready to work. If nothing happens, your yeast may be expired, tired, or emotionally unavailable. Start again with fresh yeast.
Add the flour, salt, and olive oil. Stir with a sturdy spoon or spatula until no dry patches remain. The dough will look sticky and shaggy. This is normal. Do not panic and dump in extra flour. Focaccia dough is supposed to be loose, soft, and a little dramatic.
Step 2: Let the Dough Rest
Cover the bowl with plastic wrap, a lid, or a damp towel. Let the dough rest at room temperature for 30 minutes. This short rest allows the flour to hydrate, which makes the dough easier to handle later. Think of it as a spa break for gluten.
Step 3: Stretch and Fold
Wet your hands lightly with water or oil. Grab one side of the dough, gently stretch it upward, then fold it over itself. Rotate the bowl and repeat this motion three or four times. Cover the bowl again and let it rest for another 30 minutes.
Repeat this stretch-and-fold process two more times. You are building structure without kneading. This method helps trap air, strengthen the dough, and create that beautiful open crumb focaccia is known for.
Step 4: Chill Overnight for Better Flavor
After the folds, drizzle a little olive oil over the dough, cover the bowl tightly, and refrigerate it for 8 to 24 hours. This cold fermentation is where the magic happens. The yeast works slowly, the flavor deepens, and the dough becomes easier to handle.
Can you make focaccia the same day? Yes. Should you try the overnight version at least once? Absolutely. It gives the bread a slightly tangy, bakery-style flavor that makes the final loaf taste like you planned your life better than you actually did.
Step 5: Oil the Pan Generously
Use a 9-by-13-inch baking pan for a thicker focaccia or a rimmed half-sheet pan for a thinner, crispier version. Pour 2 to 3 tablespoons of olive oil into the pan and spread it across the bottom and sides. Do not be shy. The oil helps prevent sticking and gives the bottom a crisp, almost fried texture.
Place the chilled dough into the pan and gently turn it so both sides get coated in oil. Let it rest for 15 minutes, then stretch it gently toward the corners. If it springs back, let it rest another 10 minutes and try again. Dough is like a teenager being asked to clean a room: it needs time and gentle persistence.
Step 6: Let It Rise Until Puffy
Cover the pan and let the dough rise at room temperature for 1 1/2 to 3 hours, depending on how warm your kitchen is. The dough should look puffy, bubbly, and relaxed. If your kitchen is cool, place the pan in a turned-off oven with the light on.
Do not rush this step. Under-proofed focaccia can turn out dense, while properly proofed focaccia rises tall, bakes evenly, and develops those irresistible air pockets.
Step 7: Dimple the Dough
Preheat your oven to 425°F. Drizzle the dough with olive oil. Using oiled fingers, press deeply into the dough all over the surface, creating dimples. Press straight down, almost to the bottom of the pan, without tearing the dough.
This is the most satisfying part of making focaccia. It is also the closest baking gets to bubble wrap therapy. The dimples hold olive oil, salt, herbs, and toppings, creating little flavor pockets across the bread.
Step 8: Add Toppings
Sprinkle fresh rosemary and flaky sea salt over the top. Add garlic slices, tomatoes, olives, or onions if you like. Keep toppings light enough that the dough can still rise in the oven. A focaccia is bread, not a vegetable storage unit.
If using fresh garlic, toss it in a little olive oil before adding it to prevent burning. If using cherry tomatoes, press them cut-side up into the dough so their juices roast rather than soak the bread.
Step 9: Bake Until Golden
Bake the focaccia for 22 to 28 minutes, or until the top is golden brown and the edges are crisp. The bottom should be deeply browned, and the bread should sound slightly hollow when lifted and tapped.
After baking, drizzle a little more olive oil over the hot focaccia. Let it cool in the pan for 10 minutes, then transfer it to a wire rack. Waiting is difficult. You are allowed to hover nearby and make encouraging comments.
Best Topping Ideas for Focaccia
Classic Rosemary and Sea Salt
This is the timeless version: olive oil, rosemary, and flaky salt. It pairs beautifully with soups, salads, pasta, roasted chicken, or a quiet evening where bread is the main personality in the room.
Garlic Parmesan Focaccia
Add thin garlic slices before baking and sprinkle grated Parmesan over the bread during the last 5 minutes. The cheese melts into the dimples and creates crispy, savory edges.
Tomato Basil Focaccia
Press halved cherry tomatoes into the dough and add fresh basil after baking. This version tastes like summer walked into your kitchen and brought snacks.
Olive and Onion Focaccia
Top with sliced olives and caramelized onions for a salty-sweet bread that works wonderfully on a cheese board or as the base for an outrageous sandwich.
Common Focaccia Mistakes and How To Fix Them
The Dough Is Too Sticky
Sticky dough is expected. Use wet or oiled hands instead of adding more flour. Too much flour can make focaccia heavy and dry.
The Bread Is Dense
Dense focaccia usually means the dough did not rise long enough, the yeast was weak, or the dough was handled too aggressively. Give it more time and treat it gently.
The Bottom Is Pale
Use enough olive oil in the pan and bake on the lower-middle oven rack. A metal pan usually browns better than glass.
The Top Burns Before the Center Is Done
Move the pan slightly lower in the oven or tent the top loosely with foil. Also check your oven temperature with an oven thermometer, because some ovens lie more than a toddler with chocolate on their face.
How To Serve Focaccia Bread
Fresh focaccia is excellent on its own, but it also has range. Serve it with olive oil and balsamic vinegar, slice it for sandwiches, cut it into cubes for croutons, or pair it with tomato soup. It is also fantastic next to pasta, roasted vegetables, grilled meats, or a simple salad.
For sandwiches, split the focaccia horizontally and fill it with mozzarella, tomatoes, turkey, roasted peppers, pesto, or grilled vegetables. The crisp crust and soft interior make it sturdy enough to hold fillings without turning soggy in five minutes.
How To Store and Reheat Focaccia
Focaccia is best the day it is baked, especially when the edges are crisp and the top is still fragrant with olive oil. Store leftovers in an airtight container at room temperature for up to 2 days.
To reheat, place slices in a 350°F oven for 8 to 10 minutes. You can also warm them in a skillet over medium heat to bring back the crispy bottom. Avoid microwaving unless you enjoy turning beautiful bread into a sad sponge.
Can You Freeze Focaccia?
Yes. Let the focaccia cool completely, then cut it into squares. Wrap the pieces tightly and freeze them for up to 2 months. Reheat directly from frozen in a 350°F oven until warm and crisp. Freezing individual portions is a brilliant move if you want future-you to feel deeply loved.
Experience Notes: What I Learned Making Focaccia at Home
The first time you make focaccia, the dough may feel suspiciously wet. That is the moment many home bakers panic and add more flour. Resist the urge. A wet dough is exactly what helps create the pillowy texture and open bubbles. The best trick is to oil your hands, breathe, and remember that sticky does not mean wrong. Sticky means you are on the road to good bread.
Another experience worth sharing is that the pan matters more than people expect. A metal pan gives the bottom a better crisp than a glass dish. If you love focaccia with a crunchy base, use a dark metal pan and do not skimp on the olive oil. The dough should not be swimming like it is training for the Olympics, but the pan should be generously coated.
Overnight refrigeration also makes a noticeable difference. Same-day focaccia is delicious, but overnight focaccia has more character. It tastes fuller, slightly more complex, and more bakery-like. The schedule is convenient too: mix the dough at night, bake it the next day, and pretend you casually produce artisan bread between normal life activities.
Dimpling is another place where confidence matters. Press deep enough to create real pockets, not shy little fingerprints. The goal is to push the olive oil into the dough and create valleys for salt and herbs. If the dough deflates slightly, do not worry. It will puff again in the oven.
When testing toppings, simple usually wins. Rosemary and flaky salt are classics for a reason. Garlic is wonderful, but it can burn if sliced too thin or left dry on the surface. Tomatoes add color and sweetness, but too many can release liquid and make the bread heavy. Olives bring great flavor, but they are salty, so reduce the finishing salt a little.
The biggest lesson is that focaccia is forgiving. It does not demand perfect shaping, complicated scoring, or advanced bread skills. In fact, its rustic look is part of its charm. If one corner is thicker than another, congratulations, you have created “artisan character.” If the dimples are uneven, call it handmade. If the edges get extra crisp, those pieces will disappear first.
Homemade focaccia also has a way of turning ordinary meals into events. A bowl of soup becomes dinner-party material. A sandwich becomes café-level. A plain kitchen suddenly smells like a bakery that charges seven dollars for a slice and calls it “seasonal.” That is the real beauty of this bread: it feels special, but it is built from simple ingredients and a little patience.
Once you learn the basic method, you can adjust the recipe to match your mood. Make it thicker for sandwiches, thinner for snacking, plain for dipping, or loaded with herbs for a dramatic table centerpiece. Focaccia is flexible, friendly, and hard to mess up beyond repair. That makes it one of the best breads for beginners and one of the most satisfying breads for experienced bakers.
Final Thoughts
This best focaccia bread recipe proves that homemade bread does not need to be intimidating. With flour, yeast, water, salt, olive oil, and time, you can make a loaf that is crisp on the bottom, fluffy in the middle, and rich with savory flavor. The no-knead method keeps things simple, while the overnight rise delivers excellent texture and taste.
Make it once, and you will understand why focaccia has become a favorite for home bakers everywhere. Make it twice, and you may start looking at every meal and thinking, “This could use bread.” Honestly, you would probably be right.