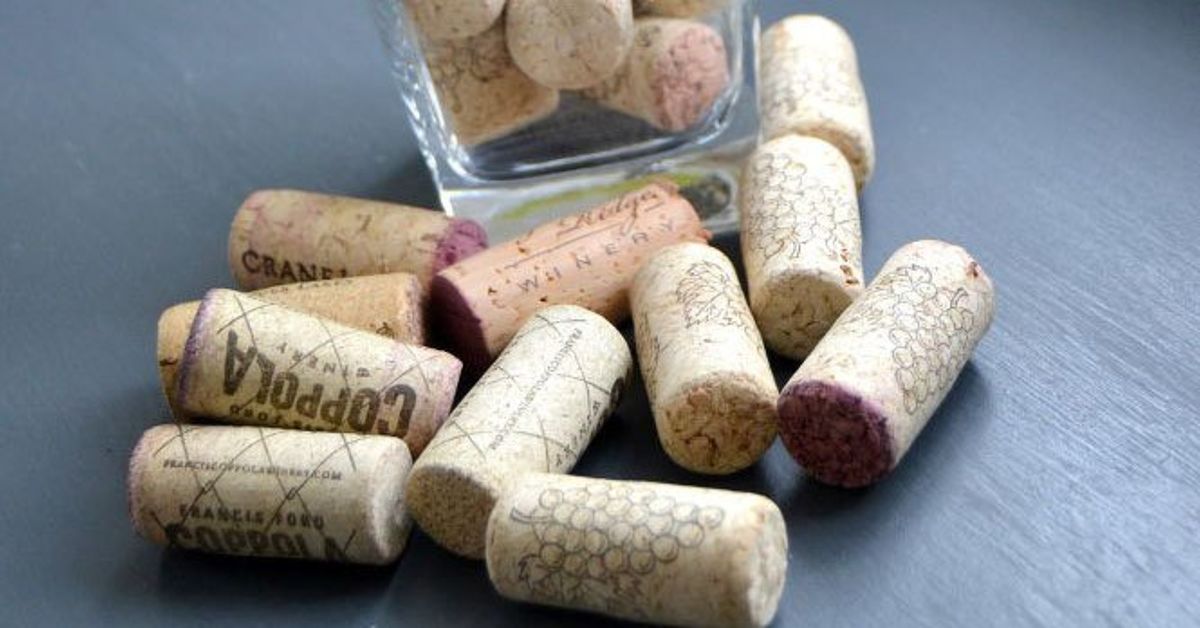
Old corks are the tiny household objects with main-character energy. They sit in jars, roll around in kitchen drawers, and somehow multiply like socks in a laundry room. But before you toss them, consider this: those little stoppers are lightweight, naturally grippy, easy to cut, and surprisingly useful around the home and garden.
Whether your corks came from a craft-store bag, a restaurant collection, or the mysterious “I might use these someday” jar on the shelf, they can be turned into practical DIY projects with very little money and almost no fancy equipment. Think coasters, plant markers, floating keychains, drawer bumpers, memo boards, garden helpers, and charming seasonal decor. In other words, your cork collection is not clutter. It is an unpaid intern waiting for a job description.
Before starting, sort your corks. Natural cork has a fibrous, woody look, while synthetic cork often looks smooth, rubbery, or foam-like. Natural cork works best for garden and compost projects. Synthetic cork can still be used for crafts, but it should not go into compost or soil. Also, clean dusty corks with a damp cloth and let them dry fully before gluing, cutting, or painting.
Why Old Corks Are Worth Reusing
Cork is useful because it is soft but sturdy, compressible, water-resistant, buoyant, and easy to customize. That is why it works so well as a stopper, but those same qualities make it perfect for simple household hacks. It cushions surfaces, labels garden beds, protects tabletops, floats in water, and gives handmade projects a warm rustic look.
Reusing old corks also supports a more sustainable mindset. The best waste is the waste you never create, and upcycling gives small materials a second life before they head to the trash. A cork coaster may not save the planet by itself, but it does save your coffee table from rings, and honestly, that table has suffered enough.
1. Make Cork Coasters That Actually Look Cute
Cork coasters are one of the easiest and most useful ways to repurpose old corks. They protect tables from water rings, add texture to a coffee table, and make your living room look like you have a “coordinated home aesthetic” instead of a “remote controls everywhere” aesthetic.
How to make them
Cut corks lengthwise in half with a sharp craft knife or small saw, then arrange the flat sides down on a thin cork sheet, wooden circle, or square tile. Try a herringbone pattern, straight rows, or a simple checkerboard. Glue the pieces with strong craft glue or hot glue, then let everything dry completely. Trim any uneven edges if needed.
For a cleaner finish, wrap the outside edge with twine, ribbon, or a strip of leather. You can also seal the top with a clear water-based sealant if the coasters will be used often. The result is practical, giftable, and far nicer than a coaster that says “Live, Laugh, Leave Me Alone.”
2. Build a Mini Memo Board for Notes and Photos
If your desk is a battlefield of sticky notes, receipts, reminders, and one coupon you will definitely forget to use, a cork memo board can help. Old corks are naturally pushpin-friendly, making them ideal for a small message board near your desk, entryway, kitchen, or dorm-style workspace.
How to make it
Use a picture frame, shallow tray, or wood panel as the base. Remove the glass if you are using a frame. Cut corks in half lengthwise, then glue them in rows until the backing is covered. Mix horizontal and vertical corks for a woven look, or keep the pattern uniform for a cleaner design.
Once dry, hang the board or lean it against a wall. Use it for grocery lists, appointment cards, Polaroid-style photos, school reminders, seed packets, or tiny motivational notes such as “drink water” and “stop buying more glue sticks until you find the ones you already own.”
3. Turn Corks Into Garden Plant Markers
Plant markers are one of the smartest outdoor uses for old corks. They are small, lightweight, and easy to write on. They also add a cozy cottage-garden look, even if your “garden” is three basil plants on a windowsill trying their best.
How to make them
Write the plant name on the side of a natural cork with a permanent marker or paint pen. Then push a wooden skewer, bamboo stake, or sturdy wire into one end of the cork. Place the marker in a pot, raised bed, or herb garden.
For a more polished version, use a wood-burning pen to label the corks. This creates a rustic look and helps the writing last longer outdoors. Stick to natural cork for garden use, especially if the marker may sit in damp soil. Synthetic cork is fine for decorative indoor plant labels, but natural cork is the better choice for outdoor beds.
4. Create Pot Feet to Improve Drainage and Protect Surfaces
Plant pots need airflow and drainage, but they often sit directly on patios, shelves, windowsills, or saucers. That can trap moisture underneath and leave stains. Cork pot feet solve this problem with almost insulting simplicity.
How to make them
Cut a cork into three or four equal slices. Glue the slices to the bottom of a planter, spacing them evenly so the pot sits level. You can also leave corks whole and place them under larger outdoor containers as removable feet.
This small lift helps air move under the pot and keeps the planter from sitting in trapped water. It is especially helpful for container gardens, balcony plants, and indoor pots placed on wood furniture. Cork is also gentle on surfaces, so your shelf gets protection without looking like it is wearing orthopedic shoes.
5. Use Natural Cork Pieces as Container Mulch
Natural cork can be chopped into small pieces and used as a light mulch on container plants. It helps cover bare soil, reduce splashing during watering, and add a tidy finished look to pots. Because cork is lightweight and buoyant, it is best used in containers rather than open garden beds where heavy rain can send it floating off on a tiny adventure.
How to use it
Cut or break natural corks into small chunks. Spread a thin layer over the soil surface, leaving a little space around plant stems. Use this method for houseplants, patio pots, herbs, and decorative planters.
Do not use synthetic corks as mulch, and avoid corks that are painted, glittered, or coated. Natural cork is the winner here. Synthetic corks belong in craft projects, not in soil. Glittered corks belong wherever glitter belongs, which is apparently everywhere forever once opened.
6. Make a Floating Keychain
A floating cork keychain is a clever little project for keys used near water, such as pool gate keys, boat locker keys, beach bag keys, or backyard shed keys that have a talent for disappearing at the worst possible time. Cork floats, so it gives your keys a fighting chance if they land somewhere wet.
How to make it
Screw a small eye hook into one end of a cork. Add a split key ring, then attach your key. For extra personality, paint the end of the cork, wrap it with colored thread, or add a small label.
Keep the design simple. A giant cluster of keys, metal charms, and decorative hardware may be too heavy to float well. One or two keys are ideal. The goal is “helpful buoyancy,” not “tiny anchor with a cork hat.”
7. Turn Corks Into Drawer Bumpers and Cabinet Cushions
Some household hacks are not glamorous, but they are deeply satisfying. Cork slices can work as bumpers for cabinet doors, drawer backs, cutting boards, picture frames, and small decor items that scrape surfaces. They reduce noise, protect finishes, and cost basically nothing.
How to make them
Slice corks into thin rounds. Glue them to the inside corners of cabinet doors, the bottom of trays, the back of picture frames, or under small tabletop objects. For a cleaner look, cut the slices evenly and sand rough edges lightly.
This is a great use for corks that are stained, uneven, or not pretty enough for display projects. Nobody will see them, but they will quietly protect your furniture like tiny cork bodyguards. It is the DIY version of doing the right thing without needing applause.
8. Craft Simple Cork Stamps for Gift Wrap and Cards
Cork stamps are fun for handmade cards, wrapping paper, gift tags, notebooks, and kids’ craft projects. The round end of a cork already makes a perfect dot stamp, but you can also carve simple shapes into it for stars, hearts, leaves, arrows, or tiny geometric patterns.
How to make them
Draw a simple shape on the end of a cork. Carefully carve away the background so the shape is raised, or glue a small foam shape to the cork end for an easier version. Dip the stamp into ink or paint, then press it onto paper.
This is a great project for scraps: leftover paint, plain kraft paper, old paper bags, envelopes, or basic card stock. Keep the shapes simple because cork is small and slightly crumbly. A heart is realistic. A detailed portrait of your dog wearing sunglasses is ambitious, and frankly, your dog deserves a larger canvas.
9. Design Seasonal Decor: Wreaths, Garlands, and Ornaments
If you have a large cork collection, seasonal decor is where corks really shine. They add texture, warmth, and a handmade look without feeling too precious. You can turn them into mini trees, wreaths, garlands, napkin-ring accents, place-card holders, or small ornaments.
How to make cork decor
For a wreath, glue corks around a flat wreath form in layers until the base is covered. Add ribbon, dried orange slices, faux greenery, small bells, or fabric scraps. For ornaments, glue corks into simple shapes such as trees, stars, or clusters, then add a small eye hook and ribbon for hanging.
For a simple table decoration, cut a slit lengthwise into the top of a cork and slide in a name card. This works for dinner parties, holiday tables, weddings, and casual gatherings. The look is charming without trying too hard, which is basically the best kind of charming.
Tips for Better Cork Projects
Not every cork behaves the same way. Some crumble when cut. Some are slightly warped. Some have printed designs that make them perfect for visible projects. Before starting, group your corks by size, color, and condition. Use the prettiest corks for coasters, boards, and decor. Save damaged corks for hidden uses like bumpers, pot feet, or chopped mulch.
If a cork is hard to cut, soften it slightly by steaming it for a few minutes and letting it cool just enough to handle safely. This can reduce cracking. Always cut on a stable surface and keep fingers away from the blade. For projects involving kids, adults should handle cutting and hot glue.
When gluing cork, match the adhesive to the project. Hot glue is fast and useful for decor. Strong craft glue gives a neater finish for coasters and boards. Outdoor projects may need waterproof glue. Let glued projects cure fully before using them, even if impatience is whispering, “It is probably dry enough.” Impatience has ruined many coasters.
Which Corks Should You Not Use?
Avoid using dirty, moldy, or heavily treated corks in projects. Do not place synthetic corks in compost, garden soil, or mulch. Do not use painted or glittered corks around plants, pets, or food surfaces. If a cork smells bad, looks suspicious, or seems crumbly beyond repair, let it retire with dignity.
For food-adjacent projects, such as trivets or serving trays, keep corks clean and seal them if needed. Cork is porous enough to hold dust and stains, so wipe finished projects regularly. If a coaster or trivet becomes sticky, stained, or damaged, it is easy to repair by replacing a few cork pieces.
Experience Notes: What Actually Happens When You Start Reusing Old Corks
The funny thing about cork projects is that they begin with pure confidence. You see a jar of corks and think, “I am about to become a resourceful design genius.” Then you dump them on the table and discover that no two corks are exactly the same size, half of them have mysterious angles, and one has been chewed by either a pet or history. This is normal. Cork crafting rewards flexibility more than perfection.
In real-life projects, the easiest wins are coasters, plant markers, and drawer bumpers. Coasters feel satisfying because they turn a small pile of corks into something you can use every day. The trick is to choose corks of similar height, especially if you are cutting them lengthwise. Uneven corks can make a coaster wobble, and a wobbly coaster is just a tiny table with trust issues. Laying the pieces out before gluing saves frustration later.
Plant markers are even more forgiving. They do not need to match. They do not need to be perfectly straight. In fact, a slightly imperfect cork marker often looks better because it gives the garden personality. Herbs, tomatoes, peppers, flowers, and seed trays all benefit from clear labeling. Anyone who has ever planted “mystery seedlings” knows the emotional journey of waiting three months to discover whether the plant is basil or a weed with excellent self-esteem.
The most underrated cork project is the cabinet bumper. It is not flashy, but it solves a daily annoyance. A thin cork slice on a cabinet door can soften that sharp closing sound. Cork pads under a tray can protect a tabletop. Small pieces behind a picture frame can stop wall scratches. These tiny fixes do not make dramatic before-and-after photos, but they make a home feel more thoughtful.
Garden cork uses require a little more judgment. Natural cork works well as container mulch, pot feet, and plant markers, but synthetic cork should stay out of soil. Chopped cork mulch can look tidy in planters, but because cork floats, it may shift during heavy watering. Use a light layer and keep it inside pots with a rim. If you want to compost natural cork, chop or shred it first. Whole corks break down slowly, so tossing them into compost untouched is more like giving your compost pile a long-term roommate.
The biggest lesson is this: start small. Do not begin with a giant cork wall, a full wreath, or a complicated geometric masterpiece unless you have plenty of corks, patience, and a snack nearby. Make two coasters, a handful of plant markers, or a floating keychain first. Once you understand how your corks cut, glue, and behave, larger projects become much easier. Old corks are humble materials, but with a little creativity, they can become useful, charming, and surprisingly fun pieces of everyday home life.
Conclusion
Old corks may be small, but they are full of practical potential. With a little sorting, cutting, and gluing, they can become coasters, memo boards, garden labels, pot feet, mulch, floating keychains, cabinet bumpers, stamps, and seasonal decorations. The best part is that most of these projects are inexpensive, beginner-friendly, and easy to customize for your home.
Instead of letting corks sit in a jar forever, give them a purpose. Start with one simple project, use the corks you already have, and let the collection become something useful. Your drawers get cleaner, your home gets a handmade touch, and your old corks finally get promoted from “random objects” to “clever little problem-solvers.” Not bad for something that used to just sit there looking cylindrical.