There are two kinds of Christmas trees in this world. The first kind looks effortlessly magical, as if a team of cheerful elves with excellent taste sneaked in after midnight and styled it while you slept. The second kind looks like a storage bin exploded in a pine tree. If you have ever stood back from your tree, tilted your head, and whispered, “Why does this look… confused?” welcome. You are among friends.
The good news is that a beautiful tree is not reserved for department stores, magazine covers, or people who casually own twelve kinds of velvet ribbon. The real secret, according to advice shared by a Macy’s designer, is not perfection. It is intention. A stunning Christmas tree starts with a clear style, a disciplined color story, thoughtful layering, and just enough personality to keep it from looking like a showroom robot decorated it.
In other words, the best trees are polished, but they still feel human. They sparkle, but they do not scream. They are edited, not overcrowded. And perhaps most importantly, they look like they belong in your home instead of arriving by sleigh from a luxury window display.
So if you want a tree that feels festive, elegant, warm, and just dramatic enough to earn a few compliments from guests who pretend not to be impressed, here is the design-minded approach that makes all the difference.
The Real Secret: Your Tree Needs a Point of View
The biggest mistake people make is treating tree decorating like a free-for-all. One red glitter reindeer here, one rustic snowflake there, three random candy canes, a disco ball ornament, a handmade school craft from 2018, and suddenly the tree has the visual identity of a very festive yard sale.
A Macy’s designer’s advice cuts through that chaos with one smart idea: start with a mood. Before you even unwrap an ornament, decide how you want the tree to feel. Classic and traditional? Elegant and glamorous? Soft and romantic? Playful and nostalgic? Rustic and woodsy? Pick two or three adjectives, and let them do the heavy lifting.
That simple step changes everything. When your tree has a point of view, shopping becomes easier, decorating becomes less overwhelming, and the finished result feels cohesive instead of accidental. Suddenly you are not asking, “Should I put this on the tree?” You are asking, “Does this belong in the story I am telling?” That is a very different question, and it usually leads to a much better tree.
Choose a Color Story and Then Show Some Restraint
If there is one decorating move that instantly makes a tree look more elevated, it is limiting the palette. Not because rules are fun, but because too many competing colors flatten the impact. A good designer tree usually sticks to three or four colors at most, then repeats them with confidence.
Think of it this way: your ornaments are not auditioning for a talent show. They do not all need a solo. They need chemistry.
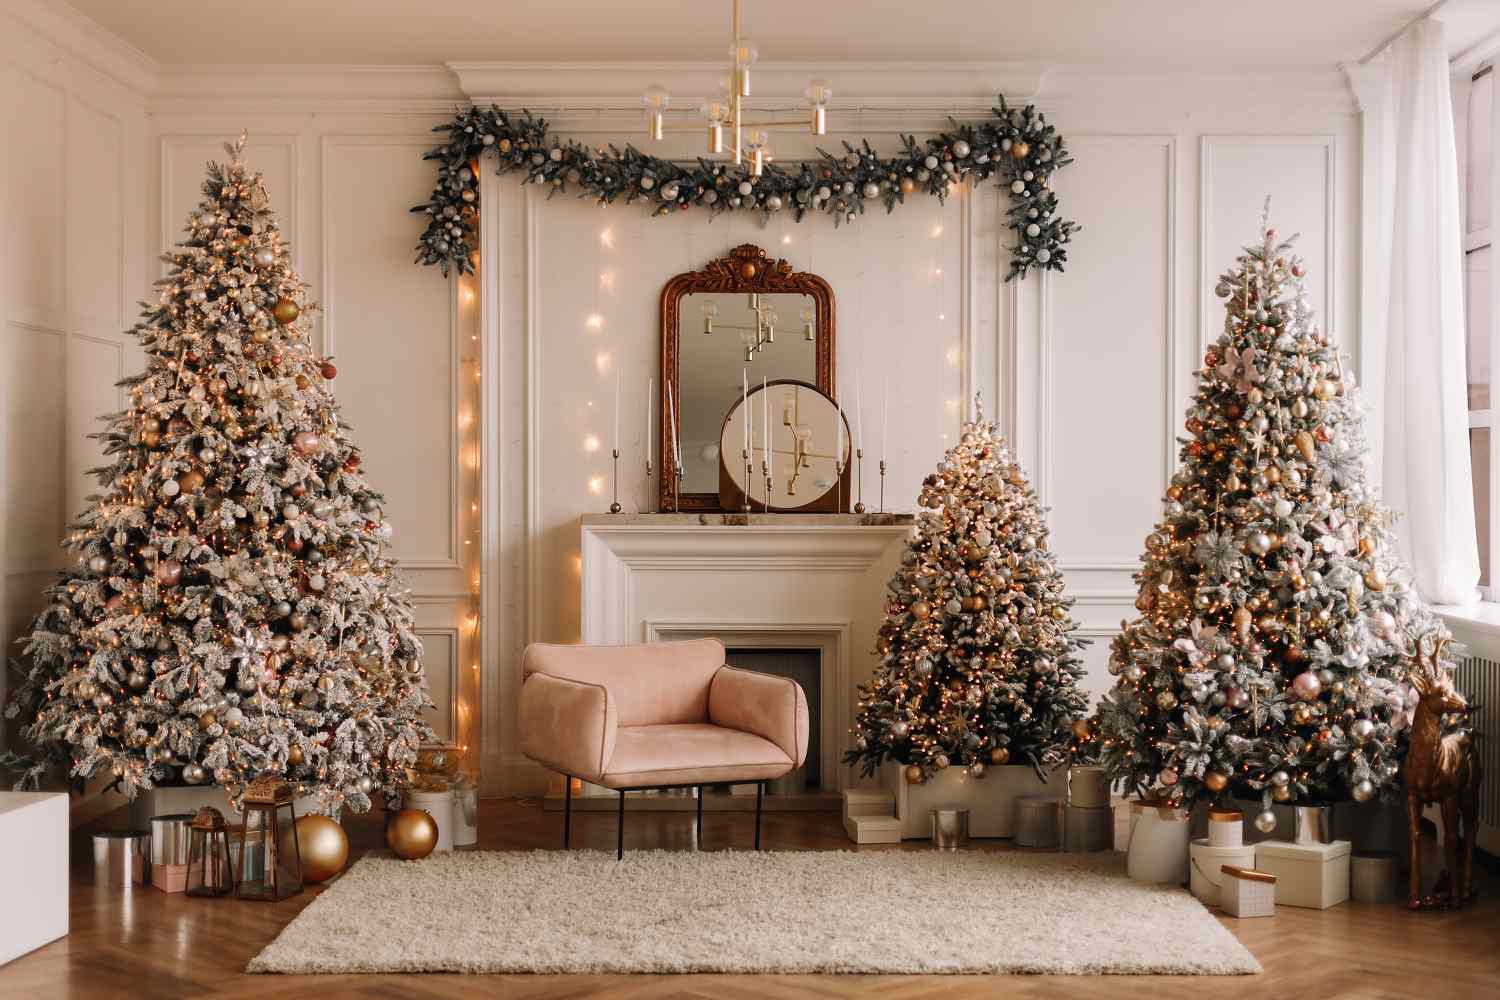
A traditional look might combine red, white, and gold. A more elegant approach could use champagne, silver, and ivory. A modern tree might lean into black, gold, and warm white. A softer, more whimsical version could play with blush, pale blue, lavender, and silver. Whatever palette you choose, repeat it throughout the tree so the eye keeps landing on familiar notes. That repetition is what makes the tree feel deliberate and expensive, even when many of the ornaments were absolutely bought on sale while wearing pajamas.
It also helps to consider the room. A Christmas tree does not live in isolation. It lives beside your sofa, near your rug, under your lighting, and in full view of your existing decor. The most beautiful trees usually echo something already in the space, whether that is a metallic finish, a textile pattern, or a color already woven into the room.
Before You Decorate, Build a Better Tree
Designers know something the rest of us often learn the hard way: a stunning tree begins before the first ornament ever goes on. If the tree itself looks thin, smushed, crooked, or unbalanced, no quantity of glittery ornaments is going to rescue the situation. That is like putting designer shoes on a folding chair and hoping for the best.
If you are using an artificial tree, fluff it thoroughly. Yes, thoroughly. Not “good enough.” Not “I spread the top three branches and called it personal growth.” Thoroughly. Shape each branch, separate the tips, and create fullness from the inside out. The tree should look attractive even when it is bare. If it does not, keep fluffing.
If you are using a real tree, take the same design mindset into the selection process. Measure your ceiling height and doorway width before shopping. Think about branch strength if you plan to use heavier ornaments. Once the tree is home, give it fresh water daily and keep it away from direct heat. A dry, droopy tree is not festive. It is a fire hazard wearing a star.
And do not overlook the stand. A reliable stand matters because a leaning tree can make even a well-decorated setup feel off. A sturdy base gives the whole arrangement confidence. Then, once the mechanics are handled, cover that stand with a skirt, collar, or basket so the bottom looks as intentional as the top.
Light It Like a Pro, Not Like You Are Wrestling a Garden Hose
Ask any decorating expert and you will hear the same advice: lights go on first. Not after the ornaments. Not after the ribbon. First. This is the foundation layer, and it shapes the glow of everything that comes after.
The designer trick is to place lights deeper into the tree, not just around the outer edge. When lights sit only on the surface, the tree can look flat, like a sparkling outline. But when some lights are tucked farther inside the branches and others sit closer to the front, the tree gets depth, dimension, and that rich inner glow that makes people stop mid-sentence and say, “Okay, wow.”
You also want enough lights. A lightly lit tree can look sparse no matter how many ornaments it has. Warm white lights tend to create a classic, upscale look, while multicolored lights feel cheerful and nostalgic. Neither is wrong. The key is committing to the mood. If your tree is elegant and neutral, multicolored lights may fight that vision. If your tree is retro, playful, or family-focused, colored lights can absolutely work.
For safety and practicality, LED lights are a smart choice. They run cooler and are often easier to connect in longer runs, which is helpful when you are trying to avoid turning your living room into an obstacle course of extension cords.
Ribbon Is the Designer Cheat Code
If ornaments are the jewelry, ribbon is the couture gown. It adds softness, movement, texture, and volume. It also fills visual gaps faster than almost anything else, which is why so many designer-style trees rely on it.
The trick is not to strangle the tree with ribbon like you are gift-wrapping a giant broccoli spear. Instead, think in loose, intentional placements. Wired ribbon works especially well because it holds shape and lets you create elegant folds, loops, or cascades. Some people drape it vertically from the top. Others tuck it into branches in generous waves. Both can look beautiful, as long as the ribbon feels integrated into the tree instead of dropped on it in a panic.
Velvet ribbon instantly reads luxe. Plaid feels classic and cozy. Burlap leans rustic. Sheer ribbon can look light and romantic. Bows, especially lately, have become a favorite finishing touch because they add shape and softness without much fuss. A large bow topper can even replace a traditional star or angel if you want a tree that feels a bit more fashion-forward.
And if your budget is not in a “custom holiday installation” mood, ribbon is one of the easiest ways to make a tree look fuller without buying dozens more ornaments.
Layer the Ornaments for Depth, Not Just Coverage
Here is where many trees lose the plot: everything gets hung on the branch tips at the same visual level, as if the ornaments formed a union and demanded equal exposure. The result is often a tree that looks busy on the outside and oddly empty inside.
A better method is layering. Place larger ornaments deeper into the tree or closer to the trunk, especially round ball ornaments that catch light beautifully. Use medium ornaments through the middle zone, then lighter or more detailed pieces toward the outer tips where they can be appreciated up close. This creates dimension and helps the tree feel lush rather than two-dimensional.
Repeat shapes and finishes around the tree so no one section feels heavy. If you have eight gold balls, do not put all eight in one area as if the tree is developing a metallic rash. Spread them out. The same goes for statement ornaments, picks, or floral stems. Distribution matters.
It also helps to edit. Not every ornament has to go on the main tree every year. You can rotate pieces, create mini trees in other rooms, or save the deeply sentimental but visually chaotic ornaments for a family memory tree elsewhere. That may sound ruthless, but it is actually freeing. Your living room tree does not need to hold every holiday emotion you have ever had since second grade.
Do Not Ignore the Back of the Tree
One of the most useful ideas from the Macy’s-designer approach is decorating all around the tree, not just the front. Even if your tree sits near a wall, giving attention to the sides and inner branches creates fullness from every angle. A tree decorated only on the front often looks thin and strangely unfinished, especially once people start moving around the room.
This does not mean the back needs as much detail as the front if it is fully hidden. It means the tree should feel visually supported all the way around. Add lights and some ornaments to the sides, work ribbon through the middle, and make sure the silhouette reads full rather than hollow. Think of it as decorating for depth, not just display.
Keep the Bottom Clean and the Top Proportional
Another small choice that has a surprisingly big effect is what happens at the very bottom of the tree. Ornaments hanging lower than the bottom branches can make the whole tree look droopy. Keeping the lower edge clean helps the shape stay crisp and intentional.
At the top, choose a topper that matches the scale of the tree. A tiny topper on a full tree can look timid. A gigantic topper on a slim tree can look like it is making unreasonable demands. Whether you go with a star, angel, oversized bow, or decorative spray, the topper should feel like a confident ending, not an afterthought.
Then finish the base. A tree collar, woven basket, or generous skirt hides the stand and frames the whole composition. Add wrapped gifts, lanterns, or a few decorative boxes underneath if you like, but keep it edited. The floor around the tree should support the moment, not turn into a retail clearance table.
The Most Important Finishing Touch Is Personal
All the designer advice in the world means very little if the finished tree feels generic. The most memorable Christmas trees always include something personal. Maybe that is heirloom ornaments from your grandparents, handmade decorations from your kids, tiny travel souvenirs, dried orange slices, or candy canes tucked into the branches. Maybe it is a theme built around family traditions instead of trends.
This is where the tree stops being beautiful and starts being meaningful. And that matters, because the most successful holiday decor is not just nice to look at. It creates atmosphere. It tells a story. It makes the room feel lived in and loved.
That is also why the best trees often balance polish with imperfection. A designer-inspired tree can still have humor, memory, and odd little details. In fact, it should. Otherwise it is just very expensive shrubbery.
How to Get the Look Without Spending Macy’s Money
If you love the department-store level of drama but not the department-store level budget, focus on the biggest visual wins. First, commit to a tight palette. Second, buy more lights than you think you need. Third, use ribbon or bows to create volume. Fourth, repeat a few affordable ornament styles instead of buying one of everything. Fifth, add natural texture like pinecones, dried citrus, or faux stems to make the tree feel layered.
You can also repurpose what you already have. Holiday cards can become ornaments. Leftover ribbon from gift wrapping can become ties or bows. Kitchen twine, cinnamon sticks, bells, or simple paper decorations can all look charming when used with intention. A good tree is not about owning the most decor. It is about making smart choices and repeating them with confidence.
My Own Experience Trying the “Designer Tree” Method
Last year, I decided my Christmas tree needed an intervention. For several seasons in a row, I had been decorating it with the same chaotic optimism I brought to packing for a weekend trip: bring everything, make no cuts, and trust that somehow it will all work out. It never did. My tree always looked cheerful, yes, but also slightly confused, like it had agreed to host five different holiday parties on the same night.
So I tried the designer method. Before opening a single storage box, I asked myself how I wanted the tree to feel. Not what I owned. Not what was trendy. Just the feeling. The answer was easy: warm, classic, and a little elegant, but still cozy enough that no one would be afraid to sit near it with a mug of hot chocolate. That gave me a direction immediately.
I chose a palette of deep red, cream, gold, and natural green. Right away, that forced me to put a few rogue ornaments aside, including a neon novelty llama that I absolutely adore but that clearly belonged to a different cinematic universe. I fluffed the artificial tree far more thoroughly than I had in previous years, and I wish I could tell you I did this with grace. In reality, I spent forty-five minutes muttering at branches and poking myself in the hand. But the payoff was immediate. Even undecorated, the tree looked fuller, taller, and far less apologetic.
Then came the lights. Usually I wrap them around the outer edges and call it a day. This time, I pushed some deeper into the branches and spread others closer to the surface. When I plugged them in, the tree looked dramatically better before I had added a single ornament. That was the first moment I understood why professionals obsess over lighting. It is not background. It is architecture.
Next, I added wide velvet ribbon in loose waves and tucked it into the branches instead of wrapping it tightly all the way around. Suddenly the tree had movement. It looked softer, richer, and a little more grown-up. Then I layered ornaments by size, placing larger gold balls deeper in the tree and more detailed ornaments toward the ends. This one change alone made the tree look fuller, because the inside was finally doing some of the visual work.
But the real transformation happened when I started editing. Instead of hanging every sentimental ornament I owned, I chose the ones that fit the overall look and saved the rest for a smaller family tree in another room. I added a few handmade ornaments from childhood, a tiny ornament from a trip, and some dried orange slices for texture. Those personal touches stood out more because they were not buried in clutter.
When I finally stepped back, the difference was honestly ridiculous. The tree looked calmer, taller, and more expensive. It also felt more like my home. Even the room around it seemed better, as if the tree had somehow bullied the rest of the decor into behaving.
The funniest part was how other people reacted. Nobody said, “Ah yes, I see you applied a disciplined palette and thoughtful ornament distribution strategy.” They said things like, “This looks amazing,” and “Why does this feel so cozy?” and “Did you get a new tree?” I did not. I just stopped decorating like a raccoon with a tinsel budget.
That experience convinced me that the secret to a stunning tree is not talent. It is structure. Once you have a plan, the decorating becomes easier, and the end result feels far more magical. Not because it is perfect, but because every choice supports the same mood. That is what makes a tree memorable. It looks beautiful, yes, but it also feels intentional. And during the holidays, intention is half the sparkle.
Conclusion
The secret to a stunning Christmas tree is not owning the fanciest ornaments or copying a department store display branch for branch. It is deciding on a style, choosing a focused color story, fluffing the tree properly, layering lights and ribbon for depth, placing ornaments with intention, and finishing with personal details that make the whole thing feel like yours.
That is what makes the Macy’s-designer advice so useful. It is aspirational without being impossible. It reminds us that a great tree is less about perfection and more about editing, balance, and story. Get the glow right. Give the eye somewhere to travel. Add texture. Hide the chaos. Keep the meaning. Do all that, and your Christmas tree will not just look festive. It will look unforgettable.