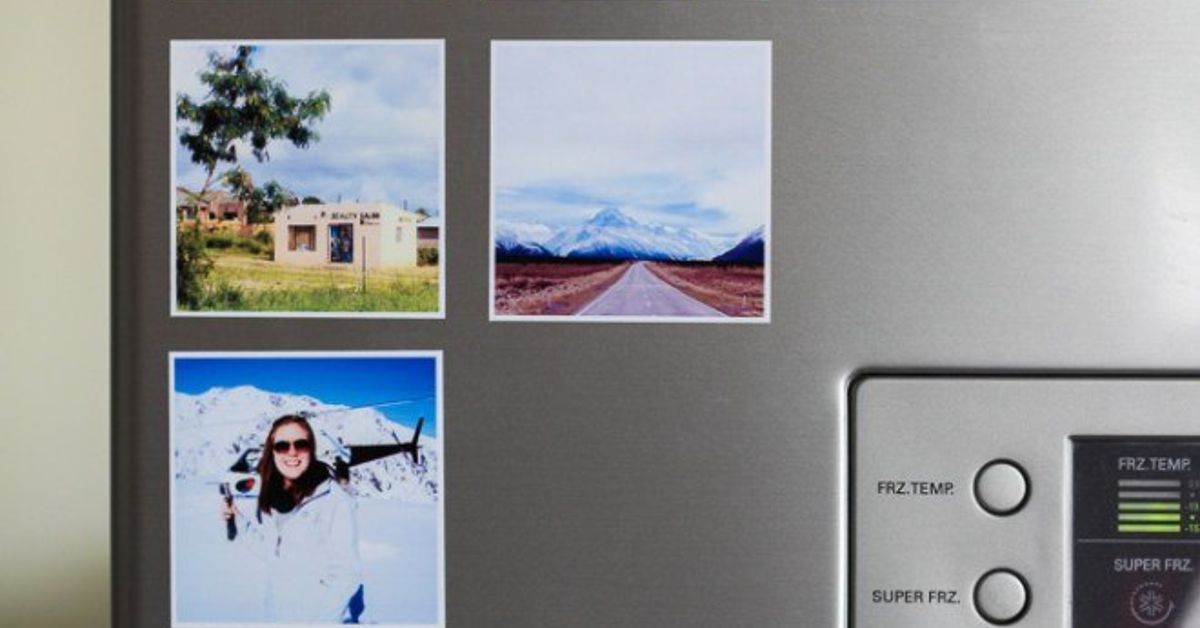
Instagram is where our best tiny memories go to look cooler than they had any right to be. A cup of coffee with suspiciously perfect foam. A beach sunset. Your dog wearing a bandana and acting like it pays rent. But after the likes fade and the post disappears into the scroll abyss, those photos deserve a second life somewhere more heroic: the refrigerator.
That is where DIY Instagram photo magnets come in. They are small, affordable, personalized, and surprisingly polished when made with the right materials. You can turn your favorite square snapshots into fridge magnets, locker decorations, office board flair, wedding favors, holiday gifts, or tiny emotional support squares that hold up grocery lists.
The best part? This is a quick DIY project. You do not need a professional craft studio, a mysterious machine with seven blinking buttons, or the patience of a museum conservator. With printed photos, magnetic sheets, adhesive, and a little sealing magic, you can create custom photo magnets in an afternoon.
Why Instagram Photo Magnets Are the Perfect Quick DIY Project
Instagram photos already have a built-in advantage: they are designed to look good in compact spaces. Square and vertical images are easy to crop, arrange, and print, which makes them ideal for small handmade magnets. A 2-inch or 3-inch photo magnet has enough room to show a face, a pet, a landscape, or a favorite moment without turning your refrigerator into a billboard.
These magnets also feel more personal than store-bought souvenirs. A magnet from a beach gift shop says, “I visited this place.” A magnet made from your own beach photo says, “I survived sunscreen, sand in my sandwich, and one heroic attempt at beach volleyball.” That is storytelling, but with adhesive backing.
DIY photo magnets also work beautifully as budget-friendly gifts. Make a set of family memories for grandparents, a pet-themed set for your best friend, a travel collection for your roommate, or a mini gallery of baby photos for a shower favor. They are small enough to mail, useful enough to keep, and sentimental without requiring a violin soundtrack.
Best Photos to Use for Instagram Magnets
The best images for custom Instagram magnets are clear, bright, and simple. Since the final magnet is small, avoid photos where the main subject is tiny or buried in visual chaos. A group photo of 27 people standing in front of a mountain may be meaningful, but at 2 inches wide it might look like a cheerful collection of decorative dots.
Choose These Types of Photos
- Close-up portraits with good lighting
- Pet photos with expressive faces
- Food photos with strong color contrast
- Travel shots with one clear focal point
- Baby or family photos with simple backgrounds
- Minimal flat lays, flowers, mugs, books, or craft projects
- Funny candid photos that still look recognizable when cropped
For a classic Instagram look, crop your images into a 1:1 square. If you are downloading from your own account, use the original photo file whenever possible instead of a screenshot. Screenshots can work in a pinch, but they often include lower detail, interface clutter, or accidental evidence that your phone battery is at 3 percent.
Supplies You Need
You can make Instagram photo magnets several ways, but the easiest method uses printed photos and adhesive magnetic sheets. This gives you clean edges, a flexible magnet, and minimal mess. If you want a chunkier handmade look, mount the photos on wood tiles, chipboard squares, acrylic blanks, or glass cabochons.
Basic Supplies
- Favorite Instagram photos or original image files
- Photo paper, cardstock, or printable magnetic sheets
- Adhesive magnetic sheet or small craft magnets
- Mod Podge or clear craft sealer
- Foam brush or soft paintbrush
- Scissors or craft knife
- Cutting mat and metal ruler
- Optional corner rounder for polished edges
- Optional laminating sheet or clear packing film
If you print directly on printable magnetic sheets, your process becomes even faster. However, many printable magnet sheets are designed for inkjet printers, so always check the packaging before printing. Laser printers can run hot, and heat is not always friendly to flexible magnetic materials. In other words, do not let your printer turn craft night into a science fair volcano.
Method 1: The Easiest Instagram Photo Magnet Tutorial
This version is the best starting point for beginners. It uses printed photos and adhesive magnet sheets. The final magnets are lightweight, flexible, and easy to make in batches.
Step 1: Select and Crop Your Photos
Choose 8 to 12 photos for your first batch. Crop each image into a square. A 2-inch square is cute and giftable; a 3-inch square shows more detail and works well for family photos. If your image is already in Instagram square format, you are halfway there. Give yourself a small bleed area around the edges so important faces do not get trimmed off during cutting.
Step 2: Arrange Photos on a Print Sheet
Use a simple design tool, photo editor, word processor, or printing app to place several photos on one page. A contact-sheet layout saves paper and keeps sizes consistent. For example, you can fit multiple 2-inch squares on a letter-size sheet or several on a 4-by-6 photo print.
Leave a little space between each image so you can cut cleanly. Future you, holding scissors and trying not to slice through Aunt Linda’s eyebrow, will be grateful.
Step 3: Print and Let the Ink Dry
Print on photo paper for the sharpest color. Use the best-quality print setting if your printer offers it. Glossy paper makes colors pop, while matte paper gives a softer, modern look and hides fingerprints better. After printing, let the sheet dry completely before sealing or cutting. Rushing this step can cause smudges, and nothing ruins a cute fridge magnet faster than a mysterious blue thumbprint across a vacation sunset.
Step 4: Seal the Photo Surface
Brush a thin, even layer of Mod Podge or clear craft sealer over the printed photo sheet. Let it dry, then add a second thin coat if you want extra protection. Thin coats are key. A heavy coat can wrinkle paper, blur ink, or leave brush marks that say, “I panicked and kept painting.”
For an ultra-smooth finish, use a soft foam brush and move in one direction. Let the sealer dry according to the product directions. A satin or gloss finish both work; gloss gives a photo-booth shine, while satin looks more subtle.
Step 5: Cut the Photos
Use scissors for a casual handmade look or a craft knife with a ruler for crisp edges. A paper trimmer is even better for batch projects. If your photos are square, cut slowly and check the alignment before each slice. You can round the corners for a softer, store-bought finish.
Step 6: Attach to Magnetic Sheet
Peel the backing from an adhesive magnetic sheet and press the photo onto the sticky side. Smooth from the center outward to remove bubbles. A clean gift card works well as a mini squeegee. Then cut around the mounted photo so the magnetic backing matches the shape exactly.
If you are using non-adhesive magnets, apply a strong craft glue to the back of the photo mount and press the magnet firmly in place. Let it dry flat. Do not test the magnet too soon unless you enjoy watching your masterpiece slide down the fridge like a tiny sad sled.
Method 2: Wood Tile Instagram Photo Magnets
For a more handcrafted look, mount your photos on small wood squares or circles. Wood tile photo magnets feel sturdy and make excellent gifts. They are especially nice for holiday sets, wedding favors, nursery decor, and family photo collections.
How to Make Them
Paint the wood tiles white or leave them natural. Cut your photo to fit the top surface. Brush a thin layer of Mod Podge on the wood, place the photo on top, and smooth gently. Once dry, seal the front with one or two thin coats. Glue a magnet to the back and let it cure fully before using.
Wood circles are great for close-up faces, pets, and floral photos. Wood squares preserve the Instagram grid look. If the edges of the paper are not perfect, lightly sand them after drying or paint the tile edges in a color that matches your kitchen. Crafting is partly skill and partly knowing how to make “oops” look intentional.
Method 3: Glass Gem Photo Magnets
Glass gem magnets are small, shiny, and charming. They work best with tiny cropped details: faces, flowers, initials, tiny landscapes, or patterns. Clear flat-backed glass gems magnify the image slightly, giving the magnet a polished, domed look.
To make one, trace the glass gem over the photo, cut the image, add a small dot of clear-drying glue or Mod Podge to the front of the image, press the flat side of the gem onto it, and let it dry. Then trim excess paper and glue a magnet to the back.
The trick is not to use too much glue. A pea-sized blob may sound harmless, but glue has ambitions. It spreads, oozes, and tries to become part of your table. Start small and press from the center outward.
Design Ideas for Instagram Photo Magnets
Make a Travel Grid
Choose one photo from each trip: a street sign, skyline, meal, museum, beach, trail, or hotel balcony view. When arranged on the fridge, the magnets become a mini travel wall. Add small text labels with city names if you want a postcard feel.
Create a Pet Collection
Pet magnets are basically guaranteed success. Use your dog’s most dramatic stare, your cat’s judgmental window pose, or your hamster looking like it just received shocking financial news. These make great gifts because pet people rarely object to more pet merchandise.
Build a Family Timeline
Use one photo from each year, birthday, vacation, or school milestone. A set of family magnets can show growth, change, and questionable hairstyle eras with beautiful honesty.
Make Party Favors
For weddings, showers, birthdays, or graduation parties, create magnets using engagement photos, baby pictures, senior portraits, or event graphics. Package each magnet in a small envelope or clear sleeve with a thank-you note.
Try a Color Theme
For a stylish fridge display, select photos that share the same color palette. Choose warm sunset tones, clean black-and-white images, soft pastels, or bright summer colors. A color theme makes the finished set look intentional, even if half the photos were taken while chasing a toddler through a park.
Pro Tips for Better DIY Photo Magnets
Small details make handmade magnets look polished. First, keep photo sizes consistent. A set of six matching 2-inch squares looks more professional than a chaotic family of rectangles, unless chaos is your brand, in which case congratulations on your artistic vision.
Second, choose the right magnet strength. Thin magnetic sheets are great for decoration, but they may not hold thick invitations or school packets. If you want the magnet to hold papers, add a stronger ceramic or neodymium craft magnet to the back of a wood tile. For safety, keep small strong magnets away from young children and pets.
Third, seal only when the ink is dry. Inkjet prints can smear if you brush sealer over them too soon. If you are worried, test one photo first. This is especially important with glossy paper.
Fourth, protect your workspace. Sealer, glue, and ink are talented travelers. Put down scrap paper or a silicone mat before starting. Your table did not ask to become modern art.
Finally, let everything cure. Even if the magnet feels dry on the surface, the adhesive underneath may still need time to strengthen. Lay magnets flat overnight before packaging or sticking them to the fridge.
Common Mistakes and How to Fix Them
The Photo Smudged
Let inkjet prints dry longer before sealing. Use lighter brush pressure and thinner coats. You can also try matte photo paper, which often handles sealers more calmly than slick glossy surfaces.
The Magnet Is Too Weak
Use a stronger magnet or reduce the weight of the front material. Flexible sheets are fine for lightweight photos, but wood and glass need stronger backing.
The Edges Look Messy
Use a metal ruler and craft knife, or trim after mounting the photo to the magnetic sheet. For wood tiles, paint the edges or sand lightly once dry.
The Photo Has Bubbles
Smooth from the center outward when attaching the photo. Use a gift card as a squeegee and work slowly. Bubbles are easier to prevent than fix, much like sending a text before proofreading.
The Paper Curled
Too much liquid sealer can cause curling. Use thinner coats and let each layer dry completely. Press finished magnets under a heavy book after they are dry if they need flattening.
Gift Packaging Ideas
DIY Instagram photo magnets look extra special when packaged thoughtfully. Stack a set of four and wrap them with baker’s twine. Place them in a small kraft envelope with a handwritten label. Attach them to a mini metal tin, a magnetic board, or a card that says, “For your fridge gallery.”
For holidays, use seasonal photos and tuck the magnets into stockings. For birthdays, use funny candid pictures and pair them with a small note. For grandparents, include a set of family faces, because grandparents are legally required to enjoy refrigerator photos. That may not be an actual law, but it is emotionally accurate.
Budget Breakdown
This project can be very affordable, especially if you already have printed photos or craft supplies. A pack of magnetic sheets, a bottle of sealer, and a few sheets of photo paper can make multiple batches. If you buy wood tiles or glass gems, the price rises slightly, but the finished magnets feel more gift-worthy.
To save money, print several photos on one sheet, use leftover scrapbook paper for backing, or repurpose old calendars and cards for non-photo designs. You can also mix Instagram photos with text squares, dates, quotes, or simple icons to create a balanced set.
Real-Life Experience: What I Learned Making Quick DIY Instagram Photo Magnets
The first time I made Instagram photo magnets, I approached the project with the confidence of someone who had watched exactly one tutorial and therefore considered myself qualified to lead a small craft empire. I picked twelve photos, printed them, cut them out, and immediately learned my first lesson: tiny square photos expose every cutting mistake. A crooked edge on regular paper is “handmade charm.” A crooked edge on a 2-inch magnet is a tiny geometric accusation.
My best results came when I slowed down during the boring steps. Cropping the photos carefully mattered more than I expected. Close-up images looked fantastic, while busy scenery became hard to read once reduced. The winning magnets were simple: my dog looking suspicious, a stack of pancakes, a beach umbrella, and one dramatic coffee photo that looked like it had a personal publicist.
Printing also changed the final look. Glossy photo paper gave the colors a bright, cheerful finish, but it showed fingerprints while I was working. Matte paper felt more forgiving and looked modern, especially after a satin sealer. I also learned to let prints dry longer than my impatient little crafting heart wanted. When I sealed one photo too soon, the ink blurred slightly. It was still usable, but the sunset looked like it had experienced emotional turbulence.
The adhesive magnetic sheet method was the easiest. Peel, press, smooth, trim. Very satisfying. It had the same energy as applying a screen protector, except with less fear and fewer dust particles ruining your day. The wood tile method took longer but felt more substantial. Those magnets looked like something I could gift without adding the phrase, “I made this, so please lower your expectations.”
One small trick made a big difference: I used a clean gift card to press the photo onto the magnet sheet from the center outward. That removed bubbles and helped the photo bond evenly. Another helpful move was trimming after attaching the photo to the magnet sheet instead of trimming both separately. That way the edges matched perfectly.
Packaging turned the magnets from “cute project” into “actual gift.” I placed four magnets on a small piece of cardstock, slipped them into a clear sleeve, and tied it with twine. Suddenly they looked boutique, which is crafter language for “I spent less than ten dollars but would like applause.”
The biggest lesson is that DIY Instagram photo magnets are best when they feel personal, not perfect. A slightly imperfect edge does not ruin the charm. A funny photo, a meaningful memory, or a little collection of everyday moments is what makes the project work. Your fridge becomes a tiny rotating gallery of good days, weird pets, favorite people, and meals you still think about. Honestly, that is a much better fate for your photos than living forever in a camera roll between blurry receipts and accidental screenshots.
Conclusion
Quick DIY Instagram photo magnets are easy, affordable, and wonderfully personal. With a few printed photos, magnetic backing, a sealer, and basic cutting tools, you can turn your favorite social media memories into handmade keepsakes. Whether you choose flexible magnet sheets, wood tiles, or glass gems, the process is simple enough for beginners and flexible enough for creative upgrades.
Use clear photos, crop thoughtfully, let prints dry, seal lightly, and give adhesives time to cure. The result is a custom set of magnets that can decorate your fridge, personalize a locker, brighten an office board, or become a thoughtful handmade gift. Best of all, every magnet tells a story. And unlike a social media post, it does not need Wi-Fi, hashtags, or your cousin commenting “cute!!!!” with four extra exclamation points.