Making a paper iPhone is one of those crafts that sounds a little ridiculous until you actually do it. Then suddenly you are hunched over a table, deeply committed to drawing camera lenses with alarming precision, and whispering things like, “No, no, the corners need more elegance.” It is a wonderfully low-cost project for kids, teens, classrooms, party props, prank photos, pretend play, and anyone who has ever looked at a real phone and thought, “I bet I can make that with cardstock and stubbornness.”
The good news is that you do not need fancy tools or elite-level craft wizardry. A convincing paper iPhone comes down to a few simple things: the right paper, clean measurements, crisp folds, neat cutting, and enough detail to fool someone from three feet away. Not from six inches away. Let us stay humble. But from across the room? Oh yes. That paper phone can absolutely serve.
In this guide, you will learn how to make a paper iPhone that looks polished, feels sturdier than plain notebook paper, and can be customized as a toy, a gift, a prop, or a creative school project. We will keep the steps easy, the instructions realistic, and the vibe fun.
Why Make a Paper iPhone?
A DIY paper iPhone is more versatile than it sounds. For younger kids, it becomes a pretend-play accessory. For older kids and teens, it is a cool paper craft that mixes drawing, measuring, and design. For content creators, it can be a prop for skits or flat lays. For teachers and parents, it is an easy paper-and-glue activity that encourages fine motor skills, attention to detail, and a surprising amount of patience. That last one is optional, but helpful.
It is also a smart project because the materials are simple. You can make one from regular paper, but cardstock or light cardboard gives better structure. Add markers, glue, tape, and maybe a printed screen image, and suddenly your fake iPhone stops looking like a sad rectangle and starts looking like something that might receive a very important imaginary text.
What You Need
Before you begin, gather your supplies. Keeping everything on the table saves you from wandering off halfway through and returning three hours later with a snack and no momentum.
Basic materials
Use 2 to 4 sheets of cardstock, construction paper, or other thick paper for the best results. You will also need scissors, a ruler, a pencil, glue or a glue stick, and tape. Markers or colored pencils are useful for details like the screen, buttons, camera lenses, and Apple-style minimalism. A black marker is especially handy because nearly every fake phone eventually ends up needing a dramatic black outline.
Optional materials
You can also use light cardboard from a cereal box, silver or gray paper, clear tape for a glossy screen effect, double-sided tape for a cleaner finish, and a printed lock screen if you want your paper iPhone to look extra realistic. If you are making the craft with younger children, adult supervision for scissors is a wise move. Tiny fingers and sharp blades are not a legendary duo.
Pick Your Paper iPhone Style
Before cutting anything, decide what kind of paper phone you want to make. There are three easy versions.
1. Flat paper iPhone
This is the simplest option. It is basically a front view and back view glued together. It looks good from above and works well for art projects, pretend play, or decorating a notebook.
2. Puffed or layered paper iPhone
This version has thickness. You build it by stacking paper or cardboard layers between the front and back pieces. It feels more like a real phone in your hand and photographs better.
3. Opening paper iPhone
This one acts more like a tiny paper case or booklet. You can hide notes, fake apps, or even a tiny folded message inside. It is part phone, part secret craft chaos, and it is delightful.
For this tutorial, we will focus on the layered paper iPhone because it gives the best balance of realism and simplicity.
Step-by-Step: How to Make a Paper iPhone
Step 1: Measure and draw the main phone shape
Start by drawing a rectangle with rounded corners on cardstock. If you want a realistic modern size, make it about 5.8 inches tall and 2.8 inches wide. That creates a phone shape similar to a current 6.1-inch iPhone style, which looks familiar without forcing you into microscopic paper engineering. Use a ruler for the straight lines and sketch the corners lightly in pencil before cutting.
Draw this shape three times: one for the front, one for the back, and one or two extra layers for the middle. Those middle layers create thickness. If you want a chunkier phone, add more layers. If you want something sleek and minimal, keep it thinner. This is your moment to decide whether your paper iPhone is elegant or built like a brick from 2007.
Step 2: Cut the pieces carefully
Cut out all your phone shapes as neatly as possible. Clean edges matter more than people think. A slightly crooked cut can make the whole craft look homemade in the wrong way. Homemade in the charming way is great. Homemade in the “this lost a fight with kindergarten scissors” way is less ideal.
If you are working with younger kids, pre-draw the pieces and help with the cutting. If you are doing this solo, slow down near the corners. Rounded corners are what make the shape instantly read as “phone” instead of “tiny clipboard.”
Step 3: Build the phone’s thickness
Take one middle layer and trim a smaller rectangle out of its center so you have a border frame. Glue that frame between the front and back pieces. This trick makes the phone feel firm without becoming too heavy. You can stack two border frames if you want a more substantial result.
Press the layers together and let the glue dry flat under a book for a few minutes. That keeps the paper from warping. Warped paper is great for abstract art and very bad for fake electronics.
Step 4: Create the screen
For the front, draw a slightly smaller rounded rectangle to represent the screen. Color it black, dark blue, or dark gray. Then add a lock screen, app icons, a wallpaper, or a pretend notification like “Mom: Did you finish your homework?” That message alone can boost realism and emotional damage.
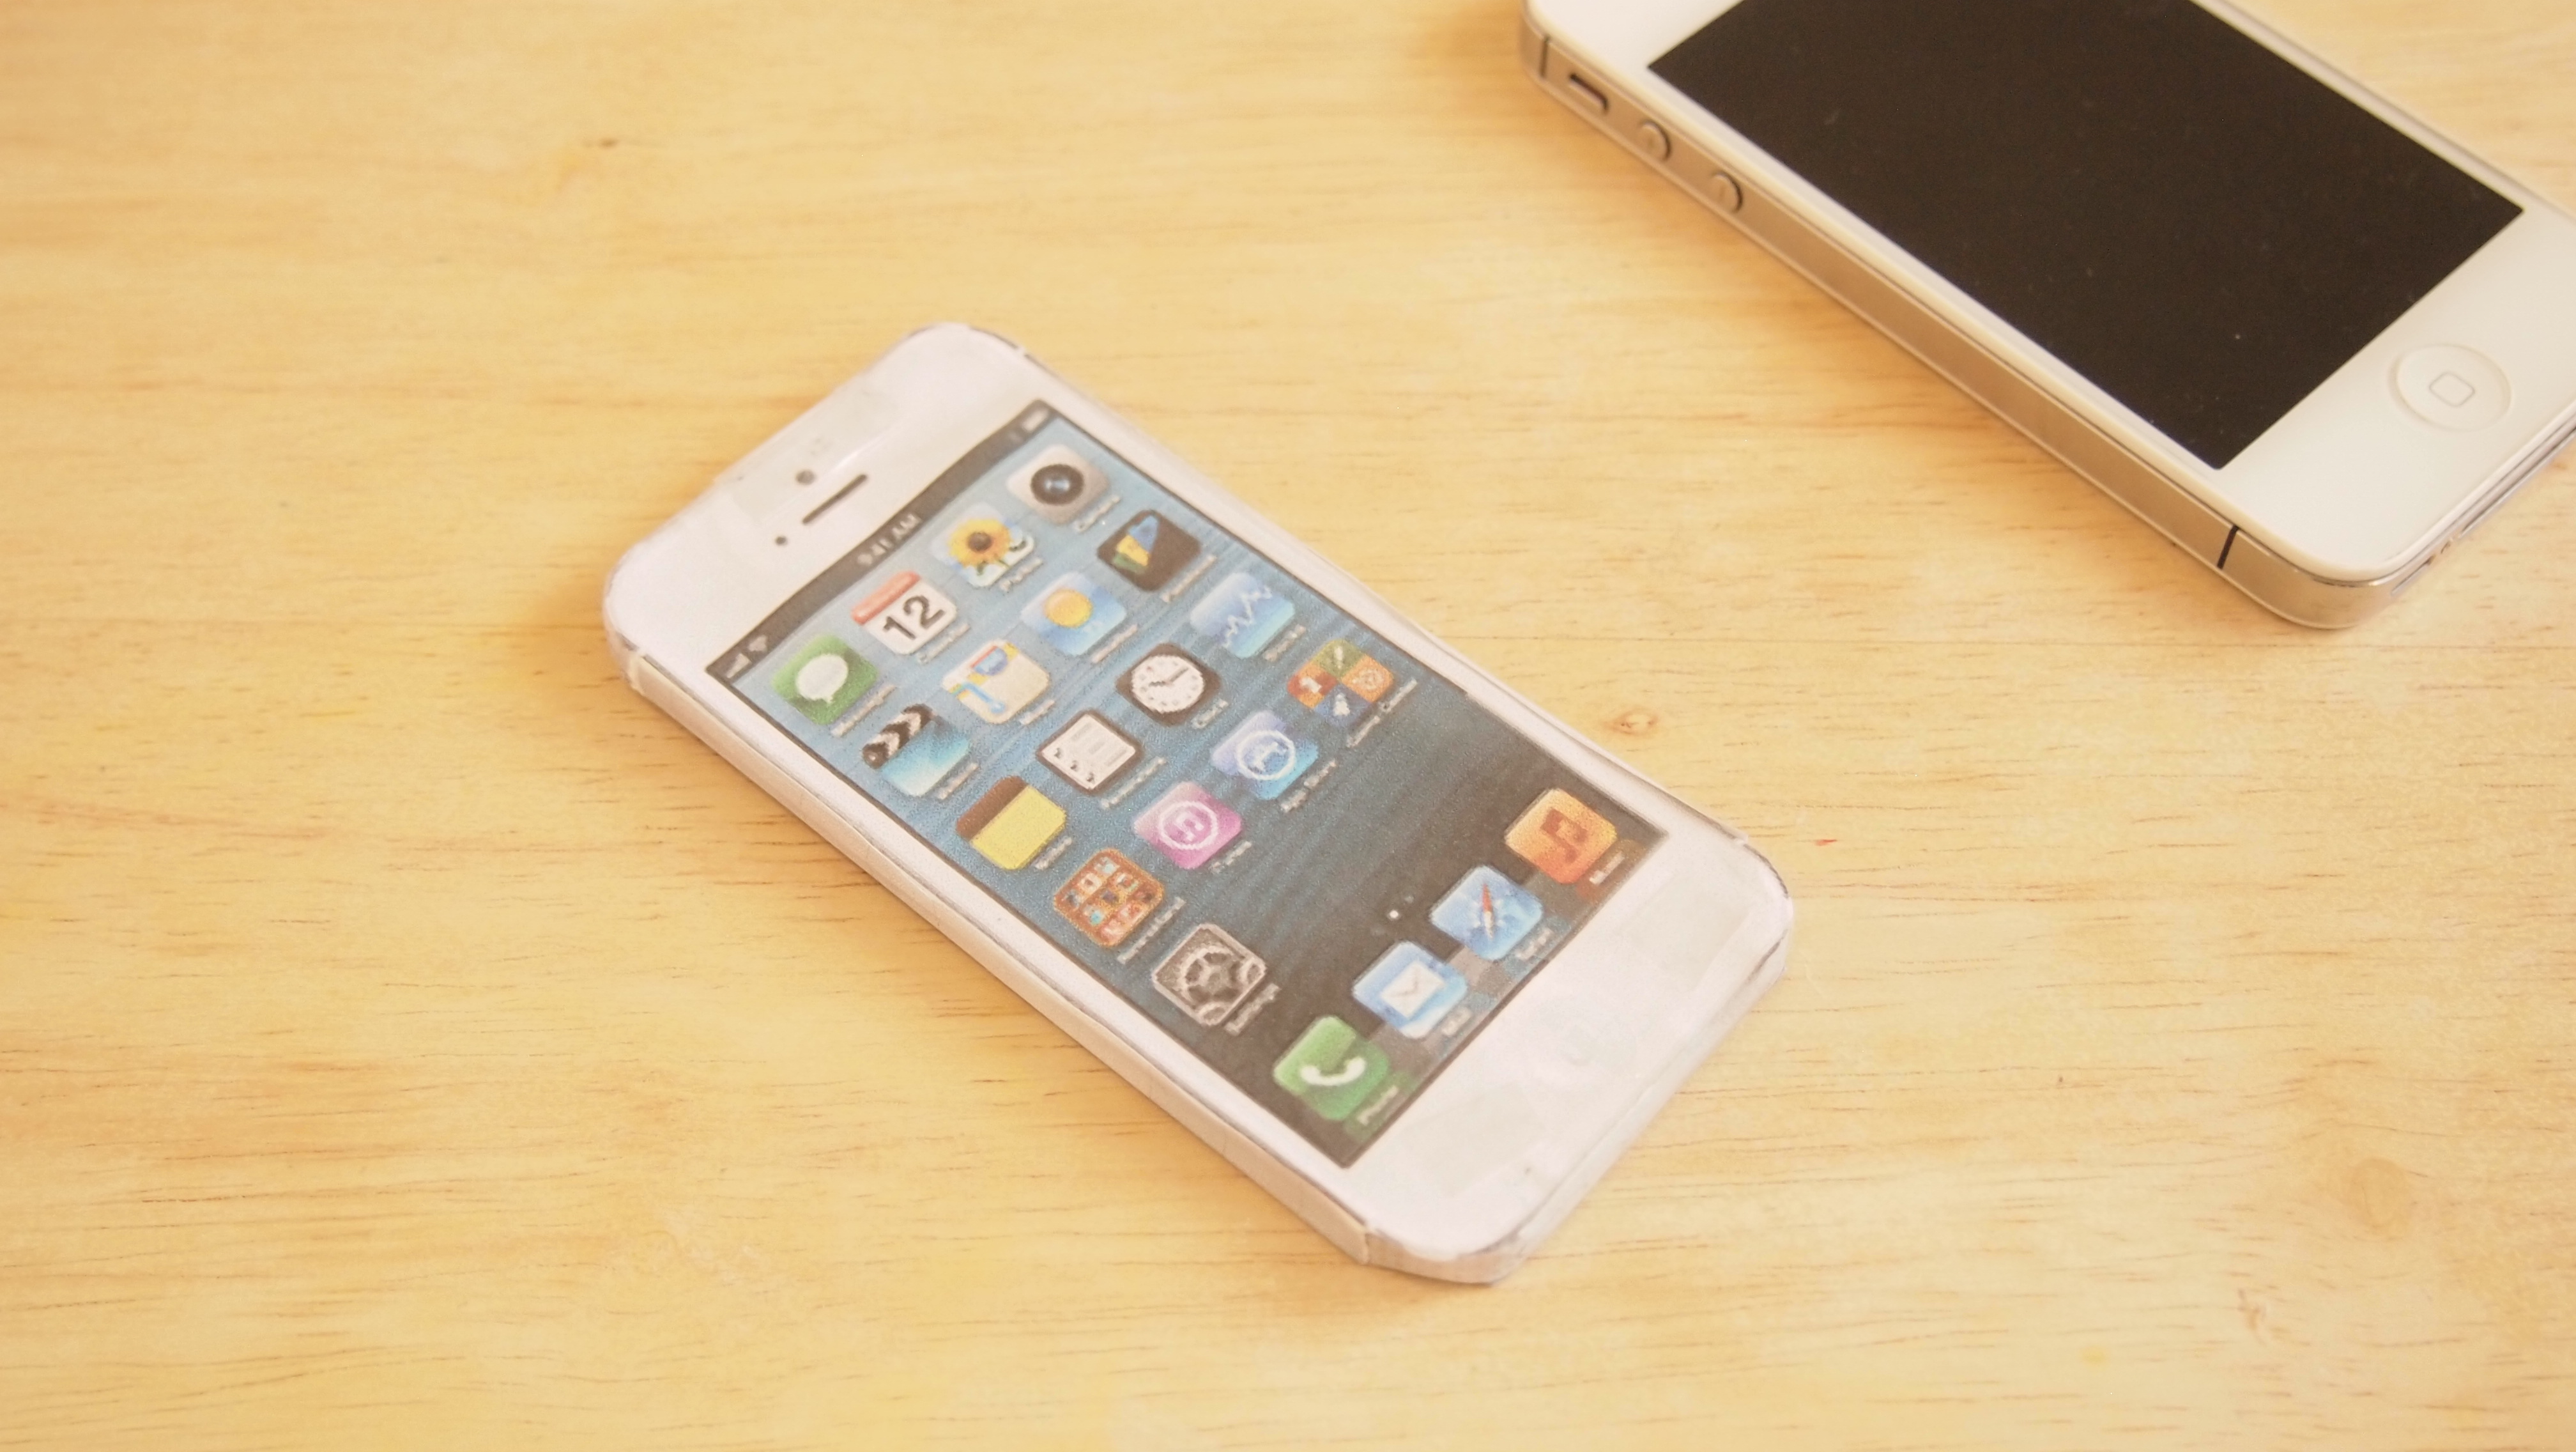
If you want a cleaner look, print a tiny smartphone screen image and glue it onto the front. Covering the screen with clear tape can make it look shinier, almost like glass. It is a simple trick, but it works surprisingly well.
Step 5: Add the camera section on the back
The back is where your paper iPhone really earns its drama. Cut a small square or rounded square for the camera bump and glue it in the upper-left corner. Then add two or three small circles for the camera lenses, depending on the style you want. A newer, more premium-looking paper iPhone usually looks better with three circles. Yes, camera count has become a personality trait.
You can layer small paper circles for a raised effect or simply draw them with marker. Add a tiny flash circle and a smaller dot for the sensor if you want more detail. Even simple lens outlines make the back instantly more recognizable.
Step 6: Make the side buttons and ports
Cut very thin strips of paper for the side buttons and glue them to the edges. Add a longer volume button and a smaller side button. At the bottom, draw or cut tiny speaker holes and a charging port. These details are small, but they help the craft feel complete.
Do not panic if the buttons are not perfect. On a paper craft, suggestion is powerful. Most people are not going to inspect your cardboard masterpiece with a microscope and a spirit of criticism. And if they do, maybe do not invite them to craft night again.
Step 7: Color and finish the edges
Use a gray, silver, blue, black, or pink marker to color the edges and frame, depending on the iPhone vibe you want. This step makes a huge difference. White paper edges can make even a carefully built craft look unfinished. Colored edges help everything blend together and give the phone a cleaner silhouette.
For a polished result, keep the colors consistent. If the phone back is blue, carry a similar shade along the sides. If the screen is glossy black, do not suddenly introduce neon green unless your design goal is “phone from a parallel universe.”
Step 8: Personalize it
Now comes the fun part. Add your own fake wallpaper, favorite app arrangement, doodle contacts list, or lock-screen time. You can make a paper iPhone themed for a birthday, school project, doll setup, pretend office, or prank gift. Some people even add tiny paper earbuds, a paper case, or a folded stand.
If you are making this craft for social media photos or a prop table, match the wallpaper and color scheme to your overall aesthetic. A little consistency can make a cheap paper project look weirdly stylish. Your paper iPhone may not work, but it can absolutely commit to the bit.
Tips for Making Your Paper iPhone Look More Realistic
Use cardstock instead of thin printer paper
Thicker paper holds its shape better, cuts more cleanly, and feels sturdier in your hand. If all you have is regular paper, glue two sheets together first. That quick fix makes the final craft less floppy and less likely to wilt like a dramatic lettuce leaf.
Score fold lines for cleaner edges
If you are folding any flap, case, or opening feature into your paper iPhone, lightly score the fold line first using a ruler and a blunt edge, such as the back of a butter knife or an empty pen. This helps paper fold neatly instead of cracking or bulging. Clean folds make a paper craft look intentional, not accidental.
Keep shapes symmetrical
Phones are sleek and balanced. If one side is wider than the other, the illusion breaks fast. Measure twice before you cut. That old rule survives because it works. Also because paper does not grow back.
Use layers for detail
Raised camera pieces, a separate screen layer, and small button strips make the craft more dimensional. Even tiny layers create shadows, and shadows create realism. That is the sort of sentence that makes crafters nod solemnly.
Common Mistakes to Avoid
The biggest mistake is rushing. A paper iPhone is simple, but it relies on neat measurements and patient assembly. Another common mistake is using too much glue. Excess glue warps paper, leaves wrinkles, and makes your phone look like it melted in a tiny stationery accident.
Also avoid making the screen too small or the camera bump too large. If the proportions are off, the craft can start looking more like a remote control with ambition. Keep your shapes balanced, and compare the front and back before gluing everything together.
Creative Ways to Use a Paper iPhone
Once you make one, you will probably want to make more. They are useful for party crafts, classroom activities, pretend play corners, handmade gifts, and skits. They also work as journal decorations, scrapbook pieces, and placeholders in room mockups or doll scenes.
You can create a whole paper tech collection with a tablet, earbuds case, smartwatch, and mini app icons. Is that necessary? Not at all. Is it fun? Extremely.
What the Experience Is Really Like: from the Craft Table
Making a paper iPhone is one of those projects that starts off feeling very casual. You tell yourself it will take a few minutes, maybe half an hour if you get fancy. Then suddenly you are fully invested in whether the camera lenses should be flat black or outlined in gray, and you are holding the finished piece at arm’s length like an art director judging a product launch. That is part of the charm. The craft is simple enough for beginners, but detailed enough to pull you into the tiny universe of design choices.
The first thing most people notice is how satisfying the measuring part can be. There is something oddly relaxing about drawing a clean rectangle, rounding the corners, and realizing that a recognizable phone shape appears almost immediately. It feels a bit like magic and a bit like geometry finally decided to be useful for once. When the front and back line up properly, you get that rare craft moment where everything seems smarter than the materials you started with.
The next surprise is how much personality a paper phone can have. Two people can follow the same basic steps and end up with completely different results. One might create a sleek minimalist model with a cool-toned wallpaper and precise button details. Another might make a glittery chaos-device with heart-shaped apps and a lock screen that says “snack time.” Both are correct. Both deserve respect. The project leaves room for realism, humor, and creativity, which is probably why it works so well across different ages.
There is also a fun little shift that happens once the details go on. At first, the craft just looks like layered paper. Then you add the black screen, the camera bump, the side buttons, and suddenly your brain starts reading it as a phone. It is not a real iPhone, obviously, unless Apple has made some very dramatic budget cuts, but the resemblance becomes surprisingly strong. That moment is usually when people start showing it to friends, siblings, classmates, or anyone nearby with the classic line: “Look what I made.”
For kids, the experience often turns into pretend play right away. The paper iPhone becomes a prop for a toy store, a school game, a pretend office, or a mini family drama in which someone absolutely forgot to “call grandma.” For teens and adults, the fun often comes from styling it, photographing it, or trying to make the next version even better. Many people end up remaking the craft with sturdier paper, a cleaner screen print, or more realistic color choices after the first try, which is a great sign. A good craft invites a second round.
Maybe the best part is that the project feels lighthearted from start to finish. It does not demand expensive tools, elite skills, or a full craft room that looks like a well-funded art studio. You need paper, a few basic supplies, and the willingness to laugh when your first camera lens comes out shaped like a tiny potato. By the end, you have made something playful, recognizable, and strangely satisfying. That is a pretty solid return on a little cardstock and a lot of determination.
Final Thoughts
If you want a craft that is easy to start, fun to personalize, and surprisingly impressive once finished, a paper iPhone is a great choice. It combines simple materials with design-based thinking, which means you get both creativity and structure in one project. Whether you are making it for a child, a classroom, a joke, a prop, or your own inner craft goblin, the process is enjoyable and the result is charming.
The secret is not perfection. It is thoughtful details. Use thicker paper, measure carefully, keep your cuts clean, and add just enough personality to make the piece feel alive. A real iPhone may have technology, but your paper iPhone has character. And honestly, character is cheaper.