Building a DIY raised garden bed is one of those weekend projects that sounds suspiciously simple until you are standing in the lumber aisle, holding a tape measure, wondering whether tomatoes have opinions about board thickness. Good news: they do not. Bad news: your soil, sunlight, drainage, and bed size absolutely do.
A raised garden bed is basically a framed growing area filled with improved soil. It can be made from cedar boards, untreated lumber, galvanized metal, concrete blocks, stone, or even a ready-made raised bed kit. The point is to create a neat, productive garden space where vegetables, herbs, flowers, and small fruits can grow in loose, fertile soil without you wrestling with compacted clay, weeds, poor drainage, or the mysterious backyard dirt that looks like it was designed by a brick factory.
Whether you want a small herb bed outside the kitchen door or a full backyard vegetable garden, this guide walks you through the planning, materials, building steps, soil mix, planting ideas, watering routine, and real-life lessons that make a raised bed successful instead of becoming a very expensive rectangle full of sadness.
Why Build a Raised Garden Bed?
A raised bed gives you more control over the growing environment. Instead of depending entirely on native soil, you can fill the bed with a balanced mix of topsoil, compost, and organic matter. That means better drainage, fewer weeds, warmer soil in spring, and easier access for planting, watering, harvesting, and pulling the occasional weed that shows up like an uninvited cousin.
Raised beds are especially useful if your yard has heavy clay soil, rocky ground, poor drainage, contaminated soil concerns, or limited space. Because the planting area is clearly defined, you do not need to improve the entire yard. You only improve the bed. That makes raised bed gardening practical for suburban yards, patios, small lots, and beginner gardeners who want results without buying a tractor or developing a personal feud with Bermuda grass.
Best Size for a DIY Raised Garden Bed
The most beginner-friendly raised garden bed size is 4 feet wide by 8 feet long. Four feet is wide enough to grow plenty of vegetables but narrow enough that most people can reach the center from either side without stepping into the soil. This matters because stepping inside the bed compacts the soil, and compacted soil is not exactly a spa day for plant roots.
If the bed is against a fence or wall and you can only access it from one side, keep it about 2 to 3 feet wide. Length is more flexible. You can build a 4×4 bed for herbs and salad greens, a 4×8 bed for mixed vegetables, or several matching beds with pathways between them. For long beds, add side support or bracing every few feet so the walls do not bow outward when the soil becomes wet and heavy.
Recommended Raised Bed Dimensions
- Small herb bed: 2 feet by 4 feet
- Beginner vegetable bed: 4 feet by 4 feet
- Classic backyard bed: 4 feet by 8 feet
- Accessible garden bed: 2 to 3 feet wide with extra height
- Pathway width: 2 to 3 feet between beds for walking, kneeling, or using a wheelbarrow
How Deep Should a Raised Garden Bed Be?
Depth depends on what you plan to grow and what sits underneath the bed. If the bed is placed directly on healthy, loosened ground, plant roots can grow down into the native soil. In that case, a 10- to 12-inch bed can work well for many vegetables.
If the bed is sitting on concrete, patio pavers, compacted subsoil, or questionable ground, build deeper. Leafy greens, beans, cucumbers, radishes, and herbs can grow in about 8 to 12 inches of soil. Tomatoes, peppers, squash, carrots, potatoes, and other deeper-rooted crops perform better with 12 to 24 inches. More depth also improves moisture storage, which is helpful because raised beds often dry out faster than in-ground beds.
Choosing Materials: Wood, Metal, Stone, or Blocks?
The best raised bed material depends on your budget, style, climate, and comfort level with tools. Cedar is a popular choice because it naturally resists rot and insects while looking charming enough to make your backyard feel like it belongs in a seed catalog. Untreated pine is cheaper but usually breaks down faster. Redwood, cypress, and hemlock can also work, depending on availability in your area.
Galvanized steel beds are durable, tidy, and often last for years with little maintenance. Concrete blocks, bricks, and stone are sturdy and long-lasting, though they require more lifting and leveling. Composite beds and recycled plastic kits can be low-maintenance options, but check that the material is designed for garden use, especially if you are growing food.
For edible gardens, avoid old railroad ties, unknown salvaged wood, and old pressure-treated lumber from questionable sources. Modern treated lumber is a debated topic, and some gardeners use it with liners, but if you want the simplest peace-of-mind choice, untreated rot-resistant wood or food-safe metal is the easiest route.
Tools and Supplies You Will Need
You do not need a professional workshop to build a raised garden bed. A basic wooden 4×8 raised bed can be built with a drill, screws, a saw, a level, and a free afternoon. If you are not comfortable cutting lumber, many home improvement stores will cut boards to length.
Basic Supply List for a 4×8 Wooden Raised Bed
- Three 8-foot boards, such as untreated cedar or rot-resistant lumber
- One additional board cut into two 4-foot pieces for the short sides
- Four corner posts or inside corner blocks
- Exterior-grade screws
- Cardboard or untreated paper for weed suppression
- Hardware cloth if burrowing pests are a problem
- Topsoil, compost, and organic matter for filling
- Mulch, such as straw, shredded leaves, or untreated grass clippings
Where to Place Your Raised Bed
Location can make or break your garden. Most vegetables need at least 6 to 8 hours of direct sunlight per day. Tomatoes, peppers, eggplants, squash, cucumbers, beans, and most fruiting crops are sun lovers. Leafy greens such as lettuce, spinach, kale, and arugula can tolerate a little more shade, especially in hot climates.
Place the bed near a water source if possible. A raised bed at the far corner of the yard may look peaceful in March, but in July it becomes a daily pilgrimage with a watering can. Also avoid placing beds directly under large trees. Tree roots compete for water and nutrients, and falling leaves can turn your lettuce bed into a compost-themed escape room.
Step-by-Step: How to Build a DIY Raised Garden Bed
Step 1: Mark the Area
Use stakes, string, spray paint, or even a garden hose to outline the bed. Check that the site gets enough sun and leaves room for paths. Before building, stand where you plan to garden and pretend to harvest tomatoes. If you have to lean like a circus performer, adjust the layout.
Step 2: Level the Ground
Raised beds do not require perfectly flat land, but the frame should sit fairly level. Remove high spots and fill low spots so the bed does not twist. A level frame holds soil better, looks cleaner, and saves you from saying “good enough” in a tone that clearly means “future problem.”
Step 3: Suppress Grass and Weeds
Lay plain cardboard over the ground inside the bed footprint. Remove tape, glossy labels, staples, and plastic coating first. Cardboard helps smother grass and weeds, then gradually decomposes. If you have gophers, voles, or other tunneling pests, install hardware cloth under the bed before filling it.
Step 4: Assemble the Frame
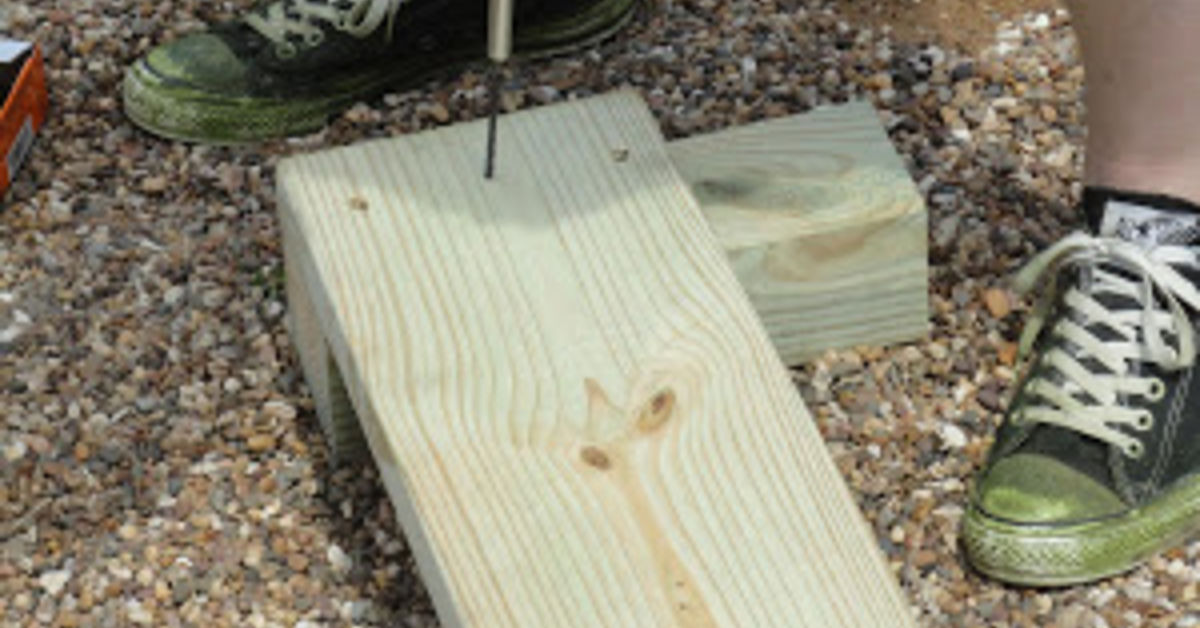
Build the frame on level ground. Attach the boards to corner posts using exterior screws. Make sure the corners are square, then tighten everything. For beds longer than 6 to 8 feet, add side supports or cross-bracing to prevent the walls from bowing. Wet soil is heavy. It may look innocent, but it has the structural ambition of a tiny landslide.
Step 5: Fill with the Right Soil Mix
Do not fill your raised bed with straight potting soil, straight compost, or heavy clay from the yard. Potting soil can be too light and expensive for large beds. Pure compost can be too rich, shrink over time, and hold nutrients unevenly. Heavy native soil may drain poorly and compact.
A practical raised bed soil mix is a blend of quality topsoil, finished compost, and organic matter such as leaf mold, aged manure, or coconut coir. Many gardeners use a rough ratio of 50% topsoil, 30% compost, and 20% organic matter. The exact mix can vary, but the goal is simple: loose enough for roots, rich enough for growth, and stable enough to hold moisture.
Step 6: Water the Soil Before Planting
After filling the bed, water deeply and let the soil settle. You may need to add more mix afterward. This is normal. Soil settles the way guests settle into your couch after Thanksgiving dinner: slowly, heavily, and with no intention of moving soon.
Step 7: Plant Smart
Plant according to crop spacing, sunlight needs, and season. Cool-season crops such as lettuce, spinach, radishes, peas, kale, and carrots can go in early spring or fall. Warm-season crops such as tomatoes, peppers, basil, cucumbers, beans, and squash should wait until after frost danger has passed and the soil has warmed.
Best Plants for Raised Garden Beds
Raised beds are ideal for vegetables and herbs that appreciate loose, well-drained soil. Lettuce, spinach, kale, Swiss chard, radishes, carrots, beets, bush beans, cucumbers, peppers, tomatoes, basil, parsley, thyme, oregano, and chives all do well in raised beds when given the right depth and spacing.
For small beds, choose compact varieties. Bush beans are easier than pole beans unless you add a trellis. Patio tomatoes are simpler than giant indeterminate tomatoes if space is limited. Cucumbers can climb a trellis to save room. Herbs can share space with vegetables, but keep aggressive spreaders like mint in containers unless you want mint to begin its backyard empire.
Watering and Mulching a Raised Garden Bed
Raised beds usually drain well and warm quickly, which is wonderful in spring and slightly dramatic in summer. Because the soil is elevated, it can dry out faster than in-ground soil. Check moisture by pushing your finger about two inches into the soil. If it feels dry at that depth, water deeply.
Drip irrigation or a soaker hose is ideal because it delivers water slowly at soil level. This reduces waste and keeps leaves drier, which can help limit disease. After planting, add mulch around plants to conserve moisture, reduce weeds, and protect the soil surface. Straw, shredded leaves, compost, and untreated grass clippings can all work.
Common Raised Bed Mistakes to Avoid
Making the Bed Too Wide
If you cannot comfortably reach the center, the bed is too wide. Keep freestanding beds around 4 feet wide and wall-side beds around 2 to 3 feet wide.
Skipping Soil Testing
If you are mixing in native soil or growing food in an urban area, consider a soil test. It can reveal pH, nutrient levels, and possible concerns such as lead. Guessing is fun for board games, not soil chemistry.
Using Only Compost
Compost is excellent, but a bed filled only with compost can shrink and become imbalanced. Blend it with mineral soil and other organic matter.
Forgetting to Brace Long Beds
Long wooden beds need support. Add stakes, corner posts, or cross-bracing to keep sides from bowing outward.
Planting Too Closely
Raised beds are efficient, but plants still need airflow and root space. Crowded tomatoes become a jungle. A charming jungle, yes, but still a jungle.
Maintenance Tips for Long-Term Success
At the end of each season, remove diseased plants, spent annuals, and weeds. Leave healthy roots when possible because decomposing roots can feed soil life. Add one to two inches of finished compost each year to refresh nutrients and replace settling soil. Rotate plant families when you can, especially tomatoes, peppers, eggplants, potatoes, brassicas, and cucurbits.
Inspect wooden frames annually. Tighten screws, replace warped boards, and keep soil from spilling over the edges. If the bed is metal, check for sharp edges. If pathways are mulched, refresh them so weeds do not sneak in from the sides like they have tiny garden passports.
Budget-Friendly Raised Bed Ideas
A raised bed does not need to be fancy. You can build one from untreated lumber, cedar fence boards, concrete blocks, stone pavers, galvanized kits, or repurposed food-safe containers. The biggest cost is often the soil, not the frame. To reduce filling costs in deep beds, use clean logs, branches, leaves, and other compostable materials in the lower layer, then place at least 10 to 12 inches of quality soil mix on top for roots.
Just be careful with salvaged materials. Avoid painted wood of unknown age, chemically treated scraps, pallets that may have carried chemicals, and anything that smells like it came from a mysterious industrial adventure.
500-Word Experience Section: What Building a DIY Raised Garden Bed Really Teaches You
The first thing a DIY raised garden bed teaches you is that soil is heavier than it looks. You may begin the project with romantic visions of basil, tomatoes, and sunlit baskets of produce. Then you lift your eighth bag of compost and suddenly understand why farmers have such strong forearms. This is not a bad thing. It is part of the experience. A raised bed makes gardening easier later, but the setup stage politely asks you to participate in a full-body workout.
One of the best lessons is to build smaller than your ambition, at least at first. A single 4×4 or 4×8 raised bed is enough to learn watering habits, plant spacing, pest pressure, and seasonal timing. Many beginners build five beds immediately, then discover that cucumbers do not read calendars, weeds do not respect optimism, and every tomato plant wants a support system both physically and emotionally. Starting with one bed lets you understand your garden before expanding into what can only be described as backyard agriculture with snacks.
Another real-world discovery is that placement matters more than decoration. The bed that looks perfect beside the fence may get only four hours of sun. The sunny spot may be farther from the hose. The most beautiful layout may leave no room to kneel, carry soil, or harvest without stepping into the bed. Good design is not just pretty; it is usable. The best raised bed is the one you can easily reach, water, maintain, and enjoy without performing garden yoga every morning.
Soil quality also becomes personal very quickly. At first, soil seems like brown stuff plants sit in. After one season, you begin noticing texture, drainage, smell, earthworms, crusting, and how quickly water disappears after a hot day. A raised bed turns you into the kind of person who says, “This compost looks beautiful,” and means it sincerely. That is growth. For you and the lettuce.
You will also learn that plants have personalities. Radishes are impatient overachievers. Lettuce is generous until summer heat makes it dramatic. Tomatoes are rewarding but needy. Basil is easygoing as long as it gets warmth and regular harvesting. Zucchini may attempt to colonize nearby furniture. These experiences help you plan better the next season. Maybe you add a trellis. Maybe you plant fewer squash. Maybe you finally believe the spacing instructions on the seed packet.
The biggest reward is not just the harvest. It is the habit. A raised bed invites you outside for five minutes at a time. You notice new leaves, tiny flowers, pollinators, moisture levels, and the first green bean hiding under the foliage like a tiny vegetable secret. You become more connected to weather, seasons, food, and the small satisfaction of building something useful with your hands. A DIY raised garden bed is simple, practical, and forgiving. Even when things go wrong, you learn fast, laugh a little, and usually still get something delicious out of it.
Conclusion
A DIY raised garden bed is one of the smartest projects for beginner and experienced gardeners alike. It gives you better soil control, improved drainage, easier maintenance, and a cleaner garden layout. Keep the bed narrow enough to reach, deep enough for your crops, filled with a balanced soil mix, and placed where sun and water access make sense.
Start simple. Build one sturdy bed, plant crops you actually like to eat, mulch the soil, water deeply, and learn as you go. Your first raised bed does not need to be perfect. It just needs to hold soil, catch sunlight, and give your plants a better place to grow. The tomatoes will handle the drama.