A bathroom remodel does not have to begin with a demolition hammer, a five-figure invoice, and three weeks of brushing your teeth over the kitchen sink. In many bathrooms, the biggest improvements come from correcting a handful of highly visibleor quietly troublesomedetails.
Fresh paint can brighten a dim room. New hardware can rescue an ordinary vanity. Better lighting can make morning routines easier, while an efficient exhaust fan can prevent the room from turning into a private tropical rainforest. Even replacing one outdated showerhead or faucet can improve appearance, performance, and water efficiency.
The key is to spend money where it will make a noticeable difference. These five quick bathroom remodeling tips focus on projects that can improve style, comfort, safety, and function without moving walls or rerouting every pipe in the house.
Before You Begin: Fix Problems Before Decorating Them
Before choosing paint colors or comparing faucet finishes, inspect the bathroom carefully. Look for soft flooring, loose tiles, peeling paint, cracked grout, dripping connections, dark stains, damaged drywall, and persistent musty odors. Cosmetic upgrades should never be used to hide an active leak or moisture problem.
The Centers for Disease Control and Prevention recommends repairing plumbing and building leaks promptly, using bathroom exhaust fans that vent outdoors, and keeping indoor humidity no higher than 50 percent when possible. Moisture problems are not improved by hanging a charming new mirror over them, although the mirror may provide an excellent view of your growing frustration.
Make a simple project list and divide it into three categories: repairs, functional improvements, and decorative upgrades. Complete them in that order. A beautiful bathroom is much more enjoyable when water is staying inside the pipes.
Quick Fix 1: Renew the Paint, Caulk, and Grout
Start With the Surfaces That Frame the Room
Paint covers more visible square footage than almost any other bathroom material, making it one of the fastest and most affordable ways to change the room. A tired beige bathroom can feel cleaner and larger in warm white, misty blue, muted sage, pale gray, or another light-reflective color. In a powder room with good lighting, a deeper navy, charcoal, forest green, or clay tone can create a dramatic jewel-box effect.
Choose paint designed for high-humidity interiors. Bathroom paint should tolerate repeated cleaning and resist moisture and mildew. Before painting, clean the walls, repair holes, sand peeling areas, and apply an appropriate primer where needed. Never paint directly over visible mildew. The growth must be removed and the moisture source corrected first.
Allow the paint to dry and cure according to the manufacturer’s instructions before taking a long, steamy shower. Fresh paint plus immediate steam can produce streaks, poor adhesion, or a finish that looks as though the walls have started sweating about the remodeling budget.
Replace Failing Caulk
Old caulk can make an otherwise clean bathroom look neglected. If the seal around the bathtub, shower, sink, or backsplash is cracked, loose, discolored, or separating from the surface, remove it rather than stacking new caulk on top like icing on a questionable cake.
Clean and dry the joint thoroughly before applying a new bead. Silicone-based bathroom caulk is commonly recommended around wet areas because it remains flexible and provides strong water resistance. Use painter’s tape for crisp edges, apply a narrow continuous bead, smooth it promptly, and give it the full curing time stated on the label.
Refresh Grout Without Retiling Everything
If tile is firmly attached and in good condition, replacing it may be unnecessary. Deep cleaning can revive grout that has collected soap residue and discoloration. Grout colorant can also create a more consistent appearance after the surface has been properly cleaned and prepared.
Crumbled or missing grout should be repaired, especially in wet areas. Widespread cracking, loose tile, or water damage behind the surface may indicate a larger problem requiring professional evaluation. A quick cosmetic fix is useful only when the structure underneath is sound.
Quick Fix 2: Give the Vanity a Low-Cost Makeover
Work With the Cabinet You Already Own
The vanity is often the visual anchor of a bathroom. Fortunately, an unattractive finish does not automatically mean the cabinet belongs in a dumpster. If the box is solid, the doors align properly, and there is no swelling or water damage, refinishing may provide a convincing transformation.
Remove the doors, drawers, hinges, and pulls. Label the pieces so reassembly does not become an unwanted puzzle. Clean away cosmetics, dust, grease, and residue; lightly sand or degloss the finish; use a suitable bonding primer; and apply a durable cabinet coating. Thin, even coats usually look better than one heroic, dripping coat.
A medium wood vanity can become crisp white, smoky blue, soft black, warm taupe, or deep green. The best color depends on the flooring, countertop, wall color, and natural light. Lowe’s identifies painting the vanity, changing hardware, replacing the faucet, and updating the countertop as practical alternatives to purchasing an entirely new cabinet.
Replace Hardware for an Instant Style Shift
New knobs, pulls, hinges, towel rings, and hooks can make an ordinary vanity look more intentional. Measure the distance between existing screw holes before purchasing pulls. Matching the current hole spacing eliminates filling, drilling, and the emotional journey known as “Why did I assume all handles were the same size?”
Coordinate finishes rather than insisting that every metal surface match perfectly. Brushed nickel, polished chrome, matte black, bronze, brass, and mixed-metal combinations can all work when repeated deliberately. For example, black cabinet pulls may coordinate with a black mirror frame, while a chrome faucet connects visually with chrome shower hardware.
Improve Storage at the Point of Use
Use drawer dividers, pullout bins, shallow trays, wall-mounted shelves, or an upgraded medicine cabinet to reduce countertop clutter. Store frequently used items where they are easy to reach rather than creating a daily scavenger hunt for toothpaste.
National Kitchen & Bath Association planning guidance emphasizes providing accessible storage for toiletries, linens, grooming products, and general supplies near the places where they are used. That sounds obviousuntil you encounter a bathroom where towels live in another ZIP code.
Quick Fix 3: Upgrade the Mirror and Lighting
Use the Mirror to Change the Room’s Proportions
A builder-grade sheet mirror may be functional, but it is not the only option. Replacing it with a framed mirror can introduce color, texture, and a stronger focal point. Another budget-friendly approach is to add a moisture-resistant frame around an existing mirror, provided the installation does not trap water or interfere with outlets and fixtures.
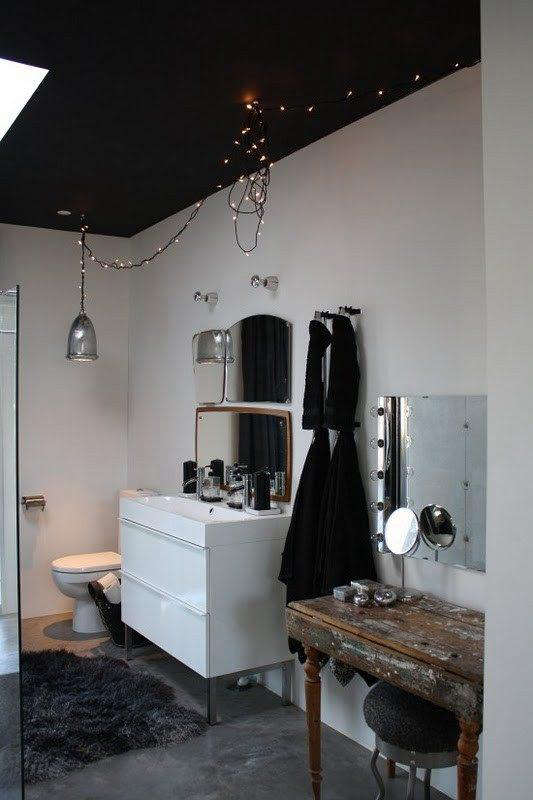
In a narrow bathroom, a wide mirror can visually expand the wall. In a compact powder room, a round or arched mirror softens a boxy layout. A taller mirror can draw the eye upward, while an oversized mirror reflects more light and may make the room feel more open. Lowe’s notes that large reflective surfaces can help brighten small bathrooms and reduce the cramped feeling caused by limited natural light.
Make sure the mirror is sized in proportion to the vanity. A tiny mirror floating above a large double vanity can look accidental, while an oversized frame squeezed between walls may feel crowded.
Layer the Lighting Instead of Depending on One Ceiling Fixture
A single overhead light often creates shadows under the eyes and chin. That is excellent lighting for telling ghost stories, but less helpful for shaving, applying makeup, or checking whether two socks are actually the same color.
For a more useful bathroom lighting plan, combine general illumination with task lighting near the mirror. Fixtures mounted on both sides of the mirror can provide balanced facial light. A fixture above the mirror can also work when space is limited, especially when it spreads light across the full vanity width.
Select bulbs with consistent color temperature and good color rendering. Extremely cool light may make the room feel clinical, while very warm light can distort colors. Dimmers provide flexibility for bright morning routines and softer nighttime visits.
Bathroom electrical work must follow local codes. Fixtures installed near showers and tubs need appropriate damp- or wet-location ratings, and electrical outlets generally require ground-fault circuit-interrupter protection. Hire a licensed electrician when wiring, circuits, boxes, or fixture locations must be changed.
Quick Fix 4: Improve Ventilation and Moisture Control
Replace the Noisy, Weak Exhaust Fan
An exhaust fan is not glamorous, but neither are blistered paint, persistent odors, and mildew spreading across the ceiling. A properly selected fan helps remove humid air at its source. It should exhaust outdoorsnot into an attic, ceiling cavity, or other enclosed space.
ENERGY STAR states that certified ventilation fans use about 48 percent less energy than standard models while offering efficient, quieter performance. Features such as humidity sensors, timers, motion controls, and adjustable speeds can make the fan easier to use consistently.
Fan capacity must suit the room and duct configuration. A powerful fan connected to a narrow, damaged, or excessively long duct may still perform poorly. Check the manufacturer’s sizing and installation instructions, and have the ductwork inspected if moisture lingers long after showers.
Make Daily Moisture Management Easier
Run the exhaust fan during bathing and long enough afterward to clear the humid air. Keep the bathroom door open after use when practical, spread towels so they can dry, and use a squeegee on shower walls and doors. Repair dripping faucets and shower connections promptly.
If the existing fan works only when the light is on, consider a timer switch or humidity-sensing control. People are more likely to ventilate the room correctly when the process does not require remembering to return twenty minutes later and flip a switch.
Peeling paint, recurring mildew, condensation on walls, and swollen trim are warnings, not decorating challenges. Correct the source of the moisture before investing in new finishes.
Quick Fix 5: Replace Inefficient Fixtures and Add Safety
Install a Better Showerhead or Faucet
A new showerhead can improve spray quality, update the room’s appearance, and reduce water use without opening a wall. Handheld models make rinsing, cleaning, bathing children, and assisting family members easier. Before installation, verify that the new fixture is compatible with the existing shower arm and local plumbing requirements.
WaterSense-labeled showerheads use no more than 2.0 gallons per minute, compared with 2.5 gallons per minute for standard showerheads, while meeting performance requirements for spray coverage and intensity. WaterSense-labeled bathroom faucets use no more than 1.5 gallons per minute and can reduce flow by at least 30 percent compared with the standard 2.2-gallon rate.
Replacing a dripping faucet may also eliminate wasted water and staining around the sink. When purchasing a faucet, confirm the sink’s hole configuration, spacing, drain requirements, supply-line connections, and clearance behind the fixture.
Consider a High-Efficiency Toilet
If an older toilet clogs frequently, runs continuously, rocks at the base, or uses excessive water, replacement may be more sensible than repeated repair. Choose a model with proven flushing performance, a comfortable height for the household, and dimensions that fit the available space.
The EPA estimates that a complete bathroom upgrade using WaterSense-labeled fixtures can save a household nearly 10,000 gallons of water annually, along with energy and utility expenses. Those savings vary by household and local rates, but efficiency is worth considering whenever fixtures already need replacement.
Add Safety Without Making the Bathroom Look Institutional
Safety upgrades can be discreet and stylish. Consider securely anchored grab bars, a handheld showerhead, non-slip flooring, a stable shower seat where appropriate, brighter nighttime lighting, and a comfort-height toilet. Modern grab bars are available in finishes and designs that resemble coordinated towel bars.
Never use an ordinary towel bar as a substitute for a grab bar. It may look sturdy until someone places body weight on it. Proper grab bars must be installed with suitable blocking or approved anchoring systems.
The U.S. Consumer Product Safety Commission recommends non-skid mats and surfaces, slip-resistant bathroom materials, clear floors, and properly installed grab bars, particularly for older adults. These improvements can benefit children, injured household members, overnight guests, and anyone who has attempted to step onto wet tile while half awake.
How to Keep a Quick Bathroom Remodel on Budget
Begin with a written spending limit and reserve part of it for unexpected repairs. Even a small project may uncover a corroded shutoff valve, damaged subfloor, leaking trap, or electrical issue. It is better to have a contingency fund than to spend every dollar on decorative tile and then discover the sink has developed opinions about gravity.
Keep the existing layout whenever possible. Moving a toilet, shower, tub, or sink can require plumbing, framing, flooring, electrical, waterproofing, and permit work. Replacing fixtures in their current locations is usually faster and less disruptive.
Choose one visual focal point. A distinctive mirror, painted vanity, patterned floor, dramatic light fixture, or bold wall color can give the room personality. When every surface competes for attention, a small bathroom can begin to resemble a design showroom experiencing a power surge.
Measure every opening and clearance twice. Check door swings, drawer extensions, faucet reach, toilet dimensions, mirror width, lighting height, and the space available around the vanity. Products that look compact online can become surprisingly ambitious after delivery.
Know when to call a professional. Painting, changing cabinet hardware, installing shelves, or replacing a compatible showerhead may be reasonable DIY projects. Hidden leaks, extensive mold, structural damage, major electrical work, waterproofing failures, and plumbing relocation belong in experienced hands. Consumer Reports and the NKBA both emphasize planning ahead, following codes, and understanding the sequence of a remodeling project before work begins.
Real-World Experiences From Quick Bathroom Remodels
Experience 1: The “Ugly Vanity” Was Not Actually the Problem
One of the most common remodeling mistakes is deciding that every unattractive item must be replaced. In one small guest bathroom, the homeowner planned to remove a structurally sound vanity because its orange-toned wood finish looked dated. A replacement cabinet, countertop, sink, faucet, delivery fee, and installation would have consumed most of the budget.
Instead, the doors were removed, the surfaces were cleaned and sanded, and the cabinet was painted a deep blue-gray. Simple brushed-metal pulls replaced the old knobs. A new faucet and framed mirror completed the update.
The finished vanity looked custom, although most of it was the same cabinet that had been there for years. The experience demonstrated an important lesson: evaluate condition separately from appearance. A solid but unfashionable cabinet may be a better remodeling candidate than a stylish but poorly constructed replacement.
Experience 2: New Paint Failed Because the Fan Was Ignored
Another homeowner repainted a bathroom ceiling after noticing peeling near the shower. The old paint was scraped, the ceiling was patched, and a fresh moisture-resistant coating was applied. Within months, the peeling returned.
The real culprit was an underperforming exhaust fan connected to a clogged duct. Steam remained in the bathroom long after showers, and condensation collected on the ceiling. Replacing the fan, correcting the duct problem, and allowing the room to dry fully solved the underlying issue before the ceiling was painted again.
The lesson was memorable and slightly expensive: peeling paint is often a symptom. Treating only the visible damage is like silencing a smoke alarm without checking whether something is burning.
Experience 3: Better Lighting Made the Room Feel Newly Built
In a windowless bathroom, the owners assumed the beige wall color was responsible for the gloomy appearance. They chose a brighter paint but were disappointed by the result. The room was cleaner, yet it still looked flat and shadowy.
The major improvement came from replacing a single dim ceiling fixture and adding balanced vanity lighting. The mirror reflected more light, the wall color became clearer, and the countertop no longer disappeared into shadow. No walls moved, and no plumbing changed, but the room suddenly felt larger and more polished.
This experience shows why finishes should be viewed under the lighting that will actually be used. Paint chips selected beside a sunny living-room window may look completely different in a bathroom illuminated by one tired bulb.
Experience 4: Matching Every Finish Was Less Important Than Repeating Them
A couple delayed their bathroom refresh because they could not find cabinet hardware that perfectly matched the existing chrome shower trim. Eventually, they chose matte-black pulls and a black mirror frame while keeping the chrome faucet and shower fixtures.
The mixed finishes worked because each one appeared more than once and the design looked deliberate. The black elements defined the vanity area, while the chrome fixtures remained bright and easy to maintain.
The practical takeaway is that coordination matters more than laboratory-level matching. Repeated colors, shapes, and finishes create visual rhythm. A bathroom does not fall apart stylistically because two metals are present; it struggles when ten unrelated ideas arrive without introducing themselves.
Experience 5: The Small Safety Upgrade Became Everyone’s Favorite Feature
During a modest shower update, a family installed a handheld showerhead and two properly anchored grab bars for an older relative. The fixtures were selected in the same finish as the rest of the shower hardware, so they blended into the design.
The unexpected result was that everyone used them. The handheld showerhead simplified cleaning, rinsing muddy feet, and bathing the family dog. The grab bar provided stability for adults and children without making the room feel medical.
The project reinforced a broader remodeling principle: universal design is not only for one age group. Features that improve reach, balance, visibility, and ease of use often make a bathroom more comfortable for the entire household.
Conclusion
A successful bathroom remodel is not measured by how much material reaches the dumpster. It is measured by whether the room becomes easier to use, simpler to maintain, safer, more efficient, and more pleasant to enter each morning.
Start with moisture and repairs. Then refresh the walls, vanity, mirror, lighting, ventilation, and fixtures according to the bathroom’s greatest needs. By keeping the existing layout and concentrating on five high-impact improvements, homeowners can create a meaningful transformation without committing to a complete renovation.
Note: Building, plumbing, accessibility, ventilation, and electrical requirements vary by location. Check local codes, permit rules, product instructions, and warranty requirements before beginning work. Use qualified professionals for structural changes, concealed water damage, extensive mold, waterproofing, plumbing relocation, and electrical installation.