Old photos have a magical talent for appearing in the least organized places on Earth: shoeboxes, cookie tins, desk drawers, mystery envelopes, and that one plastic grocery bag nobody remembers bringing home. One minute you are looking for a picture of Grandma at Thanksgiving; the next, you are sitting on the floor surrounded by 700 prints, three negatives, a baptism card, and a photo of a man everyone insists is “probably Uncle Ray.”
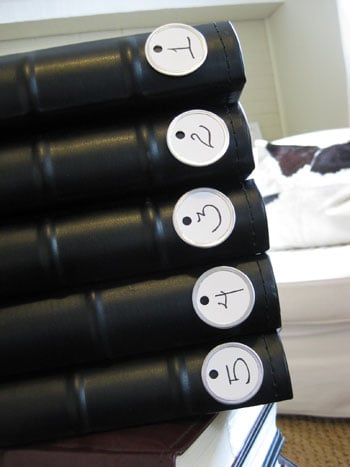
That is exactly why organizing old photos in numbered albums is such a smart, low-drama system. Numbered albums give your family photo collection structure without forcing you to solve every mystery in one weekend. Instead of trying to create the perfect museum archive, you create a practical roadmap: Album 1, Album 2, Album 3, and so on, each connected to a simple index that explains what is inside.
This method works beautifully for family historians, busy parents, downsizing households, genealogy researchers, and anyone who inherited a box of old prints with the emotional weight of a grand piano. A numbered album system protects your photos, makes them easier to find, and keeps future generations from asking, “Why are all these people wearing matching sweaters, and who are they?”
Why Numbered Albums Work So Well
The biggest mistake people make when organizing old photographs is trying to sort everything perfectly by date, person, event, and emotional importance all at once. That sounds noble. It also sounds like a project that will still be unfinished when your grandchildren retire.
Numbered albums solve the problem by separating physical organization from detailed identification. You do not need to know every name or year before you begin. You simply place photos into safe albums, number those albums clearly, and create an index that records what you know. Unknowns can stay unknown for now. They are not failures; they are research opportunities wearing tiny paper hats.
The Main Benefits
A numbered album system helps you:
- Keep photo collections in a stable order.
- Find images quickly using album numbers and page numbers.
- Preserve original family groupings and stories.
- Prevent repeated handling of fragile prints.
- Create a simple bridge between physical albums and digital scans.
- Share specific photos with relatives without digging through every box.
Most importantly, it gives the project a finish line. You can say, “Album 1 is done,” instead of “I have entered a permanent relationship with photo chaos.”
Start With a Photo Sorting Plan
Before buying albums, labels, sleeves, boxes, scanners, or anything that makes you feel productive, take inventory. Lay out your photo collection in small batches. Never dump every print onto the dining table unless you enjoy panic as a lifestyle choice.
Work with one box, envelope, or old album at a time. Create four basic piles:
- Keep: clear, meaningful photos worth preserving.
- Duplicates: extra copies that can be shared or stored separately.
- Research: unidentified people, places, or events.
- Discard: blurry, damaged, accidental, or completely meaningless prints.
Be careful with the discard pile. A dark photo of a lampshade may not matter. A faded photo with a handwritten note on the back may matter a lot. Always check the back before making decisions. Family history often hides in pencil marks, studio stamps, processing dates, and notes like “Easter at Louise’s, 1968.”
Choose Photo-Safe Albums
Not all albums are safe for old photos. Some older “magnetic” albums, which are not magnetic at all but sticky, can trap photos under plastic film and adhesive that yellows over time. If the photos are stuck, do not yank them out like you are opening a stubborn bag of chips. Forcing removal can tear the image layer.
Look for albums and pages described as photo-safe, acid-free, lignin-free, and archival quality. The best storage materials are usually made from stable plastics such as polyester, polypropylene, or polyethylene, or from archival paper designed for photographs. Avoid PVC plastics, strong-smelling plastics, self-adhesive pages, glue sticks, rubber cement, tape, and anything that promises “easy mounting” but looks suspiciously like a future conservation problem.
Album Features to Look For
- Clear sleeves that do not stick to the photo surface.
- Acid-free paper or board.
- Pages that lie flat and do not bend prints.
- Room for labels or notes beside each photo.
- Strong binding that will not crush or warp pages.
- Albums that fit standard storage boxes or shelves.
If your collection includes delicate nineteenth-century photographs, tintypes, cabinet cards, glass negatives, or badly damaged prints, consider storing them in individual archival sleeves or boxes rather than standard albums. The goal is not to make everything cute. The goal is to keep the photos alive long enough for someone in 2080 to say, “Wow, they really did wear those glasses.”
Create a Numbering System Before You Fill the Albums
A numbered album system works best when the rules are simple. Do not create a code so complicated that future relatives need a decoder ring. Use clear album numbers and page numbers.
For example:
- Album 001: Smith Family Early Years, 1940s–1960s
- Album 002: Johnson Family Holidays, 1970s–1980s
- Album 003: Weddings, Anniversaries, and Reunions
- Album 004: School Photos and Childhood Snapshots
Use three digits if you expect a large collection. Album 001 looks tidy, and it leaves room for Album 148 if your family believed every birthday cake deserved eight angles.
How to Number Pages and Photos
Inside each album, number each page. Then identify each photo by album, page, and position. A simple system might look like this:
- 001-05-A: Album 001, page 5, top-left photo.
- 001-05-B: Album 001, page 5, top-right photo.
- 001-05-C: Album 001, page 5, bottom-left photo.
- 001-05-D: Album 001, page 5, bottom-right photo.
This makes your physical albums searchable. If someone asks for the photo of Grandpa beside the blue truck, you can say, “Album 002, page 14, photo C,” instead of “It is somewhere in the house, possibly near the warranties for appliances we no longer own.”
Build a Simple Photo Index
The index is the heart of the numbered album method. It can be a spreadsheet, notebook, binder, or digital document. A spreadsheet is especially useful because you can sort, search, duplicate, and update it easily.
Include these columns:
- Album number
- Page number
- Photo position
- People shown
- Event or occasion
- Place
- Estimated date
- Photographer, if known
- Notes from the back of the photo
- Digitized file name
- Questions to research
The index does not need to be perfect. Start with what you know. “Aunt Linda, maybe 1972, beach trip” is better than leaving the photo unidentified forever. Add question marks where needed. The future family detective will thank you.
Preserve Original Order When It Matters
Original order can be valuable. If you inherited a complete album arranged by a parent or grandparent, think twice before dismantling it. The order may reveal relationships, trips, timelines, or personal meaning. A photo album is not just a container; it is sometimes a story.
If an old album is damaging the photos but still tells a story, document it before rehousing anything. Photograph each page, including captions, empty spaces, ticket stubs, pressed flowers, and handwritten notes. Then record the original album as a source in your new index.
For example, your new note might say: “Photos removed from Grandma Ruth’s red album, original page 12.” That one sentence preserves context that could otherwise disappear faster than cookies at a family reunion.
Label Carefully Without Damaging Photos
Labels are wonderful. Bad labels are little villains. Never write across the image side of a photo. Avoid ballpoint pens, markers, sticky notes on the photo surface, tape, and pressure-sensitive labels directly on prints.
The safest approach is to write information on the album page, on an archival sleeve, or in the index. If you must write on the back of a modern print, use a soft pencil and write lightly near the edge. For glossy resin-coated prints, pencil may not work well, so labeling the enclosure is usually better.
Good Label Examples
- “Album 001, page 07: Margaret and Helen, Chicago, summer 1956.”
- “Possible location: Lake Michigan. Confirm with Uncle Paul.”
- “Original caption: ‘First car!’”
- “Scanned as 001-07-B.tif.”
When in doubt, write less on the photo and more in the index. Your album should guide people to the story, not tattoo the story onto the photograph.
Digitize as You Organize
Numbered albums pair perfectly with digital scans. Once each photo has an album-page-position code, use that code as the digital file name. This keeps the physical and digital collections connected.
For example:
- 001-05-A_grandpa-blue-truck_1964.tif
- 001-05-A_grandpa-blue-truck_1964.jpg
Use TIFF files for long-term preservation if possible, because they are high-quality and widely supported. Use JPEG copies for easy sharing by email, family websites, and cloud albums. Scan important prints at a high enough resolution to capture details clearly; for many family photos, 300 to 600 dpi is a practical range, while very small prints may benefit from higher settings.
Save the back of the photo too if it contains handwriting, stamps, or dates. A beautiful portrait is wonderful, but the scribbled “To Mom, Christmas 1949” on the back is the emotional receipt.
Use the 3-2-1 Backup Rule
Digital organization is not preservation unless you back it up. A good rule is the 3-2-1 method: keep three copies of your files, on two different types of storage, with one copy stored off-site or in the cloud.
A practical setup might include:
- One copy on your computer.
- One copy on an external hard drive.
- One copy in secure cloud storage or with a trusted relative.
Also create a copy of your photo index and store it with the digital files. A folder full of scans named properly is useful. A folder full of scans plus an index is a family archive with manners.
Store Numbered Albums in the Right Environment
After you organize old photos in numbered albums, store them in a cool, dry, stable location. Avoid attics, garages, basements, sheds, and any room where the temperature swings wildly or moisture likes to throw surprise parties.
Good storage places include interior closets, bedroom shelves, or archival boxes kept away from sunlight, pipes, heaters, air vents, and exterior walls. Keep albums upright only if they are sturdy and not overfilled. Heavy or fragile albums may be better stored flat in archival boxes.
Do not cram albums onto shelves. Photographs dislike pressure, bending, heat, humidity, and being treated like old tax paperwork. Give them breathing room.
How to Handle Fragile or Problem Albums
Some old albums need extra care. If photos are stuck under plastic sheets, glued to black paper, curling, flaking, moldy, water-damaged, or stuck together, slow down. Do not use steam, water, dental floss, knives, hair dryers, or internet tricks that sound like they were invented during a power outage.
For albums with photos safely removable, document the pages first, then rehouse the photos in archival sleeves or new albums. For photos that are tightly bonded to pages, it may be safer to leave them in place and store the entire album in an archival box. When the item is rare, valuable, or emotionally irreplaceable, consult a professional conservator.
Organizing by Theme, Date, or Family Branch
Numbered albums can follow different structures depending on your collection. Choose the approach that makes retrieval easiest.
Chronological Albums
Best for collections with known dates. Album 001 might cover 1930–1949, Album 002 might cover 1950–1969, and so on. This is clean and logical, but it can be tricky when many photos are undated.
Family Branch Albums
Best for genealogy. You might create one series for the maternal line and another for the paternal line. For example, M-001 for the Miller family and J-001 for the Johnson family.
Event-Based Albums
Best for modern family collections. Weddings, holidays, vacations, military service, school years, and reunions can each have their own numbered albums.
Original Collection Albums
Best when photos arrived in meaningful groups. For example, “Album 001: Photos from Aunt Rose’s cedar chest.” This keeps provenance intact, which is a fancy archive word meaning “where it came from and why that matters.”
A Step-by-Step Weekend Workflow
If you want to make serious progress without turning your home into a paper avalanche, try this weekend plan.
Friday Evening: Prepare
Clear one table. Gather cotton or nitrile gloves for delicate prints, a pencil, sticky flags for temporary notes, archival sleeves, albums, a laptop, and clean hands. Set up good lighting and keep drinks far away. Coffee and vintage photographs should not become emotionally involved.
Saturday Morning: Sort
Work in small batches. Keep existing groups together unless you have a reason to separate them. Remove obvious duplicates, but save the best copy. Place mystery photos in a research pile rather than letting them stop the whole project.
Saturday Afternoon: Number
Assign album numbers. Label each album clearly on the spine and inside front cover. Number pages before adding photos. Enter the album and page structure into your index.
Sunday Morning: Fill Albums
Place photos in sleeves or photo-safe pages. Add notes beside the images, not on them. Record names, dates, places, and questions in the index.
Sunday Afternoon: Scan Priority Photos
Digitize the most important or fragile images first. Use the album-page-position code in the file name. Back up the scans and index before you celebrate. Then celebrate. You have earned snacks.
Common Mistakes to Avoid
- Waiting for perfect information: Start with partial details and improve later.
- Using unsafe albums: Choose photo-safe, acid-free, archival materials.
- Writing directly on photos: Label sleeves, pages, or the index instead.
- Removing stuck photos by force: Document first and seek help if needed.
- Skipping digital backups: Scans need protection too.
- Overfilling albums: Bulging albums can bend prints and strain bindings.
- Ignoring stories: Names and memories are as important as dates.
Specific Example: The Johnson Family Album System
Imagine you inherited six boxes of photos from the Johnson family. Some are loose prints, some are in envelopes, and some are in old albums. A practical numbered album setup might look like this:
- J-001: Earliest Johnson Family Photos, 1910–1949
- J-002: Johnson Family Home Life, 1950–1969
- J-003: Holidays and Reunions, 1970–1989
- J-004: Weddings and Anniversaries
- J-005: Military, School, and Work Photos
- J-006: Unknown People and Research Photos
Then your index might include an entry like:
J-003, page 12, photo B: “Thanksgiving dinner, possibly 1978. People: Ruth Johnson, Alan Johnson, unidentified boy in striped shirt. Location: likely Des Moines. Note on back: ‘Turkey too dry again.’”
That tiny note is gold. It gives names, a possible date, a place, a mystery, and a family joke. It also proves that dry turkey is a historical constant.
How Numbered Albums Help Future Generations
Organizing old photos in numbered albums is not just a cleaning project. It is an act of translation. You are translating piles of paper into a story people can understand.
Future relatives may not know the faces, houses, cars, pets, uniforms, or vacation cabins in your photos. A numbered album with an index gives them clues. It tells them where each photo belongs, what is known, what is guessed, and what still needs research.
That structure can also make sharing easier. You can send relatives a message like, “Please look at Album 004, page 9. Do you recognize the woman in photo C?” This is much better than sending 83 random images and asking, “Any idea?” which is how family group chats become haunted.
Real-World Experience: What Numbered Albums Teach You
There is something surprisingly emotional about organizing old photos in numbered albums. At first, it feels like a storage project. You buy the albums, sharpen the pencil, open the first box, and tell yourself this will be simple. Then you find a photo of your grandfather standing beside a car he clearly loved more than most furniture, and suddenly you are not organizing paper. You are holding a small doorway.
The numbered album method helps because it lowers the pressure. You do not have to become the official family historian overnight. You only have to make the next good decision. Album 001. Page 1. Photo A. That rhythm is calming. It turns a mountain into stairs.
One useful experience is to keep a “story sheet” nearby while sorting. Whenever a memory pops up, write it down immediately. Do not trust yourself to remember it later. You will not. The brain sees one cousin in a Halloween costume and suddenly opens seventeen tabs. A story sheet catches details before they vanish: who baked the birthday cake, why everyone was laughing, which house had the green carpet, and why Uncle Mike was banned from carving pumpkins after 1986.
Another lesson is that mystery photos deserve respect, but not control. Many people stop organizing because they hit a photo they cannot identify. Instead of freezing, place it in a research section or album and keep moving. Label it honestly: “Unknown woman, possibly connected to the Carter family, 1940s.” That is not a dead end. It is a breadcrumb.
It also helps to invite relatives into the process after the first few albums are organized. Do not invite everyone on day one unless you want seven opinions and no progress. Finish one small section first. Then share a few album codes and ask specific questions. People respond better to “Who is in Album 002, page 6, photo D?” than to “Tell me everything about all these pictures.” Specific questions unlock better memories.
The physical experience matters too. Numbered albums make photos feel cared for. Loose prints in a box feel temporary, even if they have been temporary since 1974. Once they are placed in clean sleeves, labeled, and indexed, they feel safe. They become easier to enjoy because you are no longer afraid of losing the order or damaging them with constant handling.
The best part is the sense of completion. A numbered album system lets you finish in chapters. Album 001 can be done even while Album 006 is still full of strangers in excellent hats. That progress is motivating. Each completed album becomes a small family museum, minus the velvet ropes and suspiciously quiet security guard.
In the end, organizing old photos in numbered albums is not about perfection. It is about kindness toward the past and practicality for the future. You are giving your family a way to find its own memories again. That is worth the time, the labels, the scanning, and yes, even the occasional argument over whether that baby is Aunt Carol or a very serious-looking neighbor.
Conclusion
Organizing old photos in numbered albums is one of the most practical ways to protect family memories while making them easier to enjoy. The system is simple: choose photo-safe albums, assign clear numbers, create a searchable index, label carefully, digitize important images, and store everything in a stable environment.
You do not need perfect dates, perfect names, or perfect handwriting to begin. You need a method that respects the photos and keeps the project moving. Numbered albums do exactly that. They turn scattered prints into an organized family archive, one page at a time.
Start with one small batch. Give it an album number. Record what you know. Protect the originals. Back up the scans. Then keep going. Somewhere in that collection is a photo someone will treasure deeply one day, even if today it is just “unknown man with impressive sideburns.”