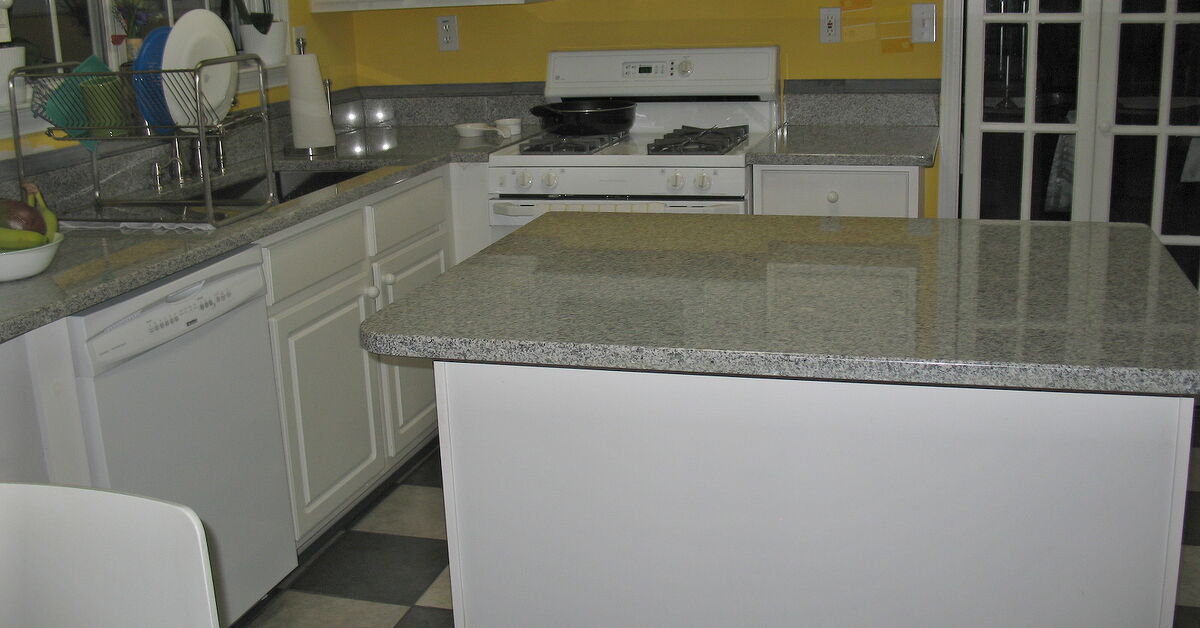
Some people dream of owning a private island with palm trees, turquoise water, and a suspiciously photogenic hammock. The rest of us look at the middle of the kitchen and think, “Honestly, I’d settle for more counter space.” Good news: a DIY kitchen island is the kind of island you can actually afford, build on a weekend, and use every single day without needing a yacht, a passport, or a billionaire uncle.
A kitchen island can become the hardest-working piece in your home. It can hold mixing bowls, hide pots and pans, serve pancakes, store trash bins, support homework, and quietly judge anyone who leaves crumbs on it. Whether you want a rolling cart, a cabinet-based island, a butcher-block prep station, or a furniture-style centerpiece, building your own island gives you control over size, storage, finish, and budget.
This guide walks through how to plan, design, build, finish, and actually live with a homemade kitchen island. It is practical, beginner-friendly, and lightly seasoned with humorbecause any DIY project involving wood glue and measuring tape deserves emotional support.
Why Build a DIY Kitchen Island Instead of Buying One?
Buying a ready-made island is convenient, but building one gives you something prebuilt furniture rarely offers: a perfect fit for your kitchen and your habits. Maybe you need deep drawers for pans. Maybe you want open shelves for cookbooks. Maybe your kitchen has an awkward empty spot that looks like it was designed by someone who forgot humans need to chop onions.
A homemade kitchen island can solve several problems at once:
- It adds extra prep space for cooking and baking.
- It creates new kitchen storage without a full remodel.
- It can include seating for casual meals.
- It can improve traffic flow when sized correctly.
- It gives your kitchen a custom look without custom-cabinet pricing.
The key phrase is “when sized correctly.” A kitchen island should feel like a helpful assistant, not a wooden refrigerator blocking the room. Before you buy lumber, cabinets, butcher block, casters, or that beautiful hardware you absolutely do not need but suddenly love, start with planning.
Step One: Measure Your Kitchen Like a Calm, Responsible Adult
Measuring is not glamorous, but neither is building an island that prevents your dishwasher from opening. A good island design starts with space. Most kitchens need clear walking paths around the island so people can move, cook, open appliances, and pass each other without performing a tiny sideways crab dance.
Recommended Kitchen Island Clearance
For many kitchens, a comfortable work aisle around an island is about 42 to 48 inches. In smaller spaces, 36 inches may work for simple passage, but tighter aisles can feel cramped when cabinet doors, oven doors, or dishwasher doors open. If seating is included, plan extra room behind stools so people can sit, stand, and escape after eating the last cookie.
A practical test is simple: tape the island footprint on the floor with painter’s tape. Then live with that outline for a day or two. Open the fridge. Pull out a pan. Pretend to carry a hot pot. If the tape outline makes your kitchen feel like an obstacle course, shrink the island before lumber gets involved.
Common DIY Kitchen Island Sizes
A small island often starts around 2 feet deep by 4 feet long. This gives useful prep space without swallowing a compact kitchen. A medium island may run 5 to 6 feet long, especially if it includes drawers, shelves, or seating for two. Larger kitchens can handle more, but bigger is not automatically better. An oversized island can make the room feel heavy and reduce the easy movement that makes a kitchen enjoyable.
For height, 36 inches is the standard counter height for prep work. A raised bar section may be around 42 inches, while table-height seating is closer to 30 inches. For most DIYers, a single-level 36-inch island is easier to build, easier to use, and easier to pair with common counter-height stools.
Choose Your DIY Kitchen Island Style
There is no single correct way to build a kitchen island. The best version depends on your budget, tools, skill level, and whether you prefer “weekend project” or “I now own seven clamps and have opinions about plywood.”
1. Stock Cabinet Kitchen Island
A stock cabinet island is one of the most approachable options. You use base cabinets or wall cabinets as the core, secure them together, add side panels, trim, a toe kick or base frame, and finish with a countertop. This method creates a built-in look without building every box from scratch.
It works especially well if you want drawers, doors, and hidden storage. Choose cabinets that match your kitchen for a seamless look, or paint the island a contrasting color for a designer effect. Navy, sage green, warm gray, black, and natural wood tones are popular because they add character without screaming, “I watched one home makeover show and panicked.”
2. Rolling Kitchen Island Cart
A rolling island is perfect for apartments, small kitchens, and commitment issues. Add locking casters to a sturdy base, and you get flexible prep space that can move where needed. This option is useful when you want extra counter space but cannot permanently alter the room.
For safety, choose heavy-duty locking casters and make sure the island is stable. A rolling island should roll when invited, not wander across the kitchen while you are kneading dough.
3. Butcher Block Worktable Island
A butcher block island has warmth, charm, and the energy of a farmhouse that knows how to bake bread. You can build a simple frame from lumber, add lower shelves, and top it with butcher block. It is excellent for food prep, baking, and creating a casual, furniture-style focal point.
Butcher block needs sealing and regular maintenance. Food-safe mineral oil, conditioner, or appropriate finishes can help protect the wood. If you want a surface that ages gracefully and you do not mind occasional upkeep, butcher block is a strong choice.
4. Repurposed Furniture Island
Old dressers, console tables, bookshelves, and workbenches can become creative kitchen islands. This is the thrifty, character-rich option. Add a durable top, reinforce weak joints, paint or stain the piece, and install hooks, towel bars, or baskets.
The caution: not every piece of furniture is kitchen-ready. Check the height, stability, drawer strength, and surface durability. A charming antique table is wonderful; a wobbly antique table holding a stand mixer is a suspense movie.
Plan Storage Before You Build
The best DIY kitchen island ideas start with what you need to store. Do not build random shelves and hope your kitchen items cooperate. Measure your largest pans, mixing bowls, cutting boards, appliances, and sheet trays. Then design storage around them.
Smart Kitchen Island Storage Ideas
- Deep drawers: Great for pots, pans, mixing bowls, and linens.
- Vertical dividers: Perfect for baking sheets, cutting boards, and trays.
- Open shelves: Best for cookbooks, baskets, serving bowls, or everyday items.
- Pullout trash bin: A kitchen luxury that feels small until you have one.
- Spice pullouts: Useful if the island is near the cooking zone.
- Hooks and rails: Affordable add-ons for towels, utensils, and small pans.
If you are torn between open and closed storage, choose both. Closed cabinets hide chaos. Open shelves show off the pretty things and politely ignore the fact that your plastic food container lids have formed their own government.
Pick the Right Countertop
The countertop determines how the island looks, feels, and performs. A DIY island countertop should match your lifestyle more than your fantasy life. Be honest. If you rarely wipe spills quickly, marble may not be your best friend. If you chop vegetables daily, butcher block may be beautiful and useful. If you want durability with minimal fuss, quartz or laminate may make more sense.
Popular DIY Kitchen Island Countertop Options
Butcher block is warm, relatively DIY-friendly, and easy to cut to size compared with stone. It needs sealing and maintenance but looks better with age when cared for properly.
Laminate is budget-friendly, lightweight, and available in many styles. Modern laminate can mimic stone, wood, or concrete better than the shiny old versions that haunted many 1980s kitchens.
Quartz is durable and low-maintenance but usually requires professional fabrication and installation. It is a great choice for a more permanent island.
Granite offers natural beauty and strong heat resistance, but it is heavy and may require sealing. Make sure the island base can support it.
Stainless steel has a commercial-kitchen feel and handles messes well, though it can scratch and show fingerprints. It is excellent for serious cooks who like function with a little restaurant energy.
For seating, allow enough overhang for knees. A 12-inch overhang is common for counter-height seating, though deeper overhangs may need support brackets, legs, corbels, or steel reinforcement. Never assume a long unsupported countertop will be fine. Gravity has no sense of humor.
Electrical, Plumbing, and Appliances: Know When to Call a Pro
A simple island with storage and a countertop is very DIY-friendly. An island with a sink, dishwasher, microwave, cooktop, or outlets is a different creature. Plumbing and electrical work may require permits, inspections, GFCI protection, special outlet placement, and professional installation depending on local code.
If you want a prep sink, remember that water supply and drainage must reach the island. If your kitchen is on a concrete slab, that can become expensive quickly. If you want a cooktop, you need safe electrical or gas connections and proper ventilation. If you want power for mixers, chargers, or small appliances, talk with a licensed electrician about current local requirements.
In other words: build the wooden island yourself, but do not freestyle electrical work because a stranger on the internet said, “Looks easy.” Your kitchen should make toast, not sparks.
How to Build a Simple DIY Kitchen Island
Here is a practical overview for a stock-cabinet island or furniture-style build. Exact dimensions will depend on your space, but the process is similar.
Tools and Materials
- Measuring tape and pencil
- Painter’s tape for layout testing
- Level
- Drill and driver bits
- Saw or pre-cut lumber
- Wood screws and construction screws
- Wood glue
- Base cabinets, plywood, or lumber frame
- Trim, panels, or beadboard
- Countertop material
- Sandpaper or sander
- Primer, paint, stain, or sealer
- Hardware, hooks, towel bar, or pulls
Basic Build Steps
- Mark the footprint. Tape the island size on the floor and test traffic flow.
- Build or place the base. Use stock cabinets, a framed lumber base, or a reinforced furniture piece.
- Secure the structure. Fasten cabinets together and attach panels or framing for strength.
- Add side panels and trim. Cover unfinished cabinet backs and edges for a custom look.
- Install shelves or drawers. Plan storage around real kitchen items.
- Attach the countertop. Follow the countertop manufacturer’s guidance for fastening and support.
- Sand and finish. Paint, stain, seal, or oil the surfaces as needed.
- Add hardware. Pulls, hooks, towel bars, and baskets make the island more useful.
- Check stability. The finished island should not wobble, tip, or shift during normal use.
Design Details That Make a DIY Island Look Expensive
A DIY island does not have to look homemade in the “my cousin brought a nail gun” sense. Small upgrades can make a budget build look polished.
Use Trim Generously
Flat cabinet backs can look unfinished. Add beadboard, shaker-style trim, fluted panels, or simple square molding. Trim hides seams, adds dimension, and makes stock cabinets look intentional.
Choose Better Hardware
Cabinet pulls are the jewelry of the kitchen. Matte black, brushed brass, polished nickel, or oil-rubbed bronze can shift the entire style. Choose hardware that coordinates with nearby faucets, lighting, or cabinet knobs.
Paint the Island a Feature Color
An island is a safe place to use contrast. White kitchens look great with blue, green, charcoal, or wood-tone islands. Warm kitchens can handle cream, taupe, or black. The island should stand out without looking like it accidentally came from another house.
Add Practical Accessories
A towel bar, paper towel holder, cookbook shelf, spice rail, or hidden trash pullout can make the island feel custom. Add only what you will use. Too many accessories can make a small island look like it is wearing a utility belt.
DIY Kitchen Island Mistakes to Avoid
Even a simple island can go sideways if you skip the boring-but-important parts. Avoid these common mistakes:
- Building too large. If traffic flow suffers, the island is wrong no matter how pretty it is.
- Ignoring appliance doors. Test refrigerator, oven, dishwasher, and cabinet door clearance.
- Using weak furniture. Reinforce repurposed pieces before adding heavy countertops.
- Skipping countertop support. Long overhangs need proper brackets or legs.
- Forgetting maintenance. Wood tops need sealing; painted finishes need durable coatings.
- DIYing electrical without knowledge. Hire a licensed electrician when power is involved.
Budget-Friendly DIY Kitchen Island Ideas
You do not need a luxury budget to build a beautiful island. Try these cost-conscious approaches:
- Use stock cabinets instead of custom cabinetry.
- Repurpose a dresser, console, or sturdy worktable.
- Choose butcher block or laminate instead of stone.
- Paint the base instead of buying premium wood.
- Use open shelving to reduce cabinet costs.
- Add trim to inexpensive materials for a custom appearance.
- Shop for remnant countertops from local fabricators.
The most affordable island is often the one that does one or two jobs very well. A compact island with prep space and storage can be better than a giant island overloaded with seating, appliances, outlets, shelves, and a built-in espresso station for your imaginary Italian café era.
Real-Life Experience: What Building Your Own Kitchen Island Actually Teaches You
Building a DIY kitchen island is one of those projects that sounds simple in theory: measure, cut, screw, paint, done. In real life, it teaches you several things about your kitchen, your patience, and your relationship with the phrase “just one more trip to the hardware store.”
The first experience many DIYers have is discovering that the kitchen looks bigger before painter’s tape enters the room. You imagine a generous island with seating for four, a butcher-block top, deep drawers, and space for your stand mixer. Then you tape the footprint on the floor and realize your dream island would require guests to climb over a stool to reach the refrigerator. This is not failure. This is design wisdom arriving early, before money has been spent.
The second lesson is that storage planning matters more than style at first. A beautiful island that cannot hold your pans is just a decorative obstacle. Before building, pull out the items you want the island to store. Put the baking sheets, bowls, utensils, towels, cutting boards, and small appliances on the floor. Yes, it will look chaotic. Yes, someone may ask if you are moving. But this step tells you whether you need drawers, shelves, dividers, or doors.
The third lesson is that finish work takes longer than expected. The structure may come together quickly, but sanding, filling nail holes, caulking seams, priming, painting, sealing, and waiting for finishes to cure can stretch the project. This is where many islands either become beautiful or permanently “almost done.” Give yourself time. Good paint needs patience. Butcher block needs sealing. Trim needs careful edges. The final 10 percent is what makes the island look built-in instead of built-in-a-panic.
The fourth lesson is that a DIY island changes how the kitchen works almost immediately. Suddenly there is a place to unload groceries. There is a place to roll out dough. There is a place for kids to sit, friends to lean, and someone to place a coffee mug exactly where you are trying to chop cilantro. The island becomes a magnet. Even a small one can make the kitchen feel more social and more organized.
The final lesson is that perfection is overrated, but stability is not. A tiny paint drip can be sanded. A slightly imperfect trim seam can be caulked. A wobbly base or unsupported overhang, however, needs fixing. Build safely, measure twice, secure everything properly, and choose materials that match how you live. A DIY kitchen island should not only photograph well; it should survive breakfast, dinner prep, holiday chaos, and that one relative who leans on everything like they are testing bridge engineering.
In the end, the best part of building your own kitchen island is not just saving money. It is the satisfaction of walking into your kitchen and seeing something useful that exists because you made it happen. You wanted your own island. You made one. No ocean required.
Conclusion: Your Kitchen Island, Your Rules
A DIY kitchen island is one of the most rewarding upgrades you can make because it blends function, personality, and everyday convenience. The best island is not necessarily the biggest, fanciest, or most expensive. It is the one that fits your kitchen, supports your cooking habits, improves storage, and makes the room easier to enjoy.
Start with measurements. Respect clearance. Choose a build style that matches your skill level. Plan storage around real items. Pick a countertop that fits your maintenance tolerance. Call professionals for electrical, plumbing, gas, or code-sensitive work. Then add the trim, paint, hardware, and finishing touches that make the island feel like it has always belonged there.
Your private island may not have palm trees, but it can have drawers, butcher block, seating, and a place for pancakes. Honestly, that sounds like a pretty good vacation.
Note: This article is written for general DIY education and web publishing. Always check local building codes and consult licensed professionals for electrical, plumbing, gas, ventilation, or structural work.