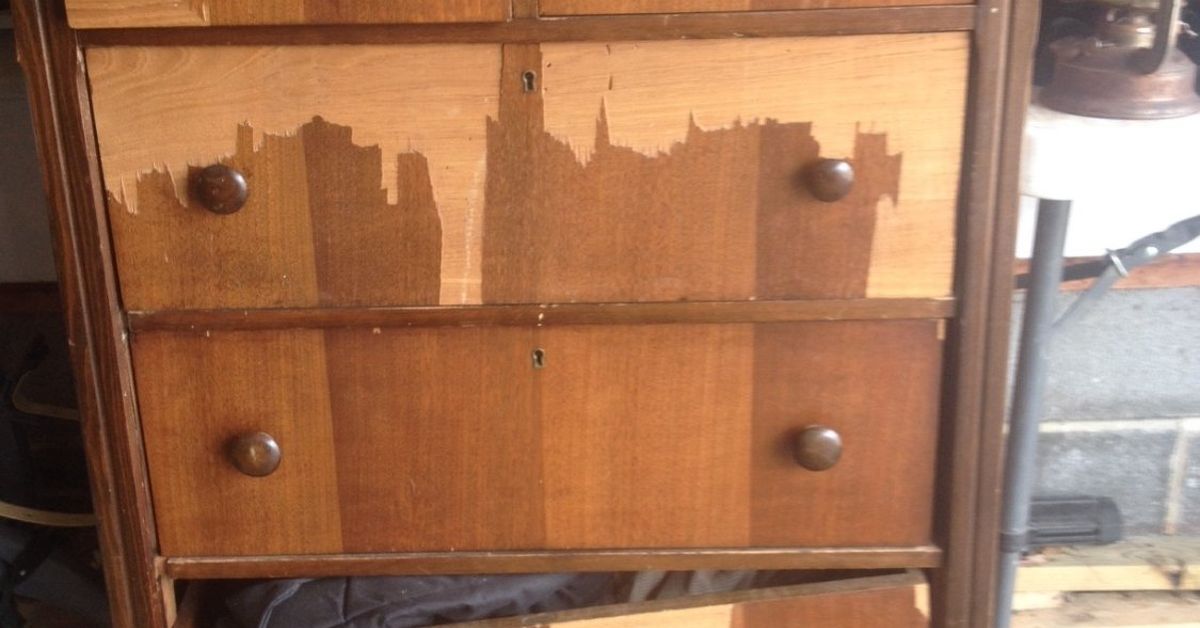
Somewhere in America, right now, an old dresser is sitting in a garage with one missing knob, a mysterious coffee ring, and the emotional energy of a retired soap opera actor. It may be scratched, outdated, orange-toned, heavy as a refrigerator, or wearing hardware that screams “1997 guest room.” But before it gets dragged to the curb, here is the good news: an upcycled old dresser can become one of the most stylish, useful, budget-friendly pieces in your home.
Upcycling is not just painting furniture and hoping guests say, “Wait, you made that?” It is the art of seeing potential where everyone else sees dust. A sturdy dresser can be transformed into a bedroom statement piece, entryway console, bathroom vanity, craft storage station, nursery changing table, dining room sideboard, media cabinet, or even a kitchen island. With the right prep, finish, hardware, and safety steps, that tired piece can look intentional instead of accidental.
This guide walks through practical dresser makeover ideas, the best ways to refinish and repurpose a dresser, common mistakes to avoid, and real-life lessons learned from paint splatters, stubborn drawers, and the kind of sanding dust that somehow ends up in your socks.
What Does “Upcycled Old Dresser” Really Mean?
An upcycled old dresser is a used, outdated, damaged, or unwanted dresser that has been creatively improved for a new purpose or a better look. Unlike simple restoration, which tries to return furniture to its original condition, upcycling often gives the piece a fresh identity. The goal is not always perfection. Sometimes the goal is personality, function, and a finish that hides the fact that the dresser once lived in a basement next to three paint cans and a forgotten treadmill.
Upcycling can be as simple as repainting a dresser and swapping the knobs, or as ambitious as removing drawers, adding shelves, cutting a sink opening, installing legs, or turning the piece into built-in-looking storage. The beauty of an old dresser makeover is that it gives you custom furniture without the custom-furniture price tag.
Why Upcycle an Old Dresser Instead of Buying New?
It Saves Money Without Looking Cheap
New furniture prices can be dramatic. One minute you are browsing for a dresser, and the next minute your cart total looks like a small appliance loan. Upcycling lets you start with a thrift store find, family hand-me-down, estate sale piece, or curbside rescue and invest mostly in paint, primer, sandpaper, hardware, and a little patience.
A high-quality older dresser, especially one made of solid wood, can often be stronger than many flat-pack alternatives. If the drawers slide well, the frame is stable, and the piece has good proportions, it may be worth saving even if the surface looks tired.
It Reduces Waste
Furniture is bulky, difficult to recycle, and often ends up in landfills when it still has years of life left. Reusing a dresser keeps useful materials in circulation and reduces demand for new raw materials. In plain English: your DIY project can look cute and do something responsible. That is a rare combination, like a toddler voluntarily choosing broccoli.
It Gives You a One-of-a-Kind Piece
Mass-produced furniture can be convenient, but an upcycled dresser has character. You choose the color, finish, pulls, legs, layout, and purpose. Want a moody navy dresser with brass handles? Done. A soft sage green changing table for a nursery? Adorable. A black fluted dresser that looks like it belongs in a boutique hotel? Absolutely. No one else will have the exact same piece unless they are copying your Pinterest board very closely, in which case, congratulations on becoming influential.
How to Choose the Right Old Dresser for Upcycling
Look for Solid Construction
Before you fall in love with a dresser’s shape, inspect the structure. Open every drawer. Wiggle the frame gently. Check whether the back panel is intact. Look for real wood, dovetail drawer joints, sturdy rails, and a top that is not badly warped. A dresser does not need to be flawless, but it should not feel like it is making retirement plans.
Solid wood pieces are usually the best candidates because they can be sanded, repaired, stained, painted, and modified more easily. Veneer can also be refinished or painted, but it requires a lighter touch because aggressive sanding can damage the thin surface layer. Particle board can work for simple paint projects, but if it is swollen from water damage or crumbling at the corners, it is usually not worth a heroic rescue mission.
Avoid Serious Odors and Major Mold
A musty dresser can sometimes be cleaned, aired out, sealed, or deodorized, but heavy mold, pet urine, or deep smoke odor can be very difficult to remove. If the smell greets you before you open the drawer, proceed carefully. No paint color is charming enough to compete with “haunted attic perfume.”
Be Careful With True Antiques
Not every old dresser should be painted. If a piece is a genuine antique, has rare craftsmanship, original hardware, valuable wood grain, or historical significance, painting it may reduce its value. In that case, cleaning, waxing, repairing, or professionally restoring it may be a better choice. Upcycling is wonderful, but so is knowing when to put down the paintbrush and step away like a responsible adult.
Best Upcycled Old Dresser Ideas
1. Paint It a Bold Statement Color
Paint is the classic dresser makeover tool for a reason. A dated brown dresser can become a dramatic focal point in emerald green, navy blue, charcoal black, clay red, creamy white, dusty pink, or deep olive. For a modern look, pair saturated paint with simple hardware. For a cottage style, try soft colors with slightly distressed edges. For a glam finish, add gold or champagne pulls.
The trick is choosing a color that works with your room rather than choosing one that only looks good under store lighting. Test a small area or paint a sample board first. Colors can change dramatically between morning light, evening lamps, and the strange bluish glow of your phone while you are shopping for knobs at midnight.
2. Refinish the Wood for a Natural Look
If the dresser has beautiful wood grain hiding under old stain, consider refinishing instead of painting. Sanding and staining can bring out warmth, texture, and depth. A natural wood dresser works beautifully in modern, farmhouse, Scandinavian, traditional, and organic-style interiors.
Start by removing the old finish, sanding with the grain, and progressing from coarser to finer grits. Then apply stain, wood conditioner if needed, and a protective topcoat. This method takes more patience than paint, but the result can look timeless.
3. Create a Two-Tone Dresser
A two-tone dresser combines paint and wood for a custom look. You might paint the frame and leave the drawer fronts stained, or stain the top and paint the body. This approach is especially useful when the entire dresser is not in equal condition. If the top has gorgeous grain but the sides are scratched, let each area do what it does best.
4. Add New Hardware
Hardware is the jewelry of furniture. The wrong knobs can make a dresser look tired; the right ones can make it look expensive. Consider brass pulls, matte black knobs, glass handles, leather tabs, ceramic knobs, or vintage-style cup pulls.
Before buying hardware, measure the existing hole spacing. If the new pulls do not match, you may need to fill old holes, drill new ones, and say a brief prayer to the alignment gods. A simple hardware swap can take a dresser from “yard sale” to “designer showroom,” assuming you install the pulls straight.
5. Turn It Into a Bathroom Vanity
An old dresser can become a beautiful bathroom vanity with the right modifications. This usually involves cutting a hole for the sink, adjusting drawers around plumbing, sealing the wood carefully, and using a water-resistant topcoat. A dresser vanity adds warmth and character that many store-bought vanities lack.
Because bathrooms are humid, sealing is not optional. Protect the top, inside cut edges, and any areas near water. If plumbing makes you nervous, this is a good project to pair with professional help. DIY confidence is wonderful; accidental indoor fountains are less wonderful.
6. Make an Entryway Console
A low or medium-height dresser can work perfectly in an entryway. Use the drawers for shoes, dog leashes, sunglasses, mail, gloves, and all the tiny objects that otherwise form a migration pattern across your kitchen counter. Style the top with a mirror, lamp, tray, and a small bowl for keys.
For narrow spaces, remove bulky legs or choose a dresser with a slimmer profile. Painting it the same color as the wall can make it feel built-in, while a contrasting color can turn it into a focal point.
7. Convert It Into a Media Cabinet
Dressers make excellent TV stands because they already offer storage. Remove one or two top drawers and replace them with open shelving for game consoles, streaming devices, or sound equipment. Drill discreet holes in the back for cords, then paint or stain the piece to match your living room.
This is one of the most practical dresser upcycling ideas because it solves two problems at once: where to put the TV and where to hide the clutter that somehow multiplies around the TV.
8. Build a Craft or Office Storage Station
An upcycled dresser can organize craft supplies, office papers, fabric, tools, chargers, and school materials. Add drawer dividers, labels, baskets, or peel-and-stick wallpaper inside the drawers. For a craft room, paint each drawer front a different color or use stencils for a cheerful look.
9. Create a Nursery Changing Table
A wide, sturdy dresser can become a nursery changing table with storage for diapers, wipes, clothes, blankets, and tiny socks that disappear as if they have joined a witness protection program. Use a changing pad with a secure base, keep supplies within reach, and anchor the dresser to the wall for safety.
10. Add Texture With Trim, Cane, or Fluting
Flat drawer fronts can be upgraded with decorative trim, wood slats, cane webbing, beadboard, or fluted molding. These details create depth and make a basic dresser look custom. Paint everything the same color for a seamless designer effect, or leave natural wood trim exposed for contrast.
Step-by-Step Guide: How to Upcycle an Old Dresser
Step 1: Clean the Dresser Thoroughly
Do not paint over dust, wax, grease, furniture polish, or mystery residue. Remove drawers and hardware first. Then clean the dresser with a mild degreasing cleaner or a solution appropriate for wood furniture. Pay special attention to corners, grooves, and drawer fronts where oils from hands often collect.
Skipping this step is one of the fastest ways to get peeling paint. Paint is loyal, but not loyal enough to stick to old lemon-scented polish from 2008.
Step 2: Make Repairs
Fill dents, gouges, and unused hardware holes with wood filler. Tighten loose screws. Repair drawer tracks. Glue loose veneer carefully. Clamp any separated joints until dry. If drawers stick, sand the sides lightly or apply furniture wax to the runners.
Good repairs make the finished piece look intentional. Bad repairs make the dresser look like it survived a small furniture-related tornado.
Step 3: Sand or Scuff the Surface
Sanding helps primer and paint adhere. You usually do not need to sand the entire dresser to bare wood unless you are staining it or removing a failing finish. For paint, a light scuff sanding is often enough. Use a finer grit for smoothing and be gentle on veneer.
After sanding, vacuum the dust and wipe the surface with a tack cloth or clean damp cloth. Dust left behind can create bumps in the finish, and nothing ruins a smooth paint job faster than furniture dandruff.
Step 4: Prime When Needed
Primer improves adhesion, blocks stains, and creates a consistent base for paint. It is especially important on glossy finishes, raw wood, dark wood, reddish wood, laminate, or pieces with stains that may bleed through. Use a primer that matches your project and paint type.
If you are painting a dresser white or a pale color, primer can save you from applying endless coats while questioning your life choices.
Step 5: Paint or Stain
Apply thin, even coats. For paint, use a quality brush, foam roller, or sprayer depending on the look you want. Brush with the grain and avoid overloading the brush. Two thin coats are usually better than one thick coat. Thick paint may look satisfying at first, but it can drip, wrinkle, and cure slowly.
For stain, apply evenly, wipe off excess, and follow the product instructions for drying time. Always test stain on a hidden area because different woods absorb color differently.
Step 6: Seal the Finish
A dresser gets touched often, so a protective topcoat matters. Use a clear polyurethane, polycrylic, furniture wax, hemp oil, or another sealer compatible with your paint or stain. High-use pieces, such as nursery dressers, bathroom vanities, and entryway storage, need durable protection.
Let the finish cure before heavy use. Dry to the touch does not always mean fully cured. This is the furniture equivalent of cookies cooling on the tray: technically ready, but touch too soon and you may regret it.
Step 7: Reinstall Hardware and Style It
Once the finish is dry and cured enough to handle, reinstall the hardware or add new pieces. Put the drawers back, adjust anything that rubs, and style the top with restraint. A lamp, framed art, tray, vase, or mirror can complete the look without turning the dresser into a decorative obstacle course.
Safety Tips for Upcycled Dressers
Anchor the Dresser to the Wall
Dressers can tip over, especially when drawers are opened or climbed by children. Any dresser with drawers, doors, or shelves should be anchored securely to the wall with an appropriate anti-tip kit. This is especially important in bedrooms, nurseries, playrooms, and family spaces.
Upcycling should make furniture prettier and safer. A beautiful dresser that is not anchored is like a cupcake with a thumbtack in it: charming at first glance, but not a good idea.
Use Lead-Safe Practices on Older Pieces
If the dresser may have old paint, especially if it dates from before modern lead paint restrictions, avoid dry sanding until you know what you are dealing with. Use a lead test kit or consult a professional when needed. Wear protective gear, work in a ventilated area, and follow safe cleanup practices.
Ventilate While Painting and Sealing
Paint, primer, stain, stripper, and topcoat can release fumes. Work in a well-ventilated space, follow product instructions, and wear the recommended protection. If you are working indoors, open windows and use fans to move air out, not just around in circles like a confused weather system.
Common Mistakes to Avoid
Skipping Prep Work
Prep work is not glamorous, but it is the difference between a dresser makeover that lasts and one that peels the first time someone sets down a coffee mug. Clean, repair, sand, prime, and let each coat dry properly.
Painting Over Damaged Finish
If the existing paint or varnish is flaking, bubbling, sticky, or peeling, new paint will not magically fix it. Remove loose areas and smooth the surface first. Paint is not a therapist; it cannot resolve deep underlying issues.
Choosing the Wrong Paint
Wall paint is not always the best choice for furniture. Dressers need a finish that can handle touching, cleaning, and drawer use. Cabinet paint, enamel paint, chalk-style paint with a proper sealer, milk paint with bonding agent, or furniture-specific paint can all work depending on the desired look.
Rushing Dry Time
Reassembling a dresser too soon can cause sticking drawers, dents, fingerprints, and chipped edges. Follow recoat and cure times. The hardest part of DIY is often waiting, which explains why so many projects include at least one fingerprint fossilized forever in the paint.
Design Styles That Work Beautifully With Upcycled Dressers
Modern Farmhouse
Use warm white, black, sage, or greige paint with cup pulls or simple knobs. Light distressing can add charm, but keep it controlled. The goal is “collected and cozy,” not “attacked by a sanding block.”
Midcentury Modern
Choose tapered legs, warm wood stain, clean lines, and minimalist hardware. If the dresser already has a midcentury shape, consider preserving the wood rather than painting everything.
Coastal
Try soft blue, white, sandy beige, weathered gray, or natural cane details. Keep the finish light and breezy. Add woven baskets or simple brass hardware for a relaxed beach-house look.
Boho
Use earthy paint colors, carved details, rattan, cane, patterned drawer liners, or mismatched vintage knobs. A boho dresser can handle personality, texture, and a little creative rule-breaking.
Classic and Traditional
Choose deep navy, forest green, black, cream, or rich wood stain. Add elegant brass hardware and keep the styling simple. Traditional dressers often look best when their original shape is respected rather than disguised.
of Real Experience: What Upcycling an Old Dresser Teaches You
The first thing an old dresser teaches you is that every DIY project begins with unreasonable confidence. You look at the piece and think, “I can finish this in one afternoon.” This is adorable. The dresser knows the truth. It knows about the stuck drawer, the stripped screw, the mystery wax layer, the chipped veneer, and the hardware holes that are almostbut not quitethe same distance apart as the new pulls.
One of the best experiences with upcycling a dresser is the moment after cleaning and sanding, when the piece stops looking like junk and starts looking like possibility. Even before paint, you can see its shape more clearly. The dust comes off, the drawers line up, the wood filler dries, and suddenly the dresser seems to stand a little taller, like it knows it has been given a second chance.
Another lesson is that prep work feels boring until you skip it. Cleaning, sanding, and priming may not give the instant satisfaction of rolling on a gorgeous color, but they decide whether the makeover lasts. A dresser that is properly prepped feels smooth, solid, and ready. A dresser that is not properly prepped becomes a future cautionary tale told in online comment sections.
Hardware can also change everything. There is a special kind of joy in replacing dull old knobs with something that fits the new style. Brass pulls can make a dark dresser look polished. Matte black hardware can modernize a pale piece. Wood knobs can soften a bold color. Sometimes the hardware costs almost as much as the dresser, which is when you begin explaining to yourself that “investment knobs” are a real thing.
Upcycling also teaches patience with imperfections. Not every brushstroke is a disaster. Not every tiny dent needs to vanish. Older furniture has history, and part of the charm is letting the piece keep a little of its story. The trick is knowing which imperfections add character and which ones make the dresser look neglected. A small nick near the base? Character. A drawer that falls out when opened? That is not character; that is a lawsuit audition.
The most satisfying part is using the finished dresser in real life. It is one thing to admire it in the garage after the final coat dries. It is another thing to place it in a room, fill the drawers, add a lamp, and realize it looks like it belonged there all along. Guests may ask where you bought it. This is your moment. Try to answer modestly, even though your soul is doing a small victory parade.
Upcycling an old dresser is not just about saving money or reducing waste. It is about learning to see value before something is perfect. It is about slowing down, solving problems, and creating a piece that fits your home because your hands helped make it that way. And yes, it is also about having a very good excuse to buy one more paintbrush.
Conclusion
An upcycled old dresser can become much more than a storage piece. With smart planning, careful prep, creative design, and basic safety steps, it can turn into a custom-looking feature for almost any room. Whether you paint it, stain it, add texture, replace the hardware, or completely repurpose it, the best dresser makeover starts with one simple question: “What could this become?”
The answer might be a bathroom vanity, media cabinet, nursery changing table, entryway organizer, craft station, or the prettiest bedroom dresser you have ever owned. The old dresser does not need to be perfect. It just needs solid bones, a clear plan, and someone willing to believe that under the scratches and questionable drawer liner, there is still a great piece of furniture waiting for its comeback.