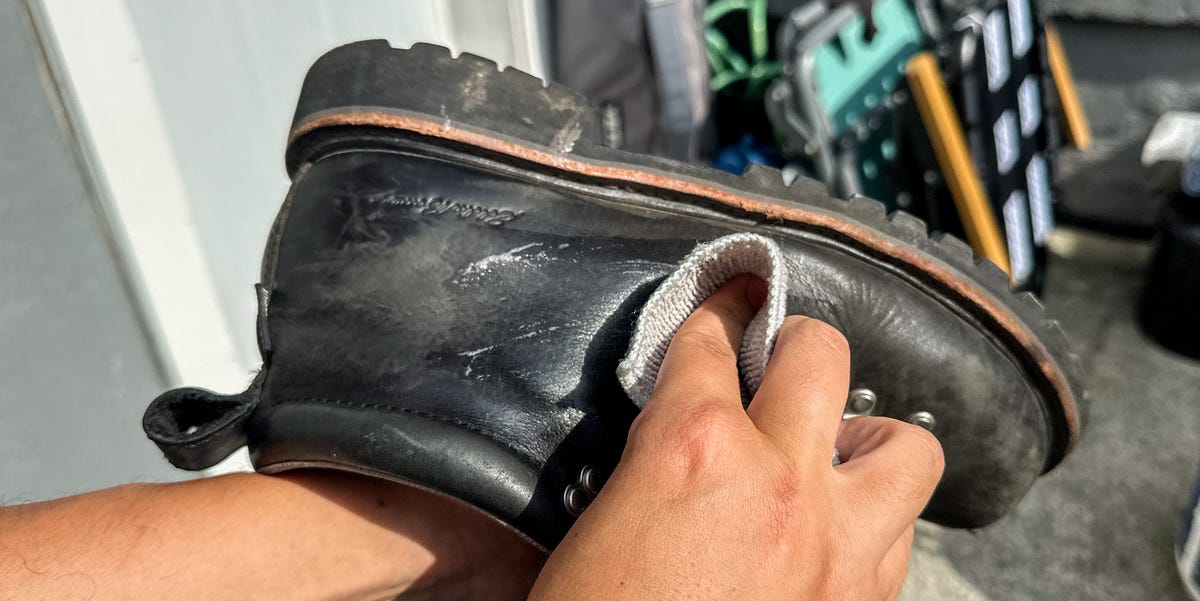
Leather boots are built to handle muddy sidewalks, dusty job sites, rainy commutes, crowded airports, and the occasional mysterious puddle that appears precisely where you step. Unfortunately, even the toughest pair cannot clean itself. Ignore dirt long enough, and it begins acting like sandpaper, grinding against the leather, stitching, and finish every time the boot bends.
The good news is that professional-looking boot care does not require a workshop, a polishing machine, or a dramatic montage set to inspirational music. With the right products and a careful routine, you can clean leather boots at home, restore their color, reduce visible scuffs, and help prevent premature cracking.
This guide focuses primarily on smooth and full-grain leather boots. Suede, nubuck, patent leather, oil-tanned leather, and exotic skins require modified techniques, which are explained below. Major footwear manufacturers consistently recommend beginning with dry dirt removal, using products designed for the specific leather, avoiding saturation, and drying boots naturally instead of exposing them to direct heat.
Why Regular Leather Boot Cleaning Matters
Leather is durable, but it is not indestructible. Dust, sand, road salt, mud, sweat, and moisture can gradually dull the finish and weaken areas that flex repeatedly. Fine grit also collects around seams, welts, tongues, and eyelets, where it can abrade both leather and thread.
Cleaning removes those contaminants before they settle deeper into the grain. Conditioning then replaces some of the moisture and oils lost through wear, while polishing and protective treatments improve appearance and provide an additional barrier against the elements.
Well-made boots may remain wearable for many years when they are cleaned, conditioned, dried, stored, and repaired properly. Bootmakers also recommend resolving worn heels and soles before damage becomes too extensive for practical restoration.
Identify Your Leather Before You Begin
Do not reach for a random bottle labeled “shoe stuff” and hope for the best. The first professional habit is identifying what your boots are actually made from.
Smooth or Full-Grain Leather
This leather has a relatively smooth, finished surface. It usually responds well to gentle leather cleaner, conditioner, cream polish, wax polish, and compatible waterproofing products. The complete process in this guide is generally appropriate for this category.
Oil-Tanned or Pull-Up Leather
Oil-tanned leather often has a rugged, waxy appearance and develops lighter marks when bent or rubbed. Heavy creams and oils may noticeably darken it. Some pull-up and rugged leathers need little more than brushing and occasional cleaning, so check the manufacturer’s instructions before adding conditioner.
Suede, Nubuck, or Roughout Leather
These materials have a soft, raised nap rather than a smooth finish. Use a suede or nubuck brush, an appropriate eraser, and a dedicated protective spray. Ordinary leather polish can flatten the nap and leave shiny patches. Standard liquid conditioners are also unsuitable for many suede products. Frye advises brushing, careful spot cleaning, and protection while avoiding conventional liquid cleaners and conditioners; Tecovas similarly warns that suede should not be conditioned.
Patent Leather
Patent leather has a glossy coated surface. Clean it with a soft cloth and a product specifically approved for patent leather. Heavy wax, saddle soap, or abrasive brushing can cloud or scratch the coating.
Exotic Leather
Ostrich, alligator, caiman, lizard, python, shark, and other exotic skins have species-specific requirements. Products must usually be applied sparingly and, on scaled leather, in the direction of the scales. Some exotic skins should not be polished at all. When the material is valuable or difficult to identify, consult the bootmaker or a professional cobbler.
Leather Boot Cleaning Supplies
Gather everything before starting. Walking around the house with one wet boot while searching for a missing cloth is not part of the professional method.
- A soft horsehair or natural-bristle boot brush
- A smaller detailing brush or clean, soft toothbrush
- Two or three clean microfiber or cotton cloths
- Lukewarm or room-temperature water
- A cleaner approved for your type of leather
- A compatible leather conditioner
- Optional cream or wax polish
- Optional leather-safe water and stain protector
- Boot trees, shoe trees, or plain absorbent paper
- A small bowl and protective covering for your work surface
Avoid rough sponges, stiff wire brushes on smooth leather, household degreasers, bleach, disinfectant wipes, rubbing alcohol, and cleaners containing aggressive solvents. These products may strip color, remove protective finishes, or dry out the leather.
How to Clean Leather Boots Step by Step
Step 1: Read the Care Label
Check the box, interior label, product page, or manufacturer’s care guide. Waterproof membranes, mixed-material panels, specialty finishes, and exotic skins may require different products. Thursday Boot Company, for example, gives separate instructions for several rugged leathers and advises against adding conditioner or protectant to certain finishes.
Step 2: Inspect the Boots
Look for loose stitching, deep cracks, separating soles, damaged eyelets, torn pull tabs, and lifting pieces of leather. Cleaning will not repair structural damage. A cobbler should assess major cracks, detached heels, split welts, or failing soles before you enthusiastically massage cleaner into the evidence.
Also identify stains and heavily worn areas. Knowing where the trouble spots are helps you clean evenly instead of discovering halfway through that one boot received a luxury spa treatment while the other got a damp napkin.
Step 3: Remove the Laces and Insoles
Take out the laces so you can reach the tongue, eyelets, speed hooks, and folds around the opening. Removable insoles should also come out, especially if the boots are damp.
Wash ordinary fabric laces separately in warm water with a small amount of mild soap. Rinse them and let them air-dry. Replace badly frayed laces rather than waiting for one to snap when you are already late.
Step 4: Let Wet Mud Dry
If the boots are covered in fresh mud, do not immediately smear it around with a wet cloth. Let the mud dry, then knock the boots gently together and brush off the loose material. Timberland specifically recommends allowing mud to dry before brushing because adding water too early can make the cleaning job harder.
Step 5: Brush Away Loose Dirt
Use a soft brush to clean the entire upper. Pay close attention to the welt, stitching, tongue folds, gusset, eyelets, heel seam, and the area where the leather meets the sole.
Brush with light, controlled strokes. The goal is to lift grit, not challenge the boot to a duel. A smaller brush can reach narrow seams and hardware. Removing dry particles first reduces the risk of scratching the leather when moisture is introduced.
Step 6: Clean the Soles and Tread
Use a separate brush to remove packed mud, gravel, and debris from the outsole. A blunt wooden tool can help loosen stubborn stones, but avoid knives and sharp metal objects.
Keeping the sole brush separate prevents dirty water and oily residue from transferring back onto the leather upper. This detail seems fussy until a black streak appears across a tan boot.
Step 7: Test the Cleaner
Apply a tiny amount of cleaner to a hidden area near the heel or inside edge. Let it dry completely and check for darkening, fading, spotting, or a change in texture.
Conditioners and protectants should be tested too. Even transparent products can deepen the color of light, vegetable-tanned, oil-tanned, or highly absorbent leather. Manufacturers including Frye and Danner recommend testing products in an inconspicuous area before treating the entire boot.
Step 8: Wipe the Leather With a Damp Cloth
Dampen a clean cloth with lukewarm water and wring it out thoroughly. The cloth should feel moist, not dripping. Wipe the leather in small sections using light circular movements.
Do not soak the boots or hold them under running water unless the manufacturer specifically permits it. Excess moisture may produce uneven staining, soften adhesives, distort the shape, or increase drying time.
Waterproof hiking-boot treatments can be an exception. Some water-based treatments are designed for application while the leather is evenly damp, so follow the product directions instead of applying a universal rule to every boot. REI’s hiking-boot guidance, for example, recommends applying certain treatments after water has soaked into the boot leather.
Step 9: Apply Leather Cleaner Sparingly
Place a small amount of cleaner on the cloth or applicator rather than pouring it directly onto the boot. Work section by section, using gentle circles and extra care around stained areas.
Clean both boots evenly. Treating only a visible stain can sometimes create a cleaner-looking island surrounded by older, darker leather. If you use saddle soap, build a light lather and remove the residue carefully. More soap does not mean more cleanliness; it often means more residue and a longer apology to your boots.
Nicks Boots recommends a soft brush or microfiber cloth, controlled moisture, and small circular movements to avoid saturating full-grain leather. Danner similarly advises using only a small amount of cleaner and wiping away excess solution.
Step 10: Wipe Away Cleaner Residue
Use a second clean, slightly damp cloth to remove loosened grime and leftover cleaner. Rinse or change the cloth when it becomes dirty. Continue until the surface feels clean rather than slippery or soapy.
Use a dry cloth to blot excess moisture. Do not rub aggressively, especially when the leather is wet and more vulnerable to marking.
Step 11: Air-Dry the Boots
Insert boot trees or loosely pack the boots with plain, absorbent paper to help preserve their shape. Avoid printed newspaper in light-colored or unlined boots because ink may transfer.
Place the boots in a ventilated room away from radiators, fireplaces, hair dryers, clothes dryers, direct sunlight, and other concentrated heat sources. High heat can dry the leather too quickly, encouraging stiffness, shrinkage, cracking, or adhesive failure. Red Wing, Ariat, Timberland, and Wolverine all recommend natural air-drying rather than direct heat.
Allow the leather to dry fully before using a conventional cream, oil, or wax conditioner unless its label specifically calls for application to damp leather.
Step 12: Condition the Leather
Once the boots are clean and dry, apply a thin layer of compatible conditioner with your fingers, a soft cloth, or an applicator brush. Begin with less than you think you need. You can add another light coat, but removing an oily flood is significantly less entertaining.
Massage the conditioner into the leather using small circles, covering the vamp, quarters, shaft, tongue, and flex points evenly. Avoid fabric panels unless the product is approved for them. Wipe away visible excess and let the conditioner absorb according to its instructions.
Conditioner can darken leather, reduce shine, or soften structured boots. Frequent conditioning is not automatically better: the right schedule depends on the leather, climate, wear, and product. Some naturally oily leathers need treatment only occasionally, while heavily used work or riding boots may need it more frequently. Tecovas specifically cautions that over-conditioning goat and bison leather can alter the finish.
Step 13: Polish for Color and Shine
Polish is optional. Work boots and matte casual boots may look better without a glossy finish, while dress boots often benefit from cream polish or wax.
Choose a neutral polish or one that closely matches the leather. Apply a thin coat with a soft cloth, allow it to haze if directed, and buff with a horsehair brush using quick, broad strokes. Cream polish helps refresh color and provides a moderate shine. Wax polish creates a brighter finish and additional surface protection but can build up when overused.
Do not apply ordinary polish to suede, nubuck, or leather the manufacturer says should remain untreated.
Step 14: Add Water and Stain Protection
Apply a compatible protector only after the boots are clean and properly conditioned. Use it outdoors or in a well-ventilated location, and follow the stated spraying distance, drying time, and reapplication schedule.
A protector can improve resistance to light rain and stains, but it does not transform every leather boot into waterproof equipment. Seams, tongues, zippers, and construction methods still affect water resistance.
Step 15: Buff, Relace, and Inspect
Give the boots a final buff with a clean brush or cloth. Reinstall dry insoles and laces, then inspect the pair under good lighting. Remove any excess product around seams, eyelets, and welt edges.
Let freshly conditioned or protected boots rest before wearing them. This allows the treatment to settle and reduces the chance of transferring product to pants, carpets, or the suspiciously light upholstery in your car.
How to Handle Common Leather Boot Problems
Water Marks
Rather than wetting only the center of a water ring, lightly dampen the surrounding area so the moisture transitions more evenly. Let the boot air-dry completely. For persistent marks, use a cleaner approved for that leather.
Salt and Winter Residue
Brush away dry crystals promptly and wipe the affected area with a damp cloth. Road salt can be stubborn, so use a manufacturer-approved salt-stain remover when plain water is insufficient. Avoid homemade acidic mixtures unless the bootmaker confirms they are safe for the finish.
Grease or Oil
Blot fresh grease without rubbing it deeper into the grain. Apply an absorbent leather-safe powder or specialized grease remover according to its directions. Dark oil stains can be difficult to remove completely, particularly on light leather, and may require professional treatment.
Scuffs
Many light scuffs improve after cleaning, conditioning, and buffing. A color-matched cream polish can camouflage remaining marks. Deep gouges, exposed fibers, and missing finish may need leather filler, dye, or professional refinishing.
Odor and Interior Moisture
Remove the insoles and let the boots ventilate between wears. Cedar boot trees can help absorb moisture and maintain shape. Wolverine recommends giving boots time to rest between uses and using shoe trees to manage moisture and odors.
Leather Boot Cleaning Mistakes to Avoid
- Cleaning without identifying the leather: A product that improves smooth leather may damage suede or a specialty finish.
- Scrubbing wet mud: This spreads grit and pushes dirt deeper into seams.
- Using too much water: Leather should usually be cleaned with controlled moisture, not treated like a beach towel.
- Drying with direct heat: Fast drying can cause stiffness, shrinkage, cracks, and weakened adhesives.
- Skipping the patch test: Cleaners and conditioners may darken or discolor the surface.
- Applying conditioner over dirt: This can trap grime and create an uneven, muddy finish.
- Over-conditioning: Excess product can oversoften leather, attract dust, clog the surface, and change the color.
- Using one brush for everything: A dirty sole brush can transfer grease and grit to the upper.
- Polishing suede or nubuck: Traditional polish can flatten the nap and create permanent shiny areas.
- Ignoring worn soles: Timely resoling may preserve boots that would otherwise become structurally damaged.
How Often Should You Clean Leather Boots?
There is no perfect schedule for every pair. Boots worn daily in mud, dust, snow, or barn conditions may need brushing after each use and a more thorough cleaning weekly or monthly. Occasional dress boots might need only a quick brush after wear and deeper care several times per year.
Use the leather’s condition as your guide. Clean the boots when dirt is visible, when salt residue appears, or before adding conditioner. Condition when the leather looks dry, feels less flexible, or develops pale creasesnot simply because a calendar notification is yelling at you.
Rotate frequently worn boots whenever possible. Giving each pair a day to dry and rest can reduce moisture buildup and help the leather retain its shape.
Real-World Experience: What Cleaning Leather Boots Actually Teaches You
The biggest lesson from cleaning many styles of leather boots is that restraint usually produces better results than enthusiasm. The first time someone buys a care kit, the temptation is to use every product in the box. Cleaner, conditioner, polish, oil, wax, waterproofing spraysurely six layers must be six times more protective. In reality, overloaded leather often feels sticky, looks unnaturally dark, and attracts dust faster than a television screen in an empty room.
A thin application is easier to control. On a pair of smooth brown service boots, for example, a dime-sized amount of conditioner may cover a surprisingly large section. The leather gradually absorbs it, dry creases become less obvious, and a horsehair brush distributes the remaining product. Adding a heavy second coat before the first one settles can turn a warm medium brown into something resembling wet chocolate. Sometimes that color lightens after a few days; sometimes it becomes the boot’s exciting new personality.
Another practical lesson is that brushing matters more than most owners expect. A thirty-second brushing after wear prevents dirt from accumulating around the welt and flex points. That tiny habit can make deep cleaning easier because grit never has time to become part of the architecture. Brushing also brings up a mild natural shine on many smooth and oil-tanned leathers without adding polish. For boots that are supposed to look rugged rather than mirror-finished, this may be all the cosmetic care they need between conditioning sessions.
Drying technique can determine whether a cleaning session ends in success or regret. A soaked boot placed near a heater may feel dry quickly, but the leather can become stiff and cardboard-like. Stuffing the boot loosely with absorbent paper, changing the paper when saturated, removing the insole, and allowing airflow takes longer but produces a better result. Boot trees are excellent once the interior is no longer dripping, although tightly packed paper is often more useful during the initial moisture-removal stage.
Color matching is another area where experience helps. A colored cream polish that looks perfect on the container may appear warmer, cooler, or darker on the actual boot. Testing near the heel avoids an accidental two-tone makeover. Neutral cream is safer when the goal is light conditioning and shine, but it will not restore heavily faded color as effectively as a well-matched pigmented cream.
Work boots and dress boots also reward different expectations. Scratches and tonal variation often improve the character of oil-tanned work leather. Trying to erase every mark can create an artificial, overprocessed appearance. Dress boots, by contrast, benefit from more deliberate polishing around the toe and heel while keeping flex areas lightly treated to prevent wax from cracking.
The most useful habit is maintaining a small, uncomplicated boot-care station: one clean horsehair brush, one detailing brush, several washable cloths, a suitable cleaner, the correct conditioner, and perhaps one polish. When those supplies are easy to reach, cleaning becomes a ten-minute maintenance routine instead of an annual rescue operation involving hardened mud, three missing laces, and questions about whether leather can hold a grudge.
Conclusion
To clean leather boots like a pro, start by identifying the material, remove dry debris before introducing moisture, use leather-specific products sparingly, and allow the boots to dry naturally. Condition only when appropriate, polish according to the desired finish, and protect the leather with a compatible treatment when weather exposure justifies it.
The process is less about making old boots look factory-new and more about preserving what makes quality leather appealing: flexibility, depth of color, comfort, and character. A few minutes of routine brushing and occasional careful cleaning can prevent hours of restoration later. Your boots will still collect creases and scars, of course. That is called patinaan elegant industry term meaning “proof that you went outside.”
SEO Metadata
Note: This article synthesizes current care recommendations from 13 established footwear manufacturers, retailers, and leather-boot specialists. Product formulas and leather finishes vary, so the instructions supplied by your boot manufacturer should take priority.