Note: This guide is written for homeowners, DIY refinishers, vintage furniture lovers, and anyone who has ever stared at a rusty drawer pull and thought, “Surely you used to be prettier.” For museum-grade antiques, rare heirlooms, or historically significant pieces, consult a professional conservator before polishing, stripping, or altering the finish.
Furniture hardware is small, but it has main-character energy. A dresser can be beautifully built, a cabinet can have elegant lines, and an old writing desk can practically whisper stories from another centurybut if the knobs, hinges, escutcheons, pulls, or key plates are dull, painted shut, rusty, or greasy, the whole piece can look tired. The good news is that learning how to restore furniture hardware is one of the most rewarding DIY upgrades you can do. It is affordable, approachable, and oddly satisfying in the way only grime removal can be.
Restoring old furniture hardware does not always mean making it look brand new. In fact, one of the biggest secrets of antique hardware restoration is knowing when to stop. A little patina can add depth, age, and character. Over-polishing, on the other hand, can turn a charming vintage drawer pull into something that looks like it escaped from a discount spaceship. The goal is not to erase history. The goal is to remove dirt, rust, paint, and corrosion while preserving as much original beauty as possible.
Why Restore Furniture Hardware Instead of Replacing It?
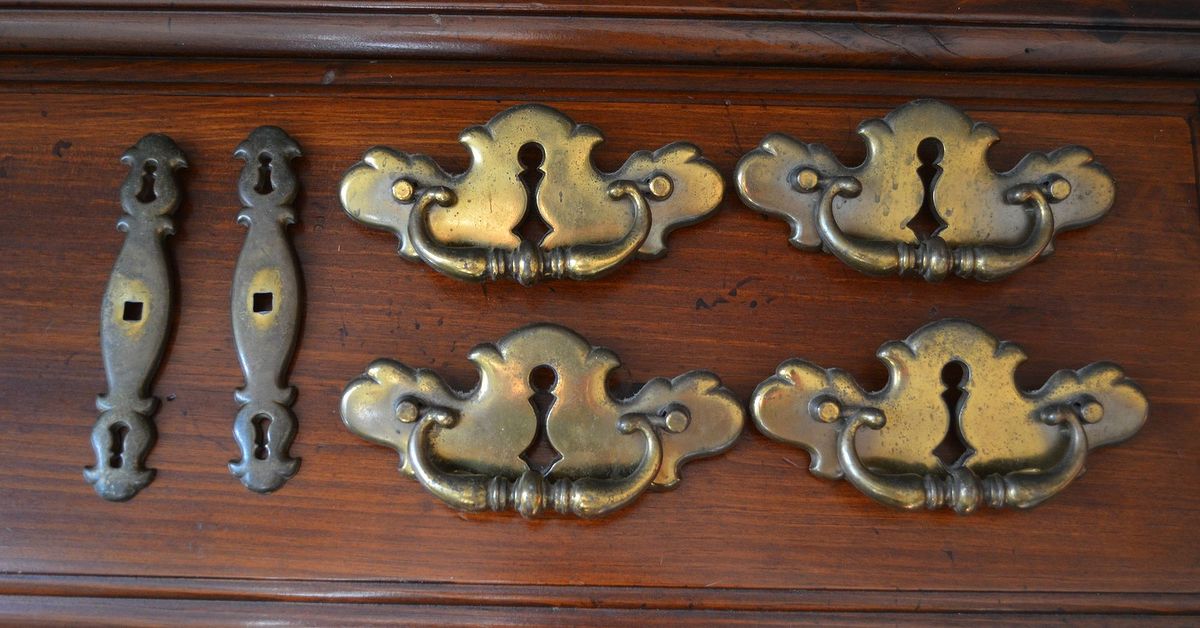
Replacement hardware is easy to buy, but original hardware is often worth saving. Older furniture frequently has pulls, hinges, and backplates made with better detail and heavier materials than many modern alternatives. Restored brass drawer pulls, iron hinges, bronze knobs, or vintage bail handles can instantly improve the value and visual appeal of a piece.
There is also the matter of fit. Old hardware often matches unusual screw spacing, curved drawer fronts, or decorative backplates that are hard to replace. Buying new hardware can quickly become a scavenger hunt involving three online carts, five browser tabs, and one emotional support coffee. Restoring what you already have is usually cheaper, more sustainable, and more faithful to the furniture’s original design.
Start With a Hardware Inspection
Before you clean, polish, soak, scrub, or declare war on tarnish, remove the hardware and inspect it carefully. Use a screwdriver that fits the screw heads properly so you do not strip old screws. Work slowly, especially if the screws are painted over or stuck. Label each piece with painter’s tape or place hardware from each drawer in a separate small bag. This simple step prevents the classic DIY mystery: “Why does this hinge suddenly not belong to anything?”
Check the Material
Different metals need different care. Solid brass can usually handle gentle polishing. Brass-plated hardware needs caution because aggressive scrubbing can remove the thin brass layer and expose the base metal underneath. Iron and steel hardware may need rust removal and protective coating. Bronze often looks best with some patina left intact. Nickel, chrome, pewter, and mixed-metal hardware should be cleaned gently unless you are certain of the finish.
A quick magnet test can help. If a magnet sticks, the piece is likely steel, iron, or brass-plated steel rather than solid brass. If the magnet does not stick, it may be solid brass, bronze, copper, or another non-ferrous metal. This is not a perfect laboratory test, but it is a useful starting point for furniture hardware restoration.
Gather the Right Tools and Supplies
You do not need a professional workshop to restore furniture hardware. Most projects can be handled with simple household items and a few inexpensive supplies.
Basic Supplies
- Small screwdriver or drill with proper bit
- Painter’s tape and small bags for labeling parts
- Warm water and mild dish soap
- Soft microfiber cloths
- Soft toothbrush or nylon brush
- Cotton swabs and toothpicks for crevices
- White vinegar, baking soda, lemon juice, or ketchup for some brass cleaning jobs
- Commercial metal polish for appropriate metals
- Fine steel wool only for solid metal pieces where safe
- Mineral oil, paste wax, or clear protective coating
- Gloves and eye protection
Use separate pots, trays, and brushes for restoration work. If you heat old painted hardware in a pot, never return that pot to food use. Older paint may contain lead, and lead does not belong in your soup, no matter how “vintage farmhouse” the soup is trying to be.
Step-by-Step Guide to Restore Furniture Hardware
1. Remove and Label Every Piece
Take photos before removing anything. Capture how hinges face, how pulls sit, and where screws go. This is especially helpful for antique furniture with slightly irregular parts. Remove the hardware carefully and keep screws with their original pieces. If screws are stuck, press the screwdriver firmly and turn slowly. For painted-over screws, score the paint around the screw head with a utility knife before attempting removal.
2. Start With the Gentlest Cleaning Method
The safest first step is warm water, mild dish soap, and a soft cloth. Soak dirty hardware for 15 to 30 minutes if the finish can tolerate moisture, then scrub gently with a toothbrush. This can remove hand oils, kitchen grease, dust, and general grime without stripping away character. Dry each piece completely afterward. Moisture left in crevices can encourage tarnish or rust.
For hardware with delicate patina, clean only the raised areas and avoid digging aggressively into recessed details. The darkened low spots often make the design stand out. Removing all of that depth can leave antique hardware looking flat and oddly modern.
3. Remove Paint From Old Furniture Hardware
Paint-covered hardware is common, especially on older cabinets, dressers, and built-ins. Sometimes a beautiful brass pull is hiding under three generations of paint and one regrettable “quick refresh” from 1987. A gentle heat-and-water method is often effective.
Place the hardware in an old pot or slow cooker with water and baking soda or a little mild detergent. Heat gently and let the pieces soak until the paint softens. Remove them with tongs and use a nylon brush, toothpick, or plastic scraper to lift softened paint. Avoid wire brushes on decorative brass or plated hardware because they can scratch the surface. Rinse well and dry thoroughly.
If you suspect old lead paint, take precautions. Wear gloves, avoid sanding dry paint, keep children and pets away, and follow local safety guidance for disposal. Restoration should be charming, not hazardous.
4. Clean Brass Hardware Without Overdoing It
Brass furniture hardware is popular because it warms up wood tones beautifully. To clean brass drawer pulls, knobs, or backplates, begin with soap and water. If more cleaning power is needed and the piece is solid brass, try a mild paste made from vinegar, salt, and flour, or lemon juice and baking soda. Apply gently, let it work briefly, rinse completely, and buff dry.
Ketchup may sound like a prank, but the mild acidity can help loosen tarnish on brass. Apply a thin coat, wait a short time, rinse, and dry. It is not elegant, but neither is tarnish. Just do not leave acidic cleaners on metal too long, especially on plated finishes. Always test a small hidden area first.
5. Remove Rust From Iron or Steel Hardware
Rusty furniture hardware needs patience. Light surface rust can often be removed with fine steel wool, a nylon brush, or a rust-removing product made for metal. For more stubborn rust, some restorers use washing soda solutions or electrolysis, but those methods require care, ventilation, and a basic understanding of the process.
After rust removal, protect the metal quickly. Bare iron and steel can start rusting again if left exposed, especially in humid areas. A light coat of paste wax, mineral oil, or clear protective finish can help keep moisture away.
6. Preserve Patina When It Adds Beauty
Patina is not the enemy. Dirt is the enemy. There is a difference. Patina is the mellow aging that gives antique hardware depth and charm. Dirt is sticky, uneven, and usually smells like a forgotten basement. When restoring vintage furniture hardware, aim to remove grime while keeping attractive age.
If the piece is valuable, unusual, or part of a true antique, avoid aggressive polishing. Clean gently with a damp cloth, mild soap, and cotton swabs. Skip harsh acids, abrasive powders, and heavy buffing. When in doubt, clean without polishing.
7. Polish Only When Appropriate
Polishing can make solid brass, copper, or bronze hardware shine, but it should be done thoughtfully. Use a polish suited to the metal and follow the product directions. Apply with a soft cloth, work in small sections, and stop before the piece looks unnaturally bright. For detailed hardware, a cotton swab can reach grooves without attacking every shadow.
Do not polish plated hardware aggressively. If you see silver-colored metal showing through a brass surface, stop. The plating is already worn, and more rubbing will not restore it. It will simply create a larger worn area with great confidence and terrible results.
8. Protect the Restored Finish
Once the hardware is clean and dry, protect it. For brass and copper, a light coat of mineral oil can slow tarnish. Paste wax works well on many metals and gives a soft sheen. Clear lacquer can provide longer-lasting protection, but it changes the maintenance routine and may not be ideal for antiques where a natural aged look is desired.
Make sure pieces are fully dry before sealing. Trapping moisture under wax or coating is like giving rust a tiny vacation home.
9. Reinstall Carefully
Before reinstalling, clean the area around screw holes. If the screw holes are loose, fill them with wood glue and toothpicks or small wood slivers, let dry, and reinsert the screws. Tighten hardware until secure, but do not over-tighten. Old screws and delicate backplates can bend, crack, or strip.
Step back and admire the difference. Restored hardware can make an old dresser look intentional, a cabinet look expensive, and a thrift-store find look like it has been waiting patiently for its big reveal.
Common Mistakes to Avoid
Using Harsh Abrasives Too Soon
Steel brushes, coarse sandpaper, and aggressive scrubbing pads can scratch metal, remove plating, and flatten decorative detail. Start gentle and increase intensity only when necessary.
Forgetting to Dry Hardware Completely
Water left in screw holes, hinges, or crevices can cause rust or tarnish. Dry with a cloth, then let parts air-dry fully before applying wax, oil, or finish.
Polishing Away the Character
Over-polished antique hardware can look strangely new against old wood. If the furniture has age, the hardware should not look like it just arrived from a hotel bathroom renovation.
Mixing Up Screws and Parts
Old furniture is not always perfectly symmetrical. Screws may vary slightly, and hardware may have worn into place over time. Label everything as you remove it.
Specific Examples of Furniture Hardware Restoration
Example 1: Brass Drawer Pulls on a Vintage Dresser
Remove the pulls, soak them in warm soapy water, and scrub gently with a toothbrush. If tarnish remains and the brass is solid, use a mild brass polish or a homemade paste. Leave some dark detail in the crevices so the pattern stays visible. Buff dry and protect with a thin coat of wax or mineral oil.
Example 2: Painted Cabinet Hinges
Remove the hinges and place them in an old pot or slow cooker with water and baking soda. Warm the solution until the paint softens. Lift the pieces with tongs, scrape gently with a plastic tool, and brush with a nylon brush. Rinse, dry completely, and apply a protective coating if the metal is prone to rust.
Example 3: Rusty Iron Handles on a Farmhouse Table
Brush away loose rust, then use a rust remover or fine abrasive method appropriate for iron. Once clean, dry the handles thoroughly and apply paste wax. The goal is not a mirror shine; it is a stable, handsome finish that suits the rustic furniture.
Maintenance Tips After Restoration
Restored furniture hardware is easier to maintain than neglected hardware. Dust it regularly with a microfiber cloth. Avoid harsh household cleaners, especially on brass, bronze, and plated finishes. Wipe spills quickly, keep furniture away from excessive humidity, and touch hardware with clean hands when possible. Finger oils can contribute to tarnish over time.
If you want a softly aged look, avoid frequent polishing. Clean gently and let the metal develop character naturally. If you prefer a brighter shine, schedule light polishing every few months rather than waiting until tarnish becomes heavy. Small maintenance beats dramatic rescue missions.
Experience Notes: Lessons From Restoring Furniture Hardware
The first lesson from restoring furniture hardware is that the smallest pieces can take the most time. A drawer pull may fit in your palm, but if it has carved edges, old paint in the grooves, and screws that were last turned when people still said “icebox,” it can become a full evening project. That is not a bad thing. Hardware restoration rewards patience. The moment a hidden brass glow appears under old grime, you understand why people get hooked on furniture refinishing.
One useful habit is to treat every piece like it has a memory. Before cleaning, look at how the hardware has aged. Is the dark color even and attractive, or is it sticky dirt? Are the edges worn from hands opening the drawer for decades? Is there green oxidation, rust, or flaking plating? These clues tell you how far to go. Many beginners want to make everything bright. With experience, you learn that “clean” and “shiny” are not the same thing.
Another experience-based tip is to test before committing. Choose the back of a pull, the underside of a knob, or an area hidden by a backplate. Try your mildest cleaner there first. If the finish changes too quickly, stop. This one habit can save brass plating, antique patina, and your mood. Nothing ruins a Saturday faster than realizing your “quick polish” removed the finish from six matching handles.
Organization also matters more than most people expect. When restoring a dresser, place each drawer’s hardware in a separate labeled bag. Old furniture often has tiny differences from one drawer to the next. A pull that fits perfectly on the top drawer may sit slightly crooked on the bottom one. Keeping parts together avoids unnecessary frustration during reinstallation.
The most satisfying projects are often the ones that look hopeless at first. Painted hinges, blackened brass pulls, and rusty handles can come back beautifully with gentle cleaning, soaking, brushing, and sealing. Still, it is important to know when replacement makes sense. If hardware is broken, missing structural parts, badly corroded, or plated so thin that the base metal dominates, restoration may not deliver the result you want. In that case, consider replacing the set or combining restored original backplates with compatible new screws or pulls.
Finally, furniture hardware restoration teaches restraint. You are not just cleaning metal; you are editing time. Remove the grime, stabilize the surface, protect the finish, and leave enough age for the piece to keep its story. That balance is what makes restored furniture feel warm, authentic, and worth keeping.
Conclusion
To restore furniture hardware successfully, begin with careful removal, identify the metal, clean gently, remove paint or rust only as needed, preserve attractive patina, and protect the finish before reinstalling. The process is simple enough for beginners but detailed enough to reward careful work. Whether you are reviving brass drawer pulls, cleaning cabinet knobs, saving painted hinges, or stabilizing rusty iron handles, the right approach can transform old furniture without stripping away its soul.
Restored hardware gives furniture a finished, thoughtful look. It is the jewelry of the piece: small, functional, and surprisingly powerful. Clean it well, treat it kindly, and it will make the entire room look like you knew exactly what you were doing all along.