A DIY pom pom rug is soft, colorfulithout wanting to poke it. Made from fluffy yarn pom-poms attached to a sturdy mesh backing, this handmade rug can brighten a bedroom, nursery, reading nook, dressing area, or quiet corner that needs a little more personality.
The project is beginner-friendly, but it is not quite a “finish it during one commercial break” craft. Making dozens of pom-poms takes patience. Fortunately, the work is repetitive rather than difficult, so you can build your rug while watching movies, listening to podcasts, or pretending to follow a complicated television mystery.
This guide explains how to choose yarn, estimate the number of pom-poms, create a practical design, secure everything properly, and care for the finished rug.
Why Make a Pom Pom Rug?
Store-bought rugs are convenient, but they rarely come in the exact combination of size, texture, and colors you imagined. A homemade pom pom rug lets you control nearly every detail, from the shape of the backing to the softness of the pile.
It is also an excellent way to use leftover yarn. Small amounts from knitting and crochet projects can become stripes, borders, scattered accent colors, or a cheerful confetti pattern. The finished rug can look polished and coordinated or delightfully chaotic. Both approaches are valid. One says “carefully curated interior.” The other says “a rainbow moved in and refuses to pay rent.”
Best Places to Use One
Pom-pom rugs perform best in low-traffic indoor locations, including:
- Beside a bed
- In front of a vanity
- Inside a walk-in closet
- In a nursery reading corner
- Under a small accent table
- Near a craft-room chair
- In a decorative photo or play area
Avoid placing the rug in a busy hallway, entryway, kitchen work zone, or damp bathroom. Constant foot traffic can flatten the pom-poms, while moisture makes the thick yarn construction harder to dry.
Materials and Tools
You do not need advanced equipment, but good materials make the project faster and more durable.
Essential Supplies
- Medium, bulky, or super-bulky yarn
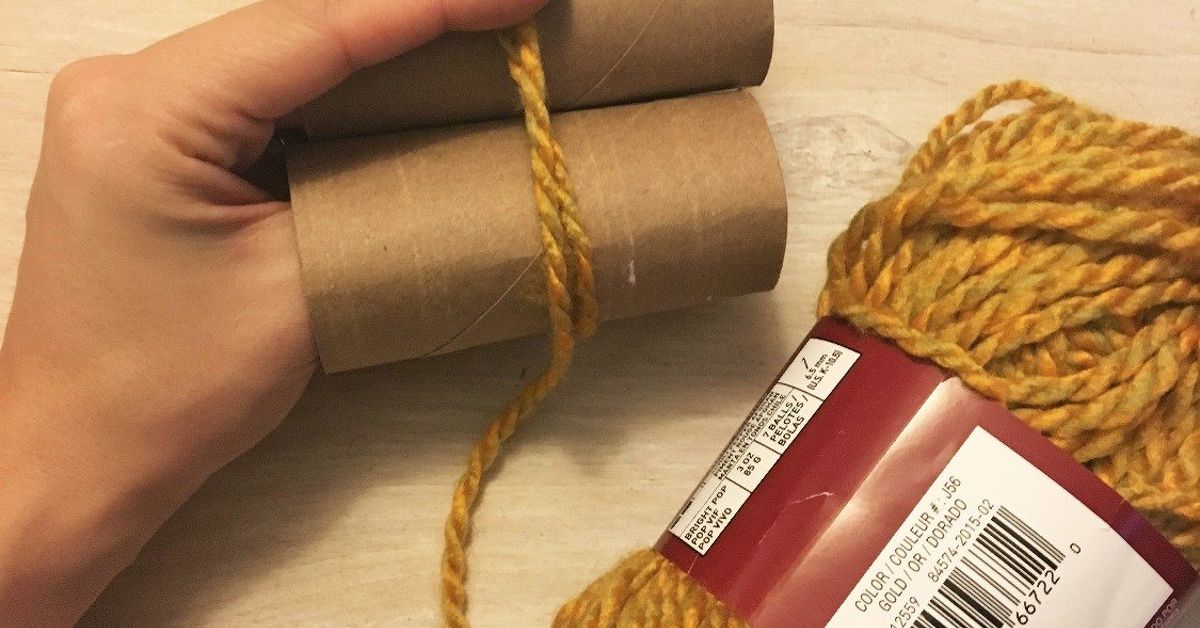
- A pom-pom maker or homemade cardboard templates
- Heavy rug canvas or latch-hook mesh
- Sharp fabric scissors
- A measuring tape or ruler
- A fabric marker
- A crochet hook, tapestry needle, or latch hook
- A separate non-slip rug pad
Optional Supplies
- Binder clips for organizing rug sections
- Small bags or boxes for sorting colors
- Flexible fabric adhesive for reinforcing difficult knots
- Fabric binding tape for finishing the edges
- A small scale for comparing pom-pom weights
Acrylic yarn is popular because it is widely available, affordable, and offered in countless colors. Wool creates a rich, warm texture but may shed and often needs gentler cleaning. Cotton can work, although it usually produces heavier, less springy pom-poms.
Use yarns with similar thickness and behavior if you want an even surface. Mixing one thin yarn with several bulky varieties may leave the finished rug looking as though a few pom-poms missed breakfast.
Plan the Rug Before Cutting Yarn
A few minutes of planning can prevent hours of rearranging fluffy spheres later.
Choose a Manageable Size
For a first project, consider a rug measuring approximately 18 by 24 inches or 24 by 36 inches. A small rug still makes a visual statement without requiring several hundred pom-poms.
A 24-by-36-inch rug may require roughly 90 to 150 medium or large pom-poms, depending on their diameter and how closely they are placed. Make five sample pom-poms, arrange them on a measured section of backing, and use that test area to estimate the final quantity.
Select a Shape
Rectangles are easiest because the backing requires only straight cuts. Circles, hearts, clouds, flowers, and animal silhouettes are possible, but curved edges require more careful trimming and binding.
Draw the outline directly on the rug canvas before cutting it. Leave an extra row or two around the edge so you have room to fold or bind the mesh.
Create a Color Plan
Popular DIY rug designs include:
- Monochrome: Several shades from one color family
- Ombre: A gradual transition from light to dark
- Checkerboard: Alternating blocks of contrasting colors
- Rainbow: Ordered bands or scattered bright shades
- Neutral mix: Cream, tan, gray, and soft brown
- Confetti: Random colors placed across the surface
Arrange yarn skeins together under the lighting of the intended room. Colors that coordinate perfectly in a craft-store aisle can look surprisingly different beside your furniture.
How to Make Pom-Poms for the Rug
A commercial pom-pom maker produces consistent results and speeds up batch work. Cardboard templates are cheaper and perfectly usable, although they may wear out during a large project.
Step 1: Wrap the Yarn Generously
Open the pom-pom maker and wrap yarn evenly around each curved arm. Continue until the maker is full and the center opening is nearly packed. More wrapping generally creates a denser, rounder pom-pom; too little yarn produces a loose, floppy result. ount your wraps for the first successful pom-pom and use approximately the same number for the rest. Exact counting is unnecessary, but consistency helps the finished rug feel level.
Step 2: Cut Around the Center
Close the maker securely. Slide sharp scissors through its center channel and cut all the wrapped loops. Short, pointed scissors are especially helpful when the yarn is densely packed.
Step 3: Tie the Pom-Pom Tightly
Cut a strong strand of yarn and pull it firmly around the center. Tie a tight double knot, then add another knot for insurance. Leave both tying tails at least 6 to 8 inches long because they will attach the pom-pom to the backing. Tight center ties are essential for keeping the cut strands together. or extra durability, use waxed thread, crochet cotton, or a strong contrasting yarn for the center tie. The tying strand will be hidden beneath the rug, so it does not need to match.
Step 4: Trim the Shape
Remove the pom-pom from the maker and roll it gently between your palms. Trim long strands until the ball looks round. Avoid over-trimming every pom-pom into a tiny perfectionist marble; minor differences create a fuller, more natural surface.
Step 5: Work in Batches
Make pom-poms in groups of 10 or 20. Sort them by color and place them loosely on the backing before tying anything down. This gives you a chance to adjust the pattern without untying dozens of knots later.
How to Assemble the DIY Pom Pom Rug
Step 1: Prepare the Backing
Cut the rug canvas to the planned dimensions. Fold sharp mesh edges inward or cover them with fabric binding tape. An unfinished plastic or woven edge can scratch flooring, catch socks, or slowly unravel.
Place the backing flat on a table or clean floor. Mark a simple grid if you want evenly spaced rows. For an organic pattern, you can skip the grid and work visually.
Step 2: Test the Layout
Arrange the finished pom-poms across the mesh without attaching them. Stand back and check the color distribution. Take a photograph of the final arrangement so you have a reference after the pom-poms inevitably roll away.
Step 3: Attach the First Pom-Pom
Push the two long tying tails through separate openings in the rug canvas. Use a crochet hook or tapestry needle if the mesh is tight. Turn the backing over and knot the tails securely against the mesh.
A square knot followed by an additional overhand knot provides a dependable hold. Do not pull so forcefully that the mesh buckles.
Step 4: Continue From the Center Outward
Begin near the center and work toward the edges. This approach keeps the design balanced and makes it easier to fill gaps. Place the pom-poms close enough that the backing disappears when viewed from above.
Pause every few rows, turn the rug right side up, and fluff the surface. If you can see large patches of canvas, add another pom-pom rather than trying to stretch nearby ones across the gap.
Step 5: Secure and Trim the Back
After all pom-poms are attached, check every knot. Reinforce loose areas with another hand-tied strand. Flexible fabric adhesive can be added sparingly to stubborn knots, but glue should support the ties rather than replace them.
Trim the tails to approximately one inch. Leaving a short tail gives the knot some security, while removing excessive yarn keeps the underside flatter.
Step 6: Add a Non-Slip Rug Pad
Place a properly sized non-slip pad underneath the completed rug, especially on tile, laminate, vinyl, or hardwood. Rug pads are designed to improve grip, add cushioning, and reduce movement. Many can be trimmed with household scissors for a custom fit. ut the pad slightly smaller than the rug so it remains hidden around the perimeter. Do not assume the mesh backing alone will provide enough traction.
Common Mistakes to Avoid
Making Pom-Poms Too Loose
Under-wrapped pom-poms separate easily and expose the backing. Wrap more yarn than you think you need, particularly when using smooth or thin fibers.
Cutting the Center Tails
The long center tails are your attachment system. Keep them separate from the surrounding strands while trimming each pom-pom.
Using Hot Glue as the Main Fastener
Hot glue is fast, but repeated pressure and bending may loosen the bond. Knots distribute stress more effectively and make individual pom-poms easier to replace.
Ignoring Yarn Dye Lots
Two skeins labeled with the same color name may have slight shade differences. Buy enough yarn from one dye lot when making a solid-color rug, or intentionally mix shades so the variation looks planned.
Choosing a High-Traffic Location
A handmade pom-pom rug is decorative soft furnishing, not an indestructible commercial carpet. Shoes, chair wheels, pets with determined claws, and frequent foot traffic can flatten or pull the yarn.
How to Clean and Maintain a Pom Pom Rug
Shake the rug outdoors regularly to release dust and crumbs. You can also use a handheld vacuum or upholstery attachment on low suction. Avoid aggressive beater bars, which may catch the strands.
For spills, blot immediately with a clean absorbent cloth. Do not scrub, because rubbing can spread the stain and distort the yarn. General rug-care guidance recommends regular vacuuming, prompt spot treatment, and testing cleaning products on a hidden area first. achine-wash the rug only when the yarn, backing, knots, adhesive, and any binding materials are all confirmed washable. Even then, a bulky handmade rug may become extremely heavy when wet. Hand washing or careful spot cleaning is often safer.
After cleaning, reshape the rug and dry it flat with plenty of airflow. Do not return it to the floor until the yarn and backing are completely dry.
Repairing Loose Pom-Poms
Keep a few extra pom-poms in your original colors. If one loosens or becomes stained beyond rescue, cut its knot from the back and tie in a replacement. This small repair is much easier than rebuilding an entire section.
Experience Notes: What Making a Pom Pom Rug Really Feels Like
The instructions make this project sound pleasantly linear: make pom-poms, tie them onto mesh, admire rug. The real experience is slightly more adventurous.
You Will Probably Underestimate the Pom-Pom Count
A typical first-time maker looks at a basket containing 30 fluffy pom-poms and thinks, “That must be nearly enough.” It is not nearly enough. Once those pom-poms are arranged on the backing, they may cover an area roughly the size of a throw pillow.
The best response is not despair but a test section. Fill a six-inch square, count the pom-poms inside it, and multiply according to the total rug area. This simple calculation prevents the craft equivalent of running out of gas halfway across a bridge.
Batching Makes the Project Much More Enjoyable
Making one pom-pom from beginning to end and repeating the full process 100 times can feel slow. A better rhythm is to wrap 10, cut 10, tie 10, and trim 10. Repeating one motion helps your hands become faster and produces more consistent results.
Many makers spread the project across several evenings. One night is for wrapping, another for trimming, and another for assembly. This keeps the craft relaxing rather than turning it into a fluffy deadline with scissors.
The First Few Pom-Poms May Look Questionable
Early attempts are often lopsided, loose, or shaped like startled sea creatures. That is normal. After several repetitions, you learn how much yarn the maker can hold, how tightly to tie the center, and how aggressively to trim.
Save the imperfect pom-poms for the rug’s interior. Once surrounded by fuller neighbors, they become nearly invisible. Handmade décor is wonderfully forgiving when every mistake is buried beneath more yarn.
The Design May Change During Assembly
A color pattern that looks attractive on paper can feel too rigid when translated into large fuzzy shapes. Conversely, leftover yarn colors that seemed unrelated may create a lively, balanced mix.
Photograph several layouts before attaching the pom-poms. Viewing the design through a phone screen makes uneven color clusters easier to notice. It also gives you a map when the cat, dog, child, or mysterious household breeze reorganizes your work.
Tying Is Slower Than Expected but More Important Than Trimming
It is tempting to rush the underside because nobody sees it. However, secure knots determine how well the rug survives use. A beautifully rounded pom-pom is not helpful if it leaves the rug after two footsteps.
Work in good lighting and check each knot with a gentle tug. The back does not need to look elegant, but it should feel stable and reasonably flat.
The Finished Rug Usually Looks Better After Fluffing
When the last pom-pom is attached, the surface may appear compressed and uneven. Shake the rug, massage the pom-poms with your fingers, and carefully trim only the most obvious long strands. The colors will settle together, gaps will close, and the rug will begin to look intentional.
Placing it in the intended room is the satisfying moment. The project that previously occupied baskets, tables, and suspicious amounts of floor space becomes one cheerful piece of handmade décor. It may not be factory-perfect, but that is precisely the point. Every color choice, tiny variation, and stubborn knot belongs to the person who made it.
Final Thoughts
Making your own DIY pom pom rug requires more patience than technical skill. The key is to choose a manageable size, create dense pom-poms, leave strong attachment tails, tie each piece securely, and place a non-slip pad underneath the finished rug.
Start small, work in batches, and allow the design to evolve. Whether you choose subtle neutrals, a dramatic ombre effect, or every leftover yarn color in the house, the finished rug will add warmth and texture that mass-produced décor cannot quite duplicate.
Safety note: Loose pom-poms, detached yarn pieces, and other small craft components can present hazards to young children or pets. Secure every pom-pom carefully, inspect the rug regularly, and supervise its use in children’s spaces. U.S. consumer-safety guidance treats detachable pom-poms and small components as potential choking hazards. strong>Research note: This article was developed by cross-checking practical craft, textile-care, rug-safety, and pom-pom-making guidance from 10 reputable U.S. resources, including The Spruce Crafts, Michaels, Yarnspirations and Red Heart, Better Homes & Gardens, Good Housekeeping, Home Depot, Martha Stewart, the American Cleaning Institute, Merriam-Webster, and the U.S. Consumer Product Safety Commission.