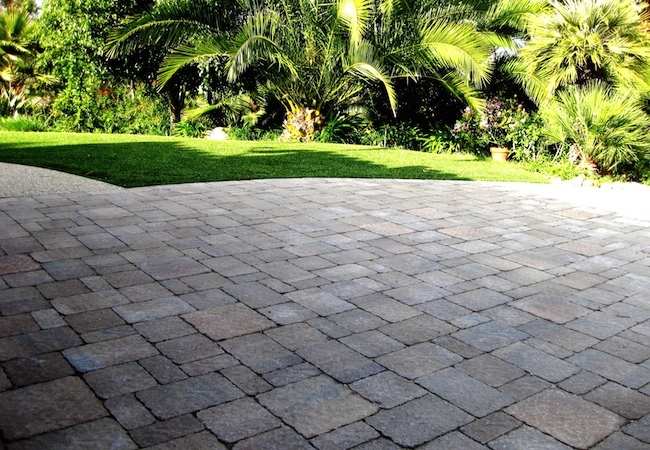
Installing pavers is one of those home improvement projects that looks simple from the patio chair and suddenly becomes very real when you are holding a shovel, staring at a pile of gravel, and wondering if your backyard has personally declared war on level surfaces. The good news? A beautiful paver patio, walkway, or garden path is absolutely within reach for a careful homeowner. The secret is not magic. It is planning, patience, proper base preparation, and a healthy respect for drainage.
Pavers are popular because they combine durability, design flexibility, and repairability. Unlike a single poured concrete slab, individual patio pavers can be replaced if one cracks, stains, or sinks. They come in concrete, brick, natural stone, porcelain, and permeable styles, giving homeowners plenty of choices for patios, walkways, driveways, pool decks, and outdoor entertaining zones. But no matter how pretty the top layer looks, the real success of a paver installation happens underneath. Think of the base as the mattress of your hardscape: if it is lumpy, thin, or poorly supported, nobody is going to sleep well.
Why Pavers Are a Smart Homeowner Project
A well-installed paver surface can add structure, charm, and function to an outdoor space. A small walkway can keep muddy shoes out of the house. A backyard patio can turn an unused patch of lawn into a grilling zone, reading corner, or “I deserve coffee outside” retreat. Pavers also offer creative freedom. You can choose a clean running bond pattern, a classic herringbone layout, a rustic tumbled stone look, or a modern large-format slab design.
The biggest homeowner-friendly benefit is that pavers are modular. If a section settles, you can lift the affected pavers, correct the base, and reinstall them. That is much more forgiving than repairing a cracked concrete slab. Still, “forgiving” does not mean “careless.” Pavers installed over a weak base may shift, dip, spread at the edges, collect puddles, or grow weeds faster than you can say, “Was this supposed to be a relaxing weekend project?”
Before You Dig: Plan Like a Pro
Choose the Right Location
Start by deciding where the paver surface should go and how it will be used. A garden path has different requirements than a patio that will hold a dining table, grill, and several relatives debating burger doneness. A driveway needs a deeper, stronger base than a pedestrian walkway. Look at sun exposure, shade, nearby trees, downspouts, doors, steps, fences, and existing drainage patterns.
Mark the project area with stakes, string, or marking paint. Then walk around it as if the project already exists. Is there enough room for chairs to slide back? Can people move comfortably? Will water run away from the house? Does the layout connect logically to doors, gates, gardens, or outdoor features? A patio should feel intentional, not like it landed in the yard after a landscaping sneeze.
Call 811 First
Before excavation, contact 811 or submit an online request through your local one-call center so underground utilities can be marked. This step is easy to skip when the project seems shallow, but buried utility lines can be closer to the surface than homeowners expect. Hitting one can be dangerous, expensive, and deeply embarrassing. “I found the internet cable with a shovel” is not the kind of DIY story anyone wants to tell.
Estimate Materials Carefully
Measure the length and width of the project area to calculate square footage. Add extra pavers for cuts, waste, and future replacements. For simple rectangular layouts, 5 to 10 percent extra may be enough. For curves, diagonal patterns, borders, or complicated shapes, plan for more. You will also need compactable gravel or paver base, bedding sand, edge restraints, spikes, joint sand or polymeric sand, landscape fabric if recommended for your soil conditions, and the right tools.
Tools and Materials You Will Need
For most DIY paver patio or walkway installations, expect to use a shovel, wheelbarrow, rake, tape measure, level, string line, stakes, hand tamper or plate compactor, screed rails, straight board, rubber mallet, broom, garden hose, safety glasses, gloves, and a masonry saw or paver splitter for cuts. A plate compactor is strongly recommended for patios and larger walkways because hand tamping a big area is exhausting and usually less consistent. Your shoulders may be brave, but gravel is braver.
The main materials include pavers, crushed stone base, bedding sand, edge restraints, joint sand, and possibly geotextile fabric. Use paver base material that compacts well, often a crushed stone blend with fines. Avoid rounded pea gravel under standard pavers because it shifts instead of locking together. Bedding sand should be coarse and clean, not soft play sand. The goal is a stable, compacted system that drains properly and supports the pavers evenly.
Step-by-Step Guide to Installing Pavers
Step 1: Mark the Layout
Use stakes and string to define the project perimeter. For patios near the house, establish a slight slope away from the foundation. A common target is about 1/8 to 1/4 inch of drop per foot, depending on site conditions and local recommendations. The surface should shed water without feeling like a miniature ski slope. Check the layout from multiple angles before digging because changes are much easier now than after you have moved half a ton of gravel.
Step 2: Excavate the Area
Excavate deep enough to allow for the compacted base, bedding sand, and paver thickness. For a typical pedestrian patio or walkway, many homeowner guides recommend a compacted gravel base around 4 to 6 inches deep, with deeper bases for poor soil, freeze-thaw climates, or heavier loads. Driveways and vehicle areas usually need a more robust base and may be better handled with professional design.
Remove grass, roots, loose soil, and organic matter. Organic material decomposes over time, which can lead to settling. Extend the excavation beyond the final paver edge so the base supports the edge restraints properly. This extra width helps prevent perimeter pavers from creeping outward later.
Step 3: Compact the Soil
Once excavation is complete, compact the subgrade. The soil should feel firm and stable. If you discover soft spots, dig them out and replace them with compacted base material. Do not ignore mushy areas. They are not “character.” They are future low spots wearing a disguise.
If your soil is clay-heavy or drainage is questionable, consider using geotextile fabric between the soil and base. Fabric can help separate the soil from the aggregate base and reduce migration of fine particles. However, fabric is not a substitute for proper grading or drainage. If the area collects water now, the paver installation needs to solve that problem, not politely cover it with expensive blocks.
Step 4: Add and Compact the Gravel Base
Add paver base in layers, usually 2 to 3 inches at a time. Lightly dampen each layer and compact it thoroughly with a plate compactor. Continue adding and compacting until the base reaches the planned depth. Keep checking slope as you go. A base that is perfectly flat but drains toward your house is not perfect; it is a tiny moat in training.
This is the step where patience pays off. Many paver problems trace back to rushed base preparation. Uneven compaction can cause pavers to settle in waves. Too little base can lead to movement. Poor slope can create puddles. Take your time and treat the base like the structural part of the project, because it is.
Step 5: Screed the Bedding Sand
After the gravel base is compacted, spread a layer of bedding sand, commonly about 1 inch thick. Place screed rails or metal pipes on the base, pour sand between them, and drag a straight board across the rails to create a smooth, even bed. Do not compact the bedding sand before laying standard pavers unless the manufacturer’s instructions call for a specific method. The pavers will settle slightly into the sand during final compaction.
Work in sections so you do not walk all over the freshly screeded sand. If you disturb it, smooth it again. Bedding sand is not there to correct major base mistakes; it is a leveling layer, not a therapist.
Step 6: Lay the Pavers
Start from a straight edge, corner, or fixed border. Lay pavers gently onto the bedding sand without sliding them around. Follow your chosen pattern and maintain consistent joints. Many concrete pavers have small spacer bars that help create uniform gaps. Pull pavers from multiple pallets or bundles if available so color variations blend naturally across the surface.
Use a string line to keep rows straight. Check the pattern frequently. Small errors can grow across a large patio, and by the time you notice, the layout may look like it had a very creative lunch break. Tap individual pavers with a rubber mallet when needed, but avoid pounding them aggressively into the sand.
Step 7: Cut Edge Pieces
Most projects require cuts around borders, curves, posts, steps, or walls. Mark each cut carefully and use a masonry saw, wet saw, or paver splitter. Wear eye protection, hearing protection, and a dust mask when cutting. For a polished look, avoid tiny sliver cuts when possible by adjusting the layout before you begin. Border courses can also help frame the project and reduce awkward cuts.
Step 8: Install Edge Restraints
Edge restraints are essential for most paver installations. They keep pavers from spreading outward under foot traffic, weather, and normal movement. Install plastic, metal, concrete, or manufacturer-approved restraints tightly against the paver edge. In many systems, the restraint should sit on the compacted base, not on loose bedding sand, and be secured with spikes according to the product instructions.
Do not skip this step because the edges “look fine.” They always look fine on day one. Edge failure is a slow-motion problem. One season the border shifts a little, the next season joints widen, and eventually the patio starts looking like it is trying to leave the property.
Step 9: Fill the Joints
Once all pavers are installed and the edge restraints are secure, sweep joint sand into the gaps. Regular joint sand can work for many installations, while polymeric sand hardens after wetting and can help resist washout and weed growth when installed correctly. Follow the polymeric sand manufacturer’s directions exactly. The paver surface must usually be dry before application, excess sand must be removed before wetting, and watering should be gentle and even.
After sweeping sand into the joints, compact the pavers if recommended for your paver type. This helps seat the pavers and settle sand into the joints. Add more sand as needed until the joints are properly filled. For delicate, large-format, or porcelain pavers, follow manufacturer guidance because compaction requirements can differ.
Step 10: Clean Up and Inspect
Blow or sweep off excess sand, rinse carefully if appropriate, and inspect the surface. Look for uneven pavers, low spots, rocking units, wide joints, or drainage issues. It is easier to correct small problems immediately than after furniture, planters, and a heroic grill have moved in.
Common Paver Installation Mistakes
Using Too Little Base
The base is not the place to save a few dollars or a few wheelbarrow trips. A thin base may seem firm at first, but weather and traffic can reveal every shortcut. Use a depth appropriate for your soil, climate, and project type.
Ignoring Drainage
Pavers should direct water away from structures. A patio that drains toward the foundation can cause moisture problems. A walkway with low spots can become a puddle collection agency. Plan the slope before excavation and check it throughout the project.
Skipping Edge Restraints
Without edge restraints, pavers can creep outward. This creates gaps, uneven joints, and weak edges. Install restraints correctly and support them with an extended compacted base.
Using the Wrong Sand
Fine play sand is not ideal for bedding pavers. Use coarse bedding sand or the material recommended by the paver manufacturer. For joints, choose regular joint sand or polymeric sand based on the project needs and installation conditions.
Rushing the Pattern
A paver pattern should be checked as it grows. Use string lines, measure often, and step back to inspect the work. The human eye catches crooked lines quickly, especially after you invite guests over and suddenly everyone becomes a patio critic.
Maintenance Tips for Long-Lasting Pavers
Routine paver maintenance is simple. Sweep leaves, dirt, and debris regularly. Rinse the surface when needed. Refill joints if sand washes out. Remove weeds early before roots settle in. Treat stains promptly, especially grease, oil, rust, and leaf tannins. If you use a pressure washer, avoid blasting joint sand out of the gaps. A gentle approach is usually better than pretending your patio is a battleship deck.
Sealing pavers is optional but can help enhance color, reduce staining, and protect the surface depending on the material. Wait until the installation is clean, dry, and ready, and follow sealer instructions carefully. Some pavers should cure or weather for a period before sealing, while others may have specific manufacturer recommendations.
When to Hire a Professional
Many homeowners can install a small walkway or patio with careful planning and the right tools. However, some projects deserve a professional. Consider hiring a contractor for driveways, large patios, steep slopes, complex drainage issues, retaining wall integration, pool decks, poor soil conditions, or expensive natural stone layouts. A professional installer can evaluate base depth, compaction, drainage, edge support, and local conditions more accurately.
Also be honest about time and physical effort. Paver installation involves digging, hauling, leveling, compacting, cutting, and kneeling. It is rewarding work, but it is work. If your idea of a perfect weekend does not involve repeatedly moving rocks from one pile to another pile with slightly more purpose, hiring help may be money well spent.
Real Homeowner Experience: What Installing Pavers Actually Feels Like
The first surprise many homeowners encounter is how much of a paver project is not about pavers. The pretty blocks may be the part everyone sees, but most of the labor happens before a single paver is placed. You spend hours measuring, marking, digging, checking slope, moving soil, moving gravel, compacting gravel, adding more gravel, and compacting again. At some point, you may question whether the pavers are even invited to this project.
One practical lesson is to stage materials close to the work area without blocking your path. If the gravel pile is too far away, every wheelbarrow trip becomes a tiny commute. If the paver pallets are in the wrong spot, you will carry heavy blocks farther than necessary. A smart setup saves time, energy, and lower-back negotiations.
Another experience-based tip is to protect the screeded sand like it is a freshly frosted cake. Once you have smoothed the bedding layer, avoid stepping in it. Work from the installed pavers and lay new pavers outward. Keep tools organized so you are not constantly crossing the sand to retrieve a level, mallet, or tape measure. The fewer footprints you create, the smoother the installation will be.
Expect small adjustments. Even with careful planning, you may discover that a border needs a slight layout change, a paver color blend looks better when mixed differently, or a cut piece is too small to be attractive. This is normal. The best DIY paver projects include a little flexibility. Measure twice, cut once, and then measure again because pavers enjoy humbling confident people.
Weather matters, too. Installing pavers in extreme heat can turn the project into a survival documentary. Rain can saturate the site, disturb bedding sand, and delay polymeric sand installation. Choose a stretch of dry, moderate weather if possible. Keep drinking water nearby, wear gloves, use knee pads, and take breaks. A patio should improve your life, not turn you into a cautionary tale told at the hardware store.
The most satisfying moment usually comes after the joint sand is swept in and the surface suddenly looks finished. Before that, the project may look dusty, uneven, and questionable. Then the joints fill, the pattern sharpens, the edges lock in, and the whole space transforms. Add a chair, a planter, or a grill, and the yard begins to feel like an outdoor room.
The biggest takeaway from real-world paver installation is simple: slow work at the beginning creates a better finish at the end. Good excavation, consistent compaction, proper slope, strong edge restraints, and careful joint filling are what separate a patio that lasts from one that needs repairs after the first hard rain. Pavers reward patience. They also punish shortcuts, but in a quiet way, usually several months later when you least feel like fixing them.
Conclusion
Installing pavers is a homeowner-friendly project when approached with planning, patience, and respect for the base beneath the surface. Choose the right pavers, call before digging, excavate properly, compact the base in layers, maintain drainage slope, screed the bedding sand evenly, install edge restraints, and fill the joints carefully. The finished result can be a patio, walkway, or outdoor space that looks custom, functions beautifully, and makes your yard feel more complete.
The real Bob Vila-style lesson is this: do the hidden work well. Anyone can admire the pavers on top, but the compacted base, drainage, and restraints are what keep the project looking good year after year. Build from the ground up, and your outdoor space will not just look finishedit will feel built to stay.
Note: This article is written in original wording for web publication and is based on established U.S. paver installation practices, homeowner hardscape guidance, and practical DIY experience.