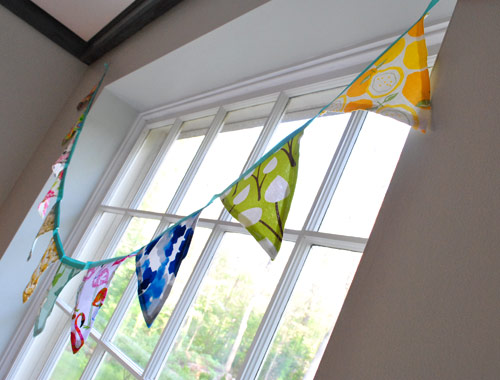
Fabric bunting is one of those projects that delivers maximum cheer for surprisingly little effort. A row of colorful pennants can turn a plain wall into a birthday backdrop, soften a nursery, dress up a porch, or make Tuesday feel suspiciously festive. It uses basic straight stitches, works beautifully with scraps, and can be reused long after paper decorations have retired to the recycling bin.
This guide explains how to sew neat, double-sided fabric bunting from start to finish, including template making, spacing, crisp points, bias-tape finishing, customization, and common troubleshooting.
What Is Fabric Bunting?
Fabric bunting is a decorative garland made from repeated cloth shapes attached to tape, ribbon, cord, or binding. Traditional bunting uses triangular flags, also called pennants, although rectangles, swallowtails, semicircles, and house shapes work too. Triangles remain popular because they are easy to draft, economical to cut, and excellent at making a room look as though cake may appear at any moment.
Single-layer bunting is fast, especially when cut with pinking shears. Double-sided bunting takes longer, but it hides raw edges, has more weight, keeps its shape better, and looks finished from either direction. For reusable party decor or a nursery garland, the double-sided method is usually worth the extra seams.
Supplies You Will Need
- Quilting cotton, cotton poplin, or another stable woven fabric
- Double-fold bias tape, cotton twill tape, or handmade binding
- All-purpose thread and a sewing machine with a universal needle
- Fabric scissors or a rotary cutter, ruler, and cutting mat
- Paper, cardstock, or template plastic
- A removable fabric marker, pins or clips, an iron, and a blunt turning tool
Quilting cotton is ideal for beginners because it presses sharply and feeds smoothly. Avoid stretchy knits for a first attempt because the triangles can distort. Slippery satin is beautiful but has the temperament of a cat near bathwater.
How Much Fabric and Tape Do You Need?
A medium pennant measuring roughly 6 inches wide by 8 inches tall needs two fabric triangles. Large scraps or fat quarters usually provide several flags. Directional prints require extra care so animals, words, flowers, or stripes face the right way.
Measure the display area and add hanging ties at both ends. Twelve to eighteen inches per end suits many indoor spaces; railings may need more. It is easier to trim an overenthusiastic tail than persuade a short one to grow.
Plan the Banner Before Cutting
A little planning prevents the classic craft-room surprise: twelve lovely flags and a banner that is somehow three feet too short. Use this formula:
Total banner length = left tie + combined flag widths + combined gaps + right tie.
For seven 6-inch flags with six 2-inch gaps and 15-inch ties, you need 84 inches of tape. Add a few inches for finishing. Odd numbers are convenient because one pennant can sit at the center; with an even number, center the gap between the middle two flags.
Create a Reusable Triangle Template
Draw a horizontal line equal to the desired width plus seam allowances. Mark the center, draw a vertical line downward for the height, and connect the lower point to both ends of the top line. A triangle about 6 1/2 inches wide by 8 1/2 inches tall works well with a 1/4-inch seam allowance. Transfer it to cardstock or template plastic for consistent cutting and future projects.
How To Sew A Fabric Bunting Step by Step
Step 1: Prepare the Fabric
Prewash cotton if the bunting may be laundered, then press out every fold. Accurate cutting begins with flat fabric; cutting across a crease is merely sewing with a surprise scheduled for later.
Step 2: Cut Two Triangles Per Flag
Trace the template on the wrong side and cut two matching pieces for each pennant. Use identical prints, coordinating fabrics, or a decorative front with a solid backing. Check directional motifs before cutting. For feature prints, position a favorite character, flower, or phrase in the center of the template.
Step 3: Pair and Pin
Place two triangles right sides together and match the raw edges. Pin or clip the two long diagonal sides, leaving the top open for turning. Add a pin near the point if the layers shift, and remove pins before they reach the needle.
Step 4: Sew the Sides
Use a straight stitch about 2.5 millimeters long. Sew from one upper corner down the first side with a 1/4-inch seam allowance. Stop 1/4 inch before the point with the needle down, lift the presser foot, pivot, and sew up the second side. Backstitch at both ends, but do not close the top.
For multiple flags, work in batches: pin every pair, sew every pair, trim every point, turn every flag, and press them all together. This production-line approach saves time and encourages consistent results.
Step 5: Trim the Point
Clip the seam allowance straight across near the tip without cutting the stitches. Taper the allowances along the lower inch if they are bulky. This removes fabric that would otherwise bunch inside the point like a tiny mitten.
Step 6: Turn and Shape
Turn the triangle right side out through the open top. Work the seams outward with your fingers, then gently ease out the point with a blunt knitting needle, chopstick, or turning tool. Do not stab aggressively; a crisp point is useful, but an accidental ventilation hole is not.
Step 7: Press Each Pennant
Roll the side seams between your fingers so the seam line sits on the edge, then press the flag flat using a suitable heat setting. Trim the small fabric “ears” at the upper corners. If the fabric is very light or will carry appliqué, fuse interfacing to one piece before sewing.
Step 8: Arrange the Flags
Lay the pennants in their final order. Alternate large and small prints, distribute strong colors, and separate similar patterns. Photograph the layout when it looks right; the picture becomes a useful map after the pieces inevitably migrate.
Fold the bias tape in half to mark its midpoint. Center one flag there for an odd-numbered set, or center the middle gap for an even-numbered set. Work outward to keep the arrangement balanced.
Step 9: Enclose the Tops
Open the double-fold bias tape and insert each raw top edge fully inside. Both folded edges should cover the fabric. Clip the flags in place with equal gaps and leave enough free tape at both ends for hanging. Wider binding is easier for beginners because it is less likely to slip away from the back edge.
Step 10: Stitch the Binding Closed
Fold the raw tape ends inward. Beginning at one end, sew close to the open folded edge, continuing across both ties and every flag in one line. Slow down where the thickness changes and confirm that the needle catches the back fold. Backstitch at both ends, press the finished banner, and hang it securely.
Creative Ways to Customize Fabric Bunting
Add Letters or Appliqué
Apply fabric letters before joining the front and back triangles. Fusible web can hold shapes in position, while a narrow zigzag or satin stitch makes them durable. Spell a name, graduation year, or “Happy Birthday” for a decoration that returns annually instead of being replaced by shiny cardboard.
Try New Shapes
Swallowtail flags suit holiday and nautical themes, rectangles allow more room for lettering, and narrow triangles create a modern look. Clip outward points and notch inward corners before turning so shaped seams lie smoothly.
Make It Reversible or Scrappy
Use one palette on the front and another on the back, or turn quilt, curtain, and tote-bag leftovers into a banner with history. Scrappy bunting looks intentional when one element repeats, such as a shared color, similar print scale, or consistent backing.
Common Problems and Easy Fixes
Blunt Points
Remove more seam bulk near the tip and shape it gradually with a blunt tool. Consistent soft points usually look better than one heroic point surrounded by exhausted fabric.
Sliding Flags or Uneven Gaps
Mark positions on the tape before attaching the pennants. Use clips, pins, washable glue, or temporary basting. A small paper spacer cut to the gap width makes repetition quick and accurate.
Twisting Bunting
Double-sided flags, firm pressing, and slightly heavier fabric reduce twisting. Temporarily hang the clipped banner before final sewing to check spacing and drape. Bring outdoor bunting inside during rain, strong wind, or prolonged sun exposure.
Practical Sewing Experiences: Lessons for Better Bunting
One of the first lessons makers discover is that sewing is not the slowest part. Cutting, arranging, pressing, and deciding whether two florals are “coordinating” or “quietly feuding” often take longer than the seams. A production-line workflow changes everything. Cut all pieces, stack pairs in order, sew continuously, and keep a small bowl nearby for clipped threads. The work feels calmer, and the color sequence is less likely to drift.
Template accuracy matters more than advanced skill. A beginner using one sturdy pattern and a consistent seam allowance can produce a polished banner. An experienced sewist cutting every triangle freehand may end up with flags waving at different altitudes. Cardstock is adequate for one project, but template plastic becomes worthwhile when making seasonal sets or repeated event decorations.
Directional fabric creates the funniest mistakes. A fox that looked upright on the cutting table can emerge from the machine performing a headstand. Place the template over the right side of the print and imagine the top edge inside the binding before tracing. Mark the template with a bold arrow labeled “UP.” It seems unnecessary until it saves the final piece of a favorite fabric.
Pressing is the dividing line between “homemade” and “beautifully handmade.” Skipping the iron can leave flags puffy, seams rolled forward, and binding rippled. Press after turning, straighten the top edges, and refresh the folds in the bias tape. The iron is not an optional side character in this project; it is doing serious supporting-actor work.
Spacing also looks different in the room than on the cutting table. Closely placed flags feel abundant and traditional, while wider gaps create a lighter, modern banner and use fewer pennants. Clip everything to the tape and temporarily hang the full length before stitching. This preview reveals awkward color clusters, short ties, and unexpected sag. Gravity is an opinionated design consultant, so invite it early.
Binding width affects the sewing experience. Narrow tape looks delicate but requires precise placement. Wider double-fold tape gives beginners more room to catch both sides. When the back fold is missed, repair only that section by stitching again from the front and matching the original line rather than unpicking the entire banner in despair.
Scrap selection teaches restraint. Many prints can coexist when the palette stays within three or four main colors. Lay everything out, squint slightly, and remove the fabric that shouts louder than the rest. Save it for a project where it can enjoy being the main character.
Finally, storage determines whether reusable bunting gets reused. Fold the flags gently in alternating directions, wrap the ties around the bundle, and keep it flat in a labeled bag. A quick press before the next event restores its shape. With secure stitching and sensible storage, one afternoon of sewing can decorate birthdays, showers, holidays, photo backdrops, and ordinary days for years.
Conclusion
Learning how to sew a fabric bunting is an excellent way to practice accurate cutting, straight stitching, pivoting, turning, pressing, and binding without committing to a giant project. Start with stable cotton, use a reliable template, trim the points carefully, center the arrangement, and stitch the tape slowly.
The real charm of DIY fabric bunting is not perfect geometry. It is the combination of color, repetition, and handmade character. One slightly softer point will not ruin the celebration. It may simply prove that a human made the banner instead of a cheerful little factory robot.