A window sash cord is one of those tiny household parts nobody thinks about until the window suddenly refuses to stay open, drops like it has a personal grudge, or makes a dramatic thump that turns a calm Saturday into a home-repair detective story. The good news? If you have an older double-hung wood window with sash weights, replacing a broken sash cord is a very doable DIY project. It requires patience, a few simple tools, and the emotional strength to meet 80 years of painted-over trim without taking it personally.
This guide explains how to replace a window sash cord step by step, including how to remove the sash, access the weight pockets, choose the right sash cord, rehang the weights, and test the window so it glides smoothly again. We will also cover common mistakes, safety tips, and real-world experience from working with old windows that have seen more seasons than your favorite cast-iron skillet.
What Is a Window Sash Cord?
A window sash cord is the rope that connects a movable window sash to a hidden counterweight inside the window frame. In traditional double-hung windows, the cord runs over a pulley near the top of the jamb and attaches to a cast-iron sash weight inside a side pocket. The weight balances the sash, making the window easier to lift and helping it stay open.
When the cord breaks, the balance system stops working. The window may slam shut, refuse to stay raised, tilt awkwardly, or feel much heavier than it should. In many cases, the window itself is not ruined. It simply needs a new cord, which is much cheaper than replacing the entire window.
Signs Your Window Sash Cord Needs Replacement
You probably need to replace a sash cord if the window drops suddenly, will not stay open, feels uneven when lifted, or has a visible frayed rope near the side of the sash. Another clue is a loose cord disappearing into the frame, followed by the unforgettable clunk of a sash weight falling into the pocket. That sound is basically an old house saying, “Congratulations, you have plans now.”
Sometimes only one side fails. However, if one cord is broken, the matching cord on the other side is often worn as well. Replacing both cords on the same sash usually gives a better result and saves you from reopening the window next month.
Tools and Materials You Will Need
Tools
- Utility knife
- Putty knife or 5-in-1 painter’s tool
- Small pry bar
- Flathead and Phillips screwdrivers
- Pliers
- Tape measure
- Hammer
- Vacuum with brush attachment
- Safety glasses and work gloves
- Painter’s tape and pencil for labeling parts
Materials
- New sash cord, usually cotton or cotton-covered cord with a strong core
- Small finish nails or screws, if the old fasteners are damaged
- Replacement parting bead, if the old bead breaks during removal
- Wood filler, if small screw holes or trim damage need repair
- Paste wax or dry lubricant for pulleys and tracks
Use real sash cord, not random rope from the garage. Standard rope may stretch, fray, bind in the pulley, or wear out quickly. A good sash cord is flexible, durable, and sized to fit the pulley groove. Many older windows use cord around 1/4 inch thick, but always match the existing cord and pulley if possible.
Important Safety Note for Older Homes
If your home was built before 1978, assume painted window parts may contain lead-based paint unless testing proves otherwise. Windows are friction surfaces, which means paint and dust can be disturbed when sashes slide, stops are removed, or old paint is scraped. Work carefully, avoid dry sanding, keep dust contained, and follow lead-safe practices. If the paint is peeling badly or you are unsure how to handle it safely, hire a certified professional.
Step-by-Step Guide: How to Replace a Window Sash Cord
Step 1: Inspect the Window Before Taking It Apart
Before removing anything, look closely at the window. Identify the lower sash, upper sash, interior stops, parting beads, pulleys, sash locks, and access panels. Take photos with your phone before each step. This is not because you will forget everything. It is because old windows love to contain tiny mysteries, and photos are cheaper than regret.
Check whether the window is painted shut. If it is, score the paint lines carefully with a utility knife. Do not force the sash or pry aggressively against fragile trim. Your goal is to remove parts cleanly so they can go back where they belong.
Step 2: Remove the Interior Stops
The interior stops are the narrow strips of wood that hold the lower sash in place from the room side. They may be attached with screws, nails, or several generations of paint. Score the seam where the stop meets the jamb and trim. Then use a putty knife or 5-in-1 tool to gently loosen it. A small pry bar can help, but use light pressure.
Label the left and right stops with painter’s tape. Old trim often fits best in its original location. If you switch sides, the window may complain by sticking, rattling, or refusing to close neatly.
Step 3: Remove the Lower Sash
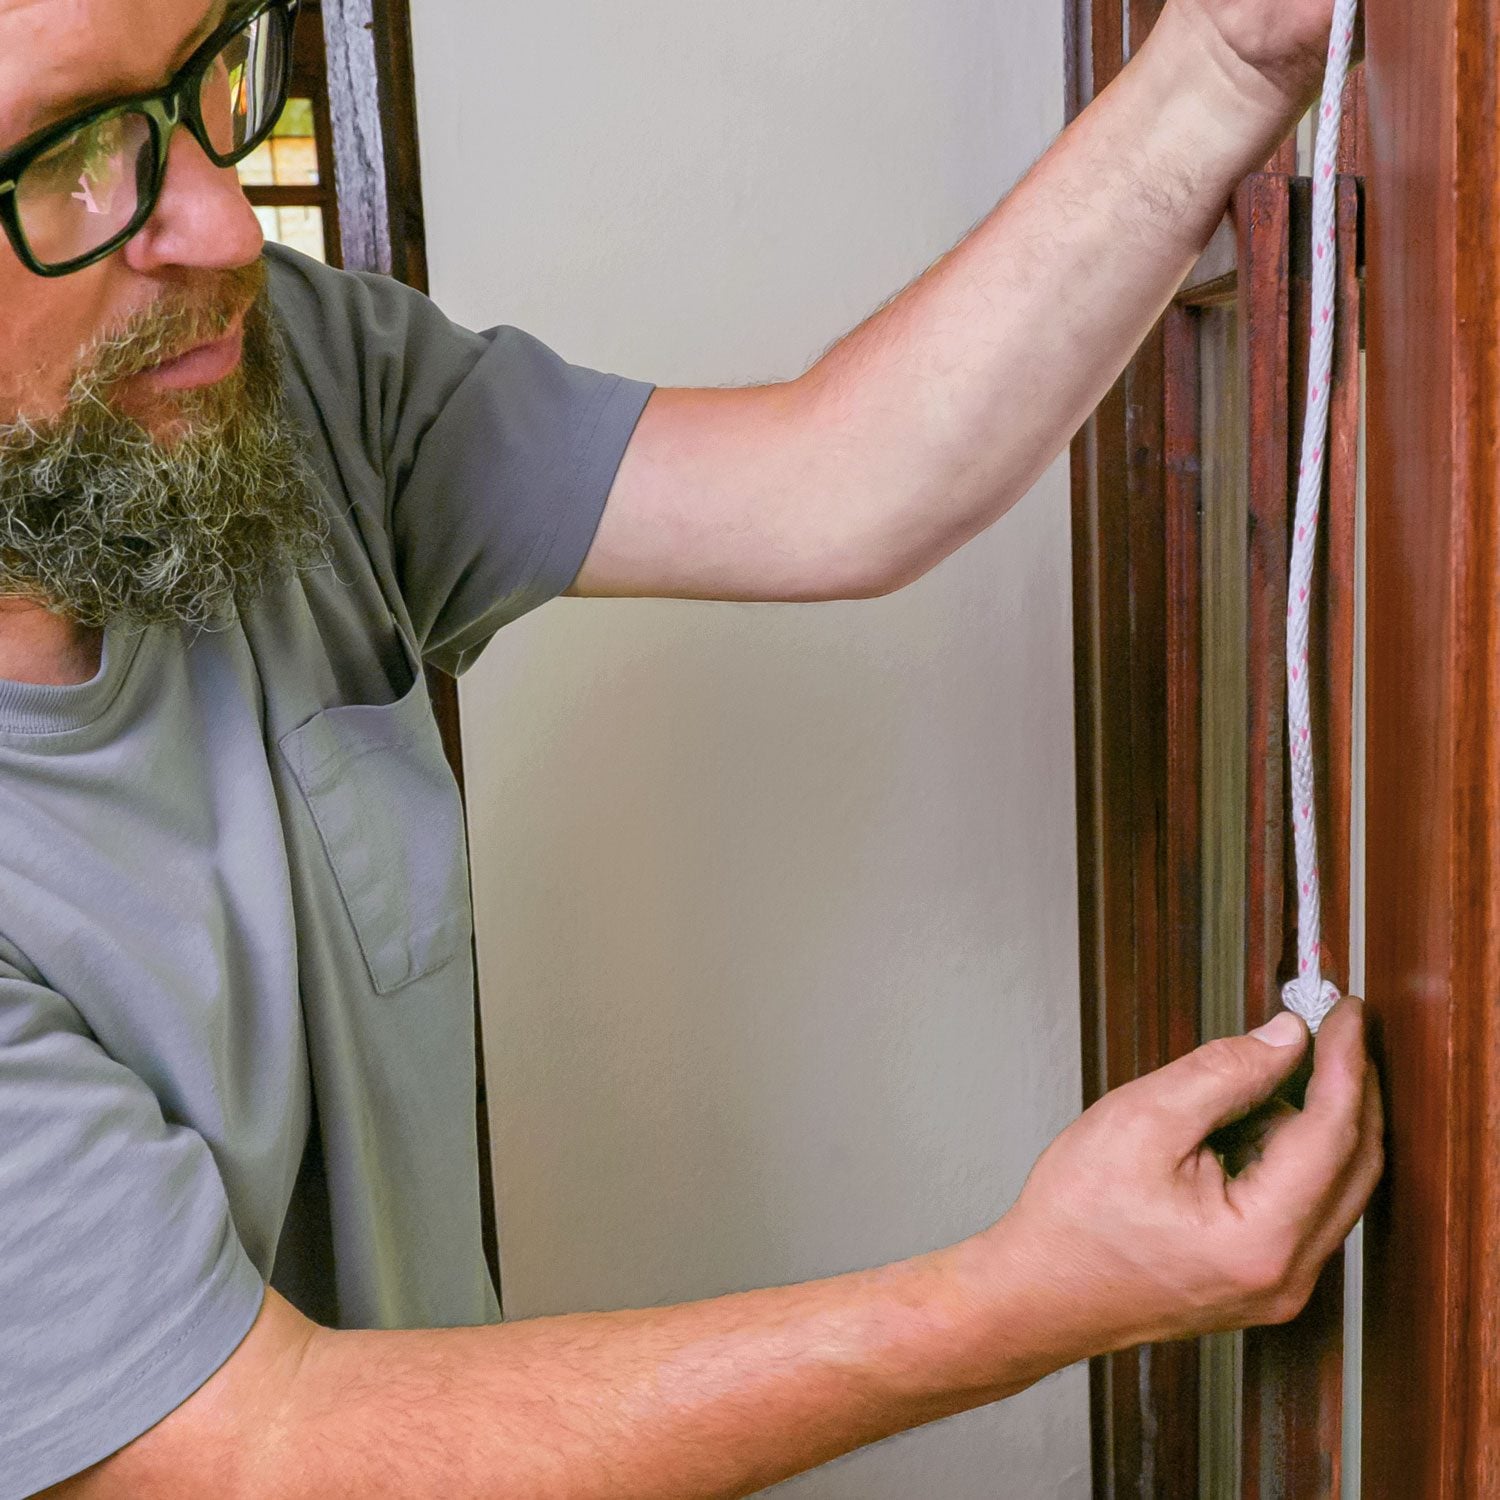
With the stops removed, carefully pull the lower sash toward you. If one sash cord is still attached, hold it firmly before disconnecting it. Do not let the cord snap back into the frame. Tie a temporary knot in the cord or clamp it so the weight does not disappear into the pocket.
Set the sash on a stable work surface. If the glass is old or loose, handle it gently. This is also a good time to inspect the sash for cracked glazing putty, loose joints, damaged rails, or paint buildup along the edges.
Step 4: Remove the Parting Bead if You Need to Repair the Upper Sash
The parting bead is the narrow vertical strip that separates the upper and lower sashes. If only the lower sash cord is broken, you may not need to remove the upper sash. But if the upper sash cord is damaged, stuck, or missing, remove the parting bead carefully.
Parting beads are often brittle. They may break, especially if they have been painted in place for decades. Replacement parting bead is inexpensive, so do not panic if one snaps. Old-house repair rule number one: sometimes the house wins a small round, but you can still win the project.
Step 5: Open the Weight Pocket
Look for the small access panel near the lower part of the side jamb. It may be held by screws, hidden under paint, or tucked behind where the parting bead was installed. Score around the panel and remove the screws. Then pry it open gently.
Inside, you should find the sash weights. They are usually cast iron and shaped like long cylinders or narrow bars. Each side of each sash normally has its own weight. Keep the weights organized. The upper sash and lower sash may use different weight sizes, and mixing them can make the window feel unbalanced.
Step 6: Remove the Old Cord
Cut away the old sash cord from the weight and pull the remaining cord out through the pulley. If part of the cord is still usable, you can tie a string to it before pulling it out, using the old cord to guide the new one through the pulley. If the cord is completely gone, you can feed a new cord over the pulley and down into the weight pocket using gravity, a flexible wire, or a small chain as a leader.
Clean the pocket while it is open. Remove dust, old cord fibers, loose paint chips, and any surprises left by time. Work gently and use safe cleanup methods, especially in older homes.
Step 7: Measure the New Sash Cord
A simple measuring method is to run the cord from the top of the pulley down to the sill and cut it at that length, leaving enough extra for knots and attachment. Another method is to match the old cord length if it was working properly before it broke.
Do not cut the cord too short. If the cord is too short, the weight may hit the pulley before the sash fully closes. If it is too long, the weight may rest on the bottom of the pocket before the sash is fully open. Either problem will make the window operate poorly.
Step 8: Feed the New Cord Through the Pulley
Thread the new sash cord over the pulley and down into the weight pocket. Make sure the cord sits properly in the pulley groove. If it twists or jumps the track, fix it now. Once the sash is back in place, reaching that pulley will be about as fun as finding a dropped screw in shag carpet.
If the cord refuses to drop into the pocket, tie a small nut or washer to the end as a weight. Lower it slowly until you can grab it through the access opening. Avoid using anything so large that it jams inside the frame.
Step 9: Attach the Cord to the Sash Weight
Run the cord through the eye of the sash weight and tie a secure knot. A bowline knot is a popular choice because it holds well and does not slip easily. The weight should hang freely inside the pocket without touching the sill when the sash is closed.
After tying the knot, gently lower the weight into the pocket. Do not drop it. A falling sash weight can damage the frame, crack plaster, or create a noise that makes everyone in the house ask what you broke.
Step 10: Attach the Cord to the Sash
Place the sash near its operating position and pull the cord down along the side groove. Many wood sashes have a channel or knot hole where the cord is secured. Tie the cord into the sash groove or fasten it the same way the original was attached. Repeat the process on the other side.
Both cords should carry the sash evenly. If one side is tighter than the other, the sash may tilt or bind. Adjust before reinstalling the stops.
Step 11: Reinstall the Sash and Test the Movement
Set the sash back into the frame. Move it up and down slowly. It should glide without dropping, dragging, or scraping. If it sticks, look for paint buildup, swollen wood, a twisted cord, or a pulley that needs cleaning.
Do not reinstall every piece of trim until you test the sash several times. This one habit can save a lot of colorful language.
Step 12: Replace the Access Panel, Parting Bead, and Stops
Once the sash works properly, close the weight pocket access panel. Reinstall the parting bead if you removed it, then reinstall the interior stops. Leave a tiny amount of clearance so the sash can move freely. If the stops are pressed too tightly against the sash, the window may bind.
Touch up small nail holes or damaged paint as needed. Use caution when disturbing old paint, and keep cleanup thorough.
Common Mistakes to Avoid
Using the Wrong Cord
Ordinary rope is not the same as sash cord. It may stretch, wear quickly, or fail to ride smoothly over the pulley. Choose a cord made for window sash repair.
Letting the Weight Fall
Always control the cord when disconnecting it. If the weight drops deep into the pocket, you may spend more time fishing it out than actually replacing the cord.
Mixing Up the Weights
Label the weights if you remove more than one. A balanced window depends on matching the correct weight to the correct sash.
Cutting the Cord Too Short
Short cords limit window travel. Measure carefully and allow room for knots.
Reinstalling Stops Too Tightly
Window stops should guide the sash, not squeeze it like a nervous handshake. Leave enough clearance for smooth movement.
Should You Replace Sash Cord or Use Sash Chain?
Sash chain is another option for some old windows. It can be durable and attractive, especially in restoration projects. However, the pulleys must be compatible with chain, and the sash must have space for it. For most straightforward repairs, sash cord is easier, quieter, and closer to the original setup in many homes.
When to Call a Professional
Call a window restoration specialist if the sash is rotted, the glass is loose or cracked, the frame is badly damaged, the pulleys are missing, or the window is covered in deteriorating old paint that may contain lead. You should also consider professional help for large, heavy windows or historically significant windows where preserving original material matters.
A good repair professional can replace cords, reglaze panes, tune pulleys, repair wood damage, add weatherstripping, and improve energy performance while keeping the character of the original window.
How Replacing a Sash Cord Improves an Old Window
Replacing a sash cord does more than stop the window from falling. It restores the balance system that made traditional double-hung windows so practical in the first place. A properly repaired window opens more easily, stays where you put it, improves ventilation, and feels safer to use.
It can also be part of a larger window maintenance plan. While the sash is out, you can clean tracks, inspect glazing, remove loose debris, check locks, wax contact surfaces, and identify small problems before they become expensive ones.
Practical Experience: What Replacing Window Sash Cords Teaches You
The first thing you learn when replacing a window sash cord is that old windows were built with a surprising amount of logic. At first glance, the system looks mysterious: ropes vanish into the frame, iron weights hide in secret pockets, and small strips of wood seem to guard the whole operation like tiny bouncers. But once the stops come off and the sash lifts free, the design starts to make sense. The sash cord, pulley, and weight work together in a simple mechanical balance. No batteries, no circuit boards, no app update required.
The second thing you learn is that patience matters more than strength. Beginners often want to pry harder when trim refuses to move. That is usually when wood splits. The better approach is to score paint lines carefully, wiggle tools gently, and work along the full length of the stop instead of forcing one stubborn spot. Old paint can act like glue, and it may take several passes with a utility knife before the trim releases cleanly.
Another practical lesson is to label everything. Left stop, right stop, upper sash weight, lower sash weight, pocket cover, screws, beadslabel them all. It may feel unnecessary while the parts are sitting neatly on the floor. But after lunch, a phone call, and one curious family member walking through the room, those similar-looking pieces become a puzzle. A few strips of painter’s tape can save a surprising amount of confusion.
Working with sash cords also teaches you to test before celebrating. A sash may look perfect after reinstallation, but the real test is movement. Raise it halfway. Lower it slowly. Open it fully. Close it completely. Listen for scraping, feel for uneven resistance, and watch whether the sash drifts down. If something feels wrong, it is easier to fix before the stops are nailed back in place.
One of the most satisfying experiences is hearing the repaired window move smoothly for the first time. A window that used to slam shut suddenly stays open at any height. The room gets fresh air, the sash feels lighter, and the whole repair has a charmingly old-school reward. You fixed a hidden mechanical system with cord, knots, and care. That is the kind of home improvement that makes you look at the rest of the house and think, “All right, what else have you been hiding from me?”
The biggest lesson is that old windows are often repairable. A broken sash cord does not mean the window has reached the end of its life. With the right cord, careful handling, and respect for the original parts, many wood windows can keep working for decades. That is good for your home’s character, your budget, and the planet. It is also good for your confidence, because once you have successfully fished a cord through a pulley and tied a sash weight in a dark pocket, ordinary household repairs seem a little less intimidating.
Conclusion
Learning how to replace a window sash cord is one of the most useful skills for maintaining older double-hung wood windows. The job requires careful disassembly, the correct sash cord, secure knots, and patient testing, but it is not complicated once you understand the system. Instead of replacing an entire window because one hidden rope failed, you can restore smooth operation and keep the original craftsmanship intact.
Take your time, label parts, respect old paint, and test the sash before final reassembly. A properly repaired sash cord can make an old window feel dependable againand that is a small home repair victory worth opening the window for.