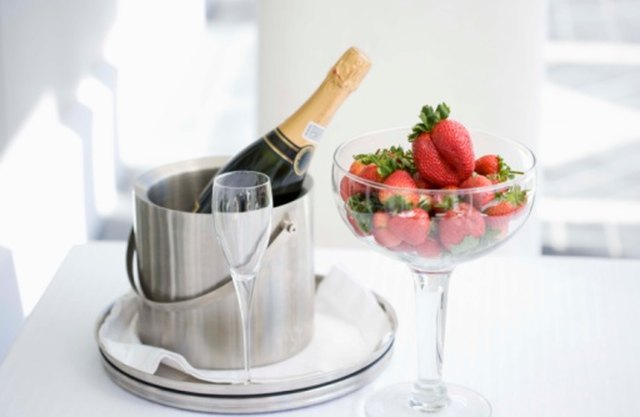
An ice bucket is already a useful party accessory, but an ice bucket made entirely from ice is something else. It chills a bottle, decorates the table, and quietly makes everyone wonder when you became the sort of person who casually creates frozen centerpieces.
The good news is that making a DIY ice bucket is much easier than the finished result suggests. You do not need specialized equipment, professional ice-carving tools, or a freezer the size of a restaurant walk-in. Two nesting containers, water, a few weights, and enough freezer space can produce a surprisingly elegant frozen wine chiller.
You can leave your homemade ice bucket crystal-simple or freeze flowers, citrus slices, herbs, berries, greenery, and other decorations into its walls. The same basic method works for weddings, holiday dinners, backyard parties, bridal showers, birthdays, and those ordinary Friday evenings when apparently the bottle of sparkling water deserves its own throne.
What Is a Frozen Ice Bucket?
A frozen ice bucket is essentially a thick cylinder of ice with a hollow center. The hollow space is large enough to hold a bottle of wine, Champagne, sparkling cider, juice, or another chilled beverage.
Instead of carving that hollow area after freezing, you create it with two containers. A smaller container sits inside a larger container while the water freezes around it. Once everything is solid, both molds are removed and the space between them becomes the walls of your bucket.
The method is simple, but a successful bucket depends on a few details: a sturdy base, reasonably even walls, a centered inner mold, complete freezing, and gentle unmolding.
Supplies You Will Need
Before starting, make sure the entire mold will fit upright and level in your freezer. Discovering that your masterpiece is half an inch too tall after filling it with water is the kind of character-building experience nobody requested.
- One large freezer-safe plastic container or bucket
- One smaller plastic container that fits inside the larger one
- Filtered, purified, or distilled water
- Rocks, canned food, or another weight for the inner container
- A freezer with enough vertical space
- A tray or shallow platter for serving
- A chopstick, skewer, or long spoon for positioning decorations
- Optional flowers, fruit, herbs, greenery, or food coloring
Choosing the Right Containers
The outer container determines the overall size and shape of your DIY ice bucket. The inner container creates the opening where the beverage bottle will sit.
For a standard 750-milliliter wine bottle, choose an inner mold comfortably wider than the bottle. Leave roughly an inch or more between the two containers so the ice walls are thick enough to survive unmolding and normal handling.
Plastic is generally the easiest mold material because it is lightweight and has enough flexibility to help release the frozen bucket. Avoid using ordinary glass containers. Water expands as it freezes, and rigid glass can crack under stress.
How to Make an Ice Bucket Step by Step
Step 1: Make the Frozen Base
Pour approximately 1 1/2 to 2 inches of water into the bottom of your larger container. Set it on a completely level freezer shelf and freeze the water until solid.
This first layer becomes the bottom of the bucket. Skipping it and immediately inserting the second container can produce an ice cylinder with little or no solid floor underneath it.
Depending on your freezer and the depth of the water, the base may need several hours to freeze. There is no prize for rushing. A solid foundation makes every later step easier.
Step 2: Center the Inner Container
Once the base is frozen, place the smaller container directly on top of it.
Look down from above and center it carefully. Uneven spacing creates one thick wall and one thin wall. The bucket may still work, but the thin section will melt faster and become more vulnerable to cracking.
Place a weight inside the smaller container. Rocks work well, but almost anything heavy and freezer-safe can do the job.
Why the weight? Because when you pour water around an empty inner container, that container will try to float. Apparently even ice-bucket molds dream of freedom.
Step 3: Add Decorative Ingredients
If you want a plain ice bucket, skip ahead and simply add water.
For a decorative frozen ice bucket, arrange your chosen materials in the gap between the two molds. Good options include:
- Lemon, lime, orange, or grapefruit slices
- Fresh cranberries
- Rose petals
- Pansies or other known edible flowers
- Mint leaves
- Rosemary sprigs
- Small pieces of evergreen for holiday displays
- Thin cucumber slices
- Colorful berries
Use a chopstick or skewer to position decorations against the outside wall where they will remain visible after freezing.
Do not pack the mold completely with flowers and fruit. Water needs enough uninterrupted space to form a strong ice structure. Too many decorations can create thin, weak areas that break apart quickly as the bucket melts.
Step 4: Fill the Mold With Water
Slowly pour water into the gap between the containers. Stop below the rim rather than filling the mold to the absolute top.
Some lightweight flowers and leaves will float. You can push them down with a skewer, but a more controlled technique is to freeze the bucket in stages.
Add several inches of water and decorations, freeze that section until firm, then repeat. Layered freezing gives you much greater control over where decorative elements appear instead of allowing everything to hold an emergency meeting at the top of the bucket.
Step 5: Freeze Until Completely Solid
Place the mold back in the freezer on a flat surface. For a full-size ice bucket, freezing overnight is a sensible minimum. Larger molds may benefit from roughly 18 to 24 hours.
Do not judge the bucket only by its visible surface. The outside may look frozen while deeper sections remain partially liquid.
If you are making the bucket for an important event, prepare it at least a day ahead. Two days ahead is even more comfortable because there is little downside to leaving a completely frozen bucket in its mold until you need it.
How to Remove the Ice Bucket From the Mold
Unmolding is the stage where patience pays off.
First, remove the weights from the center container. Add lukewarm water to the inner mold and wait briefly. Gently twist and lift it. If it refuses to move, give the warmth a few more seconds rather than wrestling with the ice.
Next, run lukewarm water around the outside of the larger container. Rotate the mold so the warming happens evenly.
Once the outer edge loosens, carefully invert or slide the frozen bucket out while supporting it with both hands.
Avoid extremely hot water. A drastic temperature change can encourage cracking, particularly when one section of the ice heats much faster than another.
How to Make a Clearer Ice Bucket
Homemade freezer ice often looks cloudy because freezing traps air and dissolved substances inside the ice. That cloudy appearance is completely normal and can actually look attractive in a rustic or wintry centerpiece.
If you prefer a cleaner visual effect, starting with distilled or purified water may help. Some DIY approaches also use water that has been boiled and completely cooled before freezing.
Do not become obsessed with laboratory-level transparency. Household freezers freeze water from several directions, so a perfectly glass-clear bucket can be difficult to achieve without controlled directional freezing.
For decorative projects, the goal is usually enough transparency to reveal flowers and fruit, not enough clarity to conduct an eye exam through the bucket.
How to Make a Floral Ice Bucket
Flowers turn the basic project into an impressive table centerpiece. Small blooms are especially convenient because they fit within the walls without requiring excessively thick ice.
Choose flowers carefully. If there is any possibility that melting water, ice, or decorations could come into contact with food or beverages, use flowers positively identified as food-safe and untreated with inappropriate pesticides or chemicals. Not every attractive flower is edible.
Trim bulky stems and arrange individual flowers or petals between the molds. Place some blooms facing outward so their most colorful sides are visible.
For greater depth, freeze flowers at different distances from the outside edge. This creates a layered effect instead of making the arrangement resemble wallpaper trapped in an iceberg.
Seasonal Floral Ice Bucket Ideas
Spring: Use pastel flowers, mint, thin lemon slices, and delicate greenery.
Summer: Try brightly colored edible flowers with lime, orange, strawberries, or blueberries.
Fall: Use orange slices, cranberries, rosemary, small leaves, and warm-colored petals.
Winter: Cranberries, citrus, rosemary, and small evergreen sprigs create an easy holiday theme.
How to Use Your Homemade Ice Bucket
Keep the bucket frozen until shortly before serving. Place it on a shallow platter, tray, or bowl capable of catching meltwater.
Insert an already-chilled beverage bottle into the center. You can add a few ordinary ice cubes around the bottle if the opening leaves enough room.
A frozen bucket works best as a decorative chiller rather than the primary method for cooling a room-temperature bottle. If you need to chill wine or sparkling wine quickly, an ice-water bath makes more contact with the bottle than dry cubes alone and therefore transfers heat efficiently. Once the bottle is cold, move it into your decorative frozen bucket for presentation.
How Long Will an Ice Bucket Last?
There is no universal melting time. A bucket’s lifespan depends on wall thickness, room temperature, sunlight, airflow, the temperature of the bottle, and the size of the finished mold.
Indoors, a generously built bucket can remain attractive through a meal or cocktail gathering. Outdoors on a hot afternoon, melting happens much faster.
To extend its life:
- Make thick walls and a substantial base.
- Start with a thoroughly frozen bucket.
- Use a beverage that is already cold.
- Keep the bucket away from direct sunlight.
- Place it away from fireplaces, grills, and heating vents.
- Do not repeatedly move or handle it.
Common Ice Bucket Mistakes
Making the Walls Too Thin
Thin ice looks delicate because it actually is delicate. Leave enough space between your molds for structural strength.
Forgetting to Weight the Center Mold
An unweighted container can float upward as water is added, giving you a shallow, crooked opening.
Overloading the Bucket With Decorations
Flowers should decorate the ice, not replace it. Maintain plenty of solid frozen water around decorative materials.
Freezing on an Uneven Shelf
A tilted mold produces uneven walls and a bottom that may not sit flat on your serving tray.
Using Questionable Flowers
Do not assume a flower is harmless simply because it looks pretty. When decorations may contact anything consumed, choose known food-safe plants from a trustworthy source.
Forgetting the Drip Tray
An ice bucket has one unavoidable hobby: becoming water. Protect wood furniture, table linens, and countertops with a waterproof platter or shallow bowl.
Creative Variations Worth Trying
Citrus Ice Bucket
Layer lemon, lime, and orange slices around the mold. The strong colors remain visible even when the ice itself is somewhat cloudy.
Berry and Rosemary Holiday Bucket
Cranberries paired with rosemary provide a classic red-and-green combination without requiring complicated arrangements.
Minimalist Clear Ice Bucket
Skip decorations altogether. A simple thick cylinder of ice can look surprisingly sophisticated alongside clear glassware and white linens.
Tinted Ice Bucket
A tiny quantity of food coloring creates themed buckets for birthdays, showers, or team celebrations. Use restraint: too much color can transform elegant translucent ice into something resembling a frozen sports drink.
Layered Ice Bucket
Freeze the mold gradually, changing decorations between layers. You could create one citrus layer, one flower layer, and one herb layer.
My Experience Making a Homemade Ice Bucket
The first lesson I learned from experimenting with frozen ice buckets is that the project is easy, but water has absolutely no interest in cooperating with your artistic vision.
My original plan was simple: arrange every lemon slice and flower perfectly, pour in water, freeze the whole thing, and reveal a frozen centerpiece worthy of an expensive hotel brunch. Approximately twelve seconds after adding water, half the flowers floated to the top, two citrus slices turned sideways, and the inner container began drifting away from center.
That attempt taught me three useful tricks.
First, freeze a proper base. A solid bottom gives the smaller container somewhere stable to sit. On later versions, I used roughly two inches of frozen water underneath the inner mold, and the finished bucket felt considerably sturdier.
Second, use more weight in the center container than you initially think you need. The inner mold does not have to be filled with bricks, but it should stay firmly against the base when water is poured around it.
Third, if appearance matters, freeze decorations in stages. I started by adding a shallow layer of water with a few pieces of fruit, freezing it, and then building upward. The process took longer but produced a much more intentional pattern.
I also discovered that cloudy ice is not necessarily a failure. In fact, rosemary and cranberries against slightly frosted ice created a beautiful winter look. The imperfections made the bucket resemble naturally frozen water rather than molded plastic.
Unmolding was another learning experience. On my first attempt, impatience suggested that aggressive twisting might persuade the inner container to come free. Ice disagreed. A small crack appeared near the rim.
Later, I simply poured lukewarm water into the inner mold and waited. After a short period, it rotated almost effortlessly. The same gentle warming around the outer container released the finished bucket without drama.
Serving taught me one final practical lesson: never place a frozen ice bucket directly on a nice table and assume a folded napkin will handle the situation. It will not. Use a real tray with a rim.
The best setup I tried was a shallow serving platter underneath the bucket with a chilled bottle already inside. Starting with a cold bottle matters because the bucket then needs only to maintain the temperature rather than sacrifice itself trying to cool a warm drink.
What surprised me most was how much attention the ice bucket received. It required inexpensive ingredients and relatively little hands-on work, yet people treated it as though somebody had spent an afternoon sculpting it by hand. That is an excellent effort-to-impressiveness ratio.
After making several versions, I would choose simple decorations over elaborate ones. Citrus wheels, cranberries, herbs, and small flowers create more visual impact than stuffing every available inch. Leaving transparent areas of solid ice gives the design contrast and also makes the bucket stronger.
If I were making one for an important dinner, I would prepare it the day before, freeze it overnight, and leave it inside the mold until close to serving time. That removes nearly all last-minute stress. Then the only remaining responsibility is remembering the drip trayand perhaps accepting compliments for a project that was secretly made by your freezer while you slept.
Final Thoughts
Learning how to make an ice bucket is mostly about understanding a clever two-container mold. Freeze a solid base, center and weight a smaller container, add water and decorations around it, freeze everything thoroughly, and gently release the finished ice.
The result is part beverage cooler, part centerpiece, and part conversation starter. Better still, the design can change with the season. Flowers create romantic spring and summer versions, citrus adds bright color, and cranberries with greenery transform the same technique into holiday decor.
Keep the construction sturdy, use freezer-safe molds, choose decorations thoughtfully, and always provide somewhere for the inevitable meltwater to go. Do those things and your homemade frozen ice bucket should look considerably more complicated than it actually was to makewhich, in the world of entertaining, is practically a superpower.
Note: A frozen ice bucket is a temporary decorative chiller and will gradually melt. Keep it on a waterproof tray, use food-safe decorations when appropriate, and avoid glass molds that could crack during freezing.