A piping bag is one of those kitchen tools that looks fancy until you realize it is basically a cone with ambition. Whether you are frosting cupcakes, writing “Happy Birthday” on a cake, filling deviled eggs, drizzling chocolate, or pretending your Tuesday cookies belong in a bakery window, a piping bag helps you control where the delicious stuff goes.
The good news? You do not always need a professional pastry bag. You can make a piping bag from a resealable plastic bag, parchment paper, or even a sturdy freezer bag in a pinch. The secret is choosing the right material, cutting the opening carefully, filling it without creating a frosting crime scene, and squeezing with steady pressure instead of panic. This guide walks you through how to make a piping bag in 11 steps, plus practical tips for piping frosting, royal icing, whipped cream, melted chocolate, mashed potatoes, and other soft fillings.
Grab your frosting, take a deep breath, and keep the scissors away from the bag until the right moment. That last part matters. Many homemade piping bag disasters begin with someone cutting a hole big enough to frost a sofa.
What Is a Piping Bag?
A piping bag, also called a pastry bag or decorating bag, is a cone-shaped bag used to push frosting, icing, cream, dough, or filling through a small opening. The opening may be plain, snipped from the corner, or fitted with a metal or plastic piping tip. Different tips create different designs, such as stars, shells, rosettes, dots, borders, leaves, lettering, and smooth lines.
Professional bakers often use disposable plastic bags, reusable coated fabric bags, or silicone bags. Home bakers can use those too, but a homemade piping bag works beautifully for small jobs. If you only need to drizzle chocolate over strawberries or add a simple swirl to cupcakes, there is no need to buy a 52-piece decorating kit unless your heart demands it.
Best Materials for a Homemade Piping Bag
Before making your piping bag, decide what you are piping. Thick buttercream needs strength. Thin glaze needs precision. Melted chocolate needs a small opening. Mashed potatoes need a sturdy bag and possibly a large tip. Here are the most useful options:
1. Resealable Plastic Bag
A zip-top bag is the easiest homemade piping bag for beginners. Choose a freezer-weight bag if possible because thin sandwich bags may split under pressure. This method works well for buttercream, cream cheese frosting, whipped cream, ganache, soft fillings, and simple cookie decorating.
2. Parchment Paper Cone
A parchment paper cone, sometimes called a cornet, is excellent for fine lines, royal icing, melted chocolate, glaze, and delicate cookie details. It is not ideal for heavy frosting because parchment can soften or burst if overfilled.
3. Disposable Decorating Bag
If you have disposable piping bags, you can still “make” one by trimming it, fitting a tip, and filling it correctly. These bags are sturdier than most kitchen bags and are great for cupcakes, cakes, borders, and larger decorating projects.
4. Reusable Pastry Bag
A reusable bag is the most durable option, especially for frequent cake decorating. It must be washed and dried thoroughly after use. For strong-smelling or oily fillings, many bakers prefer disposable bags because cleanup is much easier.
Tools You Will Need
You do not need much equipment. For a basic homemade piping bag, gather the following:
- One freezer-weight resealable plastic bag or a sheet of parchment paper
- Scissors
- Frosting, icing, melted chocolate, whipped cream, or another soft filling
- A spoon, rubber spatula, or bench scraper
- A tall glass or measuring cup for easy filling
- Optional: piping tip, coupler, rubber band, binder clip, or twist tie
How to Make a Piping Bag: 11 Steps
Step 1: Choose the Right Bag for the Job
Start with the filling. Thick buttercream, mashed potatoes, cream cheese frosting, and choux pastry need a strong bag. A freezer-weight zip-top bag or disposable decorating bag is best. Royal icing, melted chocolate, and glaze can go into a parchment cone or a small plastic bag.
If you are decorating cupcakes with swirls, choose a larger bag so you do not have to refill it every two cupcakes. If you are writing tiny letters on cookies, choose a smaller bag for better control. Bigger is not always better; sometimes it is just messier with confidence.
Step 2: Decide Whether You Need a Piping Tip
You can make a piping bag with or without a tip. Without a tip, you simply snip the corner and pipe dots, lines, lettering, or rustic swirls. With a piping tip, you can create specific shapes such as stars, shells, leaves, rosettes, basket-weave patterns, or elegant cupcake spirals.
For beginners, a large round tip and a large star tip are the most useful. A round tip is great for dots, writing, filling cupcakes, and outlining cookies. A star tip creates classic cupcake swirls, borders, stars, and textured finishes. If you want to switch tips using the same bag of frosting, use a coupler.
Step 3: Reinforce the Corner if Using a Plastic Bag
If you are using a resealable plastic bag, push the filling toward one lower corner. For extra support, especially with thick frosting, you can reinforce that corner with a small strip of tape on the outside before cutting. This helps reduce the chance of the seam splitting while you squeeze.
Use a freezer bag whenever possible. Thin bags can balloon, stretch, or burst, and nothing humbles a baker faster than buttercream exploding from the wrong end.
Step 4: Fit the Tip Before Filling
If you are using a piping tip, place the tip inside the empty bag and push it down into one corner. Do not cut the bag yet. First, mark or estimate where the tip opening should come through. The cut should be small enough that the tip fits snugly but large enough for the narrow end to extend outside the bag.
For a coupler, insert the coupler base into the bag first, push it toward the corner, then trim the bag so the threaded part can come through. Place the piping tip over the coupler from the outside and screw on the ring. This setup lets you change tips without emptying the bag.
Step 5: Cut a Small Opening
Cut less than you think you need. You can always make the hole bigger, but you cannot politely ask the plastic to grow back. For a bag without a tip, snip a tiny piece from the corner, test the flow, and enlarge it gradually.
For writing or fine lines, cut a very small opening. For cupcake swirls without a tip, cut a larger opening, about 1/2 inch wide. For filling pastries, cupcakes, or doughnuts, the opening should be wide enough to let the filling flow without forcing it.
Step 6: Place the Bag in a Tall Glass
To fill your homemade piping bag without frosting your wrists, place the bag inside a tall glass, measuring cup, or wide-mouth jar. Fold the top of the bag down over the rim like a cuff. This keeps the bag open and catches drips on the inside instead of the outside.
This step is especially helpful when working alone. It gives you two free hands: one for scooping and one for scraping. It also prevents the bag from collapsing into the frosting like a tiny plastic surrender flag.
Step 7: Fill the Bag Halfway to Three-Quarters Full
Add frosting or filling with a spoon or spatula. For best control, fill the bag only halfway to three-quarters full. Overfilling makes the bag harder to twist, harder to squeeze, and much more likely to leak from the top.
If your frosting is stiff, press it down gently as you fill to remove air pockets. Air bubbles can cause sputtering, gaps, or sudden frosting burps. Delicious? Yes. Elegant? Not exactly.
Step 8: Push the Filling Toward the Tip
Lift the bag out of the glass and unfold the cuff. Use your hands or a bench scraper to gently push the frosting toward the tip. If you are using a plastic bag, slide your fingers downward from the top toward the corner. If you are using a pastry bag, pull the frosting down and squeeze lightly until it reaches the tip.
Do not squeeze hard yet. The goal is to remove air and gather the filling, not decorate your counter before the dessert has been formally introduced.
Step 9: Twist and Seal the Top
Twist the top of the bag tightly just above the filling. This creates pressure and prevents frosting from escaping upward. You can hold the twist with your hand, secure it with a rubber band, or clip it with a binder clip.
For children or first-time decorators, a clip is helpful because it keeps the bag closed while they focus on piping. For adults, it also helps if you are the kind of person who becomes emotionally invested in cupcake symmetry.
Step 10: Practice on Parchment Paper
Before piping directly onto your cake or cookies, practice on a piece of parchment paper. Hold the bag with your dominant hand near the top twist and use your other hand to guide the tip. Squeeze from the top, not the middle, so the pressure stays even.
Try simple dots, lines, circles, and swirls. For dots, squeeze, stop pressure, then lift. For lines, squeeze steadily while moving the bag at an even speed. For rosettes, start in the center and spiral outward, or start outside and spiral inward depending on the look you want.
Step 11: Pipe with Steady Pressure
When you are ready, pipe slowly and confidently. Keep the tip slightly above the surface unless a technique requires touching it. Squeeze, guide, stop pressure, then lift away. That order matters. If you lift before stopping pressure, you may create peaks, tails, or dramatic frosting comets.
As the bag empties, twist the top downward to keep the filling compact. Refill when the bag becomes too floppy to control. A half-empty bag is often better than a full one, but a nearly empty bag can make your hand work too hard.
How to Make a Parchment Paper Piping Bag
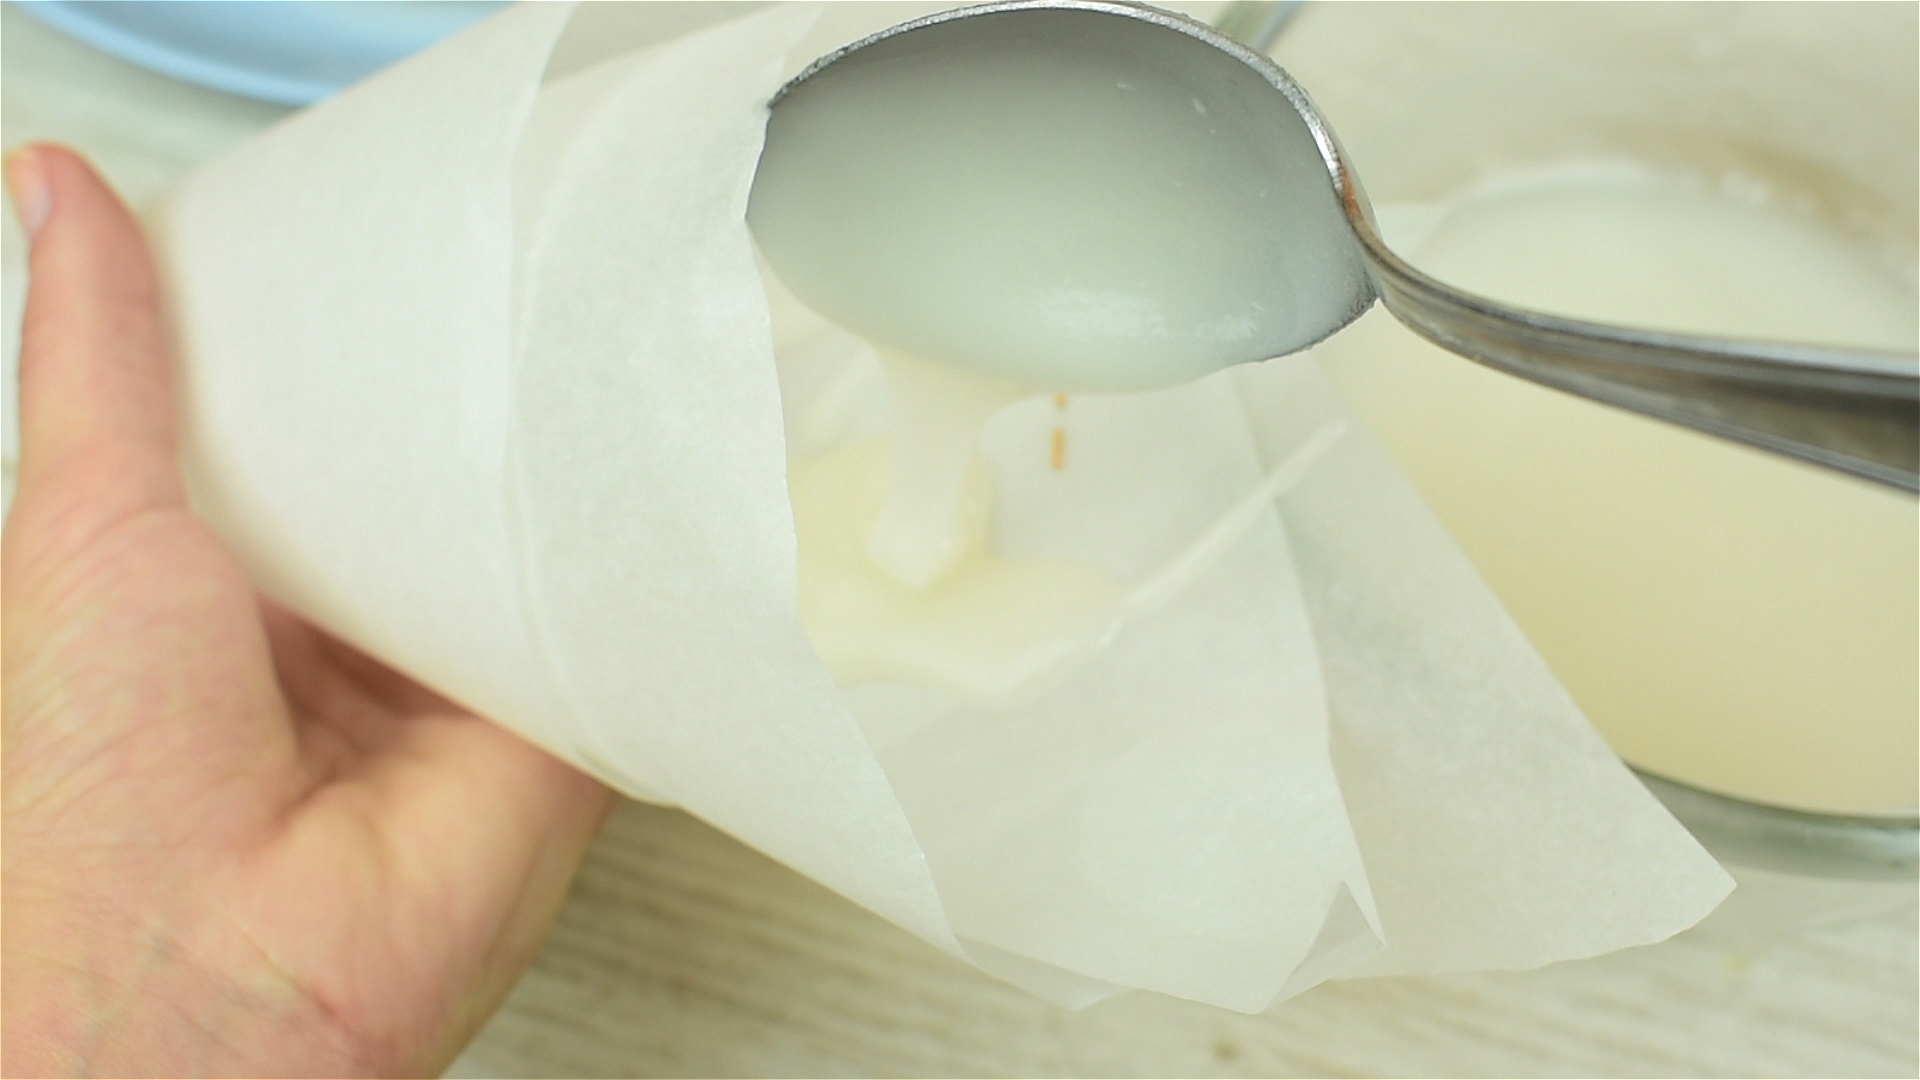
A parchment cone is perfect for small decorating jobs. Cut a square of parchment paper, then cut it diagonally into two triangles. Take one triangle and roll the corners around to form a cone. Adjust the point until it is tight and sharp. Fold the top edges inward to lock the cone in place.
Fill the cone no more than halfway. Fold the top down several times to seal it, then snip the tip when you are ready to pipe. This method is excellent for melted chocolate, thin icing, glaze, and fine cookie details. It is less suitable for thick buttercream because too much pressure can make the paper split.
Common Piping Bag Mistakes and How to Fix Them
The Hole Is Too Big
If the opening is too large, your lines will look heavy and hard to control. Transfer the filling into a new bag and cut a smaller opening. For future attempts, start with the smallest cut possible and test before enlarging.
The Frosting Comes Out of the Top
The bag is probably overfilled or not twisted tightly enough. Remove some frosting, push the rest toward the tip, and twist the top again. A rubber band or clip can help.
The Bag Bursts
The filling may be too stiff, the bag may be too thin, or you may be squeezing from the middle. Use a stronger bag, soften the frosting slightly, and squeeze from the top.
The Piping Looks Uneven
Uneven piping usually comes from inconsistent pressure or speed. Practice on parchment paper. Move slowly and keep your squeeze steady. Decorating is a rhythm, not a wrestling match.
The Tip Gets Clogged
Small tips clog easily if frosting contains lumps, zest, sprinkles, cookie crumbs, or unmixed sugar. Use smooth frosting and sift powdered sugar when needed. For royal icing, cover unused icing so it does not dry out and form crusty bits.
Best Fillings for a Homemade Piping Bag
Homemade piping bags can handle many fillings, but consistency matters. The filling should be smooth enough to flow but firm enough to hold its shape. Here are some beginner-friendly options:
- Buttercream frosting: Best for cupcakes, cakes, borders, and rosettes.
- Royal icing: Best for cookie outlines, lettering, flooding, and fine details.
- Whipped cream: Best for soft swirls, pies, hot chocolate, and quick desserts.
- Ganache: Best for chocolate borders, fillings, and drizzles.
- Melted chocolate: Best for writing, decoration, and dipping accents.
- Cream cheese frosting: Best for carrot cake, red velvet cupcakes, and cinnamon rolls.
- Savory fillings: Best for deviled eggs, twice-baked potatoes, duchess potatoes, and cheese spreads.
Food Safety and Cleanup Tips
Because piping bags touch ready-to-eat foods, cleanliness matters. Wash your hands before decorating, use clean utensils, and keep counters clean. If you use a reusable bag, wash it thoroughly with hot, soapy water, rinse it well, and let it dry completely before storing. Moisture trapped inside a bag is not your friend.
For dairy-heavy fillings such as whipped cream, cream cheese frosting, custard, mousse, or pastry cream, follow safe storage rules and refrigerate when needed. Do not leave perishable fillings sitting in a piping bag at room temperature for long periods. When in doubt, chill it out.
Disposable bags are convenient for sticky, oily, strongly colored, or strongly flavored fillings. Red frosting and garlic-herb cheese spread should probably not share a reusable bag unless you want mystery-flavored cupcakes in your future.
Simple Decorating Ideas for Beginners
Cupcake Swirls
Use a large star tip or a large corner cut. Start at the outer edge of the cupcake and pipe in a spiral toward the center. Stop pressure before lifting the bag.
Cookie Outlines
Use royal icing in a small homemade piping bag. Outline the cookie first, let the border set slightly, then fill the center with thinner icing.
Chocolate Drizzle
Use a parchment cone or small plastic bag. Fill with melted chocolate, snip a tiny hole, and drizzle over strawberries, brownies, cheesecake, or cookies.
Deviled Egg Filling
Spoon the yolk mixture into a bag fitted with a star tip, then pipe into egg white halves. It looks fancy and takes less time than carefully spooning each one.
Cake Borders
Use a star tip to pipe shells or stars around the bottom edge of a cake. Borders hide small imperfections, which is why they are beloved by both professionals and people who frosted the cake at midnight.
Extra Experience: Real-Life Lessons from Making a Piping Bag
The first lesson of homemade piping bags is that confidence should arrive after the test squeeze, not before. Many beginners fill the bag, cut the corner, march toward the cupcakes, and discover that the opening is either too tiny to release frosting or so large that each cupcake receives a frosting landslide. A small practice area on parchment paper solves this problem. Pipe a few dots and lines first. If the frosting flows smoothly, continue. If not, adjust before your dessert becomes the practice sheet.
Another useful experience is learning that bag size changes everything. A small bag feels easier to control for lettering, cookie decorating, and chocolate drizzle. A large bag is better for frosting many cupcakes, but it can feel clumsy when filled too much. For home baking, it is often smarter to refill a smaller bag twice than to battle one huge bag that behaves like a frosting-filled water balloon.
Temperature also plays a major role. Buttercream that is too cold can be stiff and difficult to squeeze, causing hand fatigue and uneven piping. Buttercream that is too warm may slump, lose definition, or slide around like it has weekend plans. The best consistency is soft but structured. When you press it with a spatula, it should move easily while still holding a peak. If it is too stiff, mix in a tiny amount of milk or cream. If it is too soft, chill it briefly and re-whip if needed.
One of the best tricks is using a tall glass to fill the bag. It sounds almost too simple, but it prevents most messes. Fold the bag over the glass, scoop in the frosting, scrape the spatula against the inside, then lift and twist. This technique is especially helpful when filling bags with sticky ganache, cream cheese frosting, or brightly colored icing. Your hands stay cleaner, the outside of the bag stays cleaner, and you do not accidentally decorate your cabinet handle.
Homemade piping bags are also perfect for small-batch creativity. You can divide frosting into three small bags, tint each one a different color, and decorate cookies without washing tips between colors. You can fill one bag with peanut butter, another with jam, and pipe neat layers into thumbprint cookies. You can even use a bag for savory foods, such as piping mashed potatoes onto a casserole or filling jalapeño poppers with cheese mixture. Once you understand the basic method, the piping bag becomes less of a cake-decorating tool and more of a kitchen control device.
The final lesson is to relax. Piping improves quickly with repetition. Your first line may wobble. Your first rosette may look like a sleepy cabbage. That is fine. Most frosting mistakes are edible, and many can be covered with sprinkles, chocolate curls, fruit, or one more swirl. A homemade piping bag is meant to make decorating easier, not turn your kitchen into a pastry-school exam. Cut small, fill wisely, twist tightly, squeeze steadily, and enjoy the sweet little magic of putting frosting exactly where you want it.
Conclusion
Learning how to make a piping bag is a simple skill that instantly upgrades your baking and decorating. With a resealable plastic bag, parchment paper cone, or disposable decorating bag, you can pipe frosting, icing, chocolate, cream, and savory fillings with more control and less mess. The keys are choosing a sturdy bag, cutting a small opening, filling only halfway to three-quarters full, twisting the top tightly, and practicing with steady pressure.
You do not need professional tools to create beautiful cupcakes, clean cookie lines, elegant cake borders, or charming chocolate drizzles. Start with a small hole, test your flow, and remember: frosting is forgiving, sprinkles are loyal, and even imperfect piping usually tastes fantastic.