Some of the best fall decorations begin with an object that has absolutely no idea it is about to become a pumpkin. Today’s unsuspecting volunteer is the humble kitchen splatter screen.
With three Dollar Tree splatter screens, orange paint, a handful of fall florals, and a little creative persuasion, you can build a charming metal pumpkin for a mantel, entryway table, covered porch, or Thanksgiving display. The overlapping mesh circles naturally resemble pumpkin ribs, while the handle can be transformed into a stem. It is inexpensive, customizable, and much easier than wrestling with an actual pumpkin full of slippery seeds.
This tutorial explains how to prepare the metal, assemble a sturdy pumpkin shape, decorate it without overwhelming the mesh, and avoid the most common craft-room mishaps. You will also find variations for farmhouse, modern, rustic, and Halloween styles.
Why Splatter Screens Make Such Good DIY Pumpkins
A standard splatter screen is already round, lightweight, and framed with a narrow metal rim. Layer three screens so that the outer two extend slightly beyond the center one, and the arrangement begins to resemble the rounded sections of a pumpkin.
The mesh provides another advantage: floral wire, thin zip ties, ribbon, and pipe cleaners can pass through it easily. That means you can connect and decorate the screens without drilling holes or using complicated hardware. Several popular versions of this craft use three screens, orange paint, fall flowers, leaves, raffia, jute, and either the original handle or a separate object as the stem.
Research basis:
Supplies You Will Need
Basic materials
- Three round Dollar Tree splatter screens of the same size
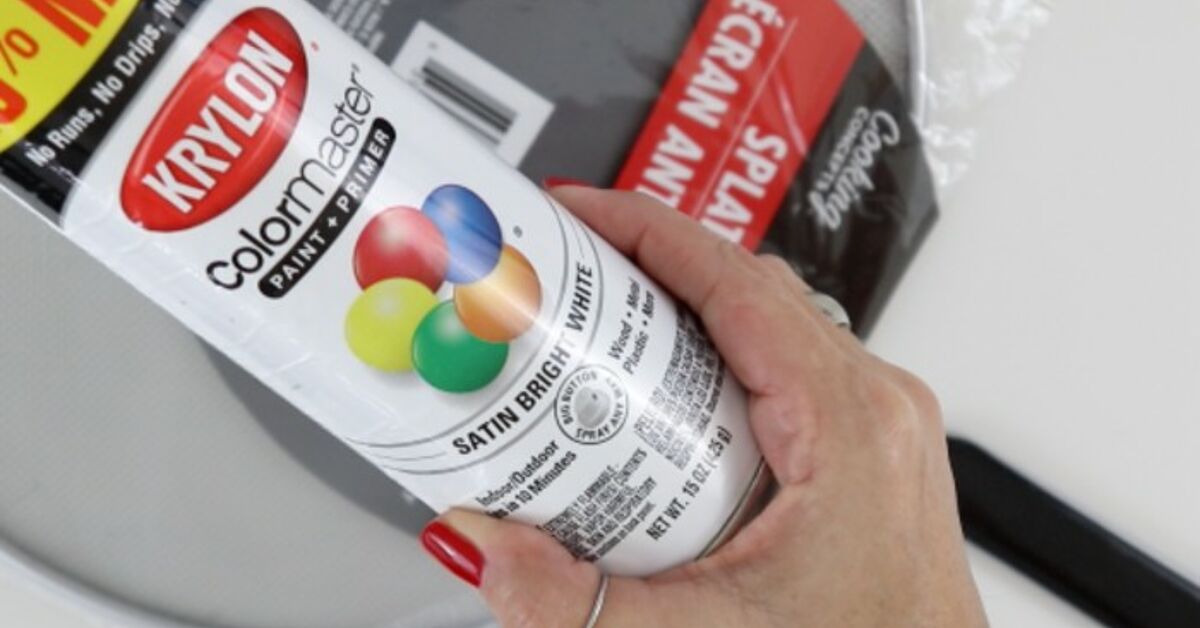
- Orange spray paint formulated for metal
- Metal-compatible primer, optional but recommended
- Small black or brown zip ties, floral wire, or sturdy craft wire
- Hot glue gun and glue sticks
- Faux fall leaves, flowers, berries, or wheat picks
- Jute twine, raffia, burlap ribbon, or wired fall ribbon
- A twig, wine cork, wood block, cinnamon sticks, or one screen handle for the stem
- Cardboard, a drop cloth, or a large box for protecting the work area
Helpful tools
- Work gloves
- Safety glasses
- Aviation snips or heavy-duty wire cutters, if removing handles
- Metal file or fine-grit sandpaper
- Needle-nose pliers
- Scissors
- Painter’s tape
Inventory and seasonal craft selections vary by store, so treat the supply list as a flexible recipe rather than a legally binding pumpkin contract. If orange spray paint, faux eucalyptus, or tiny berry picks are unavailable, substitute colors and textures that work with your decorating style.
Research basis:
Before You Begin: Choose Your Pumpkin Style
Decide where the finished pumpkin will be displayed before assembling it. A tabletop pumpkin needs a stable base and may benefit from a small wood block or easel behind it. A wall or door decoration needs a secure hanging loop. A covered-porch pumpkin should use outdoor-rated paint and weather-resistant attachments.
Next, select a color palette. Traditional orange is cheerful and unmistakably autumnal, but it is not your only option.
- Farmhouse: muted orange, cream, buffalo check, burlap, and eucalyptus
- Modern: matte black, ivory, copper, or sage green
- Rustic: burnt orange, jute, raffia, wheat, pinecones, and distressed wood
- Elegant: champagne gold, velvet ribbon, burgundy leaves, and berry sprays
- Halloween: black mesh, purple ribbon, spiders, bats, or a crooked witch hat
No-carve pumpkin decorating has become popular partly because paint, textiles, ribbons, and dimensional embellishments make it easy to coordinate pumpkins with the rest of a room or porch. The same principle works beautifully with metal splatter screens.
Research basis:
How to Make a Dollar Tree Splatter Screen Pumpkin
Step 1: Clean and inspect the screens
Remove labels, stickers, and loose adhesive. Wash the screens with warm water and dish soap to eliminate grease, dust, or manufacturing residue. Rinse them thoroughly and allow them to dry completely.
Inspect the rims and handles for loose wires, sharp points, or bent sections. Straighten minor bends with needle-nose pliers. Paint adheres more reliably to a clean, dry surface, and a quick inspection now can prevent a surprise metal splinter later.
Step 2: Decide what to do with the handles
For the cleanest pumpkin shape, remove the handles from two screens and leave one handle attached to the center screen. The remaining handle can point upward and become the stem.
Wear gloves and safety glasses when cutting metal. Use aviation snips or an appropriate metal-cutting tool rather than ordinary household scissors. File any sharp cut ends until smooth, then cover them with strong tape or a small amount of adhesive if necessary.
For a no-cut version, leave all three handles attached. Position the center handle upward, angle the other two behind the pumpkin, and secure them against the rear mesh with wire. The hidden handles can also help support a freestanding display, although the finished shape may be slightly bulkier.
Step 3: Prepare the metal for paint
If the screens have a glossy finish, lightly scuff the rims and handles with fine-grit sandpaper. You do not need to attack them as though they personally ruined fall. A gentle sanding is enough to dull the surface and improve adhesion.
Wipe away all dust with a lint-free cloth. Apply a thin coat of metal primer if recommended by the paint manufacturer, particularly when painting bare or shiny metal. Always follow the directions printed on the primer and paint labels.
Research basis:
Step 4: Paint the splatter screens
Paint outdoors or in a properly ventilated work area away from flames, pilot lights, pets, and curious children. Place the screens on cardboard or suspend them so you can reach the edges.
Shake the can for the time specified on its label. Hold it at the recommended distance and apply several light, sweeping coats instead of one thick coat. Heavy paint can collect in the mesh openings, form drips, and make the pumpkin look as though it survived an orange pudding incident.
Allow each coat to dry according to the manufacturer’s instructions. Turn the screens over and paint the backs, rims, and handles. You do not necessarily need perfect solid coverage across every wire. Slight variations can add depth and keep the mesh texture visible.
Avoid spraying in strong wind, excessive humidity, direct hot sunlight, or temperatures outside the product’s recommended range. Cover nearby surfaces because spray mist is remarkably ambitious and will happily decorate your patio, shoes, and recycling bin.
Research basis:
Step 5: Arrange the pumpkin sections
Place one screen in the center with its handle pointing upward. Position a second screen behind it and slightly to the left. Add the third screen slightly to the right. The side rims should remain visible beyond the center rim, creating three distinct pumpkin lobes.
Adjust the overlap until the pumpkin looks symmetrical. A small amount of asymmetry is perfectly acceptable; real pumpkins are rarely precision-engineered circles. Once you like the arrangement, temporarily hold the screens together with painter’s tape or clothespins.
Step 6: Secure the screens together
Thread floral wire or small zip ties through the mesh near the top, middle, and bottom of the overlapping sections. Tighten each connection gradually, checking the shape as you work. Add extra ties where needed to prevent the side screens from shifting.
Position the closures on the back whenever possible. Trim excess zip-tie tails and bend floral-wire ends inward so they cannot scratch the wall or snag fabric.
Hot glue may be added at selected contact points, but it should not be the only structural connection. Mechanical fasteners such as wire or zip ties usually provide more reliable support between flexible metal screens.
Step 7: Create the pumpkin stem
If you kept the center handle, wrap it with jute twine, brown ribbon, or raffia. Begin near the screen rim, apply small dots of glue, and wind the material upward. Finish with a secure knot or a final dot of glue.
If the original handle does not suit your design, attach a short twig, cork, wood block, bundled cinnamon sticks, or a piece of thick rope. Secure it to the upper rear portion of the screens with floral wire before adding decorative foliage.
Step 8: Add leaves, flowers, and ribbon
Build the decorative cluster near the base of the stem. Start with the largest leaves or ribbon loops, then layer medium flowers, berries, wheat, and smaller accents. Working from large elements to small ones creates depth and prevents tiny decorations from disappearing beneath everything else.
Use floral wire for heavier picks and hot glue for lightweight leaves, ribbon, and small accents. Arrange the decorations before attaching them permanently. A balanced cluster generally looks fuller near the center and becomes lighter toward the edges.
Do not cover the entire pumpkin. The painted mesh is the feature that makes this craft distinctive. Let some of the orange screen remain visible so visitors can admire the transformationand wonder why their kitchen tools have never fulfilled their artistic potential.
Keep fingers away from the hot glue nozzle and freshly dispensed adhesive. Rest the tool on its stand, protect the work surface, and unplug it after use.
Research basis:
Step 9: Add a hanger or tabletop support
For wall or door display, thread sturdy wire through the rear mesh near the top and form a closed hanging loop. Test it before decorating your front door. The goal is “adorable autumn greeting,” not “pumpkin unexpectedly attacks delivery driver.”
For tabletop use, rest the pumpkin on a small plate stand, attach a lightweight easel to the back, or secure the lower handles behind the screens to create a support. You can also glue a narrow wood block across the lower back, provided the adhesive is suitable for both materials.
Easy Ways to Customize the Design
Add fabric behind the mesh
Place buffalo check, burlap, lace, or fall-print fabric behind the center screen before joining the layers. Trim the fabric so it stays inside the metal rim. This creates a stronger color contrast and makes the pumpkin easier to see against a busy wall.
Create a distressed finish
After the orange paint dries, lightly brush small amounts of brown, cream, or metallic craft paint across the rim. Use a nearly dry brush and build the effect gradually. Concentrate the darker color near the edges to suggest age and dimension.
Make a neutral pumpkin
Paint the screens ivory, tan, sage, or matte white. Add wood beads, linen ribbon, dried-looking leaves, and a jute-wrapped stem. Neutral versions transition easily from early September through Thanksgiving.
Turn it into a Halloween pumpkin
Paint the screens black or deep purple. Add a glittery spider, striped bow, faux cobweb, or small wooden sign reading “Boo.” Battery-operated fairy lights can be woven loosely through the mesh, but keep the battery pack accessible and use only lights intended for your display location.
Make a matching set
Create one large three-screen pumpkin and two smaller single-screen pumpkins. Paint them in coordinated colors and vary the floral accents. Grouping objects in different sizes makes a mantel or entry table look intentional without requiring every piece to match perfectly.
Common Problems and How to Fix Them
The paint is clogging the mesh
You are probably spraying too closely or applying too much paint at once. Allow the coat to dry, gently clear blocked openings with a wooden skewer, and continue with lighter passes.
The screens keep sliding out of position
Add temporary clips before fastening them. Secure the center connection first, then work outward. Use at least three fastening points along each overlap instead of relying on one tie near the top.
The pumpkin will not stand upright
Use a plate stand or small easel rather than forcing the curved screens to balance. Another option is to mount the finished pumpkin on a narrow wood base with wire brackets.
The decorations look messy
Remove a few pieces. More craft supplies do not automatically create more charm. Establish one focal flower or bow, surround it with supporting leaves, and leave breathing room around the cluster.
Hot glue will not hold a heavy decoration
Thread floral wire through the decoration and mesh. Hot glue works well for positioning and lightweight accents, but heavier pinecones, wood signs, and thick floral picks often need wire support.
Where to Display Your Finished Pumpkin
This DIY splatter screen pumpkin works especially well in places where a flat or lightweight decoration is more practical than a bulky faux pumpkin. Hang it above an entryway console, lean it against the back of a mantel, place it beside a tiered tray, or use it as the center of a Thanksgiving buffet display.
For a covered porch, combine it with mums, lanterns, baskets, plaid textiles, or real gourds. Natural textures such as wheat, leaves, twigs, and raffia help connect the metal craft to traditional harvest décor. Keep it protected from prolonged rain unless every paint, adhesive, ribbon, and floral element is rated for outdoor use.
Research basis:
A Realistic First-Pumpkin Experience: What to Expect
The first thing most crafters notice is that this project looks almost suspiciously easy when the supplies are spread across the table. Three circles, one can of paint, a bow, and some flowerswhat could possibly go wrong? Fortunately, not much. However, a few small decisions make the difference between a polished pumpkin and three orange frying-pan accessories tied together during a seasonal emergency.
The painting stage usually requires the most patience. Mesh seems as though it should take paint instantly because there is so little surface area, but the narrow wires and rounded rims benefit from multiple viewing angles. After the first coat, the screens may still look silver when seen from the side. Turning them over and spraying lightly from different directions gives the color a more complete appearance without filling the openings. It is tempting to solve every bare spot with one enthusiastic blast. That is also how drips are born.
Assembly can feel awkward for the first few minutes because the circles slide over one another. Temporary tape or clips make the process dramatically easier. Once the first two ties are secured near the center, the screens stop behaving like oversized metallic playing cards. The pumpkin shape becomes obvious, and adjusting the outer sections by half an inch can noticeably improve the proportions.
Decorating the top is often where creativity attempts a hostile takeover. Fall craft bins are full of persuasive little objects: berries, sunflowers, acorns, leaves, mini signs, ribbon, raffia, pinecones, and perhaps one glitter-covered owl that has been waiting years for employment. Dry-fitting the decorations before using glue prevents the arrangement from becoming crowded. Photographing the temporary layout is useful because everything may mysteriously forget its position the moment the glue gun heats up.
A medium-sized bow with two or three floral elements is often enough. Larger decorations should sit close to the stem, where they visually anchor the design and conceal wires or cut metal. Smaller leaves can extend outward to soften the transition between the floral cluster and the screen.
The finished pumpkin is surprisingly lightweight. That makes it easy to move from a mantel to an entry table or hang from a sturdy door hook. It also means the back deserves attention. Sharp wire ends, bulky zip ties, or hardened glue can scratch painted walls and doors. Bending every wire inward and adding small felt pads creates a cleaner, safer finish.
The most satisfying part of the project is that it does not need to look identical to any tutorial. Slightly uneven screens create a relaxed handmade shape. Muted paint produces a farmhouse pumpkin, metallic paint makes it elegant, and black paint pushes it toward Halloween. Even leftover ribbon and a few mismatched floral stems can look coordinated when they repeat colors already used elsewhere in the room.
Expect the first version to teach you what you prefer. You may decide the next pumpkin needs less ribbon, a wider side section, a different stem, or no flowers at all. That experimentation is part of the fun. The splatter screens provide an inexpensive framework, while the personality comes from the choices layered on top.
Final Thoughts
Making a cute fall pumpkin out of Dollar Tree splatter screens is a clever way to turn an ordinary kitchen item into seasonal home décor. The project requires only a few basic techniques: cleaning and painting metal, overlapping three circular screens, securing them with wire or zip ties, and finishing the top with a stem and fall accents.
Take your time with surface preparation, use light coats of paint, and arrange every decorative element before gluing it down. Those simple habits produce a sturdier and more professional-looking result. Whether you choose classic orange, soft farmhouse neutrals, glamorous metallics, or Halloween black, the finished pumpkin can be adjusted to match nearly any autumn decorating theme.
Note: Product availability, paint drying times, and material compatibility vary. Follow all manufacturer instructions, use proper ventilation and protective equipment, and let an adult handle metal cutting, spray paint, and hot glue tools.