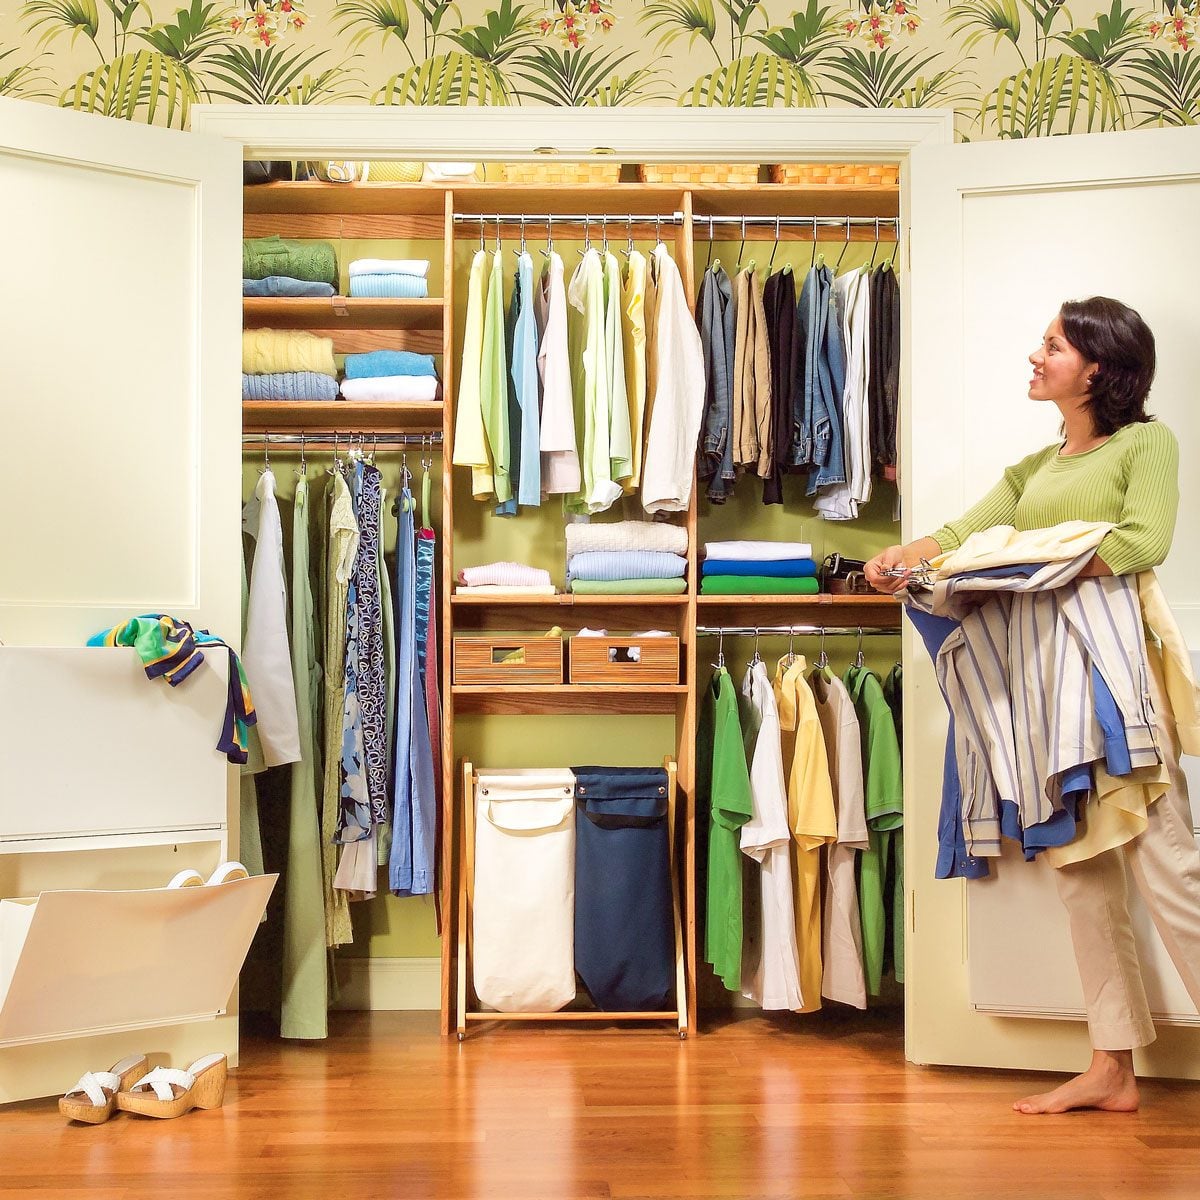
A closet without a rod and shelf is basically a small room where clothes go to form a committee. Shoes gather in the corner. Coats lean like tired commuters. Random storage bins multiply quietly in the dark. The good news? You do not need a custom cabinet shop, a luxury design budget, or a heroic amount of patience to fix it. A simple rod and shelf system can turn a plain reach-in closet into a clean, functional storage space in one afternoon.
This guide explains how to install a simple closet rod and shelf system using common tools, basic materials, and practical measurements that work in most American homes. Whether you are upgrading a bedroom closet, entry closet, linen closet, laundry nook, or a tiny “why is this here?” hallway closet, the process is the same: measure carefully, locate solid support, install the shelf, mount the rod, test everything, and then proudly admire your work as if you just built a small civilization.
The main keyword here is how to install a simple rod and shelf system for your closet, but the real goal is simpler: create a closet that holds clothes, baskets, folded items, and accessories without sagging, wobbling, or making mysterious cracking sounds at 2 a.m.
Why a Rod and Shelf System Is the Closet Upgrade That Actually Pays Off
Closet upgrades can get fancy fast. You can buy drawer towers, sliding baskets, LED lights, velvet-lined jewelry trays, and shoe walls worthy of a celebrity home tour. But for many closets, the most useful upgrade is still the classic combination: a horizontal shelf above a clothing rod.
A shelf-and-rod closet system gives you two storage zones in the same wall space. The rod handles hanging clothes, coats, dresses, shirts, or uniforms. The shelf above it stores boxes, bags, folded sweaters, bins, hats, extra linens, seasonal items, or the mystery tote labeled “important stuff” that no one has opened since 2018.
This setup works especially well in reach-in closets because it preserves clear access across the width of the opening. Instead of building a bulky unit that may block corners, a simple rod and shelf system gives you long, uninterrupted storage. It is also budget-friendly, renter-friendly when installed carefully, and easy to customize later.
Before You Start: Plan the Closet Like a Calm Person With a Tape Measure
The planning stage is where closet projects are either saved or sentenced to chaos. Do not buy lumber, brackets, or rods before measuring. Closets are famous for pretending to be square while secretly leaning, bowing, and hiding odd corners. Measure first. Shop second. Celebrate third.
Measure the Closet Width, Depth, and Height
Use a tape measure to record the inside width of the closet from wall to wall. Measure at the back wall, near the front, and at the middle. If the numbers are slightly different, use the smallest measurement when cutting a shelf or rod. This prevents the classic DIY tragedy known as “almost fits.”
Next, measure the closet depth. Many standard reach-in closets are around 24 inches deep, which is comfortable for most adult hangers. If your closet is shallower than that, you may need to position the rod carefully so clothes do not rub against the back wall or door.
Finally, measure height from the floor to the ceiling. Most simple systems place the top shelf around 80 to 84 inches from the floor, depending on ceiling height, user reach, and what you plan to store. A high shelf gives more hanging space, but if you need a ladder every time you want a sweater, the closet may start feeling like a climbing gym.
Choose a Single Rod or Double Rod Layout
A single rod is best for dresses, coats, robes, long garments, and mixed clothing. A common single-rod height is around 60 to 66 inches from the floor. That range usually allows clothes to hang freely while leaving space above for a shelf.
A double rod layout is useful when most items are shorter, such as shirts, blouses, jackets, folded pants, and kids’ clothing. In that layout, the lower rod is often placed around 36 to 40 inches high, while the upper rod sits around 76 to 82 inches high. For this article, we are focusing on the simple single shelf and rod system, but the same mounting principles apply if you later add a second level.
Tools and Materials You Will Need
You do not need a professional workshop to install a closet shelf and rod. A standard homeowner tool kit can usually handle the job. The biggest secret is not owning every tool in the aisle; it is using the right fasteners and anchoring the system correctly.
Tools
- Tape measure
- Pencil
- Stud finder
- Level
- Drill/driver
- Drill bits
- Screwdriver bit
- Saw for cutting shelf material, or a store-cut shelf
- Hacksaw or pipe cutter if cutting a metal closet rod
- Safety glasses
- Painter’s tape for cleaner cuts
Materials
- Closet shelf board, laminate shelf, plywood shelf, or wire shelf
- Closet rod, wood dowel, or metal hang rod
- Rod sockets or rod brackets
- Shelf brackets, cleats, or support rails
- Wood screws for studs
- Heavy-duty wall anchors or toggle bolts where studs are not available
- End caps for wire shelving or cut metal pieces
- Paint or edge banding if finishing a wood shelf
For a simple wood shelf system, many DIYers use a 12-inch-deep shelf board supported by side cleats, back cleats, and center brackets. For a wire shelf-and-rod system, use the manufacturer’s matching wall clips, side brackets, support brackets, and rod supports. Mixing random hardware can work, but it can also create a shelf that looks confident while quietly plotting its escape from the wall.
Step 1: Empty the Closet and Prep the Walls
Remove everything from the closet. Yes, everything. This includes the mystery box, the lonely umbrella, the shoes you forgot you owned, and that one hanger shaped like a question mark. You need clear access to the walls, floor, corners, and existing hardware.
If an old shelf or rod is already installed, remove it carefully. Patch large holes with spackle or joint compound. Let the patch dry, sand it smooth, and touch up paint if needed. A fresh wall is easier to mark, easier to level, and much more satisfying to work on.
This is also the best time to vacuum the closet floor and wipe down baseboards. A clean workspace helps you spot studs, pencil lines, dropped screws, and small hardware pieces before they disappear into the alternate universe under the baseboard.
Step 2: Find the Wall Studs
Studs are the vertical wood or metal framing members behind drywall. For the strongest installation, mount shelf supports and rod brackets into studs whenever possible. Drywall alone is not designed to hold heavy hanging clothes, stacked bins, winter coats, and the emotional weight of a reorganized wardrobe.
Use a stud finder across the back wall and side walls. Mark each stud location lightly with a pencil. Most studs are spaced 16 inches on center, though older homes and remodeled closets may vary. Confirm each location by scanning from both directions. If the stud finder seems confused, it may be detecting pipes, electrical lines, or metal corner bead. When in doubt, move slowly and avoid drilling blindly.
If your brackets cannot land on studs, use heavy-duty anchors or toggle bolts rated for the load. Always follow the hardware manufacturer’s instructions. For a closet that will hold heavy coats or packed storage bins, overbuilding is better than underbuilding. Your future self will appreciate the quiet stability.
Step 3: Mark the Shelf Height
Decide where the shelf will sit. In many simple closet installations, the shelf is placed around 80 to 84 inches from the floor. This leaves room below for hanging clothes and creates a practical overhead storage zone. If the closet ceiling is low, adjust the shelf downward. If the user is shorter, consider a slightly lower shelf for easier access.
Use a level and pencil to draw a light horizontal line across the back wall at the bottom edge of the shelf or at the top edge of the cleat, depending on your support style. Extend the line onto the side walls if you are using side cleats. Take your time here. A level shelf looks professional; a crooked shelf makes baskets slide sideways like they are trying to leave town.
Step 4: Cut the Shelf and Rod to Length
Measure the closet width again before cutting. For a wall-to-wall shelf, subtract about 1/8 inch to 1/4 inch from the tightest measurement so the shelf can slide into place without damaging the wall. If your walls are not perfectly square, you may need to trim slightly or scribe the shelf edge.
If cutting laminate or melamine shelving, apply painter’s tape over the cut line to reduce chipping. Use a fine-tooth blade and cut slowly. Many home improvement stores can cut shelf boards to length when you buy them, which is convenient if you do not own a saw or prefer not to turn your garage into a sawdust bakery.
For the closet rod, measure the distance between rod sockets or brackets after they are installed, or follow the bracket manufacturer’s instructions. A wood rod can usually be cut with a hand saw or miter saw. A metal rod may require a hacksaw or pipe cutter. Smooth rough edges and add end caps if needed.
Step 5: Install Shelf Cleats or Brackets
A shelf needs support on the back wall, at the ends, and often in the middle. For a wood shelf, you can install cleats made from 1×2 or 1×3 lumber along the back and side walls. Align the cleats with your level marks, drill pilot holes, and fasten them into studs with wood screws. Use anchors only where studs are unavailable and where the load rating is appropriate.
If using metal shelf brackets, place them at stud locations when possible. A bracket near each end and additional brackets every 32 to 36 inches is a common practical approach for many closet shelves, especially if the shelf will hold bins or folded clothing. For wire shelving systems, follow the manufacturer’s spacing instructions for wall clips and support braces. Many wire systems require frequent back clips and front support brackets to prevent sagging.
Once supports are installed, set the shelf in place and check it with a level. If it rocks, shifts, or dips, fix the support now. Do not assume the weight of your belongings will “settle it.” In closet language, “settle” usually means “fail later, dramatically.”
Step 6: Secure the Shelf
After the shelf sits level on its supports, secure it so it cannot slide forward or bounce. For wood cleats, drive short screws upward through the cleats into the underside of the shelf, making sure the screws are not so long that they poke through the top. For metal brackets, use the bracket holes to fasten the shelf from below.
If you are installing a wire shelf, snap or lock the shelf into the wall clips and brackets according to the product instructions. Make sure the front lip is fully supported. Add end caps to any cut wire ends to protect clothing and fingers. Those little caps may not look exciting, but neither does snagging your favorite shirt on a sharp wire end.
Step 7: Mark the Closet Rod Position
The closet rod should sit below the shelf and far enough from the back wall for hangers to move freely. A common rod depth is around 11 to 12 inches from the back wall to the center of the rod. This generally works well with standard hangers in a closet that is about 24 inches deep.
Vertically, place the rod so clothes have room to hang without dragging on the floor. For a single rod, 60 to 66 inches from the floor is a common working range. If the shelf is installed at about 84 inches high, the rod can often sit a few inches below the shelf, leaving room for hanger hooks and easy access.
Mark the rod socket or bracket locations on both side walls, or on a center support and side wall depending on your layout. Use a level to make sure both sides match. A rod that is off by even half an inch can make hangers slide to one side like they are attending a very boring parade.
Step 8: Install the Rod Brackets or Sockets
Drill pilot holes at your marks. If you are fastening into studs or solid wood blocking, use screws long enough to bite securely. If you are fastening into drywall, use heavy-duty anchors or toggle bolts. Rod brackets carry dynamic weight because clothes move, hangers slide, and people tug on garments. This is not the place for tiny screws from the junk drawer.
Many rod systems use one closed socket and one open socket. The closed socket holds one end securely, while the open socket lets you drop the rod into place. If using a center support bracket for a long rod, install it at the same height and depth as the side brackets. Long rods can sag under weight, especially wood rods or thin metal rods, so center support is smart for wider closets.
Step 9: Place the Rod and Test the System
Set the rod into the brackets. Tighten any set screws if your hardware includes them. Then test the installation before loading the entire closet. Pull down gently on the rod. Press lightly on the shelf. Listen for creaks, watch for shifting, and check that all brackets stay tight.
Add a small amount of weight first, such as a few hangers and folded items. If everything looks stable, gradually load the closet. Spread weight evenly across the shelf and rod. Heavy bins should sit closer to brackets or wall supports. Avoid stacking so much overhead that retrieving a blanket becomes a game of closet Jenga.
Common Mistakes to Avoid
Skipping the Stud Finder
Drywall anchors can be helpful, but studs are your best friend. Whenever possible, anchor major supports into framing. A closet full of clothes can weigh more than people expect, especially when coats, jeans, bags, and storage boxes join the party.
Installing the Rod Too Close to the Back Wall
If the rod is too close to the wall, hangers will sit at an angle and clothes will wrinkle. Aim for a practical depth that allows hangers to hang straight. Around 11 to 12 inches from the back wall to the rod center is a common target for standard closets.
Forgetting Center Support
Wide rods and shelves need additional support. If your closet is more than about 4 feet wide, consider a center bracket or additional shelf supports. Sagging does not happen all at once. It sneaks in slowly, like a bad habit with screws.
Overloading the Shelf
A shelf above a rod is great for lightweight and medium-weight storage. It is not a substitute attic. Keep very heavy items lower, closer to the floor, or on stronger shelving designed for that load.
How to Customize a Basic Closet Rod and Shelf System
Once the basic system is installed, you can customize it without rebuilding the whole closet. Add labeled bins to the shelf for seasonal clothing, sports gear, scarves, or extra bedding. Use matching hangers to save space and create a cleaner look. Install hooks on unused side walls for belts, bags, hats, or robes.
If your closet is wide enough, consider adding a vertical divider or tower in the middle, with short rods on each side. This creates separate zones for long hanging clothes, short hanging clothes, folded items, and shoes. For kids’ closets, lower rods can make clothing easier to reach and encourage independence. Translation: fewer shirts launched onto the floor in protest.
You can also add a second shelf above the first if the ceiling height allows it. Just remember that higher shelves are best for items you use less often. Holiday sweaters, guest blankets, and seasonal bags are good candidates. Your everyday jeans do not want to live in the clouds.
Maintenance Tips for a Stronger, Cleaner Closet
Check the screws and brackets once or twice a year, especially if the closet gets heavy use. Tighten loose hardware promptly. If you notice sagging, remove weight and add support before the problem gets worse. A simple center bracket can often rescue a rod or shelf before it fails.
Keep the closet organized by using containers that fit the shelf depth. Oversized bins can hang over the front edge and make the shelf feel crowded. Clear bins work well for visibility, while fabric bins create a softer, cleaner look. Labels help everyone in the household know where things belong, even the person who believes “near the closet” counts as putting something away.
Rotate seasonal items every few months. Move current clothing to the easiest-to-reach areas and store off-season pieces higher up. This keeps the rod from becoming packed so tightly that hangers squeak in fear.
Real-World Experience: What Actually Makes This Project Easier
After installing a few simple closet rod and shelf systems, you start to learn that the project is less about brute force and more about patience, measuring, and not trusting walls to be straight. The first big lesson is to measure more than once. Measure the back of the closet, the front of the closet, and the midpoint. In many homes, especially older ones, the closet may be wider at one end than the other. That tiny difference matters when you cut a shelf. A shelf that is 1/8 inch too long can turn a calm Saturday project into a wrestling match with drywall.
Another useful experience is to mark everything lightly before drilling. Put the shelf line on the wall. Mark the studs. Mark the rod depth. Hold the brackets in place and step back. Sometimes a measurement is technically correct but visually awkward. For example, a rod may be high enough for clothing, but too close to the shelf for easy hanger movement. It is better to notice that while holding a pencil than after drilling six holes.
A third lesson: buy better anchors than you think you need. Cheap anchors are fine for tiny picture frames, but a closet rod and shelf system is working furniture. It carries real weight every day. If you cannot hit a stud, choose anchors or toggle bolts with a load rating that gives you a safety margin. Also, use the screws recommended for your brackets. Screws that are too short may pull out. Screws that are too long may hit something behind the wall. The correct screw is not glamorous, but it is the tiny metal hero of this project.
Cutting is another place where experience helps. If you are cutting laminate shelving, painter’s tape is worth the extra thirty seconds. Tape the cut line, cut slowly, and support the board so it does not snap or chip at the end. If you are not comfortable cutting a long shelf at home, have it cut at the store. Many stores offer basic cuts, and a clean factory-style cut can make the finished closet look more polished.
For long closets, center support is not optional in practice. A rod can look strong when empty and still sag once it is holding jeans, jackets, bags, and winter coats. Adding a center rod support or vertical divider makes the system feel sturdier immediately. The same goes for shelves. A long shelf loaded with bins can bow over time, even if it looks fine on day one. Support now prevents disappointment later.
One of the most overlooked tips is to load the closet gradually. Do not install the system, admire it, and then immediately pile every heavy object you own onto the top shelf. Start with hanging clothes, then add shelf storage, spreading weight evenly. Heavy bins should sit near brackets or side walls. Lighter items can go toward the middle. This helps you spot weak points before they become loud problems.
Finally, the best closet system is the one that matches your actual habits. If you use baskets, choose a shelf height that lets you pull them down comfortably. If you wear long dresses or coats, do not sacrifice hanging height just to squeeze in another shelf. If kids will use the closet, lower the rod or add a second lower rod. A closet should serve the person using it, not an imaginary version of that person who folds laundry immediately and never owns too many hoodies.
Conclusion
Installing a simple rod and shelf system for your closet is one of the most practical DIY upgrades you can make. It does not require advanced carpentry, but it does reward careful measuring, level lines, strong supports, and smart hardware choices. The basic formula is simple: plan the layout, find the studs, install a secure shelf, mount the rod at a comfortable height and depth, test the system, and organize with intention.
The result is a closet that works harder without becoming complicated. You get hanging space, overhead storage, better visibility, and fewer floor piles. Best of all, you get the quiet satisfaction of opening the closet door and not being attacked by a collapsing mountain of coats. That, in the world of home improvement, is a beautiful thing.
SEO Tags
Note: This HTML includes only the body content for easy copying and publishing.