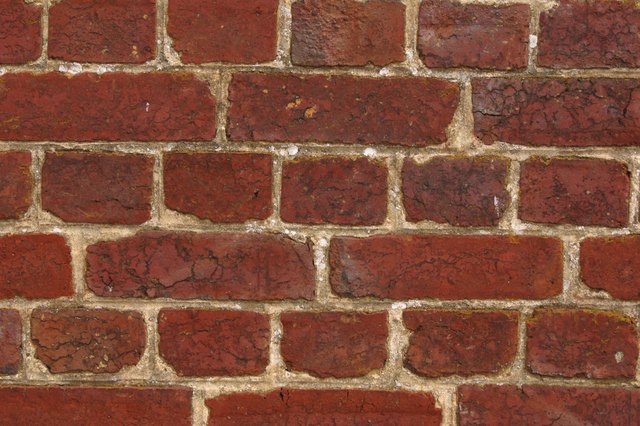
If you have a cinder block wall in your basement, garage, patio, or foundation, you already know the vibe. It says, “I am practical,” but it also says, “I was designed by a parking garage with feelings.” The good news is that you can absolutely cover cinder blocks with fake brick and end up with a wall that looks warm, textured, and intentional instead of cold, gray, and mildly judgmental.
The trick is not just sticking faux brick on the wall and hoping for the best. Cinder block is porous, sometimes dusty, sometimes damp, and occasionally painted by a previous owner who believed one coat of mystery beige could solve everything. To get a long-lasting result, you need the right faux brick product, a properly prepared surface, and an installation plan that respects gravity. Gravity, unfortunately, remains undefeated.
In this guide, you will learn how to cover cinder blocks with fake brick step by step, which materials work best, what mistakes to avoid, and how to make the finished wall look convincing rather than “DIY in the dark.”
What Counts as “Fake Brick”?
Before you buy anything, it helps to define your options. “Fake brick” is a casual phrase, but in the real world it usually means one of these materials:
1. Faux brick panels
These are often made from polyurethane, PVC, composite, or similar lightweight materials. They are designed to mimic the look of brick and usually install faster than individual pieces. Many interlock or overlap to hide seams, which makes them especially appealing for large walls.
2. Thin brick veneer panels
These are made from real brick sliced into thin pieces. They are not technically “fake,” but many homeowners group them into the same category because they give the brick look without the weight and depth of full masonry. They often require mortar or adhesive and more finish work.
3. Embossed wall paneling
This is usually the most budget-friendly option for interior spaces. Some versions look surprisingly good from a few feet away. Others look like brick’s distant cousin who tells dramatic stories at family reunions. Read reviews, order samples if possible, and do not trust product photos alone.
For cinder block walls, faux brick panels are usually the easiest route if you want speed, low mess, and a manageable DIY project. Thin brick veneer can look more realistic, but it generally requires more labor and a little more patience.
Where Faux Brick Over Cinder Block Works Best
You can use faux brick on many cinder block surfaces, but not every product belongs in every location. A basement accent wall is different from an exterior foundation wall, and a dry covered porch is very different from a splash-prone retaining wall.
Fake brick works especially well on:
- Basement walls
- Garage walls
- Foundation coverings above grade
- Outdoor kitchen surrounds that do not get dangerously hot
- Accent walls in utility rooms, workshops, or home bars
- Covered patios and screened porches
It is a poor choice for areas with persistent water intrusion, below-water applications, or any surface that stays wet for long periods. If your cinder block wall leaks, sweats excessively, or shows active efflorescence, solve the moisture problem first. Faux brick is a makeover, not a magical therapist for troubled masonry.
How to Choose the Right Faux Brick Product
When shopping, ignore the siren song of “pretty enough” and focus on performance. The best faux brick for cinder block depends on whether the wall is indoors or outdoors, how much moisture it sees, and how realistic you want the result to look.
Choose a product rated for the exact location
Some faux brick panels are designed for interior use only. Those are not the panels you want on an exterior cinder block foundation just because they were on sale and looked cute. Exterior-rated products should be clearly labeled for outdoor installation and should have guidance for masonry or concrete substrates.
Look for a convincing texture and varied color
Real brick has variation. If every “brick” on the panel is the exact same red, your wall may end up looking like it was assembled by a printer. Slight color changes, surface texture, and shadow lines help a lot.
Check how seams are handled
Interlocking edges, corner pieces, and trim accessories can make or break the final appearance. A panel that looks amazing in a product shot can look painfully obvious once four seams line up like a highway map.
Read the installation instructions before buying
Yes, before. Not while standing in your driveway holding three boxes and a caulk gun. The instructions tell you whether the product can go directly over masonry, whether it needs adhesive, screws, or both, and how the corners and termination points should be finished.
Tools and Materials You May Need
- Faux brick panels or faux brick veneer
- Masonry-safe construction adhesive
- Masonry screws or concrete anchors
- Drill or impact driver
- Masonry bit
- Level or laser level
- Tape measure
- Chalk line
- Caulk gun
- Exterior-grade or color-matched caulk if needed
- Wire brush or stiff brush
- Cleaner or degreaser appropriate for masonry
- Patching compound for holes and cracks
- Saw or cutting tool recommended by the manufacturer
- Safety glasses, gloves, and dust protection
If you are using thin brick veneer instead of lightweight faux panels, your list may also include mortar, trowels, a grout bag, spacers, and joint tools.
Step-by-Step: How to Cover Cinder Blocks With Fake Brick
Step 1: Inspect the wall honestly
Take a good look at the cinder block wall. You are checking for cracks, missing mortar, loose paint, mold, chalky residue, active moisture, and anything else that says, “Please do not cover me until I calm down.” Small cosmetic flaws are fine. Structural movement, major cracks, or ongoing leaks are not.
If the wall is painted, sealed, or flaking, that can affect adhesion. Some products can still be installed with mechanical fasteners, but you do not want to trap a failing surface behind a decorative finish. Scrape loose material, repair damage, and make sure the wall is stable.
Step 2: Clean the cinder block thoroughly
Dust, cobwebs, grease, and loose debris are the enemies of good adhesion. Brush the wall well, vacuum if necessary, and wash it according to the needs of the space. In a basement or garage, this step is usually less glamorous than the “after” photos, but it matters more.
Let the wall dry completely. Adhesive and moisture have a complicated relationship, and it usually ends with disappointment.
Step 3: Repair holes, cracks, and uneven spots
Fill obvious holes and cracks with a masonry repair product or patching compound recommended for block. If the wall is wildly uneven, consider whether furring strips or another mounting approach would make more sense for your chosen faux brick product.
The goal is not to make the wall perfectly smooth. Cinder block will still be cinder block. You just want it sound enough for the panels or veneer to attach securely and sit flat where they are supposed to.
Step 4: Dry-fit and plan your layout
Lay out several panels on the floor first. This helps you see the pattern, locate repeating textures, and figure out how seams will land. If you have corners, windows, doors, or outlets, measure all of them now. Guessing later is how people end up inventing new curse words.
Try to avoid narrow slivers at the ends of rows. Shift the layout if needed so the wall looks balanced. On many faux brick panel systems, staggering seams creates a far more natural appearance.
Step 5: Mark a level reference line
Do not assume the floor, slab, or patio is level. It often is not. Use a level or laser level to snap a chalk line for the top or bottom of your first course, depending on the manufacturer’s instructions.
This one step is what keeps the finished wall from slowly drifting into a sad diagonal situation. Once the first row is straight, the rest of the job becomes dramatically easier.
Step 6: Install corners first when the product system calls for it
If your faux brick system includes corner pieces, install those first. Corners are the place where cheap-looking projects go to reveal themselves. A clean corner makes the entire wall look more professional. A messy corner makes even great material look like a rushed weekend experiment.
If your product does not have dedicated corner pieces, you may need to miter edges or use trim. Follow the manufacturer’s instructions closely here. Corners are not a good place for creative improvisation unless you genuinely know what you are doing.
Step 7: Apply adhesive the right way
Most faux brick panels for masonry use construction adhesive, and many use adhesive plus screws. Apply adhesive beads in the pattern recommended by the manufacturer, usually vertical or serpentine lines with extra attention near edges or interlocking tabs.
Do not apply random blobs like you are decorating a cupcake. Too little adhesive reduces bond strength. Too much creates squeeze-out, mess, and the emotional experience of scraping glue from fake grout lines for half an hour.
Step 8: Fasten panels to the cinder block
On cinder block, mechanical fastening is often part of the system, especially for exterior work. That usually means masonry screws driven into predrilled holes. Position the screws where they will be least visible, such as grout lines, recessed areas, or places that will be overlapped by the next panel.
Do not over-tighten. You want the panel secure, not crushed into a strange new shape.
Step 9: Continue row by row
Work methodically across the wall, checking level often. Keep seams staggered where possible and wipe away any excess adhesive before it cures. If the product has overlapping edges or interlocking lips, seat each piece fully before fastening.
Every few panels, step back and look at the wall from a distance. This is the easiest time to catch pattern repetition, crooked lines, or a seam that suddenly screams, “Hello, I am a panel.”
Step 10: Cut panels carefully around outlets, pipes, and edges
Measure twice, mark clearly, and use the cutting method recommended by the product manufacturer. Some faux brick materials cut with common woodworking tools, while others need more specialized blades or slower, cleaner passes.
Test-fit every cut piece before gluing it. The fake brick look is forgiving in texture, but not forgiving when a pipe opening looks like it was chewed by a beaver.
Step 11: Caulk, touch up, and finish the edges
Many faux brick systems rely on color-matched caulk, touch-up kits, or trim pieces to finish seams and transitions. This is where the wall shifts from “installed” to “convincing.” Fill visible gaps, touch up cut edges if the product allows it, and clean the face of the material according to the instructions.
If you are using thin brick veneer, this stage may include grouting or pointing the joints. Take your time. Good joint work is one of the biggest differences between “nice wall” and “wow, you did that yourself?”
Common Mistakes to Avoid
- Installing over a damp wall: moisture issues should be fixed first.
- Using interior-only panels outside: sunlight, temperature swings, and water exposure are not forgiving.
- Skipping the level line: this mistake becomes more obvious with every row.
- Ignoring corners: bad corners make the whole wall look fake.
- Trusting adhesive alone when screws are recommended: block walls need the fastening method specified for masonry.
- Failing to dry-fit: this leads to awkward seams and weird pattern repeats.
- Covering unstable paint or crumbling block: decorative finishes are not structural fixes.
Interior vs. Exterior Installation
Indoor cinder block walls are usually easier. You are dealing with fewer weather concerns, no freeze-thaw cycles, and less exposure to UV light. Exterior cinder block, on the other hand, demands more discipline. Use exterior-rated materials, weather-appropriate sealants if required, and fasteners designed for masonry. Pay close attention to top edges, termination points, and any place where water could sneak behind the finish.
If the project involves a fireplace surround, grill surround, or any heat-producing element, verify the product’s fire and heat limitations. Faux brick and “near flame” are not a relationship to guess your way through.
How Much Does It Cost?
Costs vary widely based on the product, wall size, location, and how finished you want the edges and corners to look. In general, faux brick panels are faster and often less labor-intensive than thin brick veneer. Thin brick can look more authentic, but it usually asks for more time, more tools, and more finish work.
Also budget for adhesives, fasteners, patch materials, caulk, trim, blades, and your inevitable extra 10 percent for miscuts and “I measured that somehow, but apparently not correctly” moments.
Is This a Good DIY Project?
Yes, for many homeowners it is. If your wall is in sound condition and you choose a product specifically intended for masonry or concrete, covering cinder blocks with fake brick is one of the more satisfying visual upgrades you can make. It can transform a basement wall from institutional to inviting, a porch wall from bare to finished, and a foundation from plain to polished.
The biggest difference between a fantastic result and a regrettable one is usually patience. The work itself is not mysterious. It just rewards planning, layout, careful cutting, and refusing to rush the first row.
Experience: What This Project Feels Like in Real Life
Here is the part many how-to articles skip: the lived experience of covering cinder blocks with fake brick is a little messy, weirdly satisfying, and surprisingly dramatic in the best way. The wall changes fast. That is one reason people love this project. A single afternoon of prep can feel like nothing much is happening, but once the first few courses go up, the space starts changing personality almost immediately.
A lot of DIYers say the biggest surprise is how much better the room feels, not just how much better it looks. A painted cinder block basement can still feel like a basement. Add a warm faux brick surface, though, and suddenly the space feels intentional. A storage zone starts looking like a lounge. A garage wall starts reading as workshop chic instead of “unfinished concrete cousin.” It is one of those rare projects where the before-and-after photos do not exaggerate very much.
Another common experience is realizing that prep work matters more than expected. People often go into the project excited about the panels and the finished look, then discover that cleaning the wall, checking for moisture, and snapping accurate level lines are what actually determine success. It is not thrilling work, but it saves the day. Many first-time installers say the project became much easier once they stopped trying to “eyeball it” and started treating the layout like the backbone of the whole job.
There is also usually one humbling moment involving a corner, an outlet, or a pipe. Almost everyone has a moment where a simple-looking cut turns into a ten-minute stare-down with a tape measure. That is normal. The best projects are rarely the ones with no mistakes; they are the ones where the installer notices the mistake early, fixes it calmly, and pretends later that it all went exactly according to plan.
People who install faux brick over cinder block outdoors often talk about curb appeal as the biggest payoff. A plain block foundation or barbecue surround can make the entire exterior feel unfinished. Once covered, the area tends to look integrated with the rest of the home. It stops looking like an afterthought and starts looking like a design choice. That is a huge win for a project that usually costs less and moves faster than full masonry.
Inside the home, the emotional effect is just as strong. Homeowners often describe feeling more motivated to finish the rest of the room once the wall is done. One upgrade sparks another. The faux brick goes up, then suddenly there is better lighting, a rug, shelves, maybe a bar cart, and before long the room has a social life.
The most useful real-world lesson is simple: slow down at the beginning so you can move faster later. Dry-fit more than you think you need to. Double-check the wall for moisture. Read the instructions all the way through. Buy the matching corners and trim if the product offers them. And do not judge the project too early. Faux brick often looks slightly awkward halfway through, then pulls together beautifully once the seams, edges, and finishing details are complete.
In other words, if your cinder block wall currently looks like it was designed by a committee of utility closets, this project can absolutely change the story. With the right product and a careful installation, fake brick can make a hard-working wall look polished, warm, and a lot more expensive than it really was. That is the kind of home improvement magic we can all get behind.
Note: Always follow the exact instructions for your specific faux brick product and confirm local code or fire-safety requirements when installing on exterior walls, foundations, fireplaces, or heat-exposed areas.