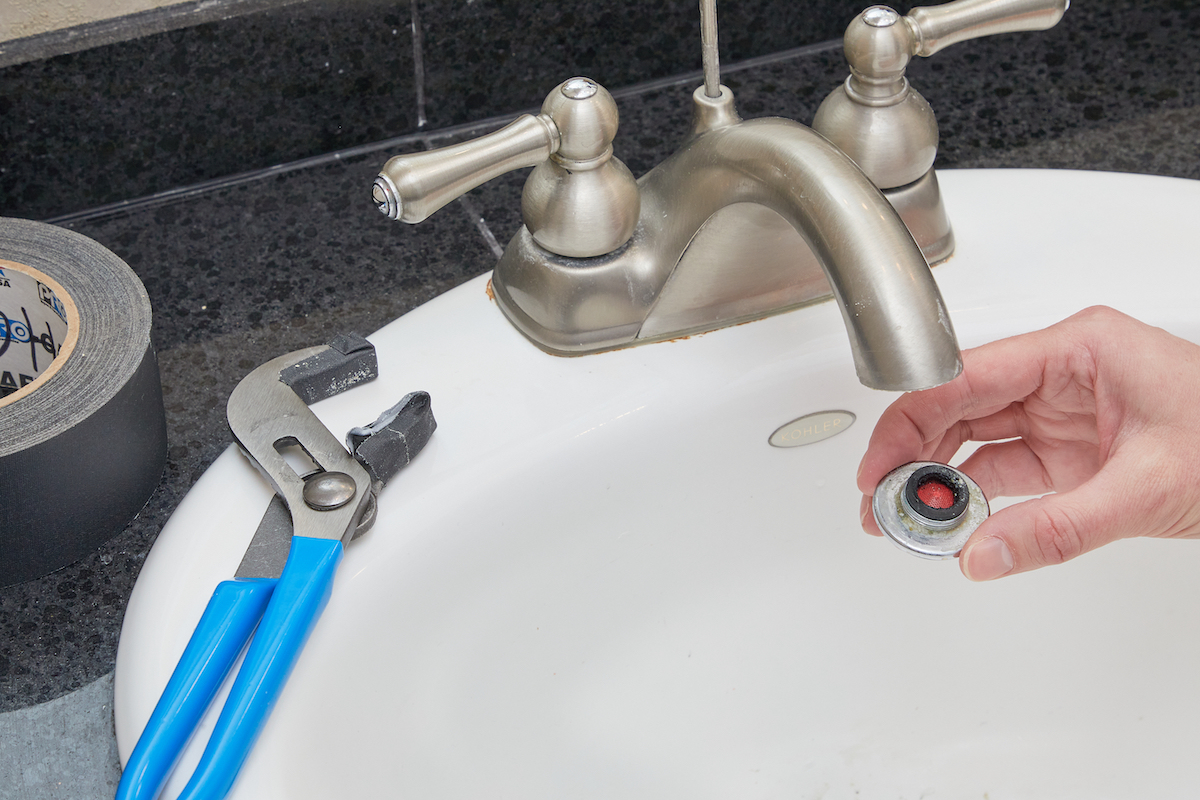
A faucet that suddenly produces a weak trickle, sideways spray, or miniature indoor fountain may not need an expensive repair. The culprit is often a small, overlooked part hiding at the end of the spout: the faucet aerator.
Minerals, sediment, rust flakes, and tiny bits of plumbing debris can collect inside the aerator’s screens. As those openings become blocked, water flow drops and the stream becomes uneven. Fortunately, cleaning a faucet aerator is one of the simplest plumbing maintenance jobs a homeowner can tackle. You need only a few basic tools, some distilled white vinegar, and enough patience not to send a tiny washer on a permanent vacation down the drain.
This guide explains how to remove, descale, clean, reassemble, and test a faucet aerator without damaging the fixture. It also covers hidden aerators, stubborn mineral buildup, flow testing, replacement decisions, and practical lessons that can make the job easier.
What Is a Faucet Aerator?
A faucet aerator is the small fitting attached to or recessed inside the tip of a faucet spout. Most models contain a housing, rubber washer, flow regulator, mesh screens, and a device that shapes the stream. By separating the water into many small streams and introducing air, the aerator helps create a smooth, controlled flow with less splashing.
The aerator may also limit the faucet’s flow rate. For example, WaterSense-labeled bathroom sink faucets and accessories use no more than 1.5 gallons per minute, compared with the traditional federal maximum of 2.2 gallons per minute. A lower rated aerator is not automatically clogged; it may simply be designed to conserve water while maintaining useful performance.
Why Aerators Become Clogged
Water carries more than water. Depending on the home and local supply, it may carry dissolved calcium and magnesium, harmless sediment, tiny rust particles, or debris released during plumbing repairs. The aerator catches many of these particles before they reach the sink.
That filtering action is helpful until the screen fills up. Hard-water scale can also form a crust around the openings. Over time, the faucet may develop one or more of these symptoms:
- Water flow is noticeably weaker at one faucet.
- The stream sprays sideways or splits into several directions.
- The faucet whistles, sputters, or sounds unusually noisy.
- Both hot and cold water have similarly reduced flow.
- White, chalky deposits appear around the end of the spout.
Confirm That the Aerator Is the Problem
Before dismantling anything, compare the affected faucet with other fixtures in the home. If only one sink has poor flow, a clogged aerator is a strong possibility. If every faucet and shower has weakened, the problem may involve the home’s main shutoff valve, pressure regulator, water supply, or plumbing system.
Test the hot and cold settings separately. When both are weak, check the aerator first. If only hot or only cold water is affected, the restriction may be in a supply valve, flexible supply line, filter screen, or faucet cartridge.
Measure the Flow Rate
A simple container test gives you a useful before-and-after comparison. Place a one-gallon container under the faucet, turn the water on fully, and record how many seconds it takes to fill.
Divide 60 by the number of seconds to estimate gallons per minute. If the container fills in 40 seconds, for example, the approximate flow is 1.5 gallons per minute. Check the number printed on the aerator before deciding the flow is too low. Many bathroom faucets are intentionally rated at 1.0, 1.2, or 1.5 gallons per minute.
Tools and Supplies You Will Need
- Distilled white vinegar
- Warm water
- A small bowl or cup
- An old soft-bristled toothbrush
- A clean towel or microfiber cloth
- Adjustable pliers or an adjustable wrench, if necessary
- Masking tape or a rubber jar opener
- A manufacturer-specific aerator key for a recessed model
- A toothpick or plastic pick for stubborn screen openings
- Your phone camera for recording the order of the parts
Avoid steel wool, abrasive scouring pads, stiff wire brushes, and harsh household cleaners unless the faucet manufacturer specifically approves them. These products can scratch polished metal, discolor specialty finishes, or damage plastic components.
How to Clean a Faucet Aerator Step by Step
Step 1: Turn Off the Faucet and Cover the Drain
Make sure the faucet handle is completely off. For an ordinary spout aerator, you generally do not need to close the shutoff valves below the sink. Place a towel or drain stopper over the drain before removing anything.
This small precaution prevents the washer, screen, or flow regulator from disappearing into the plumbing. Faucet aerator parts are exceptionally talented at bouncing once and vanishing forever.
Step 2: Identify the Type of Aerator
Standard aerators have a visible round housing at the end of the spout. They normally unscrew by hand. A recessed or “cache” aerator sits inside the spout and may appear as a smooth opening with no obvious gripping surface. This type usually requires a small plastic or metal key that fits into slots around the aerator.
Pull-down kitchen faucets and specialty stream breakers can use model-specific designs. Check the faucet manual or manufacturer’s support information before applying tools. The wrong tool can damage an aerator that would have surrendered peacefully to a five-dollar key.
Step 3: Try to Unscrew the Aerator by Hand
Dry the housing and your hands. Grip the aerator firmly and turn it counterclockwise while looking directly into the faucet outlet. A rubber jar opener can provide extra traction without scratching the finish.
If the aerator is stuck, wrap it with masking tape or a soft cloth before using pliers. Apply gentle, steady pressure rather than squeezing hard. Crushing the housing will transform a cleaning project into a shopping trip.
Step 4: Loosen a Mineral-Seized Aerator
Visible white deposits around the threads may be locking the housing in place. Soak a cloth in a 50/50 mixture of distilled white vinegar and warm water, wrap it around the faucet tip, and leave it for approximately 30 minutes. Then dry the housing and try again.
For an aerator that cannot be removed, fill a small plastic bag with enough vinegar solution to submerge the faucet tip. Secure the bag around the spout with a rubber band. Keep the solution away from finishes that the faucet manufacturer warns should not be exposed to vinegar for extended periods.
Step 5: Photograph and Disassemble the Parts
Once the aerator is removed, hold it over a towel rather than the open sink. Take a clear photo before separating the pieces. Aerator assemblies can contain several screens, a flow regulator, a mixing insert, and a washer that must return in the correct direction.
Lay each part on the towel in order. If the pieces are stuck together, work them loose gently with a toothpick or small flat tool. Do not bend the mesh or puncture the flow regulator.
Step 6: Rinse Away Loose Debris
Rinse the parts in a bowl of clean water. Holding them directly under another faucet also works, but a bowl reduces the chance of losing something. Brush away grains of sand, pipe scale, thread-sealing material, and other loose debris.
Inspect both sides of every screen. A screen that looks clean from the outlet side may be carrying a surprising collection of grit on the inlet side.
Step 7: Soak the Aerator in Vinegar Solution
Place the mineral-coated internal components in a mixture of equal parts distilled white vinegar and warm water. A 30- to 60-minute soak is usually enough for moderate scale. Heavier deposits may need several hours. Some manufacturer instructions allow overnight soaking for stubborn buildup.
Do not assume that every decorative housing, gasket, or specialty finish should soak overnight. Rubber parts can be cleaned separately with mild dish soap and water, while finished metal surfaces should follow the faucet manufacturer’s care instructions.
Vinegar is useful because its acidity helps dissolve mineral scale. It is a descaler, not a magical potion, so there is no advantage to combining it with every cleaner in the cabinet. Use one cleaning method at a time and rinse all components thoroughly.
Step 8: Scrub the Screens Gently
Remove the parts from the solution and scrub them with a soft toothbrush. Work from both directions to loosen deposits trapped in the mesh. Use a wooden toothpick or plastic pick to clear individual openings without enlarging or deforming them.
If the deposits remain rock-hard after soaking, repeat the process instead of attacking the screen with a metal tool. Damaged mesh can create an uneven stream even after the aerator is perfectly clean.
Step 9: Flush the Faucet Without the Aerator
Before reinstalling the aerator, place a bowl or towel beneath the open spout. Turn on the cold water slowly for several seconds, followed by the hot water. This brief flush can remove debris resting just behind the aerator.
Expect splashing because the aerator is not present to control the stream. Do not run the faucet at full blast unless your kitchen needs an unscheduled ceiling wash.
Step 10: Reassemble the Aerator
Use your photo to return the screens, flow regulator, insert, and washer to their original positions. The rubber washer usually sits closest to the faucet spout, where it seals the connection.
Check the washer for cracks, flattening, or brittleness. A worn washer can allow water to leak around the housing even when the aerator itself is clean.
Step 11: Reinstall Without Overtightening
Start the aerator threads by hand. Turn slowly and stop if the housing feels crooked or binds immediately. Cross-threading can damage the spout or aerator.
Tighten until the aerator is snug. Hand pressure is normally sufficient. If a small leak appears around the connection, protect the finish and add only a slight turn with the appropriate tool. More force is not more waterproof; sometimes it is simply more expensive.
Step 12: Test the Water Flow
Run both hot and cold water. The stream should be straight, smooth, and consistent. Look for leaks around the housing and repeat the timed container test if you measured the flow before cleaning.
A dramatic improvement confirms that the restriction was inside the aerator. If removing the aerator produces strong flow but reinstalling it causes another weak stream, the aerator may still be blocked, assembled incorrectly, or permanently damaged.
When Cleaning Does Not Restore Water Flow
A clean aerator cannot correct every plumbing problem. Continue troubleshooting when the stream remains weak.
Check the Aerator Assembly
Verify that the screens and flow regulator are facing the right direction. Make sure the rubber washer is seated flat and that no screen was accidentally doubled over. Temporarily remove the aerator again. Strong water flow from the bare spout points to an aerator problem rather than a restriction farther upstream.
Inspect the Shutoff Valves and Supply Lines
Confirm that both shutoff valves under the sink are fully open. A kinked flexible supply line can also reduce flow. When only one temperature is weak, concentrate on that side of the supply system.
Consider the Cartridge or Pull-Down Hose
Debris can collect in a faucet cartridge, spray head, check valve, or screen washer. Pull-down faucets may have filters at the hose connection or control box. Follow model-specific instructions before dismantling these components.
Know When to Call a Plumber
Professional diagnosis is appropriate when multiple fixtures lose pressure, pipes make new noises, water appears rusty throughout the house, shutoff valves will not operate, or flow remains poor after the aerator and faucet components have been checked. A whole-house pressure problem is not something an enthusiastic toothbrush can solve.
Should You Clean or Replace the Aerator?
Replacement makes sense when the housing is cracked, the mesh is torn, the plastic insert is distorted, the threads are stripped, or mineral deposits return almost immediately. Aerators are inexpensive, but compatibility matters.
Take the old aerator to a hardware or plumbing supply store, or identify the faucet model before ordering. Match the thread size, thread position, stream type, finish, and rated gallons per minute. A manufacturer-approved part is the safest option for an unusual or recessed faucet.
For a bathroom sink, a WaterSense-labeled replacement can reduce water use while maintaining independently verified performance. Do not remove the flow regulator simply to make the stream feel stronger. Doing so can waste water, increase splashing, and alter the faucet’s intended operation.
How Often Should You Clean a Faucet Aerator?
For many homes, cleaning each aerator once or twice a year is adequate. Homes with hard water, older galvanized plumbing, private wells, or frequent utility work may need quarterly maintenance.
Clean an aerator sooner when the spray pattern changes or after a plumbing repair. Opening and closing valves can loosen sediment inside the pipes, and that debris often makes the aerator its first stop.
To slow future buildup, wipe the faucet tip dry when cleaning the sink, remove visible scale before it thickens, and avoid abrasive products. Homes with severe hard-water scaling may benefit from having the water tested and discussing appropriate treatment with a qualified water professional.
Practical Experiences and Lessons From Cleaning Faucet Aerators
The most common experience with this repair is disbelief. A faucet can decline so gradually that nobody notices how weak it has become. Then the aerator is cleaned, the water returns in a smooth stream, and the sink suddenly feels as though it received a plumbing upgrade. In reality, the entire transformation may come from removing a teaspoon of gritty debris.
One representative bathroom scenario begins with a faucet that sprays left every morning. The homeowner wipes the nozzle, assumes the water pressure is poor, and lives with it for months. When the aerator is finally removed, one side of the screen is sealed with white mineral scale. A 45-minute vinegar soak and gentle brushing restore the stream. The lesson is simple: an uneven spray pattern is often a more useful warning than the apparent strength of the water.
Kitchen faucets create a different challenge. Pull-down spray heads may contain recessed aerators or screen washers that are not obvious from the outside. Grabbing the polished spray face with bare pliers can leave permanent marks. Homeowners who pause to identify the model and locate the correct removal key usually finish faster than those who begin with force. In faucet maintenance, research beats wrestling.
Another recurring surprise is how easily the internal parts become mixed up. An aerator may contain several nearly identical discs, yet reversing one component can produce a crooked stream or lower flow. Taking a phone photo before disassembly is one of those tiny habits that feels unnecessary until five wet plastic pieces are sitting on a towel and every one appears to be “probably the middle part.”
The drain-covering step also earns its reputation through experience. A rubber washer is small, dark, and almost perfectly designed to disappear into a sink drain. Covering the drain takes two seconds and can prevent a trip to the store. A white towel beneath the work area makes small black or gray components easier to see.
Soaking time requires judgment. Light scale often softens within 30 minutes, while a neglected aerator may need several rounds of soaking and brushing. Longer is not always better, especially when decorative finishes or rubber parts are involved. Separating the internal insert from the finished housing allows the scale-covered working parts to soak without unnecessarily exposing the visible surface.
Flushing the open spout is another practical step people frequently skip. An aerator may be cleaned perfectly, then clog again within seconds because debris remains inside the faucet. Running water briefly before reinstallation clears those loose particles. The bowl placed below the spout may reveal sand, rust flakes, or bits of sealing material that explain why the original blockage occurred.
Finally, not every “low-pressure” complaint is a pressure problem. Cleaning the aerator improves flow only when the restriction is at the outlet. When every fixture in the house is weak, repeatedly soaking one faucet will not help. Comparing fixtures, testing hot and cold water separately, and running the faucet without its aerator provide a logical diagnosis before parts are purchased.
The best overall experience comes from treating this as careful maintenance rather than emergency surgery: protect the finish, organize the parts, use a mild descaling solution, rinse thoroughly, and tighten gently. The faucet is not impressed by brute strength. It responds much better to a toothbrush and a little common sense.
Conclusion
Learning how to clean a faucet aerator can restore better water flow without replacing the faucet or scheduling a service call. Start by confirming that the problem affects only one fixture, protect the sink drain, remove the correct type of aerator, and preserve the order of its internal parts.
A soak in equal parts distilled white vinegar and warm water, followed by gentle brushing and thorough rinsing, will remove most mineral scale and trapped debris. Flush the open faucet before reassembly, reinstall the aerator by hand, and test both temperatures. When the screen, housing, washer, or threads are damaged, replacement is usually more reliable than another round of cleaning.
It is a small job with an unusually satisfying payoff: steadier flow, less splashing, and one less household annoyance glaring at you from across the sink.