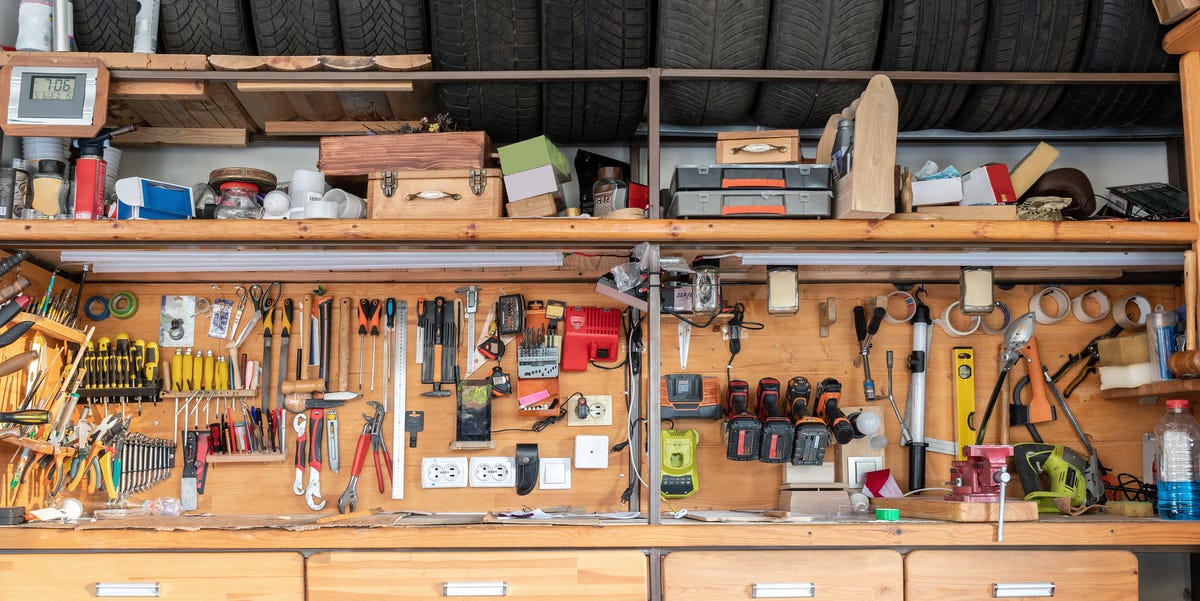
A garage without shelves has a mysterious ability to turn perfectly useful belongings into an archaeological dig. The cordless drill disappears behind the holiday decorations, the car-washing supplies migrate under a bicycle, and one unidentified cardboard box becomes the foundation of an unstable cardboard condominium.
Building your own garage shelves fixes that problem without forcing you to accept the dimensions, materials, or price of a prefabricated storage rack. A homemade shelving unit can be sized around your storage bins, designed to clear outlets and garage-door hardware, and reinforced where your heaviest equipment will sit.
This guide explains how to build an approximately 8-foot-wide, 24-inch-deep, four-tier shelving unit using 2×4 lumber and plywood. The design includes six vertical posts, intermediate shelf supports, and wall anchoring for better stability. You can shorten, deepen, or reconfigure it after measuring your garage and reviewing what you actually need to store.
Why Build DIY Garage Shelves?
Store-bought racks can be useful, especially when you need a quick solution. However, DIY garage shelving offers several important advantages:
- Custom dimensions: Build around windows, outlets, appliances, trash cans, and parking space.
- Efficient use of vertical space: Move seasonal items off the floor without stacking boxes into a wobbly monument.
- Flexible shelf spacing: Create tall openings for storage totes and shorter openings for tools, paint supplies, or automotive products.
- Repairable construction: Damaged plywood can be replaced without discarding the entire unit.
- Expandable design: Add another section, side panels, pegboard, hooks, or a small work surface later.
The biggest advantage is control. You decide where the supports go, how deep the shelves should be, and whether the unit needs to accommodate camping equipment, power tools, sports gear, or enough holiday decorations to illuminate a small airport.
Choose the Right Location
Before purchasing lumber, decide where the shelving unit will stand. Look for a long wall that does not interfere with vehicle doors, walking paths, windows, electrical panels, garage-door tracks, or the door leading into the house.
Open the garage door completely and inspect every moving component. Shelves placed too close to tracks, springs, or the opener can create a serious obstruction. Also check the proposed location with both vehicles parked inside. A shelf that fits beautifully in an empty garage may become an expensive door-denting machine once the family SUV returns.
Measure the Space and the Stored Items
Measure the available width, height, and depth in several places. Garage floors and walls are not always perfectly level, square, or straight. Use the smallest measurement when planning the final dimensions.
Next, measure your largest storage bins and equipment. Shelf spacing should be based on real objects rather than guesswork. Leave approximately 1 to 2 inches of clearance above frequently used containers so they can slide in and out without scraping the shelf above.
A depth of 16 inches works for smaller containers and hand tools, while a 24-inch shelf accommodates many large storage totes. Deeper shelves provide more capacity, but objects at the back become harder to reach. They also consume valuable parking and walking space.
Recommended Garage Shelf Dimensions
The following dimensions create a practical general-purpose shelving unit:
- Overall width: 96 inches
- Overall depth: 24 inches
- Overall height: Approximately 76 inches
- Number of shelves: Four
- Approximate shelf surface heights: 12, 32, 52, and 72 inches
These measurements are suggestions, not sacred woodworking commandments. Adjust the width to fit your wall and modify the shelf heights around your containers. For an extra-wide unit, add more vertical posts and cross supports rather than expecting a long board to perform heroic acts of engineering.
Materials and Tools
Suggested Materials
- Approximately 19 to 20 kiln-dried 2×4×8 boards
- Two 4×8-foot sheets of 3/4-inch plywood
- 3-inch structural or construction screws
- 1 1/4-inch or 1 5/8-inch wood screws for attaching plywood
- Appropriate structural screws for fastening the unit to wall studs
- Metal anti-tip brackets or angle brackets, if needed
- Composite shims for leveling
- Optional wood sealer, primer, or paint
- Optional labels and matching storage bins
Use straight lumber with minimal twisting, splitting, or large loose knots. A crooked board can turn a simple rectangular frame into a shape best described as “technically four-sided.”
For the shelf decks, plywood generally performs better than MDF in a garage. MDF is smooth and inexpensive, but it is heavy and vulnerable to moisture-related swelling. Particleboard has similar limitations. Plywood is easier to reinforce, handles fasteners well, and is better suited to changing garage conditions when properly protected.
Tools
- Tape measure
- Pencil or marking knife
- Carpenter’s square
- Four-foot level
- Stud finder
- Circular saw or miter saw
- Drill and impact driver
- Drill bits and countersink bit
- Clamps
- Sawhorses or a rigid foam cutting surface
- Safety glasses
- Hearing protection
- Dust mask or suitable respirator
Create the Cut List
A clear cut list reduces waste and prevents the classic DIY experience of discovering that the last board is two inches too short.
For Four 96-by-24-Inch Shelf Frames
- Eight 2×4 rails at 96 inches
- Twenty 2×4 crosspieces at 21 inches
Each frame uses two 96-inch rails and five 21-inch crosspieces. Because a 2×4 is approximately 1 1/2 inches thick, placing a 21-inch crosspiece between the front and back rails creates an overall depth of approximately 24 inches.
For the Vertical Posts
- Six 2×4 posts at 76 inches
The posts will stand at the front-left, rear-left, front-center, rear-center, front-right, and rear-right positions. The center posts reduce the unsupported length of the front and back rails.
For the Shelf Decks
- Four plywood panels at 24 by 96 inches
Each 4×8 sheet can be ripped into two 24-inch-wide panels. Ask the lumber department to make the long cuts when that service is available, especially if transporting full sheets or cutting them safely at home would be difficult.
Construction methods synthesized from current garage-shelving plans and connector guidance.
How to Build Your Own Garage Shelves Step by Step
Step 1: Empty and Prepare the Work Area
Move vehicles, bicycles, tools, and loose containers away from the construction zone. Sweep the floor and inspect the wall for water damage, mold, loose drywall, or other problems that should be corrected before installation.
Locate the wall studs and mark their centerlines with painter’s tape. Verify each stud from both directions with the stud finder rather than trusting the first beep. Check for outlets, plumbing, and wiring before drilling.
Step 2: Cut and Label the Lumber
Measure every piece, mark a square cut line, and cut the rails, crosspieces, and posts. Label the four shelf frames A through D and mark the corresponding components. Organizing the parts now saves time when sixteen similar-looking boards begin questioning your authority.
Support each board fully while cutting. When cutting plywood with a circular saw, place the sheet on rigid foam insulation or properly positioned supports so the offcut cannot pinch the blade.
Step 3: Assemble the Shelf Frames
Lay two 96-inch rails parallel on a flat surface. Position one 21-inch crosspiece at each end and install three additional crosspieces at approximately 24-inch intervals.
Check the frame with a carpenter’s square. Drill pilot holes where necessary and fasten the rails to the ends of the crosspieces using suitable 3-inch construction or structural screws. Use two screws at each connection and stagger them slightly to reduce splitting.
Repeat the process for the remaining three frames. Compare the completed frames by stacking or aligning them. Small differences are easier to correct now than after the unit is standing.
Step 4: Mark the Shelf Heights
Lay all six posts side by side with their bottom ends aligned. Use a square to transfer the shelf-height marks across every post. Mark the elevation consistently, indicating whether each line represents the top or bottom of the frame.
For this design, the finished shelf surfaces can sit at approximately 12, 32, 52, and 72 inches. Adjust the marks before assembly when your storage bins need different clearances.
Step 5: Attach the Bottom and Top Frames
This stage is easier with a helper. Stand the left, center, and right front posts on the floor. Position the lowest shelf frame against the height marks and clamp it in place. Check that the frame is level before fastening it to each post.
Attach the rear posts in the same way. Then install the top frame. With the bottom and top frames secured, the unit will begin to hold its shape, although it may still rack sideways until it is braced and anchored.
Do not rely on drywall screws for structural joints. They are designed primarily for fastening drywall and are not a substitute for appropriately rated construction or structural fasteners.
Step 6: Install the Middle Frames
Position the two remaining frames at their marked heights. Clamp, level, and fasten each frame to all six posts. Recheck the unit from the front and both sides as you work.
Measure the two main diagonals across the back. When the measurements are equal, the unit is square. A temporary diagonal board or strap can hold the shape while the shelf is anchored.
Step 7: Level the Unit
Place the shelving unit in its final position and check the front, sides, and individual shelf frames with a level. Garage floors commonly slope toward the door for drainage, so the posts may not all sit at the same elevation.
Use durable composite shims beneath the posts as needed. Avoid thin scraps that can crush, rot, or slide. After leveling, trim exposed shim material carefully.
Step 8: Anchor the Shelves to Wall Studs
Wall anchoring is one of the most important parts of the project. Drive appropriately sized structural fasteners through the upper rear rail or approved anti-tip brackets and into multiple wall studs. Account for the thickness of drywall and any gap between the unit and wall.
Do not attach a heavy shelving unit only to drywall. When the studs do not align conveniently with the frame, add a securely fastened wall ledger or use another attachment method suitable for the wall construction.
A freestanding design should include substantial diagonal bracing and a broad, stable footprint, but anchoring remains the preferred approach whenever the location permits it.
Step 9: Add the Plywood Decks
Place each 24-by-96-inch plywood panel on its frame. Confirm that it sits flat and flush with the edges. Fasten the panel to the rails and crosspieces using wood screws approximately every 8 to 12 inches around the perimeter and at the intermediate supports.
Predrill near panel edges to reduce splitting. Keep screw heads flush or slightly below the plywood surface so they do not catch on storage bins.
The plywood connects the frame components and helps resist racking, but it does not eliminate the need for proper supports and wall anchoring.
Step 10: Sand and Protect the Wood
Round sharp corners lightly and sand rough edges, splinters, and plywood cut lines. Remove the dust before applying a finish.
Unfinished shelves are acceptable in many dry garages, but primer, paint, or a clear wood sealer makes the surfaces easier to clean and offers additional protection from humidity and accidental spills. Seal exposed plywood edges carefully because they absorb moisture faster than the faces.
How to Make Garage Shelves Stronger
No responsible guide can promise a universal weight capacity based only on a photograph and a lumber list. Capacity changes with the lumber grade, fastener type, frame span, shelf depth, joint quality, wall attachment, moisture exposure, and how the load is distributed.
Use the following methods when you expect heavier storage:
- Add more vertical posts to shorten unsupported spans.
- Install additional crosspieces beneath each plywood deck.
- Keep the 2×4 rails standing on edge rather than laying them flat.
- Add plywood gussets or metal angle brackets at critical joints.
- Anchor the unit into several sound wall studs.
- Place dense items near posts and crosspieces instead of at the center of a long span.
- Store the heaviest items on the lowest shelf.
Watch for warning signs after loading the unit. Sagging plywood, widening joints, leaning posts, cracked lumber, loose anchors, and screws pulling from the wood all indicate that the shelves should be unloaded and reinforced.
Safety recommendations informed by OSHA woodworking guidance and CDC/NIOSH hearing and dust-control information.
Essential DIY Safety Tips
Wear eye protection when cutting, drilling, or driving fasteners. Use hearing protection around loud saws and impact drivers, and control sawdust with outdoor cutting, ventilation, or dust collection when practical. A suitable dust mask or respirator can reduce inhalation of airborne particles.
Keep guards installed and functioning on power tools. Clamp workpieces securely, maintain a balanced stance, and keep hands away from cutting paths. Disconnect power or remove the battery before changing blades or making adjustments.
Inspect boards for screws, nails, staples, and other embedded metal before cutting reclaimed lumber. Never support long material with one hand while attempting a creative one-handed saw maneuver with the other.
Garage storage also requires chemical awareness. Follow product labels and local requirements for fuels, propane cylinders, pesticides, fertilizers, paints, and other hazardous materials. Keep incompatible products separate and do not place combustible materials near heaters, flames, sparks, or other ignition sources.
Organize the Finished Garage Shelves
Building the rack creates storage capacity; organizing it determines whether that capacity remains useful.
Sort belongings into categories before loading the shelves. Common zones include automotive supplies, home-repair tools, gardening equipment, sports gear, cleaning products, emergency supplies, and seasonal decorations.
- Place frequently used items between waist and shoulder height.
- Keep heavy equipment low to reduce lifting and tipping hazards.
- Reserve the top shelf for lightweight, infrequently used belongings.
- Use clear or consistently sized bins to reduce wasted space.
- Label the front and at least one side of every closed container.
- Leave a small amount of open capacity for future storage.
Avoid packing every shelf to the ceiling on day one. Storage systems work best when objects can be removed without rearranging twelve other containers and questioning every purchasing decision made since 2017.
Organization guidance synthesized from garage-storage resources emphasizing vertical space, zones, bins, and clear floor areas.
Common Garage Shelving Mistakes
Building Before Measuring the Containers
A beautiful shelf with openings one inch shorter than your storage totes is simply a large wooden reminder to measure first. Arrange the intended containers on the floor and determine the necessary clearances before choosing shelf heights.
Using Too Few Supports
Long shelves can sag even when the frame initially appears strong. Add center posts and intermediate crosspieces during construction. Reinforcing the design now is easier than unloading it later.
Ignoring the Sloped Floor
Assembling the entire rack square and then placing it on a sloped floor can produce a visible lean. Level the unit in its final location before anchoring it.
Skipping Wall Anchors
A tall shelf can tip when someone pulls on it, climbs it, or places heavy objects near the front. Anchor the unit properly and teach children that shelving is not gym equipment.
Using the Wrong Fasteners
Choose screws intended for structural wood connections and long enough for the application. More screws do not automatically compensate for weak, brittle, undersized, or improperly installed fasteners.
Blocking Garage Equipment
Maintain access to electrical panels, outlets, shutoffs, doors, windows, and garage-door components. Do not create a shelving layout that requires dismantling half the garage during an emergency or routine repair.
Experience-Based Lessons From Building Garage Shelves
The first lesson many DIY builders learn is that the garage itself rarely cooperates. The floor slopes, the drywall bows, and the corner that appeared perfectly square turns out to have its own interpretation of geometry. This is why successful garage shelving projects are measured and leveled in their final location rather than assembled entirely from theoretical dimensions.
Another common experience involves lumber selection. It is tempting to grab the first stack of inexpensive 2×4s and hurry home. Once assembly begins, however, twisted boards fight the clamps, lift corners off the floor, and make identical shelf frames look unrelated. Spending a few extra minutes sighting down each board at the store usually saves considerably more time during construction. Straight framing lumber is not glamorous, but neither is wrestling an eight-foot wooden propeller.
Builders also discover that storage capacity is not the same as storage convenience. A 30-inch-deep shelf sounds generous until a small tool disappears behind two rows of containers. For most household garages, shallower shelves with labeled bins are easier to use than cavernous shelves where the back row becomes a retirement community for forgotten belongings.
Shelf spacing creates a similar surprise. Evenly spaced shelves look orderly in a drawing, but real garage items are not evenly sized. One tote may be 17 inches tall, a shop vacuum may need nearly 30 inches, and a toolbox may require only 10. The more practical approach is to inventory the largest objects and vary the openings accordingly. Symmetry is pleasant; being able to store the lawn spreader is better.
The assembly sequence matters as well. Installing plywood before the frame is positioned can make each section unnecessarily heavy. Attaching every screw before checking for square can lock a mistake in place. Experienced builders generally use clamps, install a few fasteners, verify the diagonals, and then complete the connections. That extra check may take two minutes and prevent an hour of disassembly.
Wall anchoring is another step that often feels optional until the empty rack begins to sway. Once loaded, the same movement becomes much more serious. Fastening the upper portion into multiple studs transforms the unit from tall furniture into a stable storage system. Builders working against masonry or unusual wall assemblies should use hardware designed for that substrate rather than improvising with whatever anchors happen to be in the junk drawer.
Loading the shelves teaches the final major lesson: weight should be treated strategically. A shelf can appear perfectly flat under holiday wreaths and sag noticeably after receiving several toolboxes, automotive parts, and leftover tile. Heavy objects belong low and close to supports. Bulky but lightweight items belong higher. Concentrated loads should not be dropped into the middle of a long span simply because an empty spot is available.
The most satisfying part comes after the labels are applied and the floor is visible again. Tools stop vanishing, seasonal boxes have assigned homes, and parking no longer requires navigating an obstacle course. A well-built garage shelving unit does more than hold belongings; it makes the entire garage easier to clean, safer to walk through, and far less likely to trigger the question, “Why do we own three leaf blowers?”
Conclusion
Learning how to build your own garage shelves is an approachable project for homeowners with basic carpentry tools and careful planning. The essential principles are straightforward: measure the space and stored items, use sound materials, shorten long spans with intermediate supports, keep the frame square and level, and anchor the finished unit securely to wall studs.
The 8-foot design in this guide provides a useful starting point, but customization is the reason to build rather than buy. Change the width, shelf spacing, and depth to match your garage. Add pegboard, hooks, cabinets, or another shelving bay as your storage needs evolve.
Note: This article provides general DIY guidance rather than an engineered load rating. Structural capacity depends on materials, spans, fasteners, connections, installation quality, wall construction, and load placement. Consult a qualified professional when storing exceptionally heavy equipment or when the supporting structure is uncertain.