Concrete has a funny way of telling the truth. If your form is crooked, bowed, weak, or tilted in the wrong direction, the finished slab will proudly preserve every mistake like a permanent autograph. That is why learning how to build a straight form for concrete is one of the most important skills in any small concrete project, whether you are pouring a patio, sidewalk, shed pad, driveway extension, garden edging, or a simple utility slab.
A concrete form is the temporary frame that holds wet concrete in place until it hardens. Think of it as the mold for your slab. A good form controls the slab’s shape, thickness, edges, slope, and final appearance. A bad form? Well, that gives you a patio that looks like it lost an argument with gravity.
The good news is that building straight concrete forms is not complicated. It takes careful measuring, solid lumber, tight string lines, enough stakes, and a little patience before the concrete truckor your wheelbarrow armyarrives. The six steps below explain how to set up a straight, strong, and accurate form so your concrete project starts with confidence instead of chaos.
Why Straight Concrete Forms Matter
Before grabbing a hammer, screws, and your favorite “this should only take an hour” optimism, it helps to understand why formwork matters so much. Wet concrete is heavy. It pushes outward against the form boards, especially on longer runs. If the boards are not braced well, they can bulge, shift, or separate at the corners. Once concrete begins setting, fixing those mistakes becomes about as fun as combing peanut butter out of carpet.
Straight forms help create clean edges, consistent slab thickness, proper drainage slope, and a more professional finish. They also make screeding easier because the top edges of the form boards guide the straightedge as you level the concrete. When the forms are aligned properly, the pour goes faster, the finish looks better, and you spend less time muttering at lumber.
Tools and Materials You’ll Need
You do not need a contractor’s entire trailer to build a straight concrete form, but you do need the right basics. For most residential flatwork, common materials include straight 2×4, 2×6, or 2×8 lumber, depending on slab thickness and site conditions. You will also need wood stakes, deck screws or duplex nails, string line, a tape measure, a level or laser level, a framing square, a hammer or drill driver, a shovel, a rake, a tamper or plate compactor, and a long straight board for checking alignment.
For safety, wear waterproof gloves, eye protection, long sleeves, sturdy boots, and a dust mask when handling dry concrete mix or cutting dusty materials. Wet concrete can irritate skin and eyes, so do not treat it like mud pie material. It is useful, strong, and deeply unfriendly to bare skin.
How to Build a Straight Form for Concrete: 6 Steps
Step 1: Plan the Layout and Mark the Perimeter
Start by deciding exactly where the slab will go. Measure the length and width carefully, then mark the corners with stakes. For a simple square or rectangular slab, run string lines between the corner stakes to outline the project. The strings represent the outside edges of your concrete form, so take time to get them right.
To check whether your layout is square, use the 3-4-5 method or measure diagonally from corner to corner. If both diagonal measurements are equal, the layout is square. If one diagonal is longer, adjust the corner stakes until the measurements match. This step may feel fussy, but it is far easier to adjust string than hardened concrete.
Also plan for drainage. Outdoor concrete should usually slope slightly away from buildings so water does not pool against foundations, steps, doors, or walls. A common guideline for patios and walkways is about 1/8 inch to 1/4 inch of fall per foot, depending on the project and local requirements. For example, a 10-foot patio might drop about 1-1/4 inches to 2-1/2 inches from the house side to the yard side. The exact slope depends on use, climate, and code, but the important point is simple: water needs somewhere sensible to go.
Step 2: Prepare the Ground and Base
Once the layout is marked, remove grass, roots, loose soil, and debris from the slab area. Excavate deep enough to allow for the planned concrete thickness and the gravel base. For many patios, walkways, and light-duty slabs, 4 inches of concrete over a compacted gravel base is common. If the slab will support heavier loads, such as vehicles or equipment, the thickness and reinforcement requirements may change.
The ground under concrete should be firm, even, and well-drained. Soft spots can settle later and create cracks. If you find loose soil, dig it out and replace it with compactable gravel. Spread crushed stone or gravel evenly, then compact it thoroughly with a hand tamper or plate compactor. A stable base is not glamorous, but it is the quiet hero of a long-lasting slab.
Do not pour concrete directly over muddy, saturated soil. Damp soil is manageable; standing water is not. If the site looks like a duck would enjoy it, wait for better conditions or improve drainage before building the form.
Step 3: Select Straight Form Boards
The secret to a straight concrete form begins at the lumber pile. Choose boards that are straight, flat, and free from major twists, bows, splits, or loose knots. Hold each board at eye level and look down its length. If it curves like a banana, leave it for someone building a pirate ship.
For a 4-inch slab, 2×4 lumber is commonly used. For thicker slabs or longer unsupported runs, 2×6 or larger boards may be better. If the slab edge will be exposed above ground, use boards tall enough to contain the full concrete depth and provide a clean screed surface. The top edge of the form board should be smooth and straight because it will help guide your screed when you level the concrete.
If you need to join boards for a longer run, splice them carefully. Place a short backing board, called a cleat, across the joint on the outside of the form and fasten both form boards to it. Support the splice with a stake so it cannot flex outward under pressure. Weak splices are a common cause of wavy slab edges.
Step 4: Set the First Form Board Straight and Level
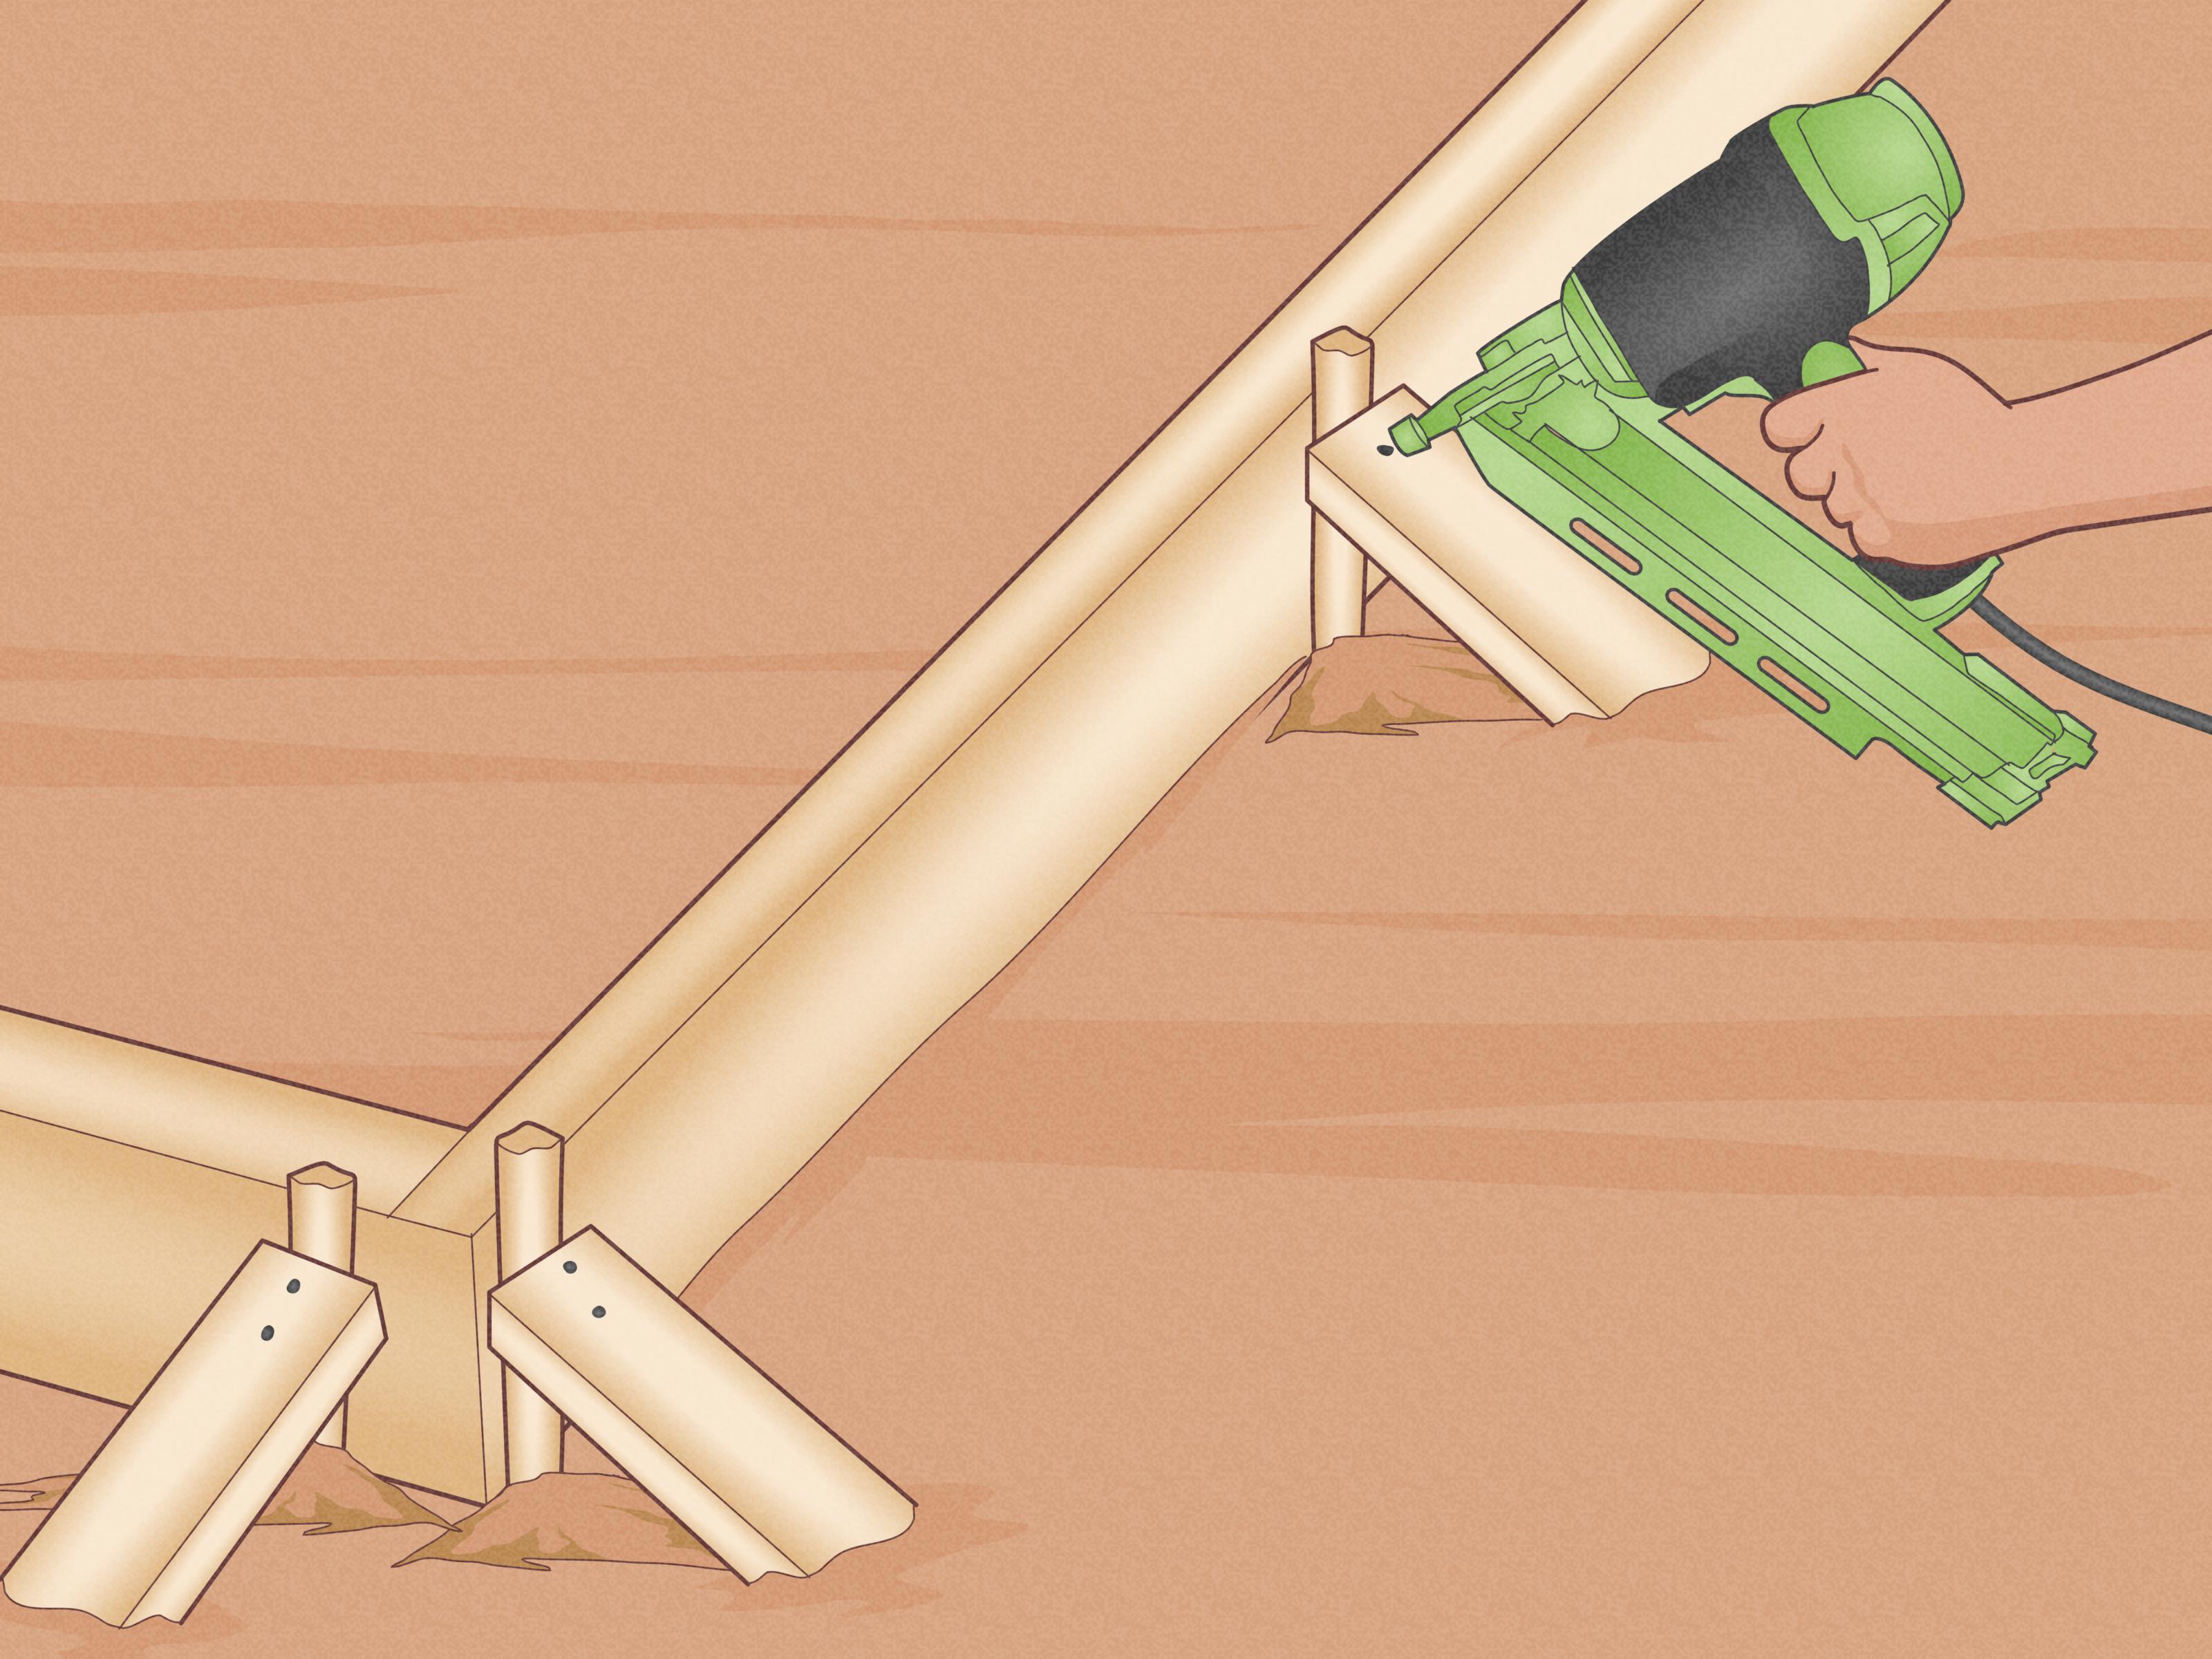
Begin with the most important long side of the slab, usually the side next to a house, walkway, fence, or other fixed reference. Place the first form board along the string line, keeping it aligned with the planned edge. Drive a stake at each end, then fasten the board to the stakes with screws or nails. Screws are especially helpful because they allow easy adjustments if the board needs to move slightly.
Check the height of the board with a level, laser level, or line level. If the slab needs slope, set the form board to the planned elevation rather than perfectly level across the entire project. The goal is not always “level”; the goal is “accurate.” A patio that is perfectly level may hold water like a birdbath, and unless you are building a spa for robins, that is not ideal.
Use the string line as your visual guide, but do not let the board push the string out of position. The board should sit just inside the string or lightly touch it without moving it. Sight down the top edge of the board and adjust until it looks straight. Small corrections now prevent big visual problems later.
Step 5: Install the Remaining Boards and Square the Corners
After the first board is secure, install the opposite side and then the end boards. Fasten the corners tightly so wet concrete cannot leak through gaps. For square or rectangular forms, recheck the diagonal measurements before final bracing. Equal diagonals mean your form is square; unequal diagonals mean it is time to loosen, adjust, and remeasure.
Use a framing square at the corners as an extra check. The form should match your planned dimensions, but it should also look right when viewed from several angles. Pull a tape measure across the width at multiple points. A slab that is 8 feet wide at one end and 8 feet 3 inches at the other may technically still hold concrete, but it will look like it is trying to escape.
For longer forms, run a string line along the outside or top edge of each board. Adjust the boards until the entire run stays straight. The human eye is excellent at spotting waves in a concrete edge after the pour, but oddly less enthusiastic about fixing them beforehand. Trust the string line.
Step 6: Stake, Brace, and Double-Check Everything
Stakes keep the form boards from moving when concrete is placed, shoveled, vibrated, and screeded. Drive stakes along the outside of the form every 2 to 3 feet for typical small slabs. Use closer spacing for tall forms, loose soil, thicker pours, or long sides that may bow. The stakes should be driven firmly into the ground and fastened securely to the form boards.
Cut the tops of stakes below the top edge of the form so they do not interfere with screeding. If any board tries to bow outward, add another stake or diagonal brace. Corners and board splices deserve extra attention because they are common weak points.
Before pouring, walk the entire form and check five things: straightness, square corners, correct elevation, secure stakes, and a compacted base. Look for gaps where concrete could escape. Dampen the base and wood forms lightly before the pour, but do not leave puddles. If the form shifts when you push it with your boot, it is not ready for concrete.
Common Mistakes to Avoid
Using Crooked Lumber
No amount of wishful thinking will make a warped board produce a straight concrete edge. Start with straight lumber and save yourself the drama.
Spacing Stakes Too Far Apart
Wet concrete is heavy enough to bow weak forms outward. When in doubt, add more stakes. Stakes are cheaper than repairing a lumpy slab edge.
Forgetting Drainage Slope
A beautiful slab that traps water is still a problem. Plan the slope before setting the form boards, especially near buildings.
Skipping the Gravel Base
A compacted gravel base improves drainage and support. Pouring directly over loose soil can lead to settling and cracking.
Not Rechecking Measurements
Forms can move while you work. Check length, width, diagonals, and elevation several times. Measuring twice is cheaper than jackhammering once.
Example: Building a Straight Form for a 10-by-12-Foot Patio
Imagine you are building a 10-by-12-foot concrete patio behind a house. You mark the four corners with stakes and run string around the perimeter. Because the patio must drain away from the house, you set the house-side form higher and the yard-side form lower by about 1-1/2 to 2 inches, depending on your chosen slope.
You excavate for 4 inches of concrete and several inches of compacted gravel. Then you install a straight 2×6 board along the house side, secure it to stakes, and use it as the reference line. Next, you set the opposite board, checking the width at both ends and in the middle. You install the two shorter end boards, measure diagonally, and adjust until both diagonals match.
Finally, you add stakes every few feet, brace the corners, tamp the base again, and sight down every board. When the concrete is placed, the screed rides cleanly across the top edges of the forms, giving you an even surface and straight patio edges. That is the quiet beauty of good prep: the pour itself becomes easier.
When Can You Remove Concrete Forms?
For many small slabs, forms can often be removed after 24 to 48 hours, once the concrete has gained enough strength to hold its shape. However, timing depends on temperature, concrete mix, slab size, weather, and project requirements. Cold weather slows curing, while hot, dry, or windy weather can cause moisture to leave the slab too quickly.
Remove forms gently. Do not pry aggressively against fresh concrete edges. After stripping the forms, continue curing the slab by keeping it damp or covered as appropriate. Concrete does not simply “dry”; it cures through hydration. Maintaining moisture during early curing helps the slab develop better strength and durability.
Practical Experience: What Really Helps When Building Straight Concrete Forms
Experience has a way of turning simple instructions into practical habits. Anyone can read “set the form board straight,” but on a real job site, straightness has enemies: uneven ground, bowed lumber, loose stakes, rushed measuring, and that one corner that keeps moving every time you tighten the opposite side. The best approach is to slow down during layout and treat the forms as the project, not as the boring thing before the project.
One of the most useful habits is to choose lumber before doing anything else. Do not grab the first boards on the pile. Sight down each piece and reject anything with a strong crown, twist, or split end. If a board is only slightly crowned, place the crown outward and stake it well, but for visible slab edges, straighter is always better. A few extra minutes at the lumber rack can save hours of frustration later.
Another lesson: string lines are your best friend, but only if you respect them. Pull the string tight, keep it clear of the boards, and use it as a reference instead of a decoration. Many beginners set the string, then accidentally bump it with lumber, stakes, boots, or a tape measure. Once the string moves, every measurement based on it becomes suspicious. Recheck the line often, especially before fastening the final stakes.
Screws are also worth using. Nails work, but screws make adjustments easier. If one section of form board needs to move 1/8 inch, backing out a screw and resetting the board is much cleaner than wrestling a nail while trying not to destroy your layout. For small DIY concrete slabs, exterior deck screws are a friendly upgrade.
Do not underestimate the pressure of wet concrete. A form that looks sturdy while empty can bow once concrete is placed and pushed around. This is especially true on long sides and deeper slabs. Add stakes generously. Place extra support at corners and splices. If the soil is soft, drive longer stakes or brace the forms diagonally. Your future self, holding a screed board and sweating through a pour, will be grateful.
It also helps to do a “dry run” before the concrete arrives. Walk around the form with your tools. Make sure stakes are not sticking above the screed path. Confirm that wheelbarrows can reach the pour area. Check whether the form boards are high enough, whether the base is compacted, and whether water has somewhere to drain. Concrete work rewards boring preparation. The less exciting your setup looks before the pour, the better the finished slab usually looks afterward.
Finally, remember that perfection and practicality are not the same thing. A backyard utility pad does not need museum-level formwork, but it does need straight edges, stable support, and correct slope. Focus on the details that affect performance: square corners, compacted base, tight boards, strong bracing, and smart drainage. Concrete is permanent enough to deserve patience, but not so mysterious that you need to fear it.
Conclusion
Building a straight form for concrete is mostly about preparation, accuracy, and restraint. Measure carefully, use straight boards, square the corners, brace the form securely, and check the slope before the pour begins. These steps may not be flashy, but they are what separate a clean, professional-looking concrete slab from one that looks like it was framed during an earthquake.
Whether you are pouring a small sidewalk, patio, shed pad, or repair section, the form controls the final result. Spend the extra time on layout and bracing, and the concrete will behave much better when it counts. In concrete work, straight forms are not just a nice detail; they are the foundation of the whole project.
Note: For structural slabs, driveways, foundations, or projects tied to buildings, always check local building codes and consider consulting a qualified concrete professional.