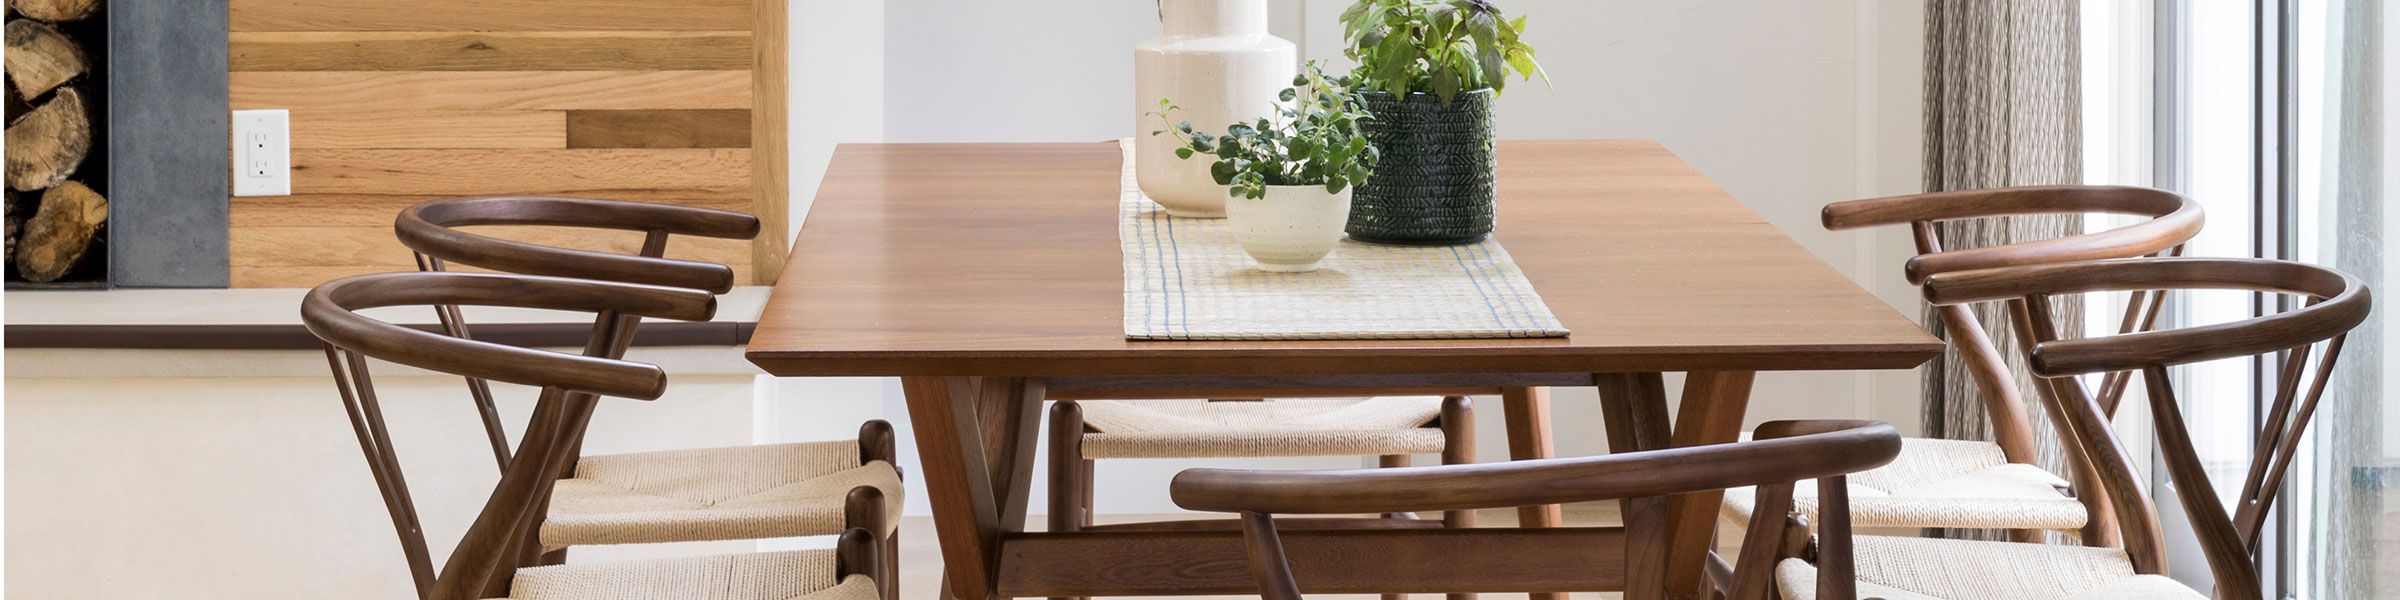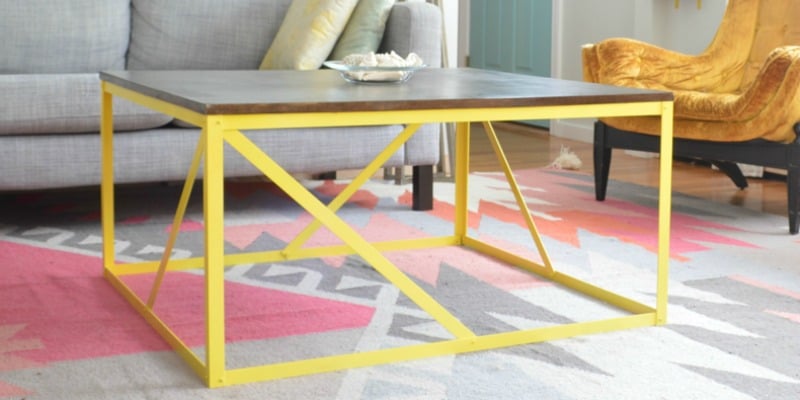
A modern industrial coffee table has a useful design secret: the materials do most of the decorating. Warm wood brings grain, texture, and character. Dark metal adds clean lines and visual strength. Together, they create a piece that looks custom-made without requiring complicated furniture joineryor a workshop large enough to have its own ZIP code.
This guide explains how to build a modern industrial wood and metal coffee table using a solid-wood top and a pre-made steel base or bolt-on metal legs. No welding is required. The example table measures approximately 48 inches long, 24 inches wide, and 17 inches high, making it suitable for many standard living-room sofas.
Why Wood and Metal Work So Well Together
Industrial furniture is built around contrast. Wood is warm, organic, and visually irregular. Metal is cool, straight, and precise. A walnut tabletop can feel elegant rather than formal when placed on a simple black steel frame. Affordable pine can look more intentional when paired with streamlined metal legs instead of a bulky wooden base.
The combination is also flexible. Rectangular steel legs create a modern architectural look. Hairpin legs make the table appear lighter and add a midcentury influence. A thick reclaimed top pushes the design toward rustic industrial, while a smooth oak panel and slim metal base produce a cleaner contemporary result. American woodworking and DIY publications frequently combine solid wood, reclaimed lumber, hairpin legs, cast-iron supports, or pipe-style bases in approachable table projects.
Plan the Coffee Table Dimensions
Measure your sofa and living room before buying materials. Most coffee tables are approximately 16 to 18 inches high, although the most comfortable height depends on the sofa cushions. A table that is level with the cushions or slightly lower is generally easy to use.
For balanced proportions, a coffee table is commonly around one-half to two-thirds the length of the sofa. Leaving approximately 18 inches between the table and seating usually provides enough room to move while keeping drinks, books, and remotes within reach.
Recommended Finished Size
- Length: 48 inches
- Width: 22 to 24 inches
- Finished height: Approximately 17 inches
- Top thickness: 1 to 1 1/2 inches
Measure the actual wood thickness before ordering the base. If the tabletop is 1 1/4 inches thick, a 15 3/4-inch base will produce a finished height of approximately 17 inches. Trust the tape measure rather than assuming the board is exactly as thick as its product name suggests.
Mark the proposed tabletop dimensions on the floor with painter’s tape. Walk around the outline and check nearby doors, chairs, recliners, drawers, and traffic paths. This quick mockup can prevent you from building a beautiful table that everyone must navigate like a piece of airport luggage.
Materials and Tools
Recommended Materials
- One 48-by-24-inch solid-wood or edge-glued panel, 1 to 1 1/2 inches thick
- Two pre-made steel U-legs, trapezoid legs, or one rectangular steel base
- Manufacturer-recommended wood screws and washers
- Wood filler for small defects, if needed
- 120-, 180-, and 220-grit sandpaper
- Wood stain, optional
- A durable clear protective finish
- Metal primer and metal-rated paint if the base is unfinished
- Matching felt pads or adjustable feet
Helpful Tools
- Tape measure, pencil, and combination square
- Clamps
- Drill/driver with an adjustable clutch
- Random-orbit sander or sanding block
- Vacuum and clean lint-free cloths
- A saw only when the panel is not already cut to size
A pre-cut, edge-glued wood panel is the simplest choice for a first build. Many lumber stores and woodworking shops can cut or flatten material for you. That reduces dust, speeds up the project, and lowers the risk of accidentally creating a trendy trapezoid when you originally wanted a rectangle.
Choose the Best Wood for the Tabletop
Pine
Pine is affordable, widely available, and easy to work. Knots and color variations suit rustic industrial interiors, but the wood dents more easily than hardwood. It can also absorb stain unevenly, so test the color and consider using a compatible pre-stain conditioner.
Oak
Oak offers visible grain and better resistance to everyday wear. White oak has a relatively calm, contemporary appearance, while red oak may show warmer pink and amber undertones. Oak pairs especially well with matte-black, charcoal, or dark bronze metal.
Walnut
Walnut is a premium choice with naturally rich brown color. It rarely needs a dark stain; a clear satin finish can provide enough depth and protection. Walnut costs more, but the grain supplies much of the table’s visual impact before assembly begins.
Reclaimed or Live-Edge Wood
Reclaimed boards and live-edge slabs create an immediately distinctive table. Inspect them for twisting, loose bark, embedded hardware, excessive cracks, moisture, and insect damage. A slab should be properly dried and reasonably flat before it becomes a tabletop. Professional flattening may be worthwhile when the alternative is sanding one raised corner for three hours while reconsidering your hobbies.
How to Build a Modern Industrial Coffee Table
Step 1: Inspect and Size the Wood
Examine both sides of the panel and choose the better-looking face for the top. Check for dents, scratches, glue residue, chipped edges, and noticeable warping. If the panel is larger than the planned dimensions, have it cut square to approximately 48 by 24 inches.
If you are joining individual boards, arrange them before assembly so the colors and grain patterns flow naturally. An edge-glued panel avoids this extra work and is usually the more convenient option for a beginner.
Step 2: Soften the Edges
A perfectly sharp tabletop edge may look crisp, but it can splinter and feel uncomfortable. Lightly ease the edges with sandpaper. Small-radius corners are also useful in compact rooms because coffee tables have a remarkable talent for locating human shins.
Step 3: Sand the Tabletop
Begin around 120 grit if the panel is already flat and reasonably smooth. Continue with 180 grit and finish near 220 grit. Sand with the grain, especially when working by hand. Do not skip directly from coarse paper to very fine paper because deeper scratches may remain beneath the polished surface.
Vacuum the top, underside, and edges between stages. Inspect the wood under light coming from a low angle; this makes scratches, dents, and leftover glue easier to see. Wood-finishing guidance emphasizes progressive sanding, complete dust removal, and testing the selected stain or finish on matching scrap before treating the visible surface.
Step 4: Test the Stain and Finish
Use an offcut or a hidden section of the underside to test the entire finishing process. Apply the same sanding preparation, stain, and clear coat that you plan to use on the visible top.
Stain samples can look dramatically different on different wood species. A color described as “warm espresso” may become “historic mud puddle” on soft pine. Testing also reveals whether the wood will absorb color unevenly.
Reliable industrial-style combinations include:
- Natural walnut with a satin clear finish
- White oak with a clear matte or satin finish
- Pine with a medium-walnut stain and protective topcoat
- Reclaimed wood with a low-sheen clear finish
Step 5: Apply the Wood Finish
Apply the stain and protective coating according to the product label. Observe all ventilation, temperature, drying, recoating, and curing requirements. Finish the top, edges, and underside instead of coating only the visible face.
Satin is a practical sheen for a coffee table because it provides some depth without emphasizing every fingerprint. Gloss can look dramatic but highlights dust and small surface defects. Matte finishes feel contemporary, although they may make darker wood appear slightly flatter.
Choose a coating intended for furniture or tabletops. Coffee tables encounter moisture, warm mugs, cleaning, food, toys, books, laptops, and people who believe coasters are merely decorative suggestions.
Step 6: Prepare the Metal Base
Factory powder-coated legs may need nothing more than inspection and careful cleaning. If the steel is bare, lightly rusted, or previously painted, prepare it with products made for metal.
A compatible metal primer improves adhesion and corrosion resistance before the finish coat is applied. Follow the coating manufacturer’s directions and work outdoors or in an appropriately ventilated location away from flames and ignition sources.
Step 7: Position the Legs
After the wood finish has dried sufficiently for handling, place the tabletop upside down on a clean, padded surface. Position the legs several inches inward from each end.
Measure the setback from each end and side so both legs are centered and parallel. Check several reference measurements rather than relying entirely on your eyes. Human vision is excellent at recognizing faces and less dependable when deciding whether a steel leg is tilted by three-sixteenths of an inch.
Temporarily mark or lightly clamp the positions, then view the base from multiple angles. Legs placed too far inward can make the tabletop look unstable. Legs pushed too close to the ends may leave insufficient wood around the mounting screws.
Step 8: Account for Seasonal Wood Movement
Solid wood expands and contracts mainly across its grain as humidity changes. A wide solid-wood top should not be rigidly trapped by a base that prevents this movement.
Select metal legs with slotted mounting holes or use tabletop fasteners designed to permit controlled movement. Figure-eight connectors, Z-clips, wooden buttons, and slotted mounting systems are established methods for securing tabletops while reducing the risk of splitting or warping.
Use the mounting hardware recommended for the base and confirm the screw length before installation. A screw should hold securely without approaching the visible face of the tabletop. Do not overtighten hardware installed through movement slots.
If the base contains only rigid round holes and was not designed for a solid-wood top, choose a more appropriate base or consult an experienced furniture builder instead of improvising the connection.
Step 9: Attach the Base
Mark the mounting locations and create appropriate pilot holes based on the selected screws, hardware, and tabletop thickness. Keep the drill aligned with the surface and use a controlled clutch setting.
Install the hardware gradually, checking that the legs remain centered and parallel. Once attached, turn the table upright with help. Avoid dragging the fresh finish across the work surface or placing twisting pressure on one leg.
Step 10: Check Stability
Place the table on a level surface and press gently at each corner. If it rocks, first verify that the metal base is square and all components are seated correctly.
Adjustable feet are ideal for tile, old hardwood, or slightly uneven floors. Matching felt pads protect flooring and make the table easier to move without producing the sound of a filing cabinet escaping down a hallway.
Step 11: Allow the Finish to Cure
A finish can feel dry before it is fully cured. Follow the product’s curing schedule before placing heavy books, trays, planters, electronics, or rubber-footed objects on the table. Premature use can leave dents, dull patches, or objects stuck to the coating.
Safety and Final Quality Checks
Woodworking can involve eye hazards, noise, airborne dust, moving equipment, and chemical exposure. Appropriate eye protection, hearing protection, dust collection, ventilation, guarded tools, and careful handling of finishes are basic precautions. OSHA woodworking resources specifically address machine guarding, wood dust, noise, eye protection, and hazards associated with finishing chemicals.
Before using the table, confirm that:
- The base is centered and securely mounted.
- The tabletop cannot shift or rotate.
- The hardware allows appropriate wood movement.
- No screw points are close to the upper surface.
- No sharp metal edges or rough wooden corners are exposed.
- The table sits flat without excessive flexing or rocking.
- The wood and metal coatings have cured.
Check the fasteners again after several weeks. Pads, hardware, and wood components can settle slightly during early use.
Modern Industrial Design Variations
Add a Lower Shelf
A narrow wood shelf or perforated-metal shelf creates storage for magazines, remotes, and baskets. Keep it visually light so the table does not become a dark block in the center of the room.
Try Charcoal or Bronze Metal
Matte black is the classic industrial choice, but charcoal, weathered steel, and dark bronze can feel warmer. These colors coordinate well with oak, leather seating, natural textiles, and cream-colored walls.
Use Rounded Corners
Rounded corners soften the table’s appearance and improve movement through compact rooms. They are especially useful when the coffee table sits near a major walkway.
Preserve Natural Wood Color
Industrial does not automatically mean dark brown. A pale oak, maple, or ash top can create a brighter Scandinavian-industrial look when paired with thin black legs.
Common Coffee Table Building Mistakes
- Ignoring sofa height: Even an attractive table feels awkward when it sits far above or below the cushions.
- Skipping the floor mockup: A reasonable-looking measurement can overwhelm a narrow living room.
- Using screws that are too long: Measure the tabletop and mounting hardware before drilling.
- Rigidly fastening solid wood: Use a mounting method that accommodates seasonal movement.
- Staining without testing: Wood species, sanding, and absorption change the final color.
- Leaving sharp edges: Lightly eased edges are more comfortable and less likely to splinter.
- Rushing the curing period: A soft coating can collect dents, rings, fibers, and regret.
- Adding too many industrial details: One strong wood surface and a simple metal base are usually enough.
First-Build Experiences: What DIYers Commonly Learn
A first wood and metal coffee table often begins with an ambitious sketch: a live-edge walnut slab, custom steel geometry, hidden storage, built-in charging, and possibly a secret compartment for snacks. Then the budget, available tools, and actual size of the living room join the meeting. Successful first-time builders usually simplify the design early. A pre-cut top and a quality bolt-on base may sound less heroic, but they leave more time for accurate layout, patient sanding, and a professional finish.
One of the first surprises is that preparation takes considerably longer than assembly. Attaching two steel legs may occupy only a small part of the project. Choosing the best face of the wood, filling small defects, softening the edges, sanding evenly, removing dust, and testing the finish can consume most of the work session.
That preparation is not wasted effort. On a simple industrial table, the surface is the main feature. There is no carved trim or complicated decoration to conceal a sanding scratch, glue mark, or patchy stain. Careful preparation is what makes a basic panel and four pieces of metal look like intentional furniture.
Another common lesson is that the darkest stain does not necessarily create the best industrial appearance. Beginners sometimes choose an almost-black stain expecting instant warehouse-loft drama. Instead, the tabletop may lose its visible grain and become a dark rectangle competing with equally dark legs.
Natural walnut, warm oak, medium brown, or even a clear finish often produces stronger contrast. The wood should still look like wood. Otherwise, the project has used a tree to perform a surprisingly accurate impression of plastic laminate.
Leg placement creates another classic first-build surprise. When the tabletop is upside down, almost any position can appear acceptable. Once the table is upright, legs placed too far inward make the top look as though it is balancing on a smaller table. Legs placed at the extreme ends can feel visually stiff and put the fasteners too close to the wood edges.
Measuring equal setbacks and temporarily marking the positions before drilling helps. It is also useful to step away from the project and view the layout from several angles. A position that appears centered from one end may look noticeably uneven from the side.
First-time builders also discover that floors are rarely as level as they claim to be. A table that sits perfectly on a garage workbench can rock on tile, an older hardwood floor, or a thick rug. Adjustable feet solve this more elegantly than folded cardboard. Felt pads are helpful, but all four should have matching thickness.
Finishing teaches patience in a particularly direct way. The tabletop may look ready, feel dry, and seem to be requesting a decorative tray. Placing objects on it too early can leave dull impressions or cause rubber feet to stick. Experienced builders treat the curing schedule as part of construction, not as an optional epilogue.
Saving a finished scrap sample is another valuable habit. Label it with the stain, topcoat, and number of coats used. Later, the sample can be used to test cleaners, practice scratch repairs, or determine whether another coat will alter the color or sheen.
Finally, completing a table changes the way people examine furniture. After measuring every setback and studying every corner, builders begin noticing grain direction, proportions, fasteners, finish quality, and stability in store-bought pieces.
The finished DIY coffee table may not be flawless, but it contains something mass-produced furniture cannot: a record of choices. A small knot, subtle sanding mark, or natural grain variation becomes part of the story. The best result is not necessarily showroom perfection. It is a stable, useful, attractive table that fits the roomand makes its builder begin thinking that matching end tables might not be such a ridiculous idea.
Conclusion
Building a modern industrial wood and metal coffee table is less about advanced joinery and more about making a series of careful decisions. Match the dimensions to the sofa, select a stable wood top, prepare the surface patiently, choose a simple steel base, and use hardware that permits seasonal wood movement.
The result is a durable living-room centerpiece with authentic material character. Wood provides warmth and individuality, while metal gives the design structure and clean modern lines. Better still, the finished table can look custom-made without requiring welding, elaborate machinery, or a furniture-building vocabulary that includes seventeen different kinds of dovetails.