Building a CNC machine at home used to sound like the kind of project that required a machine shop, an engineering degree, and possibly a wizard living under the workbench. Today, the hardware is more accessible, the community is louder, and the software is where the real flavor happens. A homebuilt CNC machine is not just rails, motors, belts, screws, and a router that screams like a caffeinated leaf blower. It is also a carefully brewed software stack that turns ideas into toolpaths, toolpaths into G-code, and G-code into sawdust, chips, or beautifully carved proof that your garage has ambition.
The phrase “Homebuilt CNC Software, Brewed To Taste” captures the best part of DIY CNC: you do not have to accept one fixed recipe. You can choose LinuxCNC for deep machine control, GRBL for lightweight Arduino-based motion, FluidNC for modern ESP32-based control with a web interface, CNCjs or Universal Gcode Sender for sending jobs, and CAD/CAM software such as Autodesk Fusion, FreeCAD, Carbide Create, or other design tools to generate the instructions. Like coffee, the right CNC software depends on your machine, your budget, your patience, and how much bitterness you can tolerate before breakfast.
What Homebuilt CNC Software Actually Does
CNC software is not one program. It is a workflow. A typical DIY CNC software chain has four major jobs: design the part, create the toolpath, send the G-code, and control the machine. Each step matters. Skip one, and your “custom walnut sign” may become “abstract modern firewood.”
The design stage usually happens in CAD software, where you draw a bracket, sign, guitar body, enclosure panel, or whatever object has been haunting your notebook. CAM software then translates that geometry into toolpaths, choosing cutting depths, feeds, speeds, pocketing strategies, contour cuts, drilling cycles, and finishing passes. A post processor converts those instructions into G-code your controller understands. Finally, sender or controller software streams commands to the machine and handles jogging, homing, probing, feed holds, and job monitoring.
In a commercial shop, this workflow may be standardized and locked down. In a homebuilt CNC setup, it is more flexible. That flexibility is powerful, but it also means you are the head chef, mechanic, software tester, and person responsible for not driving a carbide end mill into a steel clamp.
The Main Ingredients in a DIY CNC Software Stack
1. CAD: Where the Idea Becomes Geometry
CAD software is where your CNC project begins. For simple 2D parts, you might draw vectors, pockets, slots, and holes. For more advanced projects, you may build full 3D models with assemblies, constraints, and parametric dimensions. Autodesk Fusion is popular because it combines CAD and CAM in one environment, making it useful for hobbyists who want to design and machine parts without constantly exporting files between programs. FreeCAD is another strong option, especially for makers who prefer open-source tools and want a parametric modeling workflow.
The important lesson is simple: clean geometry makes clean toolpaths. Duplicate lines, open contours, sloppy sketches, and mystery gaps can confuse CAM software faster than a squirrel in a keyboard factory. Before generating G-code, inspect your design carefully and confirm that dimensions match the real material, not the fantasy board you wish you had bought.
2. CAM: Where Geometry Becomes Motion
CAM software is the bridge between design and machining. It decides how the cutter moves through material. That includes step-down, step-over, cutting order, ramping, lead-ins, tabs, rest machining, adaptive clearing, finishing passes, and tool changes. For a homebuilt CNC router, CAM settings can make the difference between a smooth cut and a noise that makes everyone in the house suddenly remember errands.
Good CAM software should let you define your stock, tools, feeds, speeds, and safe heights. It should preview toolpaths clearly and help you avoid collisions. Beginners often focus on the controller first, but CAM is where many real-world results are won or lost. Even the best machine controller cannot rescue a toolpath that plunges too deep, moves too fast, or forgets that clamps are not decorative.
3. Firmware and Controllers: The Machine’s Nervous System
Controller firmware interprets G-code and produces step and direction signals for motors. GRBL remains one of the best-known choices for small DIY CNC machines because it is lightweight, open source, and runs on simple Arduino-class hardware. It is common on desktop routers, engravers, and compact mills. For many hobby machines, GRBL is the “good black coffee” of CNC control: simple, strong, and effective when you understand its limits.
LinuxCNC sits at the other end of the homebuilt spectrum. It is powerful, highly configurable, and capable of controlling mills, lathes, plasma tables, robots, and more. It is well suited for builders who want serious control over machine behavior, real-time motion, custom interfaces, and advanced hardware integration. It asks more from the user, but it gives more back.
FluidNC has become attractive for ESP32-based controllers because it supports flexible configuration, web-based control, and modern connectivity. Marlin, originally famous in 3D printing, also appears in CNC-style machines, especially in maker projects that share hardware DNA with 3D printers. The best controller depends on your machine size, axes, motors, drivers, probing needs, spindle control, and appetite for configuration files.
4. G-Code Senders: The Barista Serving the Brew
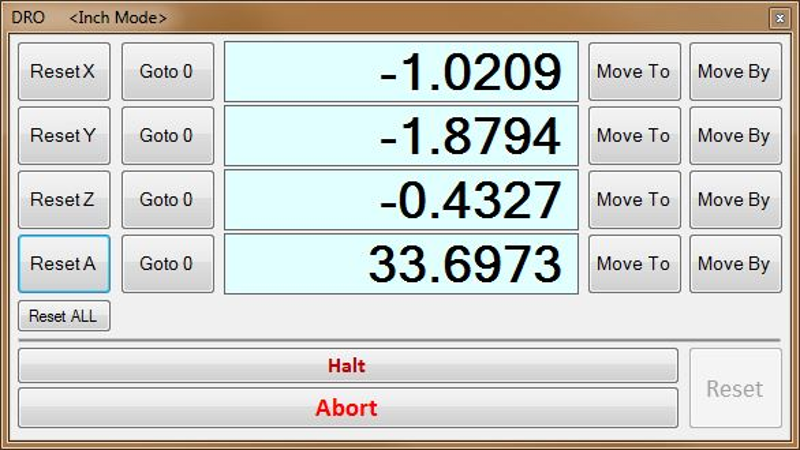
A G-code sender streams commands to the CNC controller and gives you a way to jog the machine, start jobs, pause safely, reset alarms, and monitor progress. Universal Gcode Sender is a long-running cross-platform option used with GRBL, TinyG, g2core, Smoothieware, and related controllers. CNCjs offers a web-based interface that can run on a laptop or Raspberry Pi, making it handy for shop setups where you want to control the machine from a browser.
OpenBuilds CONTROL is another popular choice for GRBL-based CNC routers, lasers, plasma machines, and drag-knife builds. Carbide Motion is designed for Carbide 3D machines such as Shapeoko and Nomad, with a guided interface that helps users get cutting quickly. These tools do similar jobs, but their personalities differ. Some feel like a cockpit. Some feel like a friendly appliance. Some feel like a science project wearing safety glasses.
Why Homebuilt CNC Software Needs Customization
No two homemade CNC machines are exactly the same. One builder uses lead screws, another uses belts, a third uses rack and pinion, and a fourth uses “parts found in a drawer labeled maybe useful.” Software must match the mechanics. Steps per millimeter, acceleration, maximum feed rate, spindle control, limit switch polarity, homing direction, soft limits, and probe offsets all need to reflect the physical machine.
Customization is also where safety enters the room, ideally before the router does. Limit switches help prevent crashes. Soft limits reduce accidental overtravel. Proper homing creates a repeatable machine coordinate system. Tool length probing helps with consistency. Feed hold gives you a controlled way to pause. Emergency stop hardware should exist outside the software, because when something goes wrong, you do not want to negotiate with a mouse cursor.
The best DIY CNC software setup is not necessarily the most complicated one. It is the setup you understand well enough to troubleshoot. A simple GRBL machine with clean configuration and reliable CAM can outperform a fancy but poorly tuned system. In CNC, elegance often means fewer surprises.
Choosing Software for Different Homebuilt CNC Machines
For a Small Desktop CNC Router
A compact 3018-style router, small gantry mill, or desktop engraver usually pairs well with GRBL or FluidNC. For sending jobs, Universal Gcode Sender, CNCjs, or OpenBuilds CONTROL can work nicely. For CAD/CAM, Carbide Create, Fusion, FreeCAD, VCarve-style software, or other 2D CAM tools may be enough. The priority is not maximum power; it is clarity, repeatability, and a workflow that does not require a ceremonial chant before every job.
For a Larger CNC Router
A full-sheet or large-format router benefits from better motion planning, reliable homing, good work coordinate management, and careful CAM strategy. Maslow-style open-source CNC projects show how community-driven machines can make large-format cutting more accessible. For large routers, software choices must account for frame flex, calibration, belt or chain behavior, dust collection, and the reality that plywood sheets are rarely as flat as our optimism.
For a Converted Mill or Lathe
A mill conversion or lathe retrofit often demands deeper control. LinuxCNC is a strong candidate because it supports advanced configurations, multiple machine types, and custom hardware arrangements. These projects involve more than sending G-code to an Arduino. They may require spindle encoders, coolant control, tool tables, backlash compensation, rigid tapping considerations, and custom user interfaces. In other words, this is where CNC software graduates from “fun weekend” to “please label all wires before future you cries.”
Post Processors: The Unsung Heroes of CNC Brewing
A post processor converts CAM output into machine-specific G-code. This is where many CNC headaches begin, because not every controller understands every command. One machine may accept a canned cycle that another machine rejects. One controller may expect arcs in a particular format. Another may require conservative G-code with fewer advanced features.
For homebuilt CNC software, choosing or editing the right post processor is essential. A Fusion toolpath posted for the wrong controller may look fine in simulation but behave badly at the machine. Before cutting real material, inspect the G-code, run an air cut, and use a simulator when possible. Watch for safe Z moves, units, work offsets, spindle commands, feed rates, and tool change behavior.
A good post processor feels boring. That is a compliment. Exciting G-code is usually exciting in the same way a smoke alarm is exciting.
Practical Tips for Brewing CNC Software to Taste
Start With a Simple Known-Good Workflow
Do not begin your CNC journey by designing a five-axis sculpture of a dragon holding a threaded adapter. Start with a square, a circle, a pocket, and a drilling pattern. Confirm that the machine moves the correct distance, cuts in the correct direction, and returns home reliably. A boring test file is a beautiful thing when it proves your machine is behaving.
Keep a Configuration Notebook
Record firmware settings, controller versions, motor driver current, microstepping, steps per millimeter, acceleration values, CAM templates, tool libraries, and post processor names. When something changes, write it down. This single habit can save hours of detective work later. CNC troubleshooting without notes is like trying to remember which mystery screw came from which appliance. Technically possible, spiritually exhausting.
Create Tool Libraries You Actually Trust
Feeds and speeds should not be random numbers copied from a forum at 1:00 a.m. Build a tool library for your own machine and materials. Record what works for plywood, MDF, hardwood, acrylic, aluminum, foam, and plastics. A homebuilt CNC router may not handle aggressive industrial feeds, and that is fine. Consistent, conservative settings beat heroic settings followed by broken bits.
Use Simulation, Air Cuts, and Single-Step Caution
Before running a new job, preview it in CAM. Then run it above the material with the spindle off when appropriate. Watch the machine path. Confirm the origin. Check that clamps are outside the danger zone. Make sure the bit installed matches the toolpath. Many CNC disasters begin with the sentence, “I’m sure it’s fine.” Spoiler: it was not fine.
Common Software Mistakes in Homebuilt CNC Projects
One common mistake is confusing machine coordinates with work coordinates. Machine coordinates describe the machine’s physical reference system after homing. Work coordinates describe the origin for a specific job. If you mix them up, the machine may confidently cut the right shape in the wrong zip code.
Another mistake is ignoring units. A file meant for millimeters can become a tiny decorative speck if interpreted as inches, or a monstrous shop-eating beast if interpreted the other way around. Always check whether your CAM, post processor, sender, and controller agree on units.
Builders also underestimate acceleration. High maximum feed rates look impressive, but acceleration determines how smoothly the machine starts, stops, and changes direction. Too much acceleration can cause lost steps, chatter, rough corners, and mysterious dimensional errors. Tune gradually and test with real cutting loads.
Finally, many beginners skip backup. Once your CNC software stack works, save copies of configuration files, firmware builds, post processors, macros, and tool libraries. Future you will be grateful, and future you already has enough problems.
The Joy of Open-Source CNC Software
Open-source CNC software gives homebuilders room to learn, modify, and repair. LinuxCNC, GRBL, FluidNC, FreeCAD, CNCjs, and Universal Gcode Sender all reflect a culture where users are not just customers; they are experimenters. That community spirit matters. Homebuilt CNC is full of edge cases, and edge cases are where forums, documentation, GitHub issues, and shared machine profiles become priceless.
Open source also encourages understanding. You can inspect configuration files, learn how motion control works, edit macros, modify post processors, and build a workflow around your actual machine. The tradeoff is responsibility. Freedom includes the freedom to misconfigure something spectacularly. But with careful testing, good notes, and a patient approach, open-source CNC software can turn a homemade machine into a reliable shop partner.
Experience Notes: What Homebuilt CNC Software Teaches You Over Time
The first lesson from working with homebuilt CNC software is that the computer is not the brain of the machine; the workflow is. A polished interface is nice, but a reliable sequence matters more: design clean geometry, create sensible CAM, post the right G-code, set the work origin, verify the tool, clamp the material, run the job, and watch the first pass like a hawk with trust issues. When that sequence becomes habit, CNC work becomes calmer and more predictable.
The second lesson is that calibration is not a one-time event. Belts stretch, screws wear, routers develop runout, spoilboards get resurfaced, and limit switches occasionally decide to become philosophers. Good software makes recalibration easier, but the user still has to care. Checking steps per millimeter, squareness, backlash, tram, and probe offsets should be part of regular maintenance. A CNC machine is not a toaster. It does not simply become “done.”
Another experience-based truth is that conservative settings are not cowardly. They are professional. Many new builders chase speed because fast machines look impressive in videos. But a homebuilt CNC router often rewards patience. A slightly slower feed, a shallower pass, or a better ramp can improve edge quality and reduce tool breakage. The goal is not to finish the job before the coffee cools. The goal is to finish the job without turning the cutter into modern art.
You also learn that macros can be magical when used carefully. A probing macro for setting Z height, a parking macro, a dust shoe clearance move, or a repeatable tool-change routine can make the machine feel far more polished. However, macros deserve the same suspicion as any other automation. Test them high above the work surface first. Read every line. Make sure they use the coordinate system you expect. A bad macro can crash a machine with incredible confidence.
Good homebuilt CNC software also teaches humility. Simulation may look perfect, but real material has grain, knots, internal stress, adhesive layers, and a talent for misbehaving. Plywood can bow. Aluminum can weld itself to a cutter if chip evacuation is poor. Acrylic can melt. MDF can create dust so fine it seems personally committed to entering every drawer in the shop. Software planning must meet physical reality, and physical reality usually has notes.
The most satisfying experience comes when your customized software stack fades into the background. The machine homes correctly. The sender connects without drama. The CAM templates match your tools. The post processor produces clean code. The probe routine works. The first chips come off exactly where expected. That moment feels less like operating a machine and more like conducting a small, dusty orchestra.
Over time, “brewed to taste” becomes more than a cute phrase. It means your CNC software reflects your shop, your materials, your machine, and your working style. You may prefer CNCjs on a Raspberry Pi because remote browser control fits your bench. You may prefer LinuxCNC because you like deep control and custom hardware. You may stay with GRBL because it is simple, predictable, and good enough for the parts you make. The right answer is the one that produces accurate work safely and repeatedly.
In the end, homebuilt CNC software is part engineering, part craft, and part negotiation with spinning tools. It rewards curiosity, documentation, and caution. It punishes assumptions. It turns laptops into machine consoles and garage benches into miniature manufacturing cells. And when everything finally works, the result is deeply satisfying: an idea leaves the screen, enters the machine, and comes back as a real object you can hold, sand, assemble, sell, or proudly show someone who will immediately ask, “Can you make me one too?”
Conclusion
Homebuilt CNC software is not about finding one perfect program. It is about brewing a workflow that fits your machine, materials, and goals. CAD gives shape to the idea. CAM creates the cutting strategy. Firmware and controller software turn G-code into motion. Senders and interfaces make the machine usable in the shop. When these pieces work together, a DIY CNC machine becomes more than a homemade tool; it becomes a flexible digital fabrication system.
Whether you choose GRBL, LinuxCNC, FluidNC, CNCjs, UGS, OpenBuilds CONTROL, Fusion, FreeCAD, Carbide Create, or a custom mix, the best setup is the one you understand, trust, and can maintain. Brew it carefully, test it patiently, document everything, and keep your clamps out of the toolpath. Your CNC machine will thank you by making chips instead of chaos.