Building a DIY wheelchair ramp is one of those projects where “close enough” is not close enough. A flower box can survive being a little crooked. A ramp carrying a wheelchair, scoos considerably better manners.
The good news is that a well-planned residential accessibility ramp is absolutely achievable for an experienced DIYer. The challenge is that the project combines layout, structural framing, drainage, weather resistance, doorway clearance, and accessibility considerations. The saw cuts are often the easy part. The thinking comes first.
This guide explains how to build a DIY wheelchair ramp with a practical focus on slope, ramp length, landings, framing, handrails, materials, and real-world usability. The commonly used 1:12 slope benchmark means 12 inches of horizontal run for every 1 inch of vertical rise. Gentler slopes, such as 1:16 or 1:20, can make a ramp easier to navigate but require considerably more space. For private homes, however, local residential codes, permits, zoning rules, frost-depth requirements, and inspection standards may differ, so check with the local building authority before buying a small lumberyard’s worth of pressure-treated wood. the Person Who Will Actually Use the Ramp
Before drawing rectangles on graph paper, think about the user. A ramp designed only around minimum dimensions may technically fit the yard while being awkward in daily life.
Will the primary user operate a manual wheelchair independently? A power wheelchair or mobility scooter? Will a caregiver normally assist? Is the ramp also expected to accommodate a walker? Does the user have limited upper-body strength or difficulty controlling speed on a descent?
These questions matter because a gentler slope may be far more comfortable for a manual wheelchair user. A wider ramp may make assisted travel easier. Larger landings may be necessary for a long wheelchair, scooter, or door that swings toward the approach area.
Whenever possible, involve the future ramp user in the planning. The best accessibility project is not merely something built for a person; it is something designed with that person’s daily routine in mind.
Check Local Codes, Permits, and Property Restrictions First
One of the most important pieces of advice for how to build a DIY wheelchair ramp is also the least glamorous: make a few phone calls before digging holes.
The Americans with Disabilities Act provides detailed accessibility standards for facilities within its scope, and many homeowners use those dimensions as strong design benchmarks. However, the ADA does not automatically function as the residential building code for every private single-family home. Your local jurisdiction may have adopted a version of the International Residential Code with state or municipal amendments.
Ask the local building department about:
- Whether a permit is required
- Maximum or minimum ramp slope
- Required landing dimensions
- Handrail and guard requirements
- Footing size and local frost depth
- Setbacks from property lines
- Restrictions involving easements or utilities
- Required inspections
If the property belongs to a homeowners association, check those rules too. An approval process is annoying, but rebuilding half a ramp because it crosses a setback line is considerably more annoying.
Before excavating for posts or concrete footings, contact 811 so buried utilities can be marked. The national 811 service advises anyone planning to dig to request utility locations before breaking ground. e Total Rise Accurately
Ramp design begins with one critical measurement: total rise. This is the vertical distance from the finished lower surface to the finished upper landing or entrance level.
Do not simply measure the height of one step and multiply it by the number of steps. Ground may slope, paving may vary, and the actual doorway elevation may surprise you.
Use a long level, laser level, builder’s level, or carefully leveled string line to establish the difference in elevation. Include the finished thickness of the ramp decking and landing in your calculations.
Use the Ramp-Length Formula
At a 1:12 slope, every inch of rise requires 12 inches of horizontal ramp run. In practical terms, each inch of rise requires approximately 1 foot of ramp.
For example:
- A 12-inch rise requires about 12 feet of run at 1:12.
- A 24-inch rise requires about 24 feet of run at 1:12.
- A 30-inch rise requires about 30 feet of run at 1:12.
Choose a gentler 1:16 slope, and a 24-inch rise requires 32 feet of run. At 1:20, that same rise requires 40 feet. The extra length can reduce effort and improve control, but it also increases material use and demands more yard space. The U.S. Access Board limits an ADA ramp run to 30 inches of vertical rise before a landing, while major home-improvement guides also emphasize using turns and intermediate landings when a long straight run will not fit the property. Best Ramp Configuration
A straight ramp is simple to frame, but it requires a long unobstructed path. Fortunately, a ramp does not have to shoot across the front yard like an airport runway.
Straight Ramp
This is the simplest layout and works well for low entrances with plenty of space. It is easy to frame and keeps travel straightforward.
L-Shaped Ramp
An L-shaped design uses a landing to make a 90-degree turn. It can follow the side of a porch or wrap around landscaping while reducing the ramp’s visual impact.
Switchback or U-Shaped Ramp
A switchback arrangement uses parallel runs connected by a turning landing. It is often the most practical solution for a high porch on a compact lot.
When a ramp changes direction, allow generous maneuvering room. Under ADA guidance, landings at direction changes provide at least 60 by 60 inches of clear space, a useful benchmark for comfortable wheelchair turning even where a private residence is governed by different local requirements. at Landings as Leftover Space
Landings are among the most important parts of a wheelchair ramp. They provide a place to stop, turn, open a door, regain control, or simply take a breath.
Plan level landings at the top and bottom of the ramp and wherever the ramp changes direction. A commonly used accessibility benchmark is a landing at least 60 inches long, with a 60-by-60-inch clear area where a turn is required.
The top landing deserves special attention. A wheelchair user should not have to balance on a slope while reaching for a lock, pulling open a storm door, or waiting for a door to swing out of the way. Consider:
- The direction of the door swing
- Door-handle reach
- Threshold height
- Space for the wheelchair beside the door
- Weather protection
- Room for a caregiver
The U.S. Access Board specifically notes that door maneuvering clearance can overlap a ramp landing but recommends locating a door swing outside the landing when practical for greater safety. amp Wide Enough for Real Life
ADA accessible-route guidance commonly uses a 36-inch minimum clear width, measured between obstructions such as handrails. For a residential DIY wheelchair ramp, building wider may improve comfort if space permits.
A little extra width can help when a caregiver walks beside the chair, when a power wheelchair has a larger footprint, or when snow and leaves inevitably decide to occupy part of the ramp.
Remember that “clear width” is usable space. Posts, handrails, curbs, and other components should not quietly steal the inches you thought you had.
Build the Foundation Like It Actually Matters
A safe wheelchair ramp needs a stable structural foundation. Exact footing requirements depend on local soil, climate, ramp height, loads, and building codes.
Permanent wood ramps are commonly supported with posts on concrete footings or other approved foundation systems. In freezing climates, footings may need to extend below the locally required frost depth to reduce movement caused by frost heave.
Lay out the project carefully with stakes and string lines. Check the ramp for square using diagonal measurements or the classic 3-4-5 method. Then verify everything again. Lumber is cheaper before it has been cut into confidently incorrect pieces.
Use corrosion-resistant connectors and exterior-rated fasteners compatible with the lumber and hardware. Modern pressure-treated lumber can be demanding on ordinary metal fasteners, so choose approved hot-dipped galvanized or stainless steel hardware where required by the material manufacturer and local code.
Frame for Strength, Drainage, and a Smooth Ride
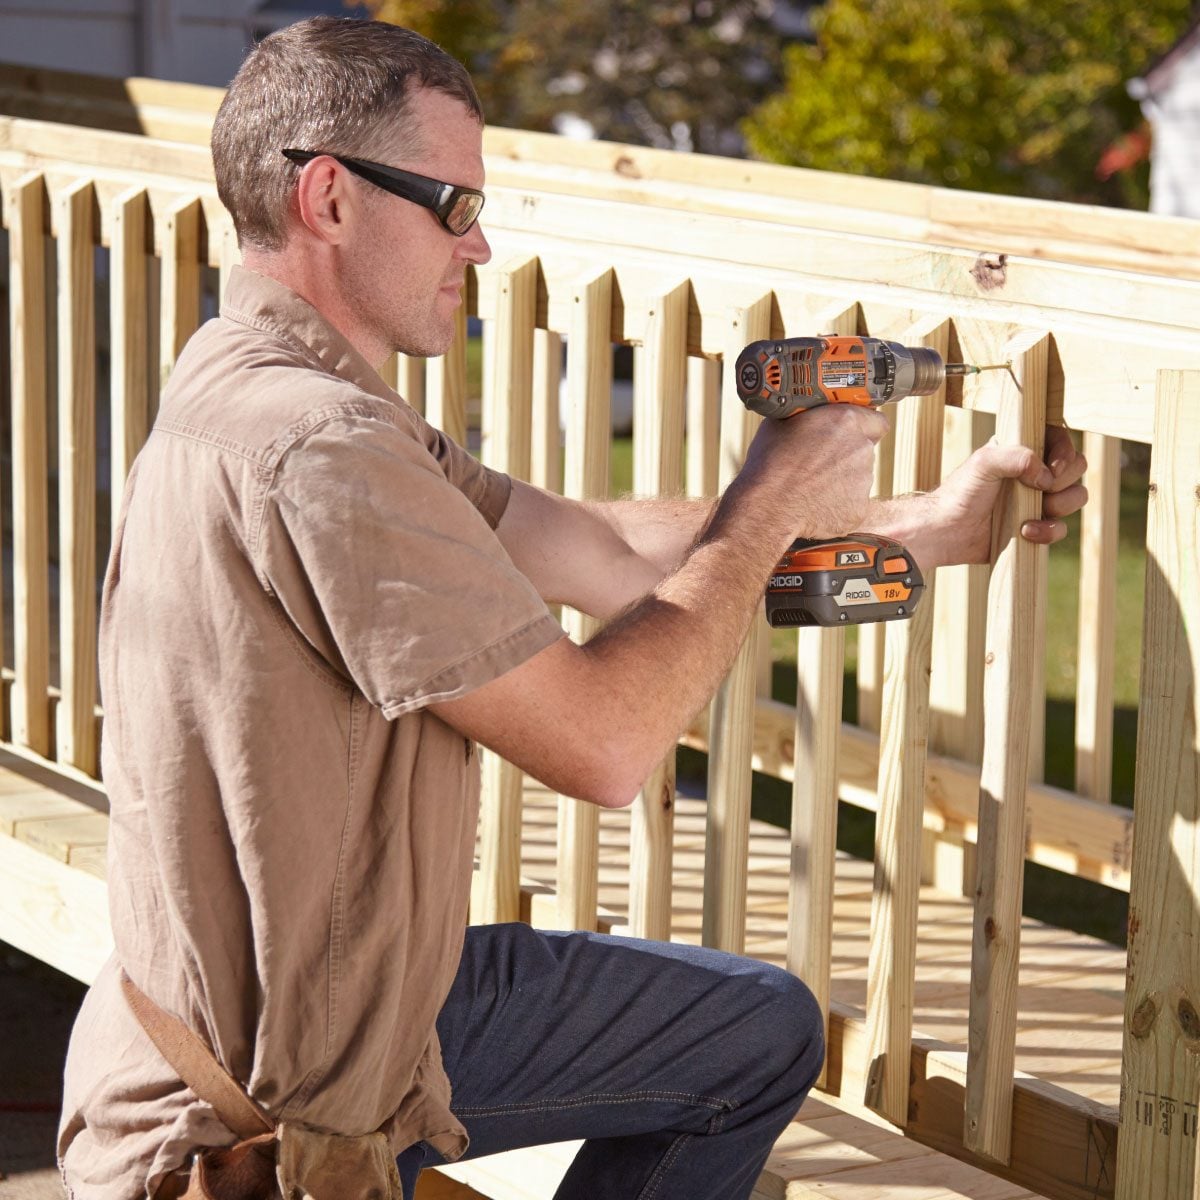
Ramp framing resembles deck construction, but the sloping surface makes precision especially important. Posts, beams, joists, blocking, and connections must work together as a structural system.
Joist spacing should match the decking manufacturer’s requirements and the expected loading. Add blocking where needed to reduce twisting and strengthen areas around posts, transitions, and landings.
The finished ramp should feel solid under a rolling load. Excessive bounce, loose boards, sharp elevation changes, or gaps that catch small front casters can turn an otherwise attractive project into an obstacle course.
Keep Transitions Smooth
Pay close attention to the bottom transition and the threshold at the top. Small wheelchair casters are much less forgiving than work boots. An abrupt lip that a walking person barely notices may stop a wheelchair wheel instantly.
The transition from ramp to landing should also avoid sudden bumps or awkward grade changes.
Choose an Outdoor Surface With Traction
For a wood ramp, pressure-treated lumber is a common choice because it is widely available and suitable for outdoor construction when properly installed and maintained. Composite decking may reduce some maintenance, but product characteristics vary. Whatever material you select, confirm that it is approved for the intended installation and provides dependable traction in local weather.
A wheelchair ramp surface should be firm, stable, and slip resistant. Rain, frost, snow, moss, wet leaves, and algae can quickly change how a surface behaves.
Avoid improvising with smooth sheets of untreated exterior plywood as a permanent exposed ramp surface. Water can damage edges and create a slippery surface. Purpose-built decking or another approved exterior system is generally a better long-term solution.
Install decking with appropriate drainage gaps, but avoid openings large enough to interfere with small casters, canes, or mobility-aid tips.
Add Proper Handrails, Guards, and Edge Protection
Handrails are not decorative accessories. They help users stabilize themselves, control movement, and recover from a momentary loss of balance.
ADA standards require handrails on both sides of ramp runs with more than 6 inches of rise and place the gripping surface 34 to 38 inches above the ramp surface. The standards also address continuity and extensions at ramp ends. Private residential requirements may differ, so local code remains the final authority for a home project. ides of the ramp are open, guards may also be required depending on the height above grade and local building code. Edge protection can help prevent wheelchair casters, walkers, and crutch tips from slipping off the side.
A good railing system should be sturdy enough that grabbing it does not produce the alarming sensation of shaking hands with a wet noodle.
Plan for Water Before Water Plans for You
Outdoor ramps live in the weather. Water should drain away from the walking surface, foundation, house, and landings.
Do not create a top landing that funnels rainwater toward the door. Avoid low spots that collect puddles, and make sure nearby gutters do not discharge onto the ramp.
Accessibility guidance generally calls for very limited cross slope so a wheelchair is not constantly pulled sideways. The ADA benchmark limits ramp cross slope to 1:48. Even where that exact standard does not legally govern a private home, keeping the cross slope minimal improves usability. Landings should also remain essentially level while still being designed so water does not accumulate. amp Before Calling the Job Finished
Once construction is complete, inspect the entire route rather than admiring it from the lawn and declaring victory.
Check that:
- The ramp surface is secure and does not flex excessively.
- No screws, splinters, or sharp hardware are exposed.
- Handrails are rigid and comfortable to grip.
- Transitions are smooth.
- The door can be operated safely from the landing.
- Water drains away properly.
- There is adequate lighting for nighttime use.
- Vegetation, furniture, and stored items do not reduce the clear width.
When appropriate and safe, have the intended user test the ramp and provide feedback. A tape measure can tell you that a landing is 60 inches long. It cannot tell you that the storm-door closer is too strong or that a particular turn feels awkward in a power chair.
Common DIY Wheelchair Ramp Mistakes to Avoid
Making the Ramp Too Steep
A short ramp may save lumber, but excessive slope can make climbing exhausting and descending difficult to control. Measure the rise first and calculate the run rather than choosing a length based on whatever space looks convenient.
Forgetting Door Clearance
A beautiful ramp leading to a landing where the user cannot open the door is a surprisingly expensive form of irony.
Skipping the Permit Check
Local rules can affect slope, footings, guards, handrails, property setbacks, and inspections. Check before construction.
Using Slippery Materials
An outdoor ramp must work after rain, not merely during a sunny inspection on construction day.
Ignoring Future Maintenance
Wood needs inspection and maintenance. Fasteners can loosen. Boards can split. Vegetation can encroach. Snow and ice require a removal plan that does not damage the surface.
Designing Only to a Minimum Number
Accessibility is about usability, not winning a contest to see how narrowly a wheelchair can fit between two handrails.
When a DIY Ramp May Not Be the Best Solution
A DIY wheelchair ramp is an advanced project. Consider hiring a licensed contractor, architect, structural professional, or Certified Aging-in-Place Specialist when:
- The entrance is several feet above grade.
- The site is steep or has poor soil.
- The ramp requires complex switchbacks.
- Retaining walls or major drainage work are needed.
- The project affects structural components of the house.
- Local code requirements are unclear.
- The user’s mobility needs are complex.
In a very tight site, a properly designed platform lift may sometimes be more practical than an extremely long ramp. The right solution is the one that creates safe, reliable accessnot necessarily the one that uses the most lumber.
Experience-Based Lessons From Building and Planning DIY Wheelchair Ramps
The most useful lessons about wheelchair ramps tend to appear after the calculator has been put away. On paper, a ramp is a slope connecting two elevations. In real life, it is a small transportation system attached to a house.
One recurring lesson is that the first proposed location is not always the best one. Homeowners naturally look at the front steps and imagine replacing them with a ramp. Then the measurements arrive. A 28-inch rise can require roughly 28 feet of ramp at a 1:12 slope before adding useful landings. Suddenly, the front yard begins to look much smaller than it did five minutes earlier.
Moving the accessible entrance to a side or garage door can sometimes create a much better route. The elevation may be lower, the driveway may provide a firm approach, and the ramp can follow the house rather than dominating the front elevation. Spending extra time comparing entrances can save a remarkable amount of construction.
Another lesson is that landings never seem too large once people start using them. During planning, a landing can look like wasted square footage. After construction, it becomes the place where a wheelchair turns, a caregiver stands, the door opens, packages wait, and someone pauses to find a key. Extra maneuvering room often improves the ramp more than a fancy railing detail ever will.
Door behavior is another detail that drawings routinely underestimate. An outward-swinging storm door can force a wheelchair user to back up while opening it. A strong closer may make the problem worse. A high threshold can become the final barrier after the user has successfully traveled the entire ramp. Testing the complete entry sequenceapproach, stop, reach, unlock, open, cross the thresholdis essential.
Weather also has a talent for exposing design mistakes. A ramp that feels perfect on a dry afternoon may behave differently after heavy rain, fallen leaves, frost, or snow. Gutters and downspouts should be considered part of the project. So should exterior lighting. A ramp used every day must work on a dark Tuesday evening in November, not just during the celebratory first roll after construction.
Experienced builders also learn to respect the difference between “level” and “smooth.” A ramp can have mathematically correct framing and still produce an uncomfortable ride if board ends, transitions, or fasteners create repeated bumps. Small front casters notice details that larger wheels and walking adults ignore. Running a hand over transitions and watching the actual wheels move across them can reveal problems that a level will not.
Finally, the best experience-based advice is to avoid treating accessibility as a one-time construction problem. The user’s needs may change. A manual wheelchair may later be replaced by a power chair. A caregiver may become involved. Grip strength, reach, and endurance may change over time. Designing a little more width, a little more turning space, better lighting, and easier maintenance into the original project can make the ramp useful for far longer.
A successful DIY wheelchair ramp should feel almost boring to use. No dramatic climbs. No awkward door gymnastics. No wobbling rails. No puddles waiting for the next cold night. The user simply gets from one level to another safely and independently. In accessibility design, boring can be a very impressive achievement.
Conclusion
Learning how to build a DIY wheelchair ramp starts with accurate measurement and thoughtful planning, not with the first cut of a circular saw. Calculate the total rise, choose a manageable slope, provide generous landings, preserve clear width, build a sound foundation, use weather-resistant materials, and pay close attention to handrails, edge protection, drainage, lighting, and doorway maneuvering.
Most importantly, design around the person who will use the ramp. ADA dimensions can provide valuable accessibility benchmarks, while current residential codes and local amendments determine what is legally required for many private homes. Reputable guidance from the U.S. Access Board, ADA.gov, ICC, NAHB, AARP, 811, Lowe’s, The Home Depot, Family Handyman, Bob Vila, and This Old House consistently reinforces the same central principle: a safe ramp is a carefully planned route, not merely a sloped deck. e: Building requirements vary by jurisdiction and site conditions. Confirm current permit, structural, accessibility, zoning, footing, handrail, guard, and inspection requirements with the local authority having jurisdiction before construction.