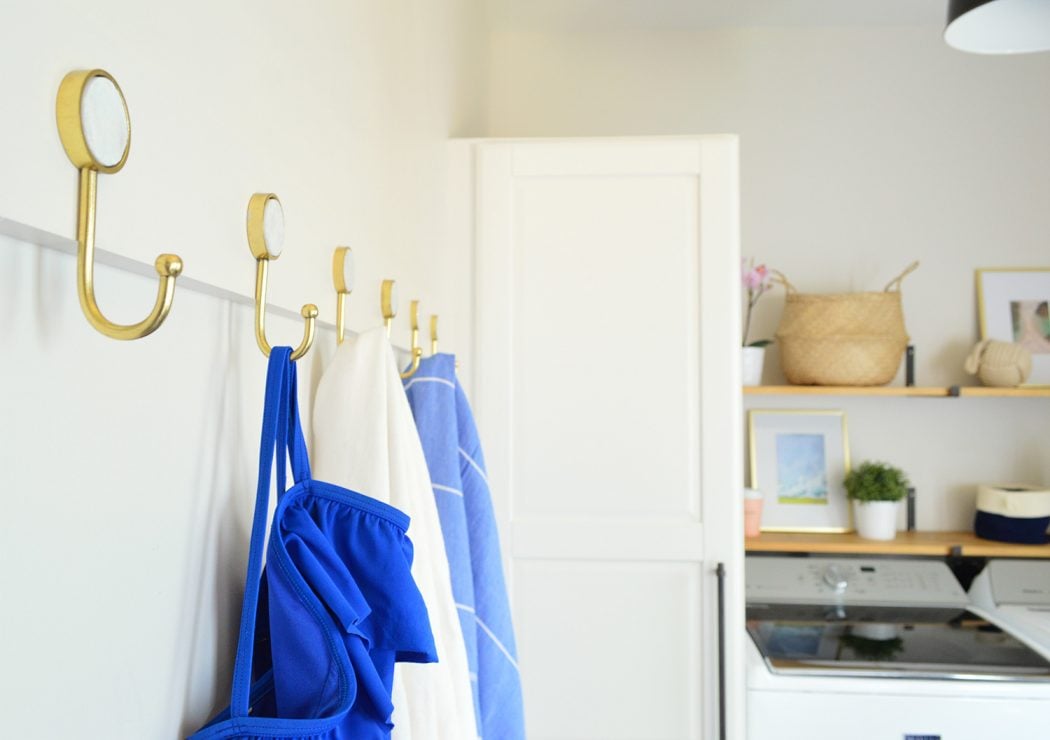
A mudroom is basically the border checkpoint between the outside world and your clean-ish home. It handles wet coats, backpacks, dog leashes, reusable grocery bags, sports gear, mystery gloves, and that one umbrella nobody remembers buying. If your mudroom currently looks like a small tornado with excellent taste in footwear, a long hook rail may be the simplest upgrade with the biggest payoff.
DIYing a long hook rail for your mudroom gives you the storage power of a built-in system without the cost, construction dust, or emotional commitment of installing cabinetry. It is a weekend-friendly project that can be customized to your wall length, family size, design style, and daily chaos level. Better yet, it does not require a master carpenter’s résumé. With a solid board, sturdy hooks, a level, a stud finder, and a little patience, you can create a clean, attractive drop zone that actually gets used.
This guide walks through planning, materials, measurements, installation, finishing, styling, and real-life lessons learned from making a long mudroom hook rail that works hard and looks polished. Think of it as practical storage wearing a nice outfit.
Why A Long Hook Rail Works So Well In A Mudroom
A long hook rail solves one of the most common mudroom problems: not enough easy-access storage. Closets are useful, but they require hangers, doors, and the kind of follow-through that disappears when someone comes home carrying a lunch box, a coat, a water bottle, and three pieces of school paper that “must not get lost.” Hooks are faster. People use them because they are visible, reachable, and forgiving.
Unlike a small premade coat rack, a long DIY hook rail can stretch across a larger section of wall. That means more hooks, better spacing, and room for everyone’s daily essentials. You can install it above a bench, beside a laundry area, near a garage entrance, or along a narrow hallway that functions as a mudroom even if your floor plan never officially gave it the title.
Another advantage is strength. When the rail is fastened into wall studs, the board distributes weight across the wall instead of depending on a few small hook screws in drywall. This is especially important for heavy winter coats, overloaded backpacks, tote bags, and pet gear. A good hook rail should not wobble every time someone grabs a jacket. It should sit there calmly, like it has seen things and survived.
Before You Build: Plan The Rail Around Your Real Life
The best mudroom projects start with honest observation. Before buying supplies, watch how your household actually uses the space. Where do bags land? Which coats are worn every day? Do kids need lower hooks? Do you need a spot for dog leashes near the door? Are wet items likely to hang there? The answers help you design a rail that solves your specific mess instead of creating a very attractive new place to ignore.
Measure The Wall
Start by measuring the full wall area where the rail will go. A long hook rail can be as short as three feet or as long as eight feet or more. If you have a narrow mudroom, leave enough clearance so hanging bags do not block the walkway. If the rail is above a bench, make sure people can sit comfortably without coats brushing their heads.
Choose A Comfortable Height
For adults, many hook rails work well around shoulder height, often somewhere near 60 to 66 inches from the floor. For children, consider a second lower rail or staggered hooks so they can hang their own items. That tiny detail can make the difference between “organized mudroom” and “jacket pancake on the floor.”
Decide How Many Hooks You Need
A useful rule is to plan at least one hook per person, plus extras for guests, bags, hats, leashes, or seasonal gear. If your wall allows it, spacing hooks 8 to 12 inches apart usually gives bulky items enough breathing room. Tighter spacing can work for hats and lighter accessories, but winter coats need more space unless you enjoy fabric traffic jams.
Materials And Tools For A DIY Long Hook Rail
You can make a mudroom hook rail with simple, widely available materials. The goal is to choose pieces that are strong, attractive, and easy to finish.
Recommended Materials
- One long wood board, such as a 1×6 or 1×8 pine, poplar, oak, or primed board
- Sturdy wall hooks, double hooks, peg hooks, or decorative hooks
- Wood screws long enough to fasten the rail into studs
- Short screws for attaching hooks to the board
- Wood filler or spackle for screw holes
- Primer and paint, stain, or clear protective finish
- Optional trim, cap molding, or small shelf board
- Optional painter’s tape and caulk for a built-in look
Useful Tools
- Tape measure
- Stud finder
- Level
- Pencil
- Drill and drill bits
- Driver bit
- Sander or sanding block
- Saw, if your board needs cutting
- Safety glasses
If you are new to DIY, ask an experienced adult for help with cutting wood or using power tools. A hook rail is beginner-friendly, but straight cuts, secure mounting, and safe tool handling still matter.
Choosing The Best Board For Your Hook Rail
The board is the backbone of the project, so choose it carefully. Pine is affordable and easy to paint. Poplar is smoother and often paints beautifully. Oak or maple can be stained for a warmer, furniture-like look. A primed board saves time if you want a painted finish.
For most mudrooms, a 1×6 board is a sweet spot. It is wide enough to hold hooks securely and substantial enough to look intentional on the wall. A 1×8 board makes a bolder statement and can feel more custom, especially in larger rooms. If your mudroom is tight, a slimmer board can work, but make sure the hooks fit comfortably without crowding the top and bottom edges.
Check the board before buying it. Look down the length to avoid major warping, twisting, or bowing. A long rail shows imperfections more than a small rack, so choose the straightest board you can find. This is not the moment to adopt a banana-shaped plank because it looked lonely at the lumber aisle.
Picking Hooks That Match Function And Style
Hooks do more than hold coats. They define the style of the entire rail. Matte black hooks create a modern farmhouse or industrial look. Brass hooks add warmth and polish. Chrome or nickel hooks feel clean and classic. Wooden pegs lean Scandinavian, Shaker, or cottage depending on the finish.
Function should come first. Choose hooks with enough depth to hold bulky coats and bags. Double hooks are excellent for mudrooms because one hook can hold a backpack while the other holds a jacket or hat. If your family uses heavy bags, look for hooks with strong mounting plates and more than one screw hole.
Also consider how the hooks feel in the room. Oversized hooks can look high-end on a long rail, while tiny hooks may seem lost on a big wall. If the rail is long, repeating the same hook style creates rhythm and keeps the project from looking random.
Step-By-Step: How To DIY A Long Hook Rail For Your Mudroom
Step 1: Cut And Sand The Board
Cut the board to your desired length, or have it cut at the store if that service is available. Sand the front, sides, ends, and edges until smooth. Slightly rounding the edges makes the board feel finished and helps paint or stain apply more evenly. Wipe away dust with a clean cloth before moving on.
Step 2: Finish The Board Before Installation
It is usually easier to paint or stain the board before it goes on the wall. For a painted rail, apply primer first if the board is raw wood, then add two coats of durable interior paint. Semi-gloss or satin finishes are popular for mudrooms because they are easier to wipe clean than flat paint.
For a stained rail, apply wood conditioner if needed, then stain, then protect it with a clear coat. A water-based polyurethane keeps the color clearer, while an oil-based finish can add a warmer tone. Mudrooms take abuse, so do not skip the protective topcoat if you stain the wood.
Step 3: Mark The Studs
Use a stud finder to locate studs behind the wall. Mark their centers lightly with pencil or painter’s tape. Most walls have studs spaced regularly, but do not rely on guesswork. A long hook rail carrying coats and bags should be anchored into studs whenever possible.
If your hook rail location does not line up perfectly with studs, the long board helps because it can span multiple studs while allowing hooks to sit where you want them. This is one of the biggest advantages of a DIY rail over individual hooks.
Step 4: Mark The Rail Height
Decide the top or center height of the board and draw a light level line on the wall. Use a long level if you have one. For a very long rail, check the level in several places. Walls and floors are not always perfectly straight, and older homes sometimes enjoy playing little geometry jokes.
Step 5: Attach The Board To The Wall
Hold the board against the wall on your level line. Drill pilot holes through the board where it crosses studs. Then drive wood screws through the board and into the studs. Use at least two studs for shorter rails and more for longer rails. Countersink the screw heads slightly so you can cover them with filler for a seamless look.
If you cannot hit studs in every location, use high-quality wall anchors only where appropriate and follow the anchor manufacturer’s directions. However, for heavy mudroom use, studs are the better choice. Drywall alone is not a superhero, even if it tries its best.
Step 6: Fill, Caulk, And Touch Up
Cover countersunk screw heads with wood filler or spackle. Once dry, sand smooth and touch up with paint or finish. If you want a built-in look, run a thin bead of paintable caulk along the top and sides where the board meets the wall. Smooth it carefully and touch up once dry.
Step 7: Space And Install The Hooks
Measure the rail and decide hook placement. A simple method is to mark the center point first, then work outward evenly. Leave extra space at both ends so items do not hang beyond the board. Use a level or square to keep hooks aligned.
Pre-drill small pilot holes for hook screws to prevent splitting, especially near board edges. Attach each hook securely. If a single-screw hook tends to twist, a small amount of adhesive caulk behind the hook base can help keep it from rotating after installation.
Design Ideas For A Long Mudroom Hook Rail
A hook rail can be simple, but it does not have to be boring. Because it stretches across the wall, it becomes a design feature. Here are a few ideas to make it look intentional.
Paint It The Same Color As The Wall
Painting the rail the same color as the wall gives it a built-in effect. This is great for small mudrooms because it adds function without visually chopping up the space. White, cream, greige, soft gray, navy, and deep green all work beautifully depending on your home’s palette.
Use A Contrasting Wood Tone
A stained wood rail adds warmth and texture, especially in mudrooms with tile floors, white walls, or painted cabinets. Pair natural wood with black hooks for a clean modern look or brass hooks for a warmer, classic feel.
Add A Narrow Shelf Above The Rail
If you have room, a shallow shelf above the hooks can hold baskets, small decor, mail trays, or seasonal accessories. Keep it narrow so it does not interfere with hanging coats. This small addition can make the rail feel like a custom mudroom feature rather than a board with hooks.
Install Hooks At Multiple Heights
Staggered hooks can help families with children. Put adult hooks higher and child-friendly hooks lower. This encourages kids to hang their own backpacks and coats, which is both practical and deeply satisfying when it actually happens.
Common Mistakes To Avoid
The project is simple, but a few mistakes can cause frustration. The first is using hooks that are too small. Tiny hooks look cute until a backpack slides off for the tenth time. Choose hooks that match the weight and size of what you actually hang.
The second mistake is ignoring studs. A rail loaded with coats and bags needs secure attachment. Always try to fasten into studs and use proper anchors only when studs are not available.
The third mistake is poor spacing. Hooks placed too close together make items overlap and look messy. Give bulky items enough room. A slightly longer rail with fewer well-spaced hooks often works better than a crowded rail packed with hardware.
The fourth mistake is skipping finish protection. Mudroom storage gets touched daily by wet sleeves, dirty hands, and bag straps. A durable finish helps the rail stay attractive and easier to clean.
How To Style And Organize Your New Hook Rail
Once the rail is installed, the fun part begins: making it work. Assign hooks by person, category, or purpose. For example, each family member can have one hook for a coat and one for a bag. Or you can group hooks by function: jackets on one end, dog gear in the middle, totes and hats on the other.
Add baskets beneath the rail for shoes, gloves, scarves, sunscreen, or pet supplies. A bench makes the area more useful because people can sit while taking shoes on and off. A boot tray helps contain wet footwear. A small wall calendar, message board, or key rack can turn the mudroom into a true command center without making it feel cluttered.
The trick is editing. Hooks are convenient, but they can become visual clutter if everything in the house hangs there forever. Keep daily-use items on the rail and move off-season coats or rarely used bags to a closet. Your hook rail should be a launchpad, not a museum of forgotten outerwear.
Maintenance Tips For A Mudroom Hook Rail
Every few months, check that hooks and wall screws are tight. This is especially important if the rail holds heavy backpacks or winter gear. Wipe painted rails with a damp cloth and mild soap when needed. Avoid harsh cleaners that can dull the finish.
If the wall behind the rail gets scuffed, touch it up with leftover paint. If hooks loosen over time, remove the screw, add a toothpick or wood filler into the hole if needed, and reinstall the screw once the repair is set. Small maintenance keeps the rail sturdy and fresh for years.
Budget-Friendly Ways To Customize The Project
A long hook rail can look expensive without being expensive. Use a simple pine board and paint it the same color as your trim for a classic look. Shop for hooks in multipacks to reduce cost. Reuse leftover paint from another room. Add inexpensive trim to the top edge for a custom profile. If you like a vintage look, mix a stained board with antique-style hooks.
You can also customize the length to avoid waste. If your store sells an eight-foot board and your wall is seven feet wide, use the leftover piece to make a matching key rail, small shelf, or laundry-room hook rack. Nothing says “I have my life together” like using scrap wood on purpose.
Extra Experience Notes: What DIYing A Long Hook Rail Teaches You
After living with a long mudroom hook rail, you quickly learn that the best DIY projects are not always the biggest or most dramatic. Sometimes the project that changes daily life is a straight board with hooks installed in the right place. It sounds almost too simple, but that is the beauty of it. A hook rail removes tiny moments of friction from your day. Instead of asking, “Where does this go?” everyone has an obvious answer.
One practical experience is that hook placement matters more than you expect. On paper, perfectly even spacing looks ideal. In real life, the items you hang are different sizes. A backpack needs more room than a baseball cap. A winter coat takes more space than a dog leash. If you are installing eight hooks, it may be worth laying out actual items on the floor in front of the board before drilling. This gives you a realistic sense of spacing and prevents the rail from becoming too crowded.
Another lesson is that a long rail can make a mudroom feel calmer even when it is full. The repeated hooks create order. Coats may still be puffy, backpacks may still be lumpy, and someone may still hang a hoodie inside out like a tiny fabric ghost, but everything has a place. That alone reduces the feeling of clutter.
Durability also becomes important fast. Mudrooms are not gentle rooms. Bags swing, coats tug, kids yank, and wet gear arrives with zero apology. Spending a little extra time on secure installation is worth it. Screwing the rail into studs, pre-drilling holes, countersinking screws, and touching up the finish may feel fussy during the build, but those steps are what make the rail feel solid instead of temporary.
Finish choice is another real-world detail. A beautiful flat paint may look great on day one, but mudrooms need wipeability. Satin or semi-gloss paint is easier to clean, especially around hooks where hands constantly touch the board. If you stain the rail, a clear protective coat helps prevent water spots and grime from settling into the wood grain. This matters if your mudroom handles rain jackets, snow gear, beach towels, or sports equipment.
One of the nicest surprises is how flexible the rail becomes over time. In winter, it holds coats, scarves, and hats. In summer, it may hold pool towels, tote bags, sun hats, or picnic blankets. During school months, backpacks and lunch bags dominate. During holidays, it might temporarily hold guest coats or reusable shopping bags. A long hook rail adapts without needing a remodel.
There is also an emotional benefit, which sounds dramatic for a board with hooks, but it is true. Entry areas set the tone for coming home. When the mudroom is a pileup, the house feels chaotic before you even take off your shoes. When the mudroom has a clear drop zone, the whole arrival routine feels smoother. You walk in, hang things up, kick off shoes, and move on. The rail quietly says, “Welcome home. Please stop throwing your coat on the chair.”
If you are nervous about DIY, this is a confidence-building project. It teaches measuring, leveling, stud finding, drilling, sanding, finishing, and hardware installation in a manageable format. You do not need to build drawers or cut complicated angles. The result is visible and useful right away, which makes the effort feel rewarding. By the end, you may find yourself looking around the house for other walls that “need hooks.” This is normal. The hook rail lifestyle is powerful.
The final experience-based tip is to install more hooks than you think you need, but not so many that the rail looks crowded. Life has a way of generating things to hang. A guest arrives. A kid joins a sport. A dog leash multiplies into three leashes and a harness. Your future self will appreciate a little extra capacity.
Conclusion
DIYing a long hook rail for your mudroom is one of those rare home projects that is affordable, attractive, beginner-friendly, and genuinely useful every single day. It turns blank wall space into organized storage, helps keep coats and bags off the floor, and gives your entry area a more finished look. With the right board, sturdy hooks, careful spacing, and secure stud mounting, you can create a mudroom feature that feels custom without requiring a custom budget.
Whether your style is modern, farmhouse, traditional, coastal, or “please just get the backpacks off the floor,” a long hook rail can be tailored to fit. Keep it simple, make it strong, finish it well, and your mudroom will finally have a system that can handle real lifemud, bags, coats, chaos, and all.