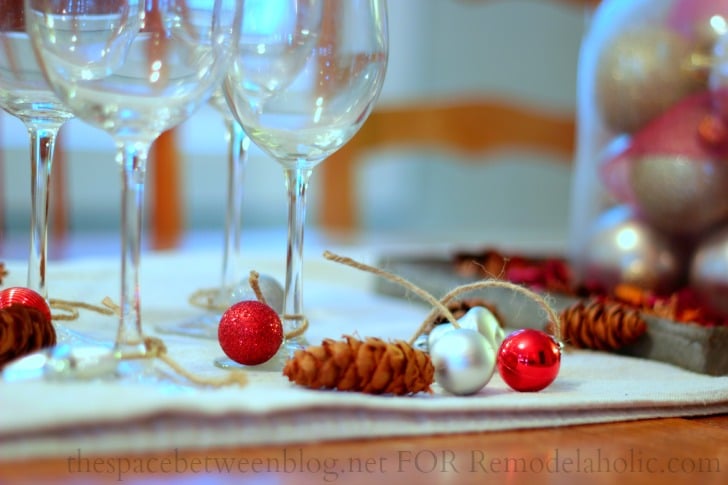
Some party problems are dramatic: the roast is late, the dog has stolen a napkin, and Uncle Gary has begun explaining cryptocurrency again. Other problems are tiny but surprisingly annoying, like six identical wine glasses slowly migrating around the room until nobody knows which glass belongs to whom. That is where DIY wine charms swoop in wearing a tiny cape made of beads, cork, ribbon, and good intentions.
Wine charms are small markers that attach to the stem, rim, or base of a glass so each guest can identify their drink. They are useful for wine, champagne, mocktails, cocktails, sparkling cider, and even mason jar drinks. Better yet, they are inexpensive, easy to make, and festive enough to look like you planned the party months in advance instead of panic-cleaning the living room 23 minutes before guests arrived.
This guide shows you how to make stylish homemade wine glass charms using affordable craft supplies, recycled materials, and a few clever shortcuts. You do not need professional jewelry-making skills. You need a flat surface, a handful of beads, a little patience, and the emotional strength to find one seed bead that rolled under the refrigerator.
What Are DIY Wine Charms?
DIY wine charms are decorative glass identifiers made from beads, wire hoops, charms, cork, cardstock, clay, ribbon, or other small materials. They typically wrap around the stem of a wine glass, but they can also clip to a rim, tie around a mason jar, or hang from a cocktail glass. Their job is simple: help every guest keep track of their drink while adding a polished, personal touch to your table.
Think of them as tiny name tags for your glass, except cuter and far less awkward than saying, “Hello, my name is Pinot.” They are especially helpful at holiday dinners, wine tastings, bridal showers, birthdays, Thanksgiving, Christmas parties, New Year’s Eve gatherings, and backyard dinners where every glass mysteriously looks the same after the first toast.
Why Make Wine Charms Instead of Buying Them?
Store-bought wine charms are convenient, but handmade wine charms offer three big advantages: they cost less, they match your party theme, and they feel more personal. A basic set can be made for just a few dollars if you already have beads, old jewelry, ribbon, cardstock, or wine corks at home. Even if you buy supplies, one pack of hoops and one bead assortment can usually create multiple sets.
DIY wine glass charms also let you control the style. Want rustic farmhouse? Use cork slices, jute, and stamped initials. Hosting a Christmas dinner? Try red, green, gold, snowflake charms, tiny bells, or pearl beads. Planning a bridal shower? Choose soft pastels, faux pearls, and letter beads. Throwing a Halloween party? Black beads, orange ribbon, and little bat charms will do the job with spooky confidence.
Plus, making them is fun. This is the kind of craft that works well for beginners, kids with supervision, and adults who claim they are “not crafty” while secretly making the prettiest charm in the room.
Basic Supplies for Inexpensive DIY Wine Charms
You can keep this project very simple or dress it up depending on your event. Here are the most useful supplies to have on hand:
- Wine charm hoops, hoop earring findings, or 20-gauge craft wire
- Assorted beads in different colors, shapes, or finishes
- Small charms, pendants, buttons, bells, or recycled jewelry pieces
- Jump rings for attaching charms
- Needle-nose pliers or round-nose pliers
- Wire cutters if cutting your own hoops
- Cardstock, printable tags, or laminated paper for paper wine charms
- Wine corks, jute, twine, or ribbon for rustic charms
- Polymer clay for custom shapes
- Permanent marker, alphabet stamps, or letter beads for personalization
If you are aiming for the cheapest version, raid your junk drawer first. Broken necklaces, single earrings, old keychains, unused buttons, scrap ribbon, greeting cards, and leftover beads can all become festive wine charms. Craft stores are wonderful, but your home may already contain a tiny bead kingdom waiting for its moment.
How to Make Easy Beaded Wine Charms
Beaded wine charms are the classic option because they are fast, reusable, and endlessly customizable. They look polished even when the process is very simple.
Step 1: Choose a Hoop or Wire Ring
The easiest method is to use pre-made wine charm hoops or hoop earring findings. These already open and close, which saves time. If you prefer to make your own, cut a short piece of 20-gauge wire and shape it around a marker, dowel, or small round object. Create a tiny loop on one end and a small hook on the other so the ring can close around the glass stem.
Step 2: Pick a Color Theme
Choose beads that fit your party. For a holiday dinner, mix metallic gold, cranberry red, evergreen, and pearl white. For summer, try turquoise, coral, yellow, and clear glass beads. For a wedding shower, use blush, ivory, champagne, and soft blue. Every charm should be different enough for guests to tell them apart quickly.
Step 3: Add Beads and a Focal Charm
Thread several beads onto the hoop. Add a small charm in the center if you have one, then continue with more beads. The focal charm can be a star, heart, snowflake, leaf, initial, shell, tassel, tiny key, or recycled pendant. Do not overload the hoop; heavy charms can slide awkwardly or pull on delicate glass stems.
Step 4: Close the Hoop
Once the beads are in place, bend the end back into its original shape so the charm can open and close. Use pliers gently. The goal is snug, not medieval blacksmith. Test the charm on a wine glass stem. If it hangs neatly and opens without dropping beads, congratulations: you have officially made tiny jewelry for glassware.
Rustic Cork Wine Charms
Wine cork charms are a fantastic choice for rustic dinners, vineyard-themed parties, fall gatherings, and wine tastings. They are also a smart way to reuse corks instead of tossing them into the “someday craft project” jar that has been judging you from the pantry shelf.
How to Make Cork Wine Charms
Start with clean, dry corks. Slice each cork into discs about one-half inch thick using a sharp knife and a stable cutting board. Work slowly and keep your fingers out of the danger zone. Stamp or write a different letter, number, or symbol on each slice. You can use alphabet stamps, paint pens, or a fine-tip permanent marker.
Next, screw a tiny eye screw into the side of each cork disc or poke a small hole and add a jump ring. Attach jute, twine, ribbon, or a wire hoop. For extra character, add one or two small beads beside the cork. The finished look is casual, earthy, and charmingly “I know what a cheese board is.”
Printable Paper Wine Charms
Paper wine charms are the fastest solution when guests are coming soon and the craft drawer is giving “limited resources.” They are ideal for large parties, office events, birthday dinners, and casual celebrations because they can be printed, cut, and slipped around glass stems in minutes.
Use sturdy cardstock and cut circles, leaves, stars, hearts, ornament shapes, or simple tags. Snip a small line from the edge to the center hole so the tag can slide onto a glass stem. Guests can write their initials on the tags, or you can pre-label them with names. If you want them to survive a few splashes, laminate the paper before cutting or use clear contact paper.
Paper tags are not as durable as wire or bead charms, but they are cheap, lightweight, and easy to match to invitations, menus, place cards, or holiday decor. They are also perfect for a “make your own charm” station where guests decorate their own tag before grabbing a drink.
Polymer Clay Wine Charms for Custom Shapes
If you want handmade wine charms that feel playful and gift-worthy, polymer clay is your friend. It can be shaped into hearts, stars, fruit, leaves, pumpkins, snowflakes, flowers, initials, or tiny wine bottles if you are feeling ambitious and properly caffeinated.
Roll the clay to an even thickness, cut shapes with mini cutters, and poke a small hole near the top before baking. Follow the baking instructions on the clay package because different brands vary. Once cooled, decorate with paint, glitter, glaze, or metallic accents. Add a jump ring and attach the clay charm to a hoop.
Polymer clay charms are especially good for themed sets: pink hearts for Valentine’s Day, pumpkins for Friendsgiving, stars for New Year’s Eve, lemons for a summer spritz party, or tiny snowmen for Christmas. They take longer than beaded charms, but the result feels custom and memorable.
Festive Theme Ideas for Every Occasion
The secret to beautiful homemade wine glass charms is not expensive materials. It is a clear theme. Here are easy ideas you can adapt for different events:
- Christmas wine charms: red beads, green beads, gold bells, snowflakes, candy cane stripes, mini wreaths, or tiny ornaments.
- Thanksgiving wine charms: cork, copper wire, leaf charms, warm amber beads, acorns, and guests’ initials.
- New Year’s Eve charms: black, silver, gold, stars, glitter clay shapes, and number charms.
- Bridal shower charms: pearls, blush beads, lace ribbon, heart charms, and letter beads spelling each guest’s name.
- Beach party charms: shells, sea glass colors, turquoise beads, raffia, and tiny starfish shapes.
- Birthday wine charms: bright beads, tassels, pom-poms, mini balloons, and colorful letter charms.
- Halloween charms: black hoops, orange beads, bats, ghosts, tiny skulls, and purple accents.
Tips for Making Wine Charms Look Professional
Even simple DIY wine charms can look boutique-worthy with a few small upgrades. First, limit each set to a coordinated color palette. If every charm uses completely random supplies, the result can look like a craft drawer sneezed. Choose three to five colors and repeat them in different combinations.
Second, vary each charm clearly. The whole point is identification, so do not make eight nearly identical gold-and-pearl charms unless you want your guests playing detective with beverages. Use a different centerpiece, letter, bead color, or symbol for each one.
Third, keep them lightweight. A wine charm should not feel like a chandelier clinging to your glass. Heavy charms can slide, clink too loudly, or make delicate stems feel unstable. Small is elegant. Tiny is mighty.
Fourth, finish sharp edges. If you cut wire, smooth or tuck the end so it does not scratch fingers. If you use paper, trim cleanly. If you use glitter, seal it well so the charm sparkles without leaving evidence all over your table like a festive crime scene.
Safety and Practical Care Notes
Wine charms are decorative, but they still belong near drinkware, so practical details matter. Keep charms away from the rim of the glass where people drink. Avoid loose glitter, flaking paint, or materials that shed easily. If using small beads, wire, or charms, keep them away from young children and pets because they can be choking hazards.
Most handmade wine charms should be wiped clean with a damp cloth rather than placed in the dishwasher. Paper, cork, jute, and clay decorations can warp, fade, or loosen if soaked. Store finished charms in a small box, jewelry pouch, divided organizer, or labeled envelope so they do not tangle into one dramatic bead knot before your next party.
Budget Breakdown: How Cheap Can This Project Be?
A basic set of six to twelve DIY wine charms can cost very little. If you already have beads, old jewelry, corks, cardstock, or ribbon, your only purchase may be hoops or jump rings. A pack of wine charm hoops is usually enough for several sets. Bead assortments and small charm packs stretch even further, especially when mixed with recycled materials.
For the lowest-cost version, make cardstock tags with guest initials. For the most reusable version, choose wire hoops and beads. For the most eco-friendly version, use cork slices and old jewelry. For the most giftable version, make a coordinated beaded or polymer clay set and package it in a small box with a handwritten tag.
DIY Wine Charms as Gifts and Party Favors
Handmade wine charms make thoughtful hostess gifts, holiday stocking stuffers, bridesmaid favors, housewarming presents, and party favors. Package a set of six in a small kraft box, organza bag, mini tin, or folded cardstock holder. Add a label that says “Cheers,” “Sip Happens,” or “No More Mystery Merlot.”
If giving them as a gift, choose a theme that suits the recipient. A friend who loves coastal decor may enjoy shell and sea-glass charms. A holiday hostess might appreciate gold-and-evergreen Christmas wine charms. A newly engaged couple may like initials or tiny heart charms. The personal touch makes the gift feel far more special than something grabbed from a checkout aisle at the last second.
Common Mistakes to Avoid
Making Every Charm Too Similar
Pretty is nice, but useful is the goal. Guests should be able to recognize their glass at a glance. Use initials, numbers, distinct colors, or different symbols.
Using Charms That Are Too Heavy
Large pendants may look dramatic on the craft table but awkward on a wine glass. Choose lightweight pieces that hang neatly without pulling.
Forgetting to Test the Fit
Wine glass stems vary. Test your charms on the glasses you plan to use. A hoop that fits one stem may be too tight or too loose on another.
Skipping Secure Closures
If the hoop does not close properly, beads can escape. And once beads escape during a party, they immediately develop the survival instincts of wild animals.
Extra Experience: What I’ve Learned Making DIY Wine Charms for Real Gatherings
After making and using DIY wine charms for parties, dinners, and last-minute “come over, I have snacks” gatherings, one thing becomes clear: the best wine charms are the ones people actually notice. A charm can be gorgeous, but if three guests need to hold their glasses under a lamp to determine whether they have the pale gold bead or the slightly paler gold bead, the design has failed politely.
The most successful sets I have used were bold but simple. For one holiday dinner, each charm had a different Christmas symbol: a star, bell, snowflake, tree, candy cane, and tiny gold bow. Nobody forgot which glass was theirs because the shapes were easy to remember. The snowflake person was deeply committed to being “Team Snowflake” by dessert. This is the power of tiny themed accessories: they turn beverage identification into a personality trait.
Another lesson is that guests enjoy personalization more than perfection. At a casual wine night, I set out blank cardstock tags, fine-tip markers, stickers, and a bowl of ribbon. Everyone decorated a tag before choosing a glass. Some wrote initials. One person drew a suspiciously confident cat. Another wrote “Not Yours” in dramatic block letters. The charms were not elegant, but they were hilarious, functional, and memorable. Sometimes the best DIY project is the one that gives guests permission to play.
For more formal dinners, I prefer pre-made beaded charms because they make the table look finished. I usually choose one metal tone, such as gold or silver, then add different accent beads. This keeps the set cohesive while still making each charm unique. If the table already has strong colors, like burgundy napkins or blue plates, I use charms that echo those shades. Small coordination details make the whole setting look intentional, even when dinner is mostly assembled from strategic grocery store shortcuts.
Cork charms are my favorite for relaxed gatherings because they feel warm and unfussy. They look especially good with wooden boards, candles, linen napkins, and anything involving cheese. The trick is to slice the corks evenly and avoid using crumbly corks that fall apart. Newer, firmer corks usually behave better. Stamp them with initials or numbers, tie them with twine, and they instantly look like something from a cozy vineyard weekend, even if you are serving snacks on your regular Tuesday plates.
One practical habit I recommend is making a few extra charms beyond your guest count. Someone may bring a plus-one, switch from wine to sparkling water, or decide they need a separate glass for tasting “just a splash” of something else. Extra charms prevent awkward glass confusion and make you look wildly prepared. The bar is low, but we accept the applause.
Finally, store your finished charms properly. I learned this after tossing a beaded set into a drawer and later discovering a tangled sculpture that looked like modern art with emotional problems. A small divided box, labeled envelope, or jewelry pouch keeps everything ready for the next gathering. Future you will be grateful, and future you deserves nice things.
Conclusion
DIY wine charms are inexpensive, easy, festive, and surprisingly useful. They solve the classic party problem of mixed-up glasses while adding personality to your table. Whether you choose beads and hoops, rustic cork slices, printable cardstock tags, polymer clay shapes, recycled jewelry, or ribbon markers, the best wine charms are clear, lightweight, and fun to use.
You do not need a huge budget or advanced crafting skills. Start with supplies you already have, choose a simple theme, and make each charm distinct. In less than an afternoon, you can create a reusable set for holidays, dinner parties, bridal showers, wine tastings, birthdays, and cozy nights with friends. The next time guests set down their glasses, nobody has to ask, “Wait, was this mine?” Instead, they can simply look for the tiny snowflake, cork initial, gold star, or glittery heart and continue sipping with confidence.
Note: This article is written as original web-publishing content based on real DIY craft methods, practical hosting experience, and common wine charm materials. No source links or citation placeholders are embedded in the article body.