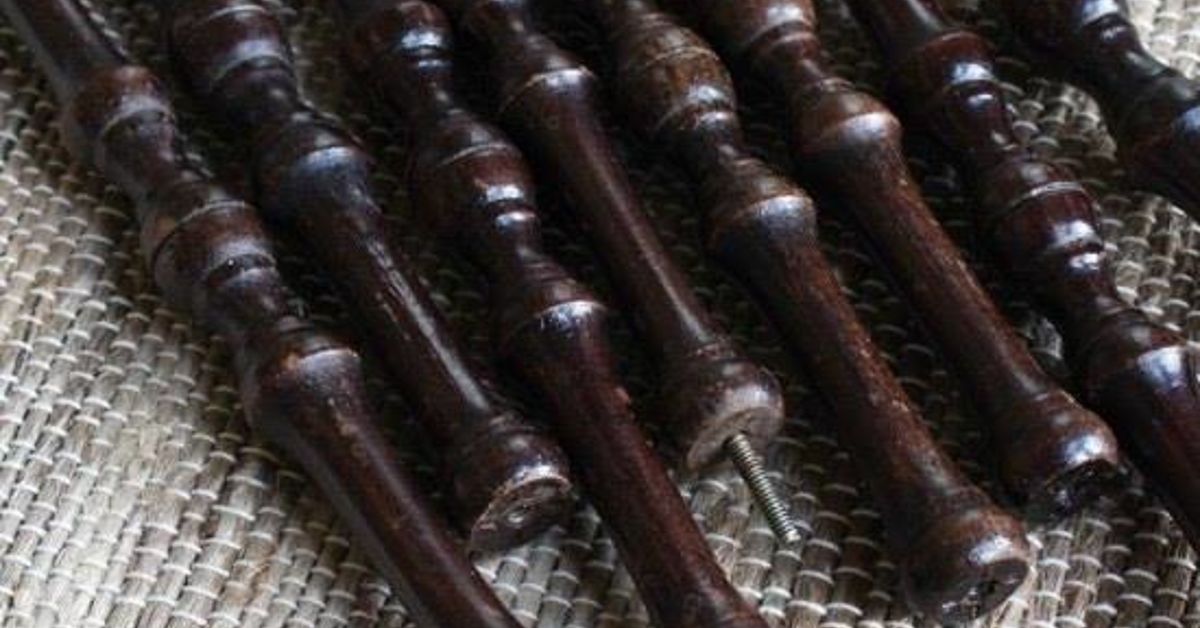
Old chair legs, staircase balusters, crib spindles, and leftover furniture parts have a habit of collecting in garages. They are too interesting to throw away, yet not quite useful enough to earn a permanent place on the workbench. Turning those lonely pieces of wood into DIY spindle wind chimes solves both problems while adding handcrafted character to a porch, patio, balcony, or garden.
This project does not require advanced woodworking skills or a workshop that resembles a television studio. With several wooden spindles, a small hanging platform, outdoor-rated cord, and basic tools, you can create an upcycled wind chime that moves beautifully in the breeze. Wooden spindles produce a soft, rhythmic clack rather than the long metallic notes of aluminum tubes. Add bells, washers, keys, or small pieces of copper when you want more sparkle in the sound.
Why Wooden Spindles Make Great Wind Chimes
Turned wooden spindles already have sculptural curves, grooves, beads, and tapered sections. A collection of mismatched pieces can look intentional once they receive a coordinated paint palette or finish. They also have enough weight to move steadily without flying around like caffeinated drinking straws.
Material, size, shape, and suspension all affect a wind chime’s voice. Larger wooden pieces generally create lower, duller knocks, while smaller pieces make lighter clicks. Metal bells and hardware add brighter, higher-pitched accents. Longer or larger vibrating objects usually produce lower pitches than smaller ones, although a solid wooden spindle behaves more like a piece of percussion than a tuned hollow tube.
The project is also flexible. You can make a farmhouse-style chime with distressed white paint, a colorful garden version using leftover exterior paint, or a natural design sealed with clear outdoor varnish. In other words, those mismatched spindles do not need to match. They merely need to agree to participate.
Project Overview
| Skill level | Beginner to intermediate |
|---|---|
| Active working time | About 2 to 3 hours |
| Drying and curing time | One to three days, depending on the finish |
| Estimated cost | $15 to $45 when using salvaged spindles |
| Best location | A covered porch, pergola, balcony, or sheltered tree branch |
Materials and Tools
Materials
- Five to seven wooden spindles, balusters, or turned furniture legs
- One wood round, scrap board, embroidery hoop, or metal ring for the top support
- One small wood disk, knob, or large wooden bead for the center clapper
- One flat wood ornament, metal shape, or scrap board for the wind sail
- UV-resistant braided cord, waxed polyester cord, or heavy fishing line
- One screw eye, cup hook, or closed hanging ring
- Small eye screws, split rings, or stainless-steel washers
- Exterior paint, stain, or clear outdoor wood finish
- Optional bells, old keys, copper pieces, beads, or metal washers
- Exterior-rated wood glue or clear adhesive
Tools
- Drill and appropriately sized wood bits
- Clamps and a scrap-wood drilling block
- Sandpaper in 120- and 220-grit
- Measuring tape, ruler, and pencil
- Paintbrush or foam applicator
- Scissors or utility knife
- Safety glasses and a suitable dust mask or respirator
Before You Begin: Inspect Salvaged Spindles
Look for cracks, rot, loose paint, sharp hardware, and insect damage. A minor dent adds character. A deep split running through the suspension point adds an unexpected floor ornament when the spindle drops.
Be especially cautious with old painted furniture or architectural balusters. Paint on items from older buildings or unknown sources may contain lead. Do not immediately attack mystery paint with a power sander. Consider using new unfinished spindles, testing the existing coating, sealing an intact finish, or consulting appropriate lead-safe guidance before disturbing it. The EPA warns that sanding, drilling, scraping, or otherwise disturbing lead-based paint can create hazardous dust.
When drilling or sanding, clamp the work securely and wear eye protection. Round spindles can roll suddenly, which is a charming trick only when performed by circus performers. A simple V-shaped cradle made from scrap wood helps stabilize curved pieces. Pilot holes also reduce the chance of splitting wood near an end.
Plan the Wind Chime Design
Choose the Number of Spindles
Five spindles create an open, airy arrangement. Six or seven produce more frequent contact and a fuller visual display. More is not always better. If a dozen heavy spindles are squeezed beneath a small top plate, the result may sound less like a peaceful garden and more like a drawer full of wooden spoons falling down the stairs.
Arrange Different Lengths
For a balanced design, use spindles of different lengths or suspend equal spindles at staggered heights. A variation of 2 to 4 inches is usually enough to create movement and visual rhythm. Lay the pieces on a table before drilling so you can test several arrangements.
Decide How Much Sound You Want
For a quiet porch, let the wooden spindles strike one another directly. For a brighter chime, place stainless-steel washers between knots, hang small bells below two or three spindles, or attach old keys around the center clapper. Metal, bamboo, shell, glass, and wood each produce noticeably different tones, so combining materials creates a more layered sound.
How to Make DIY Spindle Wind Chimes
Step 1: Clean and Prepare the Spindles
Wash unfinished or safely coated pieces with mild soap and water. Avoid soaking them, particularly if the wood is old or glued. Let everything dry completely.
Sand unfinished wood lightly with 120-grit paper, followed by 220-grit for a smoother surface. Wrap a narrow strip of sandpaper around curved sections and pull it back and forth like a shoeshine cloth. This makes it easier to follow decorative contours without flattening the details that made the spindle interesting in the first place.
Step 2: Mark the Suspension Holes
Select a solid section near the top of each spindle. Mark the hole approximately 1/2 to 1 inch below the end, depending on the spindle’s thickness. Keep the marks consistent so the pieces hang predictably.
For a rustic look, drill one hole straight through each spindle and thread the cord through it. For a cleaner appearance, drill a pilot hole into the top and install a small screw eye. Screw eyes are particularly useful when the spindle’s narrow sections are too fragile for a cross hole.
Step 3: Drill Carefully
Place the spindle in a V-block or between padded clamps. Drill slowly and allow the bit to cut without excessive pressure. Place scrap wood beneath a cross-drilled spindle to reduce breakout as the bit exits.
Check every hole before moving on. A hole filled with compacted dust or rough fibers can abrade the hanging cord over time. Smooth the edges with folded sandpaper or a countersink bit turned gently by hand.
Step 4: Paint, Stain, or Seal the Wood
Paint all surfaces, including drilled holes and end grain. End grain absorbs moisture quickly, so it deserves more than a distant wave from the paintbrush. Two thin coats generally create a more even finish than one heroic, dripping coat.
For a natural look, use an exterior-rated clear finish formulated to resist moisture and sunlight. Spar varnish or spar urethane is commonly chosen for outdoor wood because it offers water resistance, UV protection, and enough flexibility to tolerate seasonal wood movement. Follow the manufacturer’s instructions for preparation, coat count, ventilation, drying, and curing.
Step 5: Create the Top Support
A 6- to 8-inch wood round works well for five to seven medium spindles. Mark evenly spaced hanging points approximately 3/4 inch from the outer edge. A paper circle divided into equal sections makes a convenient drilling template.
Drill one hole at each mark and another hole in the center. The outer holes support the spindles. The center hole carries the clapper and wind sail. Install a strong screw eye on top, or drill three additional holes and create a triangular hanging harness.
A three-cord harness tends to keep the platform level. A single center screw eye looks simpler and works well when the top is thick enough to hold the hardware securely.
Step 6: Hang the Spindles
Cut the outer cords several inches longer than needed. Thread one cord through each support hole and connect it to a spindle. Use double overhand knots, figure-eight knots, or secure fishing knots appropriate for your chosen line.
Adjust the cords so the spindles hang at slightly different heights. Leave roughly 3/4 to 1 1/2 inches between their widest sections. They should be close enough to touch when moved but far enough apart that they do not remain tangled after every breeze.
Once the spacing looks right, tighten the knots and add a tiny dab of exterior-rated adhesive where appropriate. Do not coat the entire knot in a giant glue blob. The project is a wind chime, not an archaeological specimen preserved in amber.
Step 7: Add the Center Clapper
Thread a long cord through the center hole in the top support. Attach a round wooden disk, knob, or large bead at the height where it can strike the middle portions of the surrounding spindles.
The clapper should move freely without being so large that it constantly jams between the pieces. Begin with a diameter of approximately 2 to 3 inches. You can increase or reduce the size after testing.
For more sound, attach several metal washers around the edge of the clapper or suspend a few keys beneath it. A single metal component often adds enough brightness without turning the porch into a percussion rehearsal.
Step 8: Attach the Wind Sail
Connect a lightweight sail 6 to 12 inches below the clapper. A 3- to 5-inch painted wood shape works well. Leaves, birds, stars, hearts, and simple rectangles all catch wind effectively.
A larger sail responds to lighter breezes but can make the chime excessively active during storms. A smaller sail requires stronger airflow and produces fewer sounds. Start modestly; you can always make another sail after learning how air moves through the chosen location.
Step 9: Balance and Test
Hang the wind chime temporarily and gently push the sail. Watch the top support. If it tilts sharply, adjust cord lengths or reposition heavier spindles. Check that each piece swings freely and that the clapper reaches multiple spindles.
Listen from several feet away. A sound that seems mild at arm’s length may carry surprisingly well across a quiet yard. Adjust the clapper height, spindle spacing, and optional metal accents until the sound is pleasant rather than persistent.
How to Tune the Movement and Sound
The Chime Barely Moves
Use a larger or lighter wind sail, lengthen the cord below the clapper, or move the chime closer to the edge of a porch. Airflow is often weaker near a solid wall and more active near corners, openings, railings, and roof edges.
The Spindles Tangle
Increase the spacing between suspension holes, shorten overly long cords, or add a little more weight to the bottom of each spindle. Swivels or split rings can also reduce twisting.
The Chime Is Too Quiet
Move the clapper so it strikes wider sections of the spindles. Add a few small bells, keys, brass washers, or copper pieces. Harder contact surfaces generally create a sharper attack than wood striking wood.
The Chime Is Too Loud
Remove some metal hardware, reduce the sail size, wrap the clapper edge with thin leather, or move the chime to a more sheltered position. Soft wooden pieces are often recommended when a mellow, neighbor-friendly sound is preferred.
The Top Support Tilts
Rearrange the heaviest spindles so they are distributed evenly. When using a three-cord harness, confirm that all three support cords are identical in length before making smaller balance adjustments.
Creative Spindle Wind Chime Ideas
Farmhouse White
Paint the spindles warm white, pale gray, and muted sage. Lightly distress safe, newly applied paint at the raised details, then seal it for outdoor use. Add a small galvanized star as the sail.
Rainbow Garden Chime
Give each spindle a different cheerful color. Repeat one or two colors on the top support and clapper so the arrangement looks coordinated rather than like the paint shelf sneezed.
Natural Wood and Copper
Stain the wooden components in a warm cedar or walnut tone. Add copper washers, short copper tubes, or aged keys for contrast. Copper develops a natural patina outdoors, which works particularly well in cottage gardens.
Memory Wind Chime
Use spindles from a family chair, crib, or damaged piece of furniture. Add dated tags, engraved beads, or a small waterproof plaque. Preserve the original finish when it is stable and known to be safe, allowing scratches and wear to remain part of the story.
Holiday Interchangeable Chime
Attach the wind sail with a small clasp. Swap a flower for spring, a star for summer, a leaf for fall, and a snowflake for winter. One wind chime can then become four decorations without occupying four storage boxes.
Where to Hang Spindle Wind Chimes
Choose a place that receives intermittent airflow but offers some protection from severe weather. Covered porches, pergolas, gazebo edges, balcony corners, and sturdy tree branches are good candidates.
Do not hang the chime where swinging parts can strike windows, vehicles, fragile plants, electrical lines, or people. Use hardware rated for more than the complete weight of the chime, and secure it to solid framing rather than decorative trim alone.
Listen to the chime from inside the house and from nearby property lines. A gentle sound near the garden can become an all-night solo beside a bedroom window. Placement affects both how often the chime moves and how far its sound carries.
Outdoor Care and Maintenance
Inspect the cord, knots, screw eyes, and top support every few months. Sunlight and repeated movement can weaken some plastics and natural fibers. Replace any line that appears faded, stiff, cracked, or frayed.
Bring the chime indoors during hurricanes, severe thunderstorms, ice storms, or prolonged high winds. Even well-built outdoor décor is not improved by traveling horizontally across the neighborhood.
Clean the spindles with a soft damp cloth and mild soap. Avoid soaking the wood. When the finish becomes dull, lightly clean and prepare the surface before applying a compatible maintenance coat. Pay special attention to end grain, drilled holes, and any area where pieces repeatedly rub together.
Practical Experiences and Lessons From Building Spindle Wind Chimes
The first lesson many makers discover is that the initial tabletop arrangement rarely becomes the final hanging arrangement. Spindles that look perfectly balanced while lying flat can behave very differently when suspended. One piece may be denser, another may have an off-center screw eye, and a third may insist on rotating backward as though it has creative differences with the rest of the project. Temporary knots are extremely useful during the testing stage. Tighten everything permanently only after the chime hangs level.
Spacing also requires experimentation. Placing the spindles too far apart creates a beautiful mobile that produces almost no sound. Placing them too close creates a wooden traffic jam. A practical starting point is to arrange the widest portions about an inch apart, then adjust them while the chime is hanging. Testing the project with a household fan on a low setting can reveal tangles and balance problems, although outdoor airflow will always be less predictable.
The center clapper usually needs the most adjustment. A clapper that hangs too high may strike narrow sections of the spindles and create only faint taps. One that hangs too low can miss them completely. Moving it by just an inch may dramatically improve the sound. Before cutting away excess cord, test several heights and mark the best position with painter’s tape.
Another common experience involves the wind sail. Large sails look impressive, but they can overpower the entire design. During a strong gust, an oversized wooden sail may swing the spindles violently rather than musically. Lightweight sails made from thin wood, metal, or durable composite material tend to respond more gracefully. Rounded corners also reduce snagging and make the finished piece safer around walkways.
Finishing turned spindles takes longer than expected because grooves collect drips. Thin coats and a small brush are more reliable than loading the surface with paint. Hanging each spindle from a temporary wire while painting makes it easier to coat all sides without leaving fingerprints. It also prevents the familiar workshop ritual of painting one side, setting it down, and immediately remembering that wet paint obeys gravity.
Sound expectations deserve a reality check. Solid wooden spindles will not ring like tuned aluminum tubes. Their appeal lies in a warm clack, visual movement, and the story of the salvaged material. Adding two or three small metal elements creates a pleasant hybrid sound while preserving the wooden character. The most successful designs usually combine restraint with variety: enough contact to be heard, enough space to move, and enough metal to sparkle without overwhelming the softer wooden rhythm.
Finally, location often matters more than construction. A chime that barely moves against a protected wall may become lively when shifted a few feet toward the porch opening. Before installing a permanent hook, hang it temporarily in several locations. Observe it in morning and evening breezes, listen from indoors, and consider nearby neighbors. A thoughtfully placed wind chime becomes a charming garden detail. A poorly placed one becomes the unofficial neighborhood alarm clock.
Conclusion
DIY spindle wind chimes transform forgotten furniture parts into practical outdoor art. The project is affordable, customizable, and forgiving enough for beginners, yet it offers plenty of room for creative finishes, decorative hardware, and sound experiments.
Start with sound wood, stabilize every piece before drilling, use outdoor-rated materials, and test the balance before tightening the final knots. Let wooden spindles provide the mellow rhythm, then add bells, keys, or washers when you want brighter notes. The finished wind chime may not perform a recognizable song, but it will give the breeze something considerably more interesting to do.