In the world of prosthetics, the flashy stuff usually steals the spotlight. Robotic fingers! Carbon fiber limbs! Sensors that read muscle signals! Hands that look like they wandered in from a sci-fi movie and decided to help with the dishes!
But every prosthetic user, prosthetist, engineer, and maker eventually meets the humble truth: a prosthetic device is only as useful as the socket that connects it to the human body. The socket is the handshake between person and machine. If it fits poorly, even the fanciest bionic hand becomes an expensive desk ornament with excellent dramatic potential.
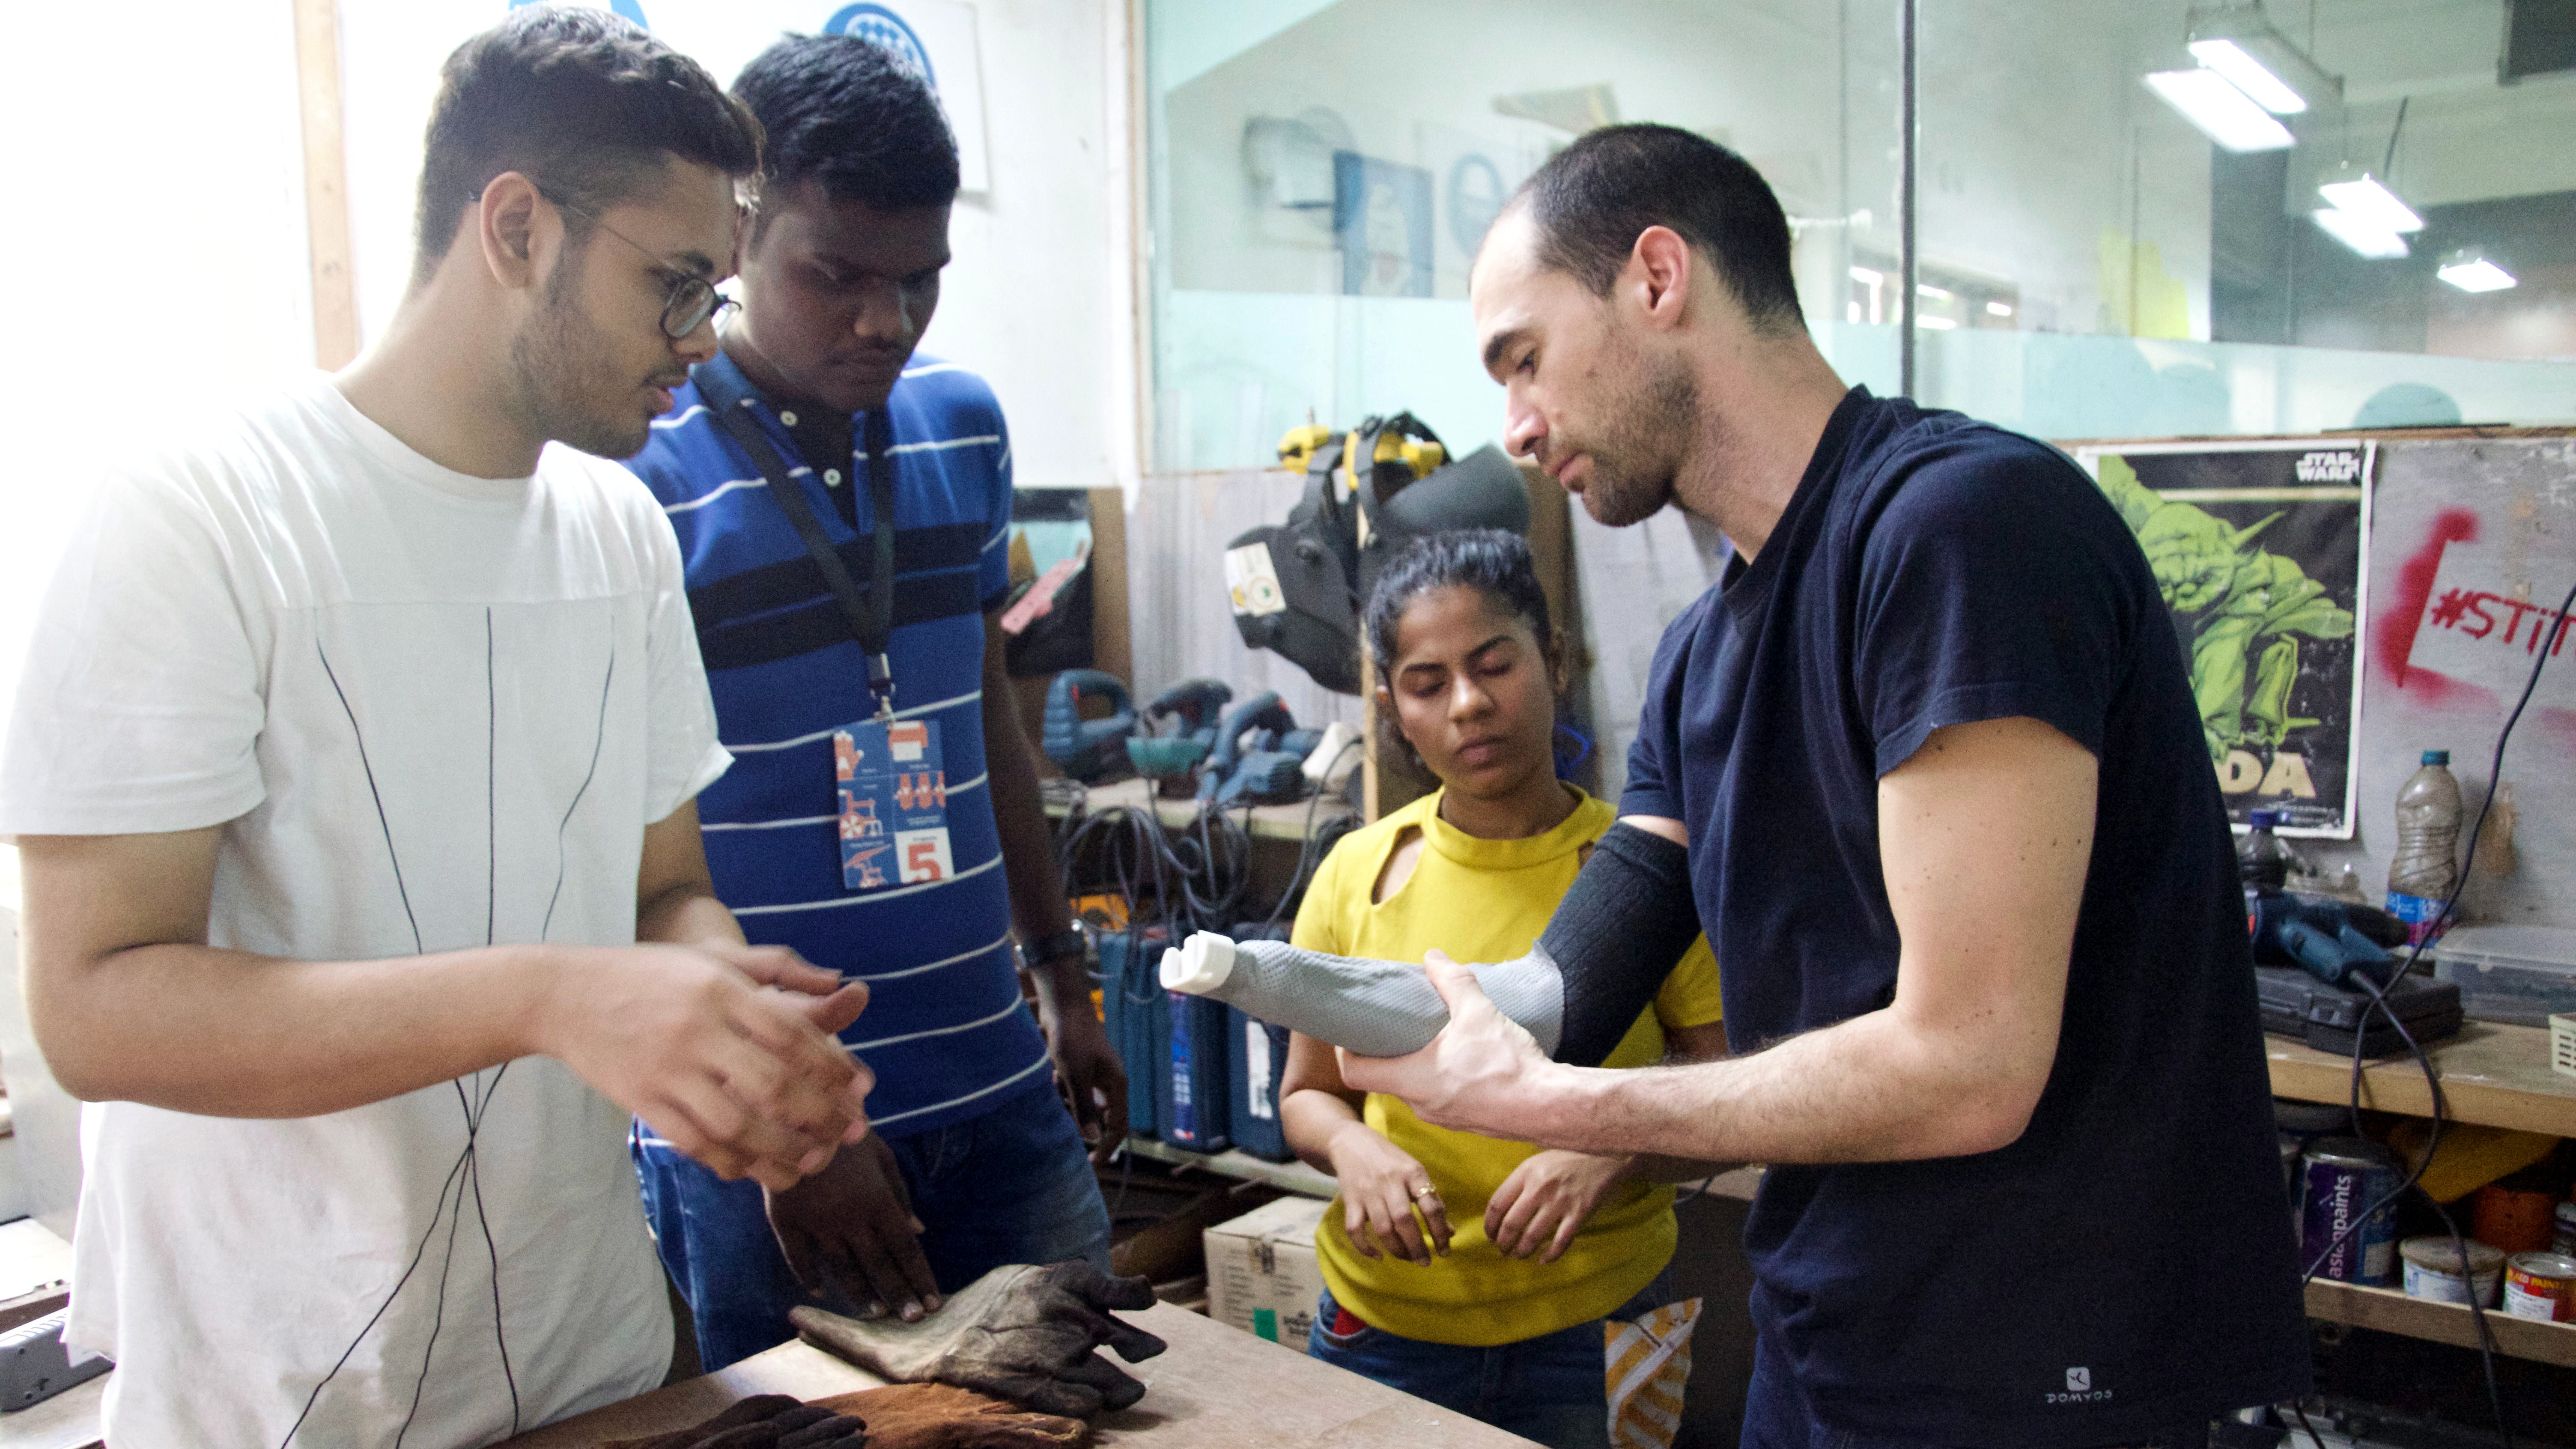
That is why the project behind “DIY Socket For Prosthetics Contains Power Supply, Charger” is so interesting. Instead of focusing only on the terminal devicethe hand, hook, tool, or attachmentit focuses on the foundation: a custom prosthetic socket that can hold electronics, batteries, sensors, a charger, and a power output system. In plain English, it asks a very practical question: what if the prosthetic socket did more than just attach the arm?
This DIY prosthetic socket concept combines thermoplastic forming, Velcro adjustment, a 3D-printed battery holder, lithium-ion cells, a micro USB charging module, a battery protection circuit, voltage conversion, and sensor integration. It is not a polished commercial medical device. It is a maker-style prototype. But it points toward something important: accessible, modular, repairable prosthetic technology that does not require a secret laboratory, a billionaire sponsor, or a wizard robe.
What Is a Prosthetic Socket, and Why Does It Matter So Much?
A prosthetic socket is the part of a prosthesis that fits around the residual limb. It transfers force, supports movement, keeps the device suspended, and allows the user to control or position the artificial limb. In upper-limb prosthetics, the socket may connect to a hand, hook, wrist unit, elbow mechanism, or specialized tool. In lower-limb prosthetics, it helps transfer body weight and movement into the foot, knee, or ankle system.
That sounds simple until you remember that the human body is not a block of aluminum. Skin moves. Soft tissue compresses. Sweat happens. Limb volume changes throughout the day. A socket that felt fine at breakfast can feel like a medieval negotiation tactic by late afternoon.
Good socket fit helps reduce pain, friction, pressure points, blisters, and skin breakdown. Poor socket fit can turn daily prosthetic use into a battle. That is why professional prosthetic care involves assessment, fitting, adjustment, training, and follow-up. A DIY project can be educational and innovative, but a socket used on a real person should always involve qualified clinical guidance.
The Big Idea: A Socket That Also Powers the Prosthesis
The original DIY prosthetic socket project stands out because it treats the socket as a functional hub, not just a shell. The design includes space for a battery pack and charging hardware, allowing the socket to power attachments such as a prosthetic hand, sensors, or other assistive components.
This matters because powered upper-limb prosthetics need energy. Myoelectric hands use electrodes or sensors to detect muscle activity, then send signals to a controller that activates motors. Other experimental devices may use infrared sensors, pressure sensors, buttons, or mechanical switches. All of that requires power, and power has to live somewhere.
Traditional powered prosthetic systems often place batteries in dedicated compartments built into the prosthesis. The DIY socket concept takes a maker-friendly approach: use accessible components, mount them cleanly, and create a compact self-contained system. In other words, it gives the prosthetic socket a second job. It is no longer just “the part that holds on.” It becomes the electrical backpack, charging dock, and control platform.
Core Components of the DIY Prosthetic Socket
The project uses a mix of mechanical, electronic, and 3D-printed parts. Each one plays a specific role in making the socket adjustable, wearable, and electrically useful.
Thermoplastic Socket Material
Thermoplastic is useful in prosthetic prototyping because it becomes flexible when heated and stiffens as it cools. That makes it easier to shape around a form. In a DIY context, thermoplastic allows rapid iteration: heat, shape, test, adjust, and repeat. It is the craft foam of serious assistive technologyexcept less glittery and much more structural.
However, shaping a socket is not just about making something that “looks right.” The internal contour must distribute pressure safely. A small ridge, edge, or tight zone can irritate skin or compress tissue. For educational builds, thermoplastic is approachable. For real-world use, professional fitting is essential.
Velcro Straps for Adjustability
The project includes Velcro straps to improve comfort and adjustability. This is a smart choice for a prototype because strap tension can be changed quickly. When limb volume shifts or the user needs a tighter or looser fit, straps offer flexibility without rebuilding the whole socket.
Adjustable straps also make the device easier to don and remove. That matters more than it sounds. A prosthesis that takes too long to put on, feels fussy, or requires an engineering degree before coffee is less likely to be used consistently.
3D-Printed Battery Holder
A 3D-printed battery holder gives the power system a dedicated home. This is one of the most useful parts of the design because loose batteries inside a wearable device are a terrible idea. Batteries should be secured, protected from impact, kept away from sweat, and positioned so they do not create pressure points.
3D printing shines here because the holder can be customized. Need a different battery orientation? Change the model. Need a thicker wall? Modify the file. Need a cable channel so wires do not wander around like confused spaghetti? Print it in.
Rechargeable 18650 Lithium-Ion Batteries
The project uses two 18650 lithium-ion cells. These batteries are common in electronics projects because they provide good energy density in a compact cylindrical format. They are found in flashlights, battery packs, tools, and many DIY electronics builds.
But lithium-ion batteries are not toys. They require correct charging, protection from over-discharge, over-current protection, insulation, secure mounting, and careful wiring. A prosthetic socket sits close to the body, so battery safety is not optional. It is the difference between “clever assistive technology” and “why is my arm warmer than my coffee?”
Micro USB Charging Module
A built-in micro USB charging module allows the battery pack to recharge without removing everything from the socket. That is convenient, especially for a wearable device. Charging ports should be placed where they are easy to access but protected from sweat, dust, and accidental strain.
Modern builds might choose USB-C instead of micro USB, but the principle is the same: a prosthetic socket with charging capability becomes easier to maintain. The user does not need to disassemble the prosthesis every time the battery runs low.
Battery Management and Protection Circuit
The project includes a 7.4V charger protection circuit, also called a BMS or battery management system in many battery-pack builds. This kind of circuit helps protect cells from dangerous conditions such as overcharging, over-discharging, overload, and short circuits.
In a wearable prosthetic system, this is a must-have. A battery pack should never be treated as just two cells and a wish. Protection circuitry, proper insulation, and mechanical strain relief all matter.
Voltage Step-Down Modules and USB Output
The design includes DC-DC step-down conversion to reduce voltage to 5V for USB-powered electronics. That means the socket can potentially power small modules, sensors, controllers, or even charge external devices in some configurations.
This is where the project becomes especially fun. A prosthetic socket with a built-in power bank sounds like something a comic book inventor would build after losing a charger for the third time. But it also makes practical sense: powered prosthetics are electronic systems, and modular power access can make experimentation easier.
Sensor Integration
The DIY socket includes an infrared sensor intended to detect movement and help control a prosthetic hand or related attachment. Many powered prosthetic systems rely on body signals, switches, sensors, or muscle activity to trigger motion. Sensor placement matters because poor positioning can lead to unreliable control.
In a clinical myoelectric prosthesis, electrodes are usually placed where they can detect meaningful muscle signals from the residual limb. In DIY prototypes, sensors may be simpler, but the same principle applies: the system must read the user clearly and consistently.
Why This DIY Prosthetic Socket Is Clever
The cleverness of this project is not that it creates a perfect medical product. It does not. The cleverness is that it bundles several practical needs into one wearable platform.
First, it recognizes that prosthetic sockets are central to usability. A hand may be impressive, but if the socket is uncomfortable, the device fails the everyday test.
Second, it makes room for electronics in a structured way. Instead of taping a battery pack somewhere and hoping gravity signs a peace treaty, the build uses a dedicated holder and mounted components.
Third, it embraces modularity. A socket with power and sensor access can support different terminal devices, prototypes, and experiments. That is valuable for makers, students, researchers, and open-source assistive-tech communities.
Fourth, it keeps affordability in mind. High-end prosthetic devices can be expensive, and access remains uneven. Open-source design, 3D printing, and low-cost components can help people explore solutions, especially in education and early prototyping.
The Safety Reality: DIY Prosthetics Need Adult Supervision, Even for Adults
Let’s be honest: DIY prosthetics can be inspiring, but they are not the same as building a desk lamp. A prosthetic socket touches skin, transfers load, influences movement, and may include batteries near the body. That raises safety concerns in three major areas: fit, electronics, and durability.
Socket Fit and Skin Health
A socket must avoid harmful pressure and shear. If the skin becomes red, painful, blistered, broken, or irritated, the user should stop using the device and consult a prosthetist or healthcare professional. Padding a pressure spot without understanding the cause can sometimes make pressure worse, not better.
Moisture is another issue. Sweat inside a socket can increase friction, soften skin, and contribute to discomfort or infection. That is why socket liner materials, ventilation, hygiene, and daily inspection matter.
Battery and Charging Safety
Lithium-ion batteries should be charged with appropriate circuits and protected from puncture, crushing, short circuits, heat, and water exposure. A wearable battery system should include a proper enclosure, strain relief for wires, insulation, and a clear way to disconnect power.
Charging while wearing the prosthesis is generally not a good idea for DIY systems. Commercial devices include safety testing and specific user instructions. A prototype should be treated conservatively: charge it off-body, monitor it, and use quality components.
Mechanical Strength
A socket may look sturdy on a table but behave differently during daily use. Repeated motion, twisting, heat, sweat, accidental drops, and strap tension can reveal weak points. 3D-printed parts can crack along layer lines, especially if printed with poor orientation or low infill. Any load-bearing part must be tested carefully.
Where 3D Printing Fits Into Prosthetic Innovation
3D printing has changed the assistive-technology conversation. It allows designers to create customized shapes, iterate quickly, and share files globally. Open-source communities have used 3D printing to create upper-limb assistive devices, mechanical hands, orthoses, and experimental prosthetic components.
For sockets, 3D printing can help with brackets, housings, cable guides, covers, adapters, and battery holders. In some research and clinical contexts, printed sockets are also being explored. But socket fabrication is more demanding than printing a phone stand. Comfort, safety, tissue loading, hygiene, and long-term durability all matter.
The DIY socket project uses 3D printing wisely by applying it to a battery holder and wrist interface rather than pretending every part of prosthetic care can be solved by pressing “print” and walking away. That is the right spirit: use maker tools where they help, and respect clinical complexity where the human body is involved.
How a Powered Socket Could Support Future Prosthetic Designs
A socket that contains a power supply and charger could support many future ideas. It might power a myoelectric hand, a gripping tool, a sensor system, lights for visibility, haptic feedback, or a small onboard controller. It could also simplify testing because the power system stays with the socket while different attachments are swapped in and out.
Imagine a modular prosthetic platform where the user can attach a hand for daily tasks, a tool holder for workshop work, a sports attachment for recreation, or a specialized device for cooking. If the socket already includes safe power and signal routing, the attachment system becomes more flexible.
That is the real promise of this project. It is not just a homemade socket. It is a small step toward prosthetic ecosystems that are more open, adaptable, and user-centered.
Practical Lessons From This DIY Prosthetic Socket
The first lesson is that comfort beats gadget glamour. A prosthetic device must be wearable before it can be useful. The socket deserves as much design attention as the motorized fingers.
The second lesson is that integration matters. Batteries, sensors, chargers, and wires should not be afterthoughts. They should be planned into the structure from the beginning.
The third lesson is that modular design reduces waste. If one attachment fails, the whole system should not need to be rebuilt. If one battery holder needs improvement, it should be replaceable.
The fourth lesson is that open-source assistive technology can inspire innovation, but it should not bypass professional care. Makers can contribute ideas, prototypes, and problem-solving energy. Prosthetists and clinicians bring anatomy, safety, fit, and rehabilitation expertise. The best results come when those worlds talk to each other instead of standing on opposite sides of the room holding soldering irons and clipboards.
Experience Section: What Building or Testing a DIY Powered Prosthetic Socket Might Feel Like
Working on a project like a DIY prosthetic socket with a power supply and charger is part engineering challenge, part anatomy lesson, and part patience test. On paper, the design looks straightforward: shape the thermoplastic, add straps, mount the batteries, solder the charging circuit, route the wires, attach the sensor, and test the output. In real life, each step politely raises its hand and says, “Actually, I have seven problems.”
The first experience most builders notice is how personal the socket shape is. You can measure length and circumference, but comfort depends on details that are harder to capture: where pressure lands, how the limb moves, where the edges sit, and how the user feels after ten minutes versus two hours. A socket can look beautifully symmetrical and still feel wrong. That teaches a useful maker lesson: the body is not a CAD file.
The second experience is wire management. At first, the electronics may seem like the exciting part. Then the wires start crossing each other like tiny rebellious noodles. A battery pack needs secure mounting. The charging port needs access. The USB output needs protection. The sensor needs stable placement. Every wire needs strain relief because wearable devices move constantly. A wire that is fine on a bench can fail quickly when attached to a human who bends, reaches, twists, sweats, and occasionally bumps into furniture because furniture is rude.
The third experience is learning that charging convenience is a big deal. If a prosthetic device is difficult to charge, people may avoid using it. A built-in charging module makes the system easier to maintain, but only if it is safe and accessible. The charging port should not dig into the limb, catch on clothing, or sit where moisture collects. Good design is often invisible: the user simply plugs it in and does not have to think about it.
The fourth experience is discovering how quickly small design choices affect daily usability. Strap placement changes comfort. Battery position changes weight balance. A rough printed edge can irritate skin. A poorly placed switch can be impossible to reach with one hand. A socket that is too bulky may fit poorly under clothing. These details are not glamorous, but they determine whether the device becomes useful or joins the drawer of “interesting prototypes I swear I’ll fix someday.”
The fifth experience is respect. Building a powered prosthetic socket gives you respect for prosthetic users, clinicians, engineers, and open-source makers. It also gives you respect for safety. A prototype may work for a demonstration, but a wearable assistive device must survive real life. That means testing, feedback, adjustment, and professional review. The goal is not just to make something move. The goal is to make something that helps someone live with more comfort, confidence, and independence.
Conclusion
The DIY socket for prosthetics that contains a power supply and charger is a fascinating example of practical assistive-tech innovation. It focuses on the part of the prosthesis that matters most for real-world use: the socket. By combining thermoplastic shaping, adjustable straps, 3D-printed hardware, rechargeable batteries, charging electronics, voltage conversion, and sensor integration, the design shows how a socket can become a modular platform rather than a passive shell.
Still, the most important takeaway is balance. DIY prosthetic projects can make technology more accessible, educational, and creative. They can inspire better design and help communities prototype new solutions. But prosthetic sockets interact directly with the body, and powered systems bring electrical safety responsibilities. Anyone exploring this kind of build should involve qualified prosthetic and medical professionals before real-world use.
In the end, this project proves that the future of prosthetics is not only about smarter hands or stronger motors. Sometimes the smartest innovation is the part that quietly holds everything togetherand remembers to bring the charger.