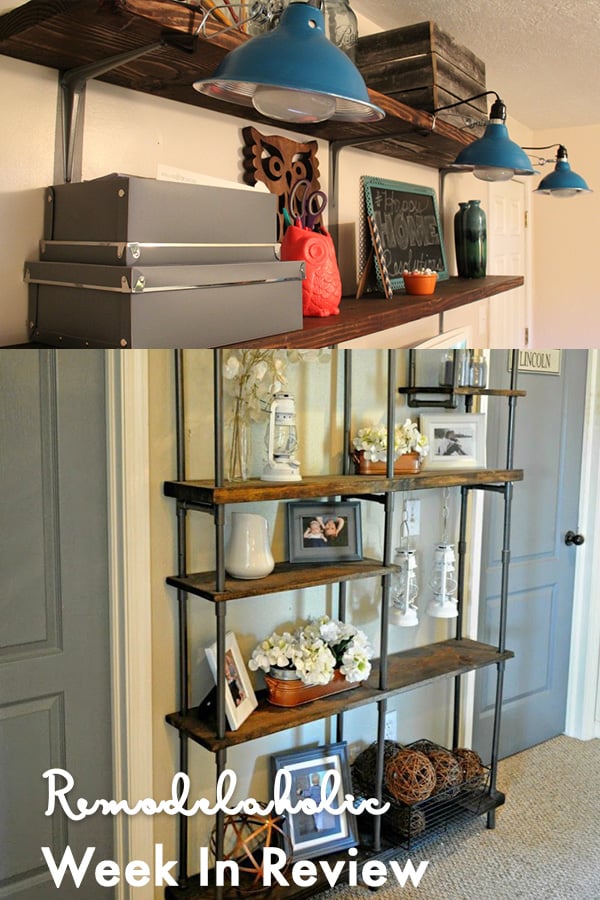
Rustic wood and metal shelves are the home-improvement equivalent of a great pair of jeans: practical, good-looking, and relaxed enough to work almost anywhere. They can warm up a sterile kitchen, rescue a cluttered bathroom, turn an empty living-room wall into a display area, or give a home office enough storage to stop important papers from forming their own mountain range.
Better yet, DIY rustic wood and metal shelves do not require a professional cabinet shop or an advanced degree in woodworking. With dimensional lumber, sturdy metal brackets, basic tools, and a free afternoon, you can build shelves that look custom without paying custom-furniture prices.
This guide explains how to select lumber, prepare metal hardware, create a convincing rustic finish, mount the shelves securely, and avoid the mistakes that make a shelf look less “industrial farmhouse” and more “garage sale emergency.”
Why Rustic Wood and Metal Shelves Work So Well
The appeal comes from contrast. Wood brings warmth, visible grain, knots, and natural variation. Metal adds clean lines, dark color, and an industrial edge. Put them together and you get a design that can lean farmhouse, modern rustic, vintage industrial, or minimalist depending on the materials and finish.
These shelves are also wonderfully adaptable. A thick pine board with black steel brackets feels casual and rugged. White oak with slim powder-coated brackets looks more refined. Reclaimed wood and aged iron create a genuine workshop aesthetic, while a smooth walnut-toned board with matte-black supports can fit comfortably in a modern apartment.
Functionally, open shelving keeps frequently used items visible and accessible. The important word, however, is properly. Properly supported open shelves are useful. Poorly supported shelves are simply gravity experiments with decorative objects.
Plan the Shelf Before Buying Materials
Start by deciding what the shelf will hold. Framed photos and a small plant create a very different load from cookbooks, cast-iron cookware, record albums, or a collection of suspiciously heavy ceramic roosters.
Measure the available wall area and note nearby doors, cabinets, outlets, vents, switches, and walking paths. Use painter’s tape to outline the proposed shelf directly on the wall. This simple preview helps you evaluate its length, depth, and height before drilling permanent holes.
A Practical Sample Design
For a versatile three-shelf installation, consider the following dimensions:
- Three wood boards measuring approximately 36 inches long
- A shelf depth between 8 and 10 inches
- A finished board thickness between 1 and 1 1/2 inches
- Vertical spacing of 12 to 16 inches between shelves
- Two or three metal brackets per shelf, depending on the load, bracket rating, board stiffness, and wall framing
A nominal 2-by-10 board is a convenient choice because its actual dimensions are approximately 1 1/2 by 9 1/4 inches. It produces a substantial shelf without requiring you to laminate several thin boards together.
Bracket spacing should always follow the hardware manufacturer’s instructions. As a general planning guideline, brackets for light-to-medium shelving are often placed no more than about 24 inches apart, with closer spacing or larger supports used for heavier loads. The weight of the shelf board itself must be included when evaluating the total load.
Materials and Tools
Materials
- Solid wood boards, preferably straight and dry
- Rated steel shelf brackets or heavy-duty angle brackets
- Appropriate structural or wood screws for wall studs
- Wall anchors suitable for the wall material when studs cannot be used
- Short screws for attaching the shelf boards to the brackets
- Wood stain, wood dye, or tinted finish
- Clear protective topcoat
- Metal primer and paint, if the brackets are unfinished
- Wood filler, if desired
- Painter’s tape, pencils, rags, and disposable gloves
Tools
- Tape measure
- Stud finder
- Carpenter’s level or laser level
- Drill and driver bits
- Countersink bit
- Circular saw, miter saw, or handsaw
- Random-orbit sander or sanding block
- Clamps
- Safety glasses, hearing protection, and suitable dust protection
Choose the Right Wood
Pine: Affordable and Easy to Distress
Pine is popular for DIY rustic shelves because it is widely available, relatively inexpensive, and easy to cut. Its soft surface accepts dents and distressing readily, which is useful when you want a worn-in appearance.
The downside is that pine can absorb stain unevenly. Sanding carefully and applying a compatible pre-stain conditioner can reduce blotchiness. Finish manufacturers generally recommend preparing bare wood thoroughly and testing the complete finishing system on scrap material before committing to the visible shelf.
Cedar: Naturally Rustic
Cedar has strong color variation and distinctive grain. It works especially well for decorative shelving, bathrooms, mudrooms, and covered outdoor spaces. Because it is relatively soft, it can dent, so it may not be ideal for shelves that will be constantly rearranged.
Oak: Strong and Refined
Oak costs more than common pine but offers greater hardness and prominent grain. It produces a more polished version of the rustic look, especially when paired with simple black brackets.
Reclaimed Wood: Beautiful but Unpredictable
Authentic reclaimed boards may contain nail holes, saw marks, mineral streaks, and weathering that would be difficult to reproduce artificially. Inspect them for hidden metal, insects, rot, strong odors, chemical contamination, and structural damage.
Use particular caution with old painted lumber. Sanding, sawing, or scraping painted material from older buildings can create hazardous dust if lead-based paint is present. The EPA warns that projects disturbing painted surfaces in pre-1978 buildings may produce dangerous lead dust and recommends lead-safe practices or qualified professional help.
Allow Wood to Adjust Indoors
Wood exchanges moisture with the surrounding air, and changes in temperature and relative humidity can affect its moisture content and dimensions. Store the boards flat in the room or a similar indoor environment before building, especially when lumber has recently come from an outdoor rack, damp garage, or unconditioned warehouse.
Select Metal Supports That Match the Job
Steel Angle Brackets
Steel angle brackets are the easiest and most reliable choice for this project. Look for brackets designed specifically as shelf supports, with published installation requirements and load information. The horizontal arm should support most of the shelf depth rather than stopping awkwardly near the wall.
Decorative Industrial Brackets
Decorative brackets may feature gussets, curved braces, hammered finishes, visible bolts, or faux-rivet details. They offer the industrial look without requiring metal fabrication.
Black Iron Pipe Supports
Black iron pipe, floor flanges, elbows, and short nipples can create convincing industrial shelf supports. However, plumbing components are not automatically a load-rated shelving system. Treat pipe-based brackets as decorative or light-duty unless their complete installation has a verified capacity. Secure the flanges into framing whenever possible and avoid assuming that four screws in drywall can support a small public library.
Protect Bare Metal
Uncoated steel may rust, especially in bathrooms, kitchens, laundry rooms, basements, or humid climates. Remove oil, dirt, loose scale, and rust before applying a compatible metal primer and protective enamel. Heavily rusted metal may require a rust-specific primer, while clean bare metal should receive a primer intended for clean metal.
Safety Comes Before the Rustic Charm
Wear safety glasses when cutting, drilling, sanding, or handling metal. Use hearing protection with loud power tools and connect tools to dust collection when possible. Woodworking produces airborne dust as well as chips, and OSHA guidance emphasizes controlling dust near the point where it is generated.
Clamp workpieces instead of holding them close to a moving blade. Read the operating instructions for every tool. Check the wall for plumbing and electrical lines before drilling, particularly near kitchens, bathrooms, utility areas, and outlets.
Apply stains, solvents, primers, and spray paints in accordance with their labels. Provide ventilation, keep products away from flames, and allow oily finishing rags to dry or be stored and disposed of according to the product manufacturer’s fire-safety directions.
How to Build DIY Rustic Wood and Metal Shelves
Step 1: Measure and Mark the Boards
Measure each shelf separately rather than assuming the wall is perfectly square. Mark the cut line with a sharp pencil and use a carpenter’s square to draw a line across the board.
If you are creating several shelves, label each board and its intended wall position. This prevents the classic DIY puzzle in which every board is almost the same length but somehow none of them fits the place you are holding it.
Step 2: Cut the Shelves
Support the board on a stable work surface and clamp it securely. Use a miter saw for straightforward crosscuts or a circular saw guided by a straightedge. Cut just outside the pencil line, then refine the edge with sanding if necessary.
Check the cut ends for square. A small error may not be visible on a single shelf, but three shelves with three different angles can make the entire installation look crooked even when the brackets are level.
Step 3: Create a Controlled Rustic Texture
Rustic does not have to mean badly damaged. Concentrate distressing along edges and in a few selected areas rather than attacking the whole board with every tool in the garage.
Useful techniques include:
- Softening sharp corners with sandpaper
- Adding a few shallow dents with a rounded hammer face
- Pressing a short length of chain lightly into the surface
- Scratching subtle lines with an awl
- Using a wire brush with the grain to emphasize soft wood fibers
Step back frequently. The goal is believable age, not evidence that the shelf survived a disagreement with a lawn mower.
Step 4: Sand the Wood
Begin with a medium grit if the lumber is rough, then progress to a finer grit. For many rustic pine projects, sanding through approximately 80, 120, and 150 grit creates a surface that is smooth enough to handle but still accepts stain well.
Sand in the direction of the grain whenever possible. Round over exposed edges slightly so they feel finished and are less likely to splinter. Vacuum the board and wipe away remaining dust using a method compatible with your chosen finish.
Step 5: Test the Stain
Test stain on an offcut from the same board. A color sample printed on a can cannot predict how your specific lumber will react. Wood species, sanding grit, natural color, conditioner, application time, and topcoat can all change the final appearance.
For a layered rustic finish, apply a lighter brown base followed by a darker glaze or stain in dents, grain lines, and edges. Wipe the second color back quickly so it adds age rather than turning the entire shelf into a chocolate bar.
Step 6: Apply the Finish
Apply stain evenly in manageable sections, following the manufacturer’s directions for application, wiping, drying, ventilation, and recoating. Inspect the board from several angles to catch lap marks or shiny wet areas.
After the color has dried fully, apply a protective topcoat. Matte or satin finishes generally complement rustic shelves better than a high-gloss coating. Use additional protection in kitchens, bathrooms, and other areas exposed to moisture or frequent cleaning.
Finish all visible faces and edges. Sealing the underside as well as the top can also create a more consistent appearance and reduce uneven moisture exchange.
Step 7: Prepare the Brackets
Factory-finished brackets may only need cleaning. Bare, oily, or rusty brackets require more preparation. Degrease the metal, remove loose corrosion, scuff glossy surfaces, and apply the correct primer.
Spray several light coats rather than one heroic coat that immediately sags. Allow the paint to cure thoroughly before installation. Paint that feels dry to a fingertip may still be soft enough to scratch under a screw head.
Step 8: Locate the Wall Studs
Use a stud finder to mark both edges of each stud, then mark the center. Confirm suspicious readings by checking from both directions. Outlets and switches can offer clues about framing locations, but they are not a substitute for careful detection.
Mounting brackets directly into studs generally provides the most secure installation. When studs are unavailable, use anchors specifically rated for the wall material and expected load. Drywall anchors, toggle bolts, masonry anchors, and plaster fasteners are not interchangeable.
Step 9: Establish a Level Reference Line
Mark the desired top or bottom edge of the shelf with a level. For multiple shelves, use a laser level or carefully measured reference lines so the arrangement remains consistent.
Place the brackets against the wall and mark the mounting holes. Confirm that the shelf will sit at the intended height after accounting for the thickness and orientation of the bracket.
Step 10: Drill Pilot Holes
Drill pilot holes using a bit appropriate for the screw and wall construction. Pilot holes help guide fasteners, reduce splitting, and make it easier to keep brackets aligned. Do not drill deeper than necessary, and avoid overtightening fasteners into drywall, plaster, or soft wood.
Step 11: Install the Brackets
Attach the first bracket loosely, check it with a level, and then tighten it. Position the second bracket using the wall reference line. Place the shelf temporarily across both supports and confirm that it sits flat before installing additional brackets.
Use the fastener type and length specified by the bracket manufacturer. Decorative screws chosen only because they have attractive heads may not provide the strength, thread engagement, or corrosion resistance the installation requires.
Step 12: Secure the Wood to the Metal
Set the finished board on the brackets and adjust the overhang until it is even. Mark the underside through the bracket holes, remove the shelf, and drill shallow pilot holes.
Choose screws short enough that they cannot break through the top surface. Reposition the shelf and fasten it from below. A countersunk screw should sit flush without crushing the wood or stripping the hole. Guidance from woodworking hardware specialists commonly recommends pilot or guided holes to control screw placement and reduce splitting.
Step 13: Perform a Careful Load Test
Check every bracket and fastener before loading the shelf. Apply a modest amount of weight gradually while watching for movement, wall damage, loose screws, bracket flex, or shelf deflection.
Do not exceed the lowest-rated component in the system. A strong steel bracket cannot compensate for an unsuitable anchor, damaged stud, weak masonry joint, cracked board, or incorrect screw.
Design Variations
Farmhouse Kitchen Shelves
Use warm medium-brown wood, substantial black brackets, white dishes, glass containers, and a few copper or ceramic accents. Keep frequently used items within reach and avoid placing unfinished wood directly where it will receive constant cooking grease or steam.
Bathroom Storage Shelves
Select moisture-resistant finishes and corrosion-resistant hardware. Use the shelves for towels, closed containers, and lightweight decor. Leave breathing room around items so moisture does not remain trapped against the wall.
Modern Industrial Shelves
Choose straight-grained lumber, a smooth satin finish, and simple rectangular brackets. Limit distressing and let the wood-metal contrast provide the character.
Live-Edge Display Shelves
A live-edge slab creates an organic focal point. Make sure the wall-facing edge is straight enough for stable mounting, and select brackets that support the irregular board without distracting from it.
Corner Shelving
Wraparound shelves can make an unused corner functional, but they require careful measuring because corners are rarely exactly 90 degrees. Create cardboard templates before cutting expensive lumber.
Common Mistakes to Avoid
Choosing Looks Over Load Capacity
A bracket can appear heavy-duty while having thin metal, poor welds, shallow screw holes, or no tested rating. Select hardware for the expected load first and appearance second.
Using Wet or Twisted Lumber
A bowed board will not become straight simply because you ask it nicely with screws. Sight down the lumber before buying it and reject boards with severe twist, cup, or cracks.
Skipping the Stain Test
Different boards from the same stack can absorb stain differently. Testing an offcut is faster than sanding an entire shelf back to bare wood while questioning every decision that led you there.
Attaching Heavy Shelves Only to Drywall
Drywall is a finish material, not framing. Some anchors can support useful loads when installed correctly, but direct stud attachment is preferable for heavy shelving. Always match the anchor to the wall type and follow its published rating.
Using Screws That Are Too Long
Wall screws must reach sufficient structure, while underside screws must not emerge through the shelf. Measure both jobs separately instead of buying one box and hoping the screws understand their assigned roles.
Loading the Front Edge
Heavy items placed near the front create greater leverage on the brackets and wall fasteners. Keep dense objects toward the back and distribute weight across the shelf.
Maintenance Tips
Dust wood shelves with a soft cloth and clean them using products compatible with the topcoat. Avoid soaking the wood or allowing wet containers to remain on it.
Inspect the installation occasionally, especially during the first few months. Tighten loose shelf-to-bracket screws carefully and investigate any bracket movement, wall cracking, or increasing shelf sag.
In humid areas, check metal hardware for corrosion. Small scratches in painted steel should be cleaned and touched up before rust spreads beneath the coating.
Conclusion
DIY rustic wood and metal shelves succeed because they combine straightforward construction with nearly unlimited customization. The project can be affordable, beginner-friendly, and completed with common tools, yet the result looks intentional and architectural.
The best shelves are not merely attractive boards placed on attractive brackets. They are planned around the intended load, made from stable lumber, protected with an appropriate finish, and secured to suitable wall structure with the correct fasteners.
Take time with the layout, test every finish, mount the hardware carefully, and resist the urge to decorate immediately with every heavy object you own. Your reward will be sturdy open storage with enough personality to make an empty wall look as though it finally got its life together.
Real-World Experience: Lessons From Building Rustic Shelves
The Wall Layout Matters More Than the Cutting
One of the most useful lessons from building rustic shelves is that the woodworking is often the easy part. Cutting three boards to length may take only a few minutes. Deciding exactly where those boards should hang can consume far more time.
A shelf that looks perfectly proportioned on a workbench may appear too short once placed above a large sofa. A 12-inch-deep board may feel reasonable in the lumber aisle but look enormous in a narrow hallway. Painter’s tape solves many of these problems before they become holes in the wall.
For one typical 36-inch shelf layout, outlining all three shelves with tape revealed that the original 12-inch vertical spacing felt cramped. Increasing the spacing to approximately 15 inches gave taller objects room to breathe and made the entire arrangement look less like a shoe rack.
Perfectly Matching Boards Can Look Artificial
It is tempting to force every shelf to have the same stain color and distressing pattern. In practice, slight variation often improves the rustic effect. Natural grain, knots, and color differences help the shelves look like real wood rather than printed décor.
The trick is maintaining a shared visual family. The boards can vary, but the finish should have the same general warmth and level of sheen. One shelf should not be pale honey while another looks like it spent two centuries at the bottom of a coffee barrel.
A reliable technique is to prepare all boards together, use the same sanding schedule, and apply the same base color. Then make small adjustments with a darker glaze or a second light stain application.
Distressing Is Easy to Overdo
The first few dents usually look convincing. After that, enthusiasm can take over. Suddenly every square inch has hammer marks, scratches, chain impressions, and mysterious gouges that suggest the board once served as a shield during a medieval battle.
The most believable wear occurs where handling would naturally happen: corners, front edges, and occasional surface areas. Random marks should vary in size and direction, but they should not be distributed with mathematical regularity.
After distressing, lightly sanding the sharpest damage helps integrate the marks. Stain will settle into recesses and emphasize them, so subtle texture before finishing can become surprisingly dramatic afterward.
Dry Time Is Part of the Build
A common schedule mistake is treating drying and curing as passive details. The cutting, sanding, and drilling may fit comfortably into one afternoon, but the finish may require a much longer window before the shelves can be handled and installed safely.
Rushing causes fingerprints, bracket-shaped impressions, smeared stain, or paint that sticks to the wall. Finishing the wood and metal before installation is usually cleaner, but only when both are allowed to harden properly.
It helps to divide the project into stages: prepare and stain the wood on the first day, apply protective coats according to the label, prepare the brackets separately, and install everything only after the surfaces are ready for normal handling.
Stud Locations May Redesign the Project for You
Many attractive shelf plans begin with perfectly symmetrical bracket positions. Then the stud finder arrives and explains that the wall has other ideas.
Moving a bracket several inches may be the safest and simplest solution. Another option is adjusting the shelf length so the bracket locations relate naturally to the ends. For a larger installation, a securely mounted wood backer or cleat can provide more placement flexibility, although its fasteners must still connect properly to structure.
The practical lesson is to locate the studs before finalizing the board lengths. Designing around real framing is easier than buying lumber, finishing it beautifully, and discovering that the desired bracket holes line up with empty drywall.
The Final Styling Should Respect the Engineering
When the shelves are finished, the urge to cover every inch is strong. A more attractive arrangement usually mixes objects of different heights, includes some empty space, and repeats colors or materials across the shelves.
Place heavier objects close to brackets and toward the wall. Use bookends for upright books, felt pads under abrasive ceramics, and trays beneath plants. Avoid putting valuable electronics, irreplaceable collectibles, or large glass items on a shelf until the mounting has been checked and gradually tested.
In real use, rustic shelves become most successful when they remain functional. Leave room to remove a book, lift a basket, or water a plant without rearranging the entire display. Beautiful storage should reduce household chaos, not create an elaborate obstacle course.
Editorial note: This independently written guide synthesizes practical information from reputable U.S. resources, including the USDA Forest Products Laboratory, U.S. Environmental Protection Agency, Occupational Safety and Health Administration, This Old House, Family Handyman, The Home Depot, Lowe’s, Kreg Tool, Minwax, Rust-Oleum, Simpson Strong-Tie, Rockler, Popular Mechanics, and Bob Vila. Product-specific capacities and application instructions can vary, so always follow the documentation supplied with the exact brackets, fasteners, anchors, coatings, and tools used in your project.