Building a poker table is one of those weekend projects that sounds wildly ambitious until you realize the basic recipe is surprisingly friendly: plywood, foam, fabric, vinyl, screws, patience, and just enough confidence to say, “Yes, I measured twice. Probably.” A well-built DIY poker table turns a regular game night into an event. Cards glide instead of skid, chips stack neatly, elbows rest on padded rails, and your dining table can finally retire from its second job as a casino floor.
The good news is that you do not need a professional cabinet shop to make a professional-looking poker table. You need a practical plan, smart material choices, safe cutting habits, and a clear understanding of how the pieces work together. This guide walks you through DIY poker table plans from start to finish, including sizing, tools, materials, cutting, padding, upholstering, assembly, upgrades, maintenance, and real-world lessons learned from building one yourself.
Why Build a Poker Table Instead of Buying One?
A ready-made poker table can be expensive, bulky, and sometimes oddly designed for the room you actually have. DIY poker table plans give you control over the size, shape, color, playing surface, cup holders, legs, rail padding, and storage options. If your game group is six people, you can build a compact round or octagon table. If your home game regularly attracts eight to ten players, an oval table with a padded rail makes more sense.
Building your own table also lets you spend money where it matters. Instead of paying for shipping, branding, or features you do not need, you can put your budget toward quality plywood, casino speed cloth, comfortable rail foam, durable vinyl, and stable legs. The result is a custom poker table that feels personal, looks sharp, and quietly tells everyone, “Yes, I made this. No, I will not build one for your cousin by next Friday.”
Choosing the Best Poker Table Design
Before buying wood, decide what kind of poker table fits your space and playing style. The three most popular DIY options are oval, round, and octagon.
Oval Poker Table
An oval poker table is the classic home-game design. It usually seats eight to ten players and gives the dealer enough room to pitch cards comfortably. A common DIY size is about 84 inches long by 42 inches wide, though many builders adjust the length to fit basements, garages, spare rooms, or multi-use spaces. Oval tables work well with folding legs, pedestal bases, or a removable tabletop design.
Round Poker Table
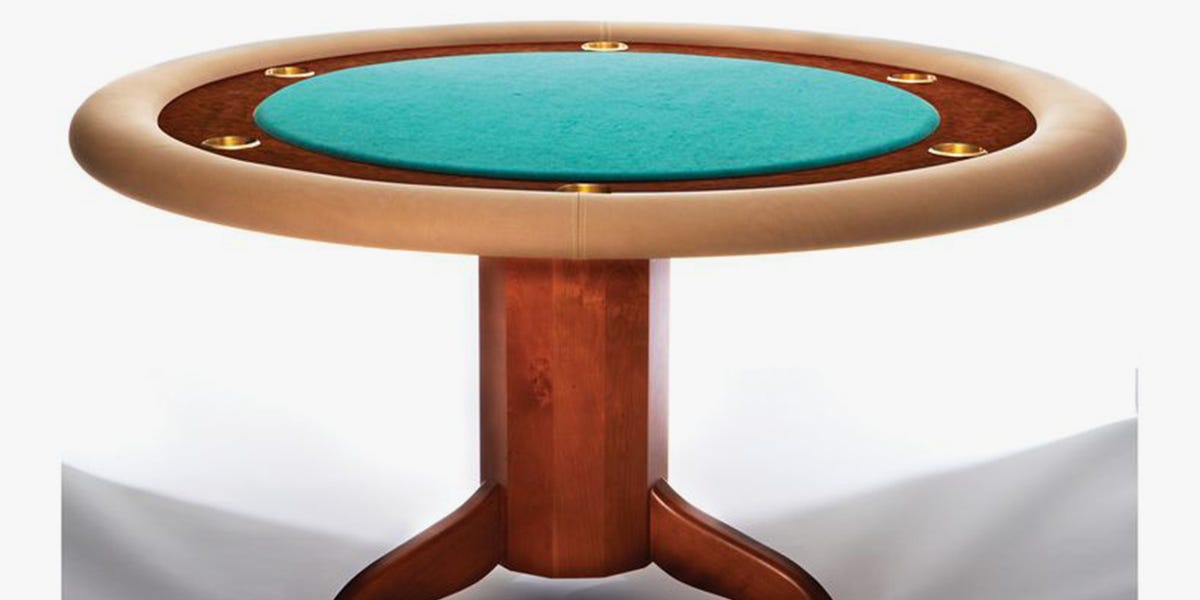
A round poker table is ideal for smaller groups, usually four to six players. It is easier to cut from one sheet of plywood, easier to store, and more social because everyone sits within easy talking distance. The main drawback is leg room. A single pedestal base or tabletop-only design often works better than four standard legs.
Octagon Poker Table
An octagon poker table is a great middle ground. It offers defined player stations, works nicely with cup holders, and looks more custom than a basic round table. It is also forgiving for DIY builders because straight cuts are easier than long curves. If you are nervous about cutting ovals, the octagon is your friendly neighborhood backup plan.
Recommended Size and Layout
For a versatile home poker table, an 84-inch by 42-inch oval is a strong starting point. It can seat eight players comfortably and ten players in a friendly squeeze. The playing surface should be large enough for cards, chips, and community cards, while the padded rail should be wide enough for elbows without eating the whole table.
A practical layout includes a 4- to 6-inch padded rail around the outside, a smooth center playing surface, and optional cup holders placed in the rail or mounted beneath the table. If you want a dealer tray, chip rack, or LED lighting, plan those upgrades before cutting. Retrofitting cup holders after upholstery is possible, but it is about as fun as finding a missing screw in shag carpet.
Tools You Will Need
You can build a basic poker table with common DIY tools. A circular saw or table saw handles straight cuts. A jigsaw cuts curves. A drill/driver installs screws and legs. A staple gun secures speed cloth and vinyl. A utility knife trims foam and fabric. Clamps, a tape measure, pencil, sanding block, and safety gear round out the essentials.
If you want cleaner curves, a router with a circle-cutting jig or trammel can make the tabletop edges smoother than a jigsaw alone. However, a careful jigsaw cut followed by sanding works perfectly well for most home builds. Your table does not need to impress a museum curator. It needs to host poker night without wobbling like a nervous bluff.
Materials List for a Standard DIY Poker Table
For an oval table, plan on buying two to three sheets of 3/4-inch plywood, depending on the design. One sheet can become the main base, another can create the rail sections, and a third may be needed for a raised rail or added support. Birch plywood is a popular choice because it is stable, smooth, and easier to finish than rough construction-grade panels.
You will also need 1/4-inch foam for the playing surface, 1-inch foam for the padded rail, casino speed cloth or suited poker felt, vinyl or faux leather for the rail, spray adhesive, wood glue, wood screws, staples, folding legs or a pedestal base, sandpaper, and optional cup holders. If you are adding LED lights, include a low-voltage LED strip, diffuser channel if desired, wiring clips, and a safe power supply.
Step 1: Plan the Shape and Mark the Plywood
Start by drawing your tabletop shape on the plywood. For an oval table, mark the centerline lengthwise and widthwise. To create rounded ends, use a simple string-and-pencil method: place a screw or nail at the center point of the arc, tie a string to it, attach the pencil at the correct radius, and swing the arc smoothly. This low-tech trick works beautifully, provided the string does not stretch and your pencil does not wander off like it has somewhere better to be.
For an octagon, measure equal sides and mark angled corners. For a round table, locate the center and draw a full circle using string, a compass jig, or a router trammel. Label each piece as you draw it. If your plan includes separate rail rings, playing surface inserts, or support layers, mark them clearly before cutting.
Step 2: Cut the Base and Rail Pieces
Cut the main tabletop first. Use a circular saw for straight sections and a jigsaw for curved ends. Keep the blade moving steadily and do not force the cut. After cutting the base, cut the rail pieces. The rail is usually made as a ring that sits around the playing surface. It can be built from one or more layers of plywood depending on whether you want a flush rail, raised rail, or thicker upholstered armrest.
Once the pieces are cut, sand the edges until they are smooth. Fabric and vinyl will reveal sharp corners, bumps, and splinters, so do not skip this step. Rounded-over edges also help upholstery stretch cleanly around curves. If you have a router, a small roundover bit can give the rail a softer, more polished feel.
Step 3: Strengthen the Table Structure
A poker table needs to feel solid. Nobody wants chips bouncing because someone leaned on the rail during a dramatic river card. Add support by layering plywood where needed, attaching cross braces underneath, or using a sturdy apron frame. Apply wood glue between structural layers, then secure the pieces with screws. Pre-drill holes near edges to reduce splitting.
If you are using folding legs, position them so the table balances evenly and players have reasonable knee room. If you are using a pedestal base, make sure the base is rated for the size and weight of your tabletop. A beautiful table on a weak base is just a very fancy accident waiting for snacks.
Step 4: Add Foam to the Playing Surface
The playing surface should be slightly cushioned but not squishy. A 1/4-inch closed-cell foam or headliner foam is usually enough. Cut the foam slightly larger than the playing surface, spray adhesive on the plywood and foam according to the adhesive instructions, then lay the foam carefully in place. Smooth it from the center outward to avoid bubbles or wrinkles.
Trim the foam cleanly along the edge with a sharp utility knife. Replace dull blades quickly. A dull blade tears foam, and torn foam makes the fabric look lumpy. Lumpy poker tables are for villain lairs and abandoned rec rooms, not your carefully planned game night.
Step 5: Install the Speed Cloth or Felt
Casino speed cloth is a favorite because cards slide easily, it resists spills better than ordinary felt, and it gives the table a professional look. Suited speed cloth, microfiber, or gaming suede can also work. Cut the fabric several inches larger than the playing surface on all sides.
Place the fabric face down on a clean surface, then center the foam-covered panel on top of it. Pull the fabric snug, staple the middle of one side, then move to the opposite side and pull evenly before stapling. Repeat on the remaining sides. Work gradually around the table, alternating sides to maintain even tension. Avoid over-stretching, which can distort patterns or create thin spots. The goal is smooth, not trampoline-tight.
Step 6: Build and Upholster the Padded Rail
The padded rail is what separates a homemade table from a “board with ambitions.” Cut 1-inch foam to match the rail shape. Use spray adhesive to attach it to the rail plywood. Then place vinyl or faux leather over the foam and begin stapling underneath the rail.
Start on the long straight sections, then work toward the curves. Pull the vinyl firmly but evenly. On inner curves, make relief cuts in the excess vinyl so it can fold cleanly without bunching. Be careful not to cut too close to the visible edge. Check the top often for wrinkles before committing with too many staples. Upholstering a rail can test your patience, but once it clicks, it becomes a rhythm: pull, smooth, staple, rotate, repeat.
Step 7: Add Cup Holders, Lights, and Accessories
Cup holders are optional, but they are highly recommended unless your players have the hand-eye coordination of professional surgeons. You can install stainless steel drop-in cup holders in the rail or mount folding cup holders underneath the table. In-rail cup holders look clean, but they require careful hole placement before upholstery. Under-table cup holders are easier and reduce the risk of drinks sitting directly above the playing surface.
LED lighting can add a modern casino feel, especially under a raised rail. Use low-voltage LED strips, hide wiring neatly, and avoid creating bright glare around the playing area. Subtle lighting looks classy. Blinding your guests every time they look at pocket aces is less classy.
Step 8: Attach the Rail and Final Assembly
Once the playing surface and rail are upholstered, dry-fit everything. Make sure the rail sits evenly and the playing surface is centered. Attach the rail from underneath using screws, so no fasteners are visible from the top. If the table will need future repairs, avoid gluing the rail permanently in place. Screws make it easier to remove and reupholster later.
Install the legs or base last. Stand the table upright and check for wobble. If needed, add adjustable furniture levelers, felt pads, or shims. A stable poker table makes the whole experience feel more premium. It also prevents that tragic moment when someone bumps the table and every chip stack becomes modern art.
Safety Tips Before You Start Cutting
DIY woodworking is satisfying, but it deserves respect. Wear eye protection when cutting, drilling, sanding, or stapling. Use hearing protection with loud power tools. Wear a dust mask or respirator when sanding or cutting plywood, because airborne wood dust can irritate the lungs and create health risks. Keep cords away from saw blades, support large plywood sheets properly, and never cut on an unstable surface.
Before using a circular saw, check that the blade is sharp, undamaged, and installed correctly. Set the blade depth so it extends only slightly below the wood. Let the tool do the work. If a cut begins to bind, stop and correct the support instead of forcing the saw. Your project should end with a poker table, not a dramatic story told in an urgent care waiting room.
Common Mistakes to Avoid
Using Cheap, Warped Plywood
Warped plywood makes every later step harder. Choose flat sheets and store them flat until you begin. If the base is twisted, the rail will not sit evenly, and the finished table may wobble.
Forgetting Fabric Direction
Some speed cloth has a visible pattern or slight directional texture. Lay it out before stapling and confirm the pattern is straight. A crooked layout will bother you forever, even if nobody else notices.
Stapling Too Randomly
Staple in a balanced sequence. Start in the center, move to the opposite side, then work outward. This keeps fabric tension even and prevents wrinkles.
Placing Cup Holders Too Close to the Edge
Leave enough material around each cup holder so the rail remains strong. Test with actual cups before cutting. Giant novelty mugs are funny until they do not fit.
Budget Breakdown
A basic DIY poker table can often be built for a modest budget if you already own tools. Plywood, foam, speed cloth, vinyl, adhesive, screws, staples, and legs are the major costs. A simple tabletop design may be the least expensive option. A full oval table with padded rail, pedestal base, cup holders, and lighting will cost more but still may be cheaper than many commercial tables of similar quality.
The best place to save money is on decorative extras, not on the playing surface or structural materials. Good fabric and comfortable rail foam make the table feel professional. Cheap vinyl, weak legs, or thin plywood can make the table feel flimsy no matter how nice it looks in photos.
Maintenance: Keeping Your Poker Table Looking New
After all that work, protect your table. Brush or vacuum the playing surface gently with a soft attachment. Blot spills immediately instead of rubbing. Keep food crumbs away from the felt unless you enjoy discovering chip dust in places chip dust should never be. Cover the table when not in use, especially if it lives in a garage, basement, or multipurpose room.
Inspect the underside occasionally for loose screws or shifting legs. If the rail vinyl loosens over time, remove the rail and add staples underneath. One of the great advantages of DIY poker table plans is repairability. Because you built it, you understand how to fix it.
Real-World Experience: Lessons From Building a DIY Poker Table
The first thing you learn when building a poker table is that the project is not difficult because of one big impossible step. It is challenging because of many small steps that all want attention. The plywood needs to be flat. The arcs need to match. The foam needs to be smooth. The fabric needs to stretch evenly. The rail needs to look relaxed, even though you were absolutely not relaxed while upholstering it.
One practical lesson is to build a cardboard or paper template before cutting expensive material. This is especially helpful for cup holder placement. Sit around the template with chairs and pretend to play. It may feel silly, but it reveals real problems quickly. Maybe the table is too wide for players to reach the center. Maybe the cup holders land exactly where someone’s elbow wants to be. Maybe ten players technically fit, but only if everyone breathes in during the flop.
Another lesson is to leave extra fabric and vinyl. Beginners often cut upholstery material too close because they want to avoid waste. Do not do this. Extra material gives you something to grip while stretching. You can always trim excess later, but you cannot magically add two inches of vinyl after a corner starts wrinkling. Upholstery rewards generosity.
Also, do not rush the sanding. The table may be covered in foam and fabric, but rough edges still matter. Sharp plywood corners can telegraph through vinyl, wear fabric faster, or make the rail uncomfortable. Spend the extra time rounding and smoothing edges. It is not glamorous, but it is one of those details that makes the finished table feel intentional instead of improvised.
If you are building in a small workspace, plan your assembly sequence carefully. A full-size oval tabletop is awkward to rotate, flip, and store. Use sawhorses, get a helper for large pieces, and keep the floor clear. Nothing ruins a confident DIY mood faster than stepping backward onto a clamp while holding a half-upholstered rail.
One underrated experience is the joy of the first test deal. When the cards slide cleanly across the speed cloth, the entire project suddenly makes sense. The padded rail feels comfortable. The chips sound better. The game feels more organized. Even casual players notice the difference. Someone will tap the rail and say, “You built this?” That moment is worth every staple.
The final lesson is to accept small imperfections. A DIY poker table does not have to be factory-perfect to be excellent. One tiny wrinkle under the rail or a slightly uneven staple line underneath will not ruin the table. What matters is that the playing surface is smooth, the rail is comfortable, the structure is stable, and the table makes game night more fun. Perfection is nice, but poker is already full of people pretending their hands are better than they are. Your table can be honest.
Conclusion
DIY poker table plans give you the chance to build something useful, personal, and genuinely impressive. Whether you choose a compact round topper, an octagon table for casual games, or a full oval poker table with padded rail and speed cloth, the process is manageable with careful planning. Focus on a stable base, smooth playing surface, comfortable rail, safe tool use, and clean upholstery. Add cup holders or LED lighting if they fit your style, but remember that the best feature is simple: a table that makes people want to sit down and play one more hand.
Building a poker table is more than a woodworking project. It is a game-night upgrade, a conversation starter, and a satisfying reminder that a few sheets of plywood can become the centerpiece of many memorable evenings. Just measure carefully, staple bravely, and keep drinks out of the pot.