A DIY concrete and wood LED floor lamp is the kind of project that makes your living room look like it hired an architect, even if your workshop is currently just a folding table, a clamp, and a very optimistic attitude. It combines three design favorites: the cool industrial weight of concrete, the warmth of natural wood, and the clean glow of modern LED lighting. The result is a handmade floor lamp that feels custom, stylish, and surprisingly practical.
This project is especially appealing because it does not require a giant shop or a professional lighting studio. With a simple mold, a straight wooden frame, a low-voltage LED strip or LED channel kit, and patient finishing, you can build a modern floor lamp that looks at home beside a sofa, reading chair, entryway console, or bedroom corner. It is minimal without being boring, sturdy without looking bulky, and bright enough to make your houseplants feel like they are on a tiny stage.
Before getting started, one important note: this guide focuses on a safer DIY approach using a plug-in, low-voltage LED system with listed components. Avoid homemade household-voltage wiring unless you are qualified, working with a knowledgeable adult, or consulting a licensed electrician. A beautiful lamp is wonderful; a lamp that behaves itself electrically is even better.
Why Build a Concrete and Wood LED Floor Lamp?
Store-bought floor lamps are convenient, but many look either too generic or too expensive. A DIY concrete and wood LED floor lamp lands in the sweet spot: custom design, reasonable cost, and a finished piece that can be tailored to your space. You choose the wood tone, base size, lamp height, LED brightness, color temperature, and final finish.
The contrast is the magic. Concrete brings visual weight and stability. Wood softens the design and adds warmth. LED lighting keeps the lamp energy-efficient, slim, and modern. Instead of hiding the light source inside a bulky shade, an LED strip can run vertically through a wooden channel, behind a diffuser, or along the inner edge of the frame for a clean architectural glow.
This style works well in modern, Scandinavian, industrial, Japandi, farmhouse-modern, and minimalist interiors. In plain English: it looks good in almost any room that does not already contain seven lava lamps and a beanbag from 2003.
Project Overview
The basic design is simple: a heavy concrete base supports a vertical wooden column or frame, and an LED light strip is installed along the wood. The concrete keeps the lamp from tipping, while the wood holds the lighting in a clean, attractive shape. A diffuser can soften the light so the lamp feels cozy instead of “interrogation room chic.”
Recommended Dimensions
A good starter size is a wooden column between 42 and 54 inches tall, with a concrete base roughly 6 to 8 inches wide and 5 to 7 inches tall. A taller lamp needs a wider and heavier base. If the lamp will sit near pets, kids, or high-traffic areas, make the base wider and add non-slip rubber feet underneath.
Best LED Choice
For this kind of DIY LED floor lamp, a low-voltage LED strip with a matching plug-in adapter is usually the most beginner-friendly option. Look for a listed power supply, the right voltage match, and enough lumens for your intended use. Warm white LEDs around 2700K to 3000K create a cozy living-room glow, while 3500K to 4000K feels cleaner and more task-friendly.
Tools and Materials
Materials
- Concrete countertop mix or fine concrete mix
- Wood boards or strips, such as pine, oak, poplar, maple, or walnut
- Low-voltage LED strip or LED channel kit with diffuser
- Matching plug-in power adapter from a reputable brand
- Wood glue
- Screws or threaded inserts, depending on the design
- Mold material, such as melamine board, plastic container, or sealed plywood
- Mold release or cooking spray used only for workshop projects
- Concrete sealer
- Wood finish, such as polyurethane, hardwax oil, or water-based clear coat
- Rubber feet or felt pads
Tools
- Measuring tape and pencil
- Saw appropriate for cutting wood
- Clamps
- Drill and bits
- Mixing bucket and stir stick or paddle
- Sandpaper in several grits
- Safety glasses, gloves, and dust protection
- Caulk or hot glue for sealing the mold
Safety gear is not decorative, but it is important. Concrete dust and wood dust are not things you want to collect in your lungs like limited-edition trading cards. Mix concrete in a ventilated area, avoid breathing dust, and use dust collection or a respirator when sanding or cutting.
Step 1: Design the Lamp Before You Build
Start with a sketch. It does not have to be museum-worthy; a rectangle with notes is enough. Decide whether you want a single vertical wood post, a U-shaped frame, or two side rails with an LED channel in the middle. The cleanest version uses two wooden strips with the LED strip recessed between them, covered by a milky diffuser.
Think about where the cord will exit. The best design hides the cord at the back of the wooden column and lets it pass through or behind the concrete base. If you plan the cord path early, the finished lamp looks intentional. If you forget it, the cord may wander out like it missed a meeting.
Step 2: Build the Concrete Mold
The concrete base gives the lamp stability, so make it neat and heavy. A simple rectangular mold is easiest. Melamine board works well because its smooth surface releases concrete cleanly. A plastic food container can also work for a small lamp base, as long as the shape is stable and the sides do not bow outward.
Seal all mold seams with caulk or hot glue. Any tiny gap can leak wet concrete paste. Add a small removable tube, straw, or protected channel if you want a cord path through the base. Make sure the wooden post or mounting hardware will be centered and supported. A slightly off-center base may still function, but it will quietly bother you every time you walk past it.
Step 3: Mix and Pour the Concrete
Use a concrete countertop mix or a fine, high-strength concrete mix for a smoother finish. Follow the manufacturer’s water instructions and add water gradually. The goal is a mix that flows into the corners but is not watery. Too much water can weaken the concrete and cause a dusty or crumbly surface.
Pour the concrete into the mold in layers. Tap the sides of the mold gently to release trapped air bubbles. You can also vibrate the mold lightly by tapping it with a rubber mallet or moving it gently on the work surface. Do not get too aggressive; you are persuading bubbles to leave, not trying to wake the neighbors.
If the wood support will be embedded directly into the concrete, protect the part that goes into the base and make sure it stays perfectly vertical while the concrete cures. Many builders prefer to cast the concrete base first, then attach the wood later using screws, anchors, or a mechanical bracket. This makes repairs and adjustments easier.
Step 4: Let the Concrete Cure Properly
Concrete may feel hard after a day, but that does not mean it has reached full strength. Give the base time to cure according to the mix instructions. For many small decorative projects, demolding after 24 to 48 hours may be possible, but extra curing time improves durability. Keep the concrete in a mild environment and avoid letting it dry out too quickly.
Once removed from the mold, sand sharp edges lightly. If you like a raw industrial look, leave small pinholes and surface variation. If you prefer a refined finish, fill larger voids with a cement slurry, let it dry, and sand again. Finish with a concrete sealer to reduce dusting and protect the base from stains.
Step 5: Prepare the Wood Frame
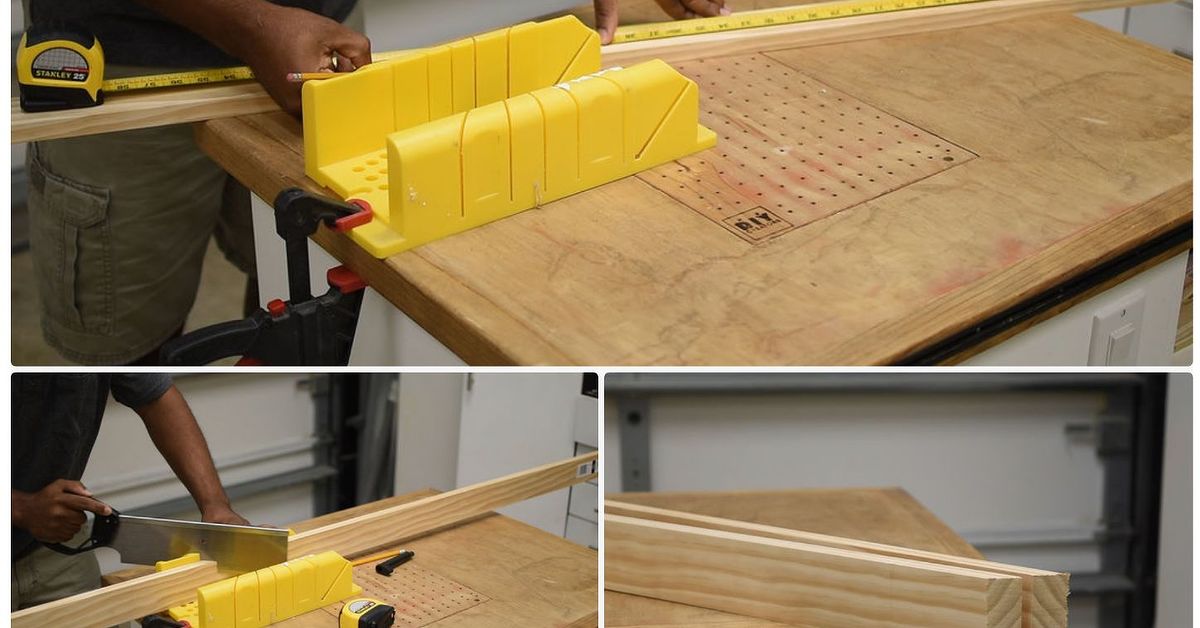
Cut your wood pieces to length and dry-fit everything before gluing. For a simple lamp, two long side strips and one backer strip can create a channel for the LED strip. If you are using an aluminum LED channel, cut or size the wood so the channel sits straight and flush.
Sand the wood progressively, usually ending around 180 to 220 grit for a smooth finish. Remove dust before applying stain or clear coat. If you are using pine, consider a pre-stain conditioner to reduce blotchiness. If you are using oak, walnut, or maple, a clear finish may be all you need because the grain already knows how to show off.
Step 6: Install the LED Channel or Strip
A quality LED channel with a diffuser makes the lamp look far more professional. The channel protects the LED strip, keeps it straight, and softens the light. Mount the channel along the wooden column using the hardware or adhesive recommended by the manufacturer.
Use a low-voltage LED strip and a matching plug-in power adapter. Check that voltage and wattage are compatible. The adapter should have enough capacity for the length of LED strip you are using. Avoid pinched cords, exposed conductors, loose connections, and mystery power supplies from the bottom drawer of doom.
Test the LED system before final assembly. Confirm that the strip lights evenly, the switch works, the adapter does not overheat, and the cord exits cleanly. If anything flickers, smells odd, becomes hot, or behaves unpredictably, stop and replace the questionable component with a certified one.
Step 7: Attach the Wood to the Concrete Base
There are several ways to attach the wood frame to the concrete base. A common method is to use screws with appropriate anchors, a hidden metal bracket, or threaded inserts cast into the concrete. The strongest approach is usually mechanical fastening rather than relying only on glue.
Keep the wood perfectly vertical while attaching it. Use a square or level, and check from multiple angles. This is one of those steps where “close enough” becomes very visible later. A leaning floor lamp has a certain personality, but unfortunately that personality is “I was assembled during a thunderstorm.”
Once everything is secure, apply rubber feet under the concrete base. They protect the floor, reduce sliding, and help the lamp sit evenly. If the base rocks, add a small felt pad where needed.
Design Ideas and Custom Options
Minimalist Line Lamp
Use a single vertical wood post with one LED channel running down the front. This is the cleanest and easiest design. Choose warm white LEDs for living rooms and bedrooms.
Double-Rail Modern Lamp
Build two parallel wood rails with the LED strip recessed between them. The light appears as a glowing vertical line, while the wood creates a slim architectural frame.
Backlit Wall-Washer Lamp
Mount the LED strip on the rear side of the wood so the light bounces off the wall. This creates a soft ambient glow and hides the LEDs from direct view.
Smart LED Floor Lamp
Use a compatible smart plug or smart LED controller if you want dimming, scheduling, or app control. Keep the system simple, use reputable components, and make sure the controller matches the LED voltage and load.
Common Mistakes to Avoid
The first mistake is making the base too small. Concrete is heavy, but a narrow base can still tip if the lamp is tall. Increase the footprint if the lamp is over 48 inches high.
The second mistake is adding too much water to the concrete. A soupy mix may pour easily, but it can cure weaker and show more surface problems. Add water slowly and mix thoroughly.
The third mistake is skipping a diffuser. Bare LED dots can look harsh, especially in a floor lamp placed near eye level. A diffuser creates a smoother glow and gives the project a polished, store-bought finish.
The fourth mistake is rushing the finish. Concrete needs curing time, wood finish needs drying time, and glue needs clamping time. DIY projects reward patience. They are less impressed by dramatic speeches about how you “need it done tonight.”
Safety Tips for a Better DIY Lamp
Use a low-voltage plug-in LED system instead of attempting household-voltage wiring. Choose reputable components with proper safety markings. Keep power adapters accessible and ventilated. Do not bury adapters inside concrete or seal them inside a closed wooden cavity where heat can build up.
During construction, wear eye protection when cutting or drilling, gloves when handling wet concrete, and dust protection when mixing dry materials or sanding. Work in a ventilated space. Keep cords away from sharp concrete edges, and use grommets or smooth channels wherever a cord passes through a hard surface.
When the lamp is finished, test it in a safe location before placing it permanently. Let it run for a while and check for heat around the LED strip, adapter, switch, and cord. LEDs are efficient, but electronics still need common sense. Common sense, sadly, is not included in most hardware kits.
Where This Lamp Looks Best
A concrete and wood LED floor lamp works beautifully beside a reading chair, behind a sofa, near a media console, or in a hallway corner. It is best as ambient or accent lighting rather than the only light source in a room. Think of it as mood lighting with a power tool origin story.
In a small apartment, the slim vertical design saves space while adding height. In a larger living room, a pair of matching lamps can frame a sofa or entertainment wall. In a bedroom, a warm dimmable LED strip creates a calm evening glow without the bulk of a traditional shade.
Hands-On Experience: What Building a DIY Concrete and Wood LED Floor Lamp Teaches You
The most valuable lesson from building a DIY concrete and wood LED floor lamp is that simple projects are rarely simple in the exact way you expect. On paper, the design looks easy: pour base, attach wood, add light, accept compliments. In real life, the concrete wants to trap bubbles, the wood wants to shift during clamping, and the LED strip somehow becomes the most delicate spaghetti in the room.
One practical experience is learning how much the mold matters. Beginners often focus on the concrete mix, but the mold controls the final shape. A slightly bowed plastic container can create a base that looks swollen. A poorly sealed corner can leak. A rough mold surface can leave texture that is either charming or suspicious, depending on your original plan. Taking ten extra minutes to square, seal, and reinforce the mold can save an hour of sanding later.
Another experience is discovering that concrete is not just “gray rock soup.” It has timing. It changes texture as you mix it, pour it, tap it, and cure it. If you add water too quickly, it becomes weak and messy. If you undermix it, dry pockets can appear. If you demold too soon, edges can chip. The best approach is calm and measured: prepare everything first, mix only when ready, and respect the cure time.
The wood side of the project teaches a different kind of patience. A clean LED floor lamp depends on straight lines. If the wood frame is twisted, the light will reveal it. Sanding also matters more than expected because LED light can emphasize scratches and uneven finish. A satin clear coat often works well because it protects the wood without turning it into a shiny bowling lane.
The lighting step is where many builders realize that brightness is not the same as comfort. A super-bright cool white strip may look exciting during testing, then feel too harsh in a living room. Warm white LEDs usually make the lamp more inviting. A diffuser is also worth using. It turns a row of tiny LED points into a smooth line of light, which is the difference between “designer lamp” and “science fair runway.”
The finished lamp also teaches you about balance. A tall wooden post needs a base that is not only heavy but wide enough to resist tipping. Test the lamp gently from different angles before deciding the base is finished. If it feels unstable, redesign the base or lower the height. A good DIY project should look impressive, but it should also survive normal daily life, including vacuum cleaners, curious pets, and someone bumping it while carrying snacks.
Finally, this project gives you a strong sense of ownership. Every small decision becomes visible: the wood species, the concrete texture, the warmth of the light, the shape of the base, the cord route, and the finish. That is the joy of a handmade concrete and wood LED floor lamp. It is not just a lamp; it is a functional sculpture with a plug. And when someone asks where you bought it, you get to deliver the most satisfying DIY sentence ever: “Actually, I made it.”
Conclusion
A DIY concrete and wood LED floor lamp is a rewarding project for anyone who likes modern home decor, practical lighting, and the small thrill of turning raw materials into something useful. Concrete provides a stable, sculptural base. Wood adds warmth and character. LED lighting delivers efficiency, flexibility, and a sleek glow that fits beautifully in contemporary homes.
The key is to design carefully, use safe low-voltage lighting components, give the concrete enough time to cure, and finish the wood with patience. Do that, and you will end up with a handmade floor lamp that feels custom, expensive, and personal. Best of all, it will not look like every other lamp in the aisle. It will look like yours.