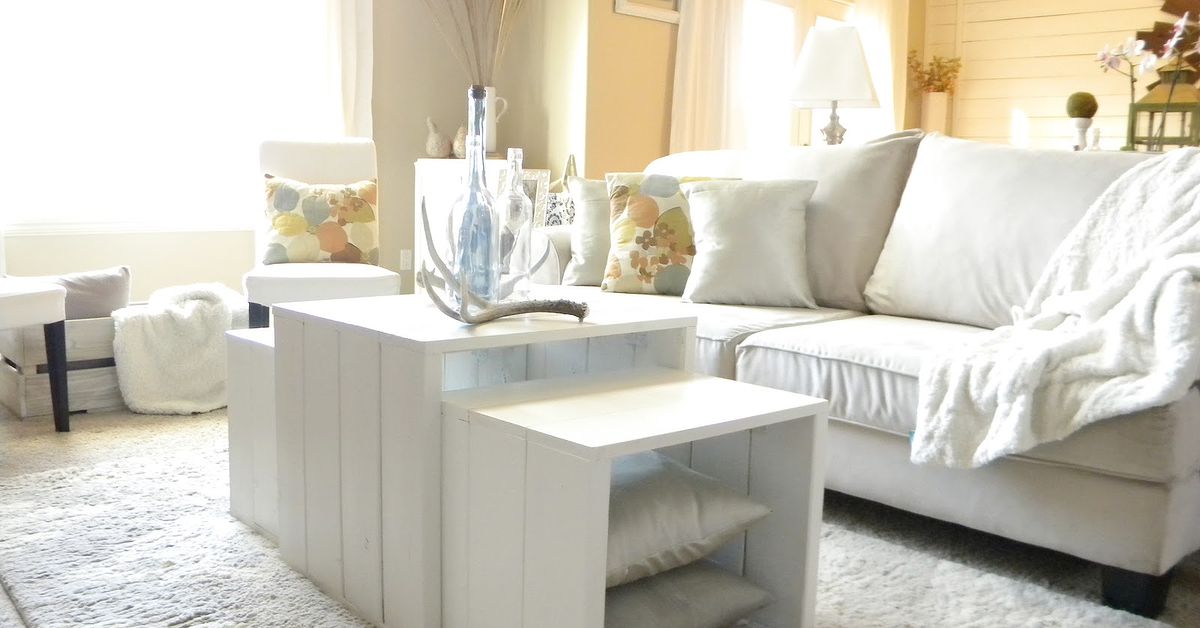
Note: This guide is written as an original, web-ready DIY article based on widely accepted woodworking, home-improvement, furniture-sizing, and finishing practices. Always follow the instructions that come with your tools, lift-top hardware, fasteners, glue, and protective finishes.
A coffee table is usually the quiet middle child of the living room: useful, ignored, and constantly blamed for holding too many remotes. But a DIY 3-in-1 coffee table is different. It is not just a place to park your mug. It works as a classic coffee table, a hidden storage box, and a lift-top desk or snack station. In other words, it is furniture with a résumé.
This project is designed for real homes, especially the kind where blankets multiply, laptops migrate to the couch, and someone always asks, “Where did the TV remote go?” By building a coffee table with hidden storage and a lift-top surface, you get a piece that looks clean, saves space, and makes the living room work harder without looking like a garage workshop moved indoors.
The best part is that this build can be adjusted to your skill level. Beginners can use plywood, pocket-hole screws, and simple butt joints. More experienced DIYers can upgrade with hardwood edging, inset panels, soft-close hardware, casters, or a furniture-grade finish. The goal is not to build a museum piece that nobody is allowed to touch. The goal is to build a sturdy, attractive, multifunctional table that survives coffee, laptops, board games, and at least one mysterious sticky spot.
What Makes This Coffee Table “3-in-1”?
A true 3-in-1 design should solve three everyday problems. First, it functions as a normal coffee table with a comfortable height and enough surface area for drinks, books, trays, and décor. Second, it includes hidden storage for blankets, toys, chargers, magazines, game controllers, or the emotional support clutter every household seems to own. Third, it has a lift-top that raises toward the sofa, creating a better surface for working, eating, writing, crafting, or pretending to answer emails while actually watching a movie.
Function 1: Everyday Coffee Table
The standard table mode should be stable, balanced, and proportional to your sofa. A practical size for many living rooms is around 42 inches long, 24 inches deep, and 17 to 19 inches high. If your sofa is unusually long, you can stretch the table to 48 inches. If your room is small, keep it closer to 36 inches long so it does not become a wooden island in a sea of regret.
Function 2: Hidden Storage
The storage compartment is the secret hero. A box-style base gives you room for soft items like throws and pillows, while smaller dividers can hold electronics, coasters, books, and charging cables. Hidden storage keeps the room visually calm, which is interior-design language for “nobody can see the mess.”
Function 3: Lift-Top Desk or Dining Surface
The lift-top mechanism raises the tabletop upward and slightly forward. That makes it easier to use from the couch. Instead of hunching like a shrimp over your laptop, you can bring the surface closer to a comfortable working height. It also works beautifully for casual dinners, puzzles, journaling, or sorting receipts that you swear you will organize this time.
Recommended Dimensions and Layout
Before cutting anything, measure your living room. The table should usually sit about 16 to 18 inches from the sofa. That distance lets you reach your drink without performing yoga, while still leaving enough space to walk through. The height should be close to the sofa seat height or slightly lower when the top is closed. When lifted, the surface should land at a comfortable laptop or dining height, often around 24 to 27 inches depending on the hardware.
For this project, a balanced beginner-friendly layout is:
- Overall size: 42 inches long x 24 inches deep x 18 inches high
- Storage box depth: about 8 to 10 inches inside
- Lift-top panel: 42 inches x 24 inches
- Base height: 15 to 16 inches before adding the top
- Leg or plinth height: 2 to 4 inches, depending on the look you want
This size works well for apartments, family rooms, and medium-size living rooms. It is big enough to be useful but not so huge that guests start asking whether you are building a dining table in disguise.
Materials You’ll Need
You can build this DIY coffee table from plywood, pine boards, poplar, oak, ash, or walnut. Plywood is stable and budget-friendly. Pine is affordable and easy to work with, though it dents more easily. Poplar paints well. Oak and walnut look beautiful with stain, but your wallet may need a small pep talk first.
Basic Material List
- One 3/4-inch plywood sheet or pre-cut panels for the base and top
- 1×2 or 1×3 boards for internal bracing and trim
- Lift-top coffee table hinge mechanism
- Wood glue
- 1 1/4-inch pocket-hole screws or wood screws
- 1 1/2-inch or 2-inch screws for heavier framing areas
- Wood filler
- Sandpaper in 120, 180, and 220 grit
- Paint, stain, polyurethane, polycrylic, or hardwax oil
- Optional: soft-close lid supports, casters, drawer pulls, edge banding, felt pads, cable grommet
Tools
- Circular saw, table saw, or track saw
- Miter saw or handsaw for trim
- Drill and driver bits
- Pocket-hole jig, if using pocket-hole joinery
- Clamps
- Measuring tape and square
- Orbital sander
- Safety glasses, hearing protection, and dust mask or respirator
Do not skip the protective gear. Wood dust is not artisanal cinnamon. Wear eye protection, control dust when sanding, and work in a ventilated space when applying finishes.
Step-by-Step: How to Build a DIY 3-in-1 Coffee Table
Step 1: Plan the Cut List
For a 42-by-24-inch table, cut one top panel at 42 inches by 24 inches. For the storage box, cut two long side panels, two short end panels, and one bottom panel. A simple base can use 3/4-inch plywood sides around 14 inches tall. Add internal cleats or braces near the top edge to support the lift mechanism and keep the box square.
Measure twice, cut once, and then measure again because wood has a sense of humor. Label each piece with painter’s tape so you do not accidentally turn a side panel into a very disappointing shelf.
Step 2: Build the Storage Box
Assemble the long sides, short ends, and bottom panel into a rectangular box. Use wood glue along the joints and reinforce them with screws or pocket holes. Clamps help keep the panels aligned while the glue sets. Check the diagonals from corner to corner. If both measurements match, your box is square. If they do not, gently adjust before the glue dries and the table becomes permanently “modern art.”
Add 1×2 cleats inside the upper edges. These braces strengthen the box and create solid mounting points for the lift-top hardware. If you plan to store heavy items, add a center support under the bottom panel.
Step 3: Add Legs, a Plinth, or Casters
You have three good base options. Legs give the table a lighter look. A plinth base feels modern and hides dust bunnies with suspicious efficiency. Casters make the table mobile, which is great for small rooms, game nights, and people who rearrange furniture as a personality trait.
If using legs, attach them through corner blocks or metal mounting plates. If using a plinth, build a smaller rectangular frame and center it under the storage box. If using casters, choose locking casters rated for the weight of the table plus whatever you plan to store inside.
Step 4: Build and Strengthen the Lift Top
The tabletop should be flat, strong, and attractive. If using plywood, apply edge banding or attach solid wood trim around the edges for a finished look. If using boards, glue them edge-to-edge and clamp them flat. Pocket holes can help pull boards together, but glue and clamps are still important for a clean top.
Because the lift hardware puts stress on the top, add underside support strips. Keep them away from the hinge path so they do not block movement. Dry-fit the mechanism before final installation. This is the step where patience saves you from drilling twelve “decorative” holes in the wrong place.
Step 5: Install the Lift-Top Mechanism
Lift-top hinges vary by brand, so follow the hardware template carefully. Most mechanisms mount to the inside walls of the storage box and the underside of the tabletop. Mark the screw holes, pre-drill them, and attach the mechanism securely. Use screws that are long enough to hold firmly but not so long that they poke through the tabletop like tiny metal prairie dogs.
After installation, test the motion slowly. The top should lift evenly, stay stable, and close without rubbing. If one side binds, loosen the screws slightly and adjust alignment. A lift-top table should feel smooth, not like you are negotiating with a garage door.
Step 6: Add Dividers and Smart Storage Details
Inside the box, add dividers based on your lifestyle. A long open space works well for blankets. Smaller compartments are better for remotes, tablets, notebooks, and chargers. A simple removable tray can hold coasters and gaming accessories. You can also drill a small cable hole in the back and add a grommet if the table will become a charging station.
For a cleaner look, line the storage compartment with peel-and-stick felt, thin cork, or painted hardboard. This makes the inside feel intentional instead of looking like a plywood cave.
Step 7: Sand Like You Mean It
Sanding is where a DIY project stops looking homemade in the wrong way and starts looking handmade in the good way. Start with 120-grit sandpaper to smooth rough areas, move to 180 grit, and finish with 220 grit before applying paint or clear coat. Round over sharp edges slightly so the table feels comfortable to touch.
Vacuum the dust and wipe the surface with a tack cloth or a slightly damp rag. Do not rush this step. Dust trapped under finish has a talent for making furniture look like it was varnished during a sandstorm.
Finish Ideas for a Beautiful Coffee Table
Painted Finish
Paint is forgiving, stylish, and great for plywood or poplar. Prime first, sand lightly, then apply two coats of durable furniture paint. A satin or semi-gloss sheen is easier to wipe clean than a flat finish. For a farmhouse look, choose warm white, charcoal, sage green, or navy blue.
Stained Wood Finish
If you use oak, ash, walnut, or attractive plywood veneer, stain can highlight the grain. Test stain on a scrap piece first because wood can surprise you. Pine, in particular, may absorb stain unevenly, so a pre-stain conditioner helps reduce blotchiness.
Protective Topcoat
A coffee table needs protection from water rings, snacks, laptops, and life. Water-based polyurethane or polycrylic keeps the color clearer and dries with less odor. Oil-based polyurethane gives a warmer tone and strong protection but takes longer to dry and can yellow over time. Apply thin coats, sand lightly between coats, and let the finish cure before heavy use.
Design Upgrades That Make the Table Feel Custom
Small upgrades can make your DIY 3-in-1 coffee table look expensive. Add fluted trim around the base for texture. Use black metal legs for a modern industrial style. Install brass pulls on a false drawer front if you want the storage to look like cabinetry. Add a lower open shelf for books if you prefer display space. Use a two-tone finish, such as a stained top with a painted base, for a designer look without designer pricing.
You can also make the tabletop reversible in style: smooth wood on top, painted underside, or even a game-board insert inside the lift compartment. For families, rounded corners are worth considering. They are friendlier to knees, toddlers, and anyone who walks through the living room in the dark like a sleepy raccoon.
Common Mistakes to Avoid
Making the Table Too Tall
A coffee table that is too tall feels awkward beside the sofa. It can also make the lift-top mode uncomfortable. Match the closed height to your seating and test the lifted position before finalizing hardware placement.
Forgetting Clearance
The lift top needs room to move forward and upward. Make sure the table sits far enough from the sofa that the top can open without bumping knees, cushions, or snack bowls.
Using Weak Hardware
Cheap hinges may work for a light lid, but a lift-top table needs hardware designed for the job. Choose a mechanism rated for the size and weight of your tabletop. If the top is heavy, consider using gas-assisted or stronger lift hardware.
Skipping Pre-Drilling
Pre-drilling helps prevent splitting, especially near edges. It also makes screw placement more accurate. This is one of those tiny steps that prevents big vocabulary words from being shouted in the garage.
Budget Breakdown
Your final cost depends on wood choice, hardware, and finish. A plywood-and-pine version can often be built on a modest budget. A hardwood version with premium lift hardware and designer legs will cost more, but still may be cheaper than buying a comparable multifunctional coffee table from a furniture store.
- Budget build: plywood, pine trim, basic lift hardware, painted finish
- Mid-range build: cabinet-grade plywood, solid wood edging, better hinges, stain and clear coat
- Premium build: hardwood top, soft-close lift mechanism, metal legs, custom compartments, high-end finish
If you are building for your own home, spend money on hardware and finish before decorative extras. A beautiful table that wobbles, sticks, or slams shut is not “rustic.” It is annoying with a stain color.
Experience Notes: What It’s Really Like to Build and Use a 3-in-1 Coffee Table
The first thing you learn when building a DIY 3-in-1 coffee table is that multifunctional furniture demands more planning than a basic four-leg table. A normal coffee table only has to sit there and look useful. This one has to open, lift, store, close, support weight, and still look good in the middle of the room. That means every small decision matters: the thickness of the top, the strength of the hinges, the placement of braces, and whether the storage compartment is actually easy to reach.
One practical lesson is to test the lift mechanism before finishing the table. It is tempting to paint or stain everything first, then install the hardware like a grand finale. But lift hardware can be fussy. A tiny misalignment can cause the top to rub or rise unevenly. Dry-fitting the mechanism lets you correct problems while the wood is still easy to adjust. It also helps you understand where your hands naturally go when opening the top, which can influence whether you add a pull notch, handle, or soft-close support.
Another experience-based tip is to avoid making the storage compartment too deep unless you enjoy losing things in a wooden canyon. A deep compartment sounds great until remotes, cables, and small items sink to the bottom. For daily use, shallow trays or dividers are better than one huge open box. Keep one large section for blankets and add one smaller section for electronics. Your future self will thank you the next time you find the remote in ten seconds instead of organizing a search party.
The finish also changes how the table feels in real life. A matte painted table may look beautiful in photos, but if your household drinks coffee, eats snacks, or has children, pets, or gravity, a more durable wipeable topcoat is worth it. Satin finishes usually hide fingerprints better than glossy ones while still cleaning easily. If you choose stain, test it under the same lighting as your living room. Wood can look warm and rich in the garage, then oddly orange beside your sofa. Lighting is sneaky like that.
In daily use, the lift-top feature becomes more valuable than expected. It turns the couch into a casual workspace, makes movie-night food easier, and gives small homes an extra surface without adding another piece of furniture. The hidden storage keeps clutter under control, but only if you create categories. Otherwise, the table becomes a stylish junk drawer with legs. A simple rule helps: blankets on one side, tech on the other, nothing mysterious allowed.
The biggest reward is personal. Every time someone compliments the table, you get to say, “I built it,” which is one of the finest sentences in the English language. It feels even better when the table is not just pretty, but genuinely useful. A DIY 3-in-1 coffee table proves that smart furniture does not need to be complicated, overpriced, or assembled with instructions that look like they were translated by a confused toaster. With careful measuring, solid hardware, patient sanding, and a little humor, this project can become the hardest-working piece in your living room.
Conclusion
A DIY 3-in-1 coffee table is one of the most practical furniture projects you can build for a modern living room. It combines a classic coffee table, hidden storage, and a lift-top desk or dining surface in one compact design. That makes it ideal for apartments, family rooms, small homes, and anyone who wants furniture that does more than sit politely in the corner.
The key to success is planning the dimensions around your sofa, choosing sturdy lift-top hardware, building a square and reinforced storage box, and finishing the surface so it can survive real life. Add smart compartments, smooth edges, and a finish that matches your style, and you will have a custom piece that looks great and works hard every day.
Whether you paint it, stain it, add casters, install dividers, or dress it up with designer-style trim, this project gives you control over the final look and function. And yes, it also gives you a dignified place to hide the remote collection. That alone may be worth the sawdust.