Some outdoor upgrades whisper. A hula hoop chandelier absolutely knows how to make an entrance. It hangs above a patio table, catches the evening breeze, throws a soft glow over dinner, and suddenly your backyard feels less like “patch of grass with chairs” and more like the kind of place where people linger until the ice melts in their glasses.
That is the charm of a hula hoop chandelier. It is inexpensive, surprisingly elegant, beginner-friendly, and wildly adaptable. You can make one look boho, rustic, romantic, modern farmhouse, or full-on backyard fairy tale. Better yet, you do not need a workshop, a degree in engineering, or an emotional support trip to the hardware store to pull it off.
If you want a DIY project that adds instant personality to a porch, pergola, gazebo, or outdoor dining space, this is it. A well-made hula hoop chandelier creates ambient lighting, adds visual height, and becomes a conversation piece before the burgers even hit the grill. The best part? It looks impressive enough that guests will assume you either paid too much for it or have your life suspiciously together.
Why a Hula Hoop Chandelier Works So Well Outdoors
Outdoor spaces need more than brightness. They need atmosphere. A floodlight may help you find the dog, but it does very little for romance. A hula hoop chandelier solves that problem by adding a warm focal point overhead. It defines an area, softens the mood, and makes even a basic patio set feel intentional.
The circular shape also works in your favor. A ring naturally feels balanced and decorative, and it is easy to wrap with lights, greenery, ribbon, fabric strips, beads, faux florals, or hanging accents. Unlike heavy metal fixtures, a hula hoop is lightweight, forgiving, and easy to customize. That makes it a smart choice for DIY outdoor decor where style matters but simplicity matters more.
It is also budget-friendly. One plain hoop can become a chandelier for far less than the cost of most statement outdoor lighting. If you already have twinkle lights, zip ties, floral wire, or leftover ribbon, you are halfway there. This is the rare craft project that does not require a second mortgage or a meltdown in aisle 12.
What Is a Hula Hoop Chandelier, Exactly?
At its core, a hula hoop chandelier is a decorative light fixture built around the circular frame of a hula hoop. The hoop becomes the base structure. From there, you wrap or weave in lights, suspend decorative strands, attach accents, and hang the finished piece overhead with rope, chain, or strong cord.
For outdoor use, the smartest versions rely on lightweight LED lighting. Battery-operated fairy lights, solar micro-lights, or outdoor-rated LED strands are popular because they create a soft glow without making the fixture heavy or complicated. If you want an even safer and easier setup, you can skip hardwired anything and keep the project decorative, low-voltage, and renter-friendly.
Materials You’ll Need
- A hula hoop in your preferred size
- Outdoor-rated LED fairy lights, micro-lights, or battery-operated light strands
- Zip ties, floral wire, or clear fishing line
- Jute rope, outdoor cord, or lightweight chain for hanging
- Optional decor: faux eucalyptus, faux flowers, ribbon, acrylic beads, lightweight lantern charms, or fabric strips
- Outdoor-safe hooks or hanging hardware rated for the location
- Scissors and wire cutters
- Optional spray paint if you want to change the hoop color
Choose decor that can tolerate outdoor conditions, especially if your chandelier will live on a covered porch or pergola for longer than a weekend. Lightweight materials are your friend. This is a chandelier, not a CrossFit challenge.
How to Make a Hula Hoop Chandelier Step by Step
1. Pick the Right Hoop Size
A small hoop feels sweet and subtle. A larger hoop creates drama. For an outdoor dining table, a medium-to-large hoop usually works best because it anchors the space without looking skimpy. If your seating area is wide, go bigger. Tiny chandelier over a big table equals visual heartbreak.
2. Decide on Your Style First
Before attaching anything, choose a direction. Are you aiming for romantic garden party, rustic farmhouse, modern neutral, or whimsical boho? This decision keeps the finished piece cohesive. Randomly adding lace, faux ivy, beads, and nautical rope often creates the design equivalent of a group project with no leader.
3. Prep the Hoop
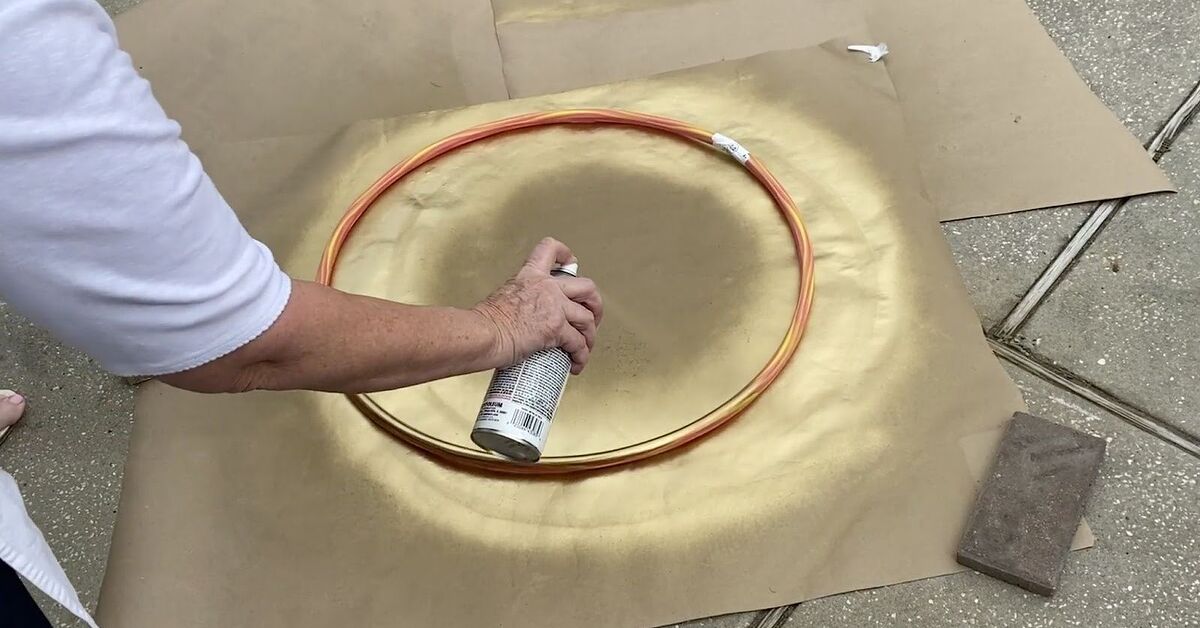
If the hoop is bright neon pink and your dream aesthetic is “soft summer evening in Tuscany,” consider painting it. Matte black, white, bronze, gold, and weathered metallics are popular outdoor-friendly choices. Let the finish dry completely before decorating.
4. Add the Lights
Wrap the hoop evenly with LED lights. Space them so the glow feels balanced all the way around. Secure the strand with zip ties or floral wire, keeping fasteners neat and tucked away. If your lights have a battery pack or solar component, plan where that piece will sit so it remains discreet but accessible.
5. Create Depth With Hanging Details
This is where the magic happens. Attach strands of beads, ribbon, faux greenery, or lightweight ornaments so they hang at varying lengths from the hoop. That layered look gives the chandelier movement and dimension. Keep the center open enough that the design still reads as airy, not like a craft bin exploded in slow motion.
6. Build a Secure Hanging System
Use three or four evenly spaced lengths of rope, cord, or chain attached to the hoop and brought together at the top. This keeps the fixture level. Uneven hanging lines create the dreaded slanted chandelier, which says less “enchanted garden” and more “we tried our best after two iced coffees and poor math.”
7. Test Before You Hang It Permanently
Turn the lights on, hold the chandelier up, and check the balance. Make adjustments while it is still easy to reach. If anything droops, twists, or bunches awkwardly, fix it now instead of performing corrective surgery on a ladder later.
8. Hang It in a Smart Spot
Choose a covered or semi-covered location when possible. Pergolas, gazebos, porches, and sheltered patios are ideal. Make sure the support point is sturdy and that the chandelier hangs high enough for comfortable walking and conversation below.
Safety Tips That Make the Project Smarter
Beauty is great. Beauty plus common sense is better. If your chandelier uses electricity outdoors, stick with products clearly intended for outdoor use. Inspect cords, light strands, and battery compartments before installation. Avoid damaged wires, overloaded extension cords, and anything that looks like it came out of a mystery bin labeled “probably fine.”
For the easiest and lowest-stress setup, use LED lights that stay cool and consume less power. Battery-operated or solar options are excellent for temporary installations, parties, weddings, and rental-friendly spaces. If you plan a more permanent electrical setup, that is the moment to stop being brave and start being wise. Consult a licensed electrician.
Also skip open flames on a lightweight DIY chandelier. Candles are lovely in theory and chaotic in practice. Flameless LED candles or enclosed light effects will give you the same mood without turning your centerpiece into a cautionary tale.
Design Ideas That Make It Look High-End
Go Boho With Greenery and Texture
Wrap the hoop with faux eucalyptus, add natural-toned ribbon, and let a few strands of beads hang loose. Pair it with woven seating, linen napkins, and neutral pillows for that relaxed resort look.
Make It Romantic With Soft White Lights
Use warm white fairy lights and add sheer ribbon or delicate acrylic crystal strands. This works beautifully over an outdoor dining table, especially for engagement parties, bridal showers, and summer dinners.
Try Rustic Farmhouse Style
Paint the hoop a distressed finish, use jute rope for hanging, and weave in faux olive branches or dried-look botanicals. Set it above a wood table with lanterns and stoneware for easy charm.
Keep It Modern and Minimal
Choose a black or matte bronze hoop, limit the embellishments, and let the circular form shine. A clean ring wrapped in evenly spaced warm LEDs can look surprisingly polished in a contemporary backyard.
Best Places to Hang a Hula Hoop Chandelier
- Above an outdoor dining table
- Inside a gazebo or pergola
- On a covered porch
- Over a lounge area with sectionals or Adirondack chairs
- At outdoor weddings, baby showers, and birthday parties
- In a screened-in porch where you want a dramatic focal point
The best placement is wherever people naturally gather. Good outdoor decor should not feel random. It should support the mood of the space. A chandelier over a table says, “Stay awhile.” A chandelier in the middle of nowhere says, “We had leftover zip ties.”
How to Style the Rest of the Space Around It
Once your chandelier is up, let it lead the rest of the design. Add textiles that echo its colors. Repeat circular shapes through lanterns, planters, or a round table. Use cushions, rugs, and tableware that support the vibe rather than compete with it.
Layering matters outdoors just as much as it does indoors. A chandelier looks even better with soft surrounding light, so combine it with string lights on a fence, lanterns on the table, or small solar path lights nearby. Think of your hula hoop chandelier as the star of the show, not the entire cast.
Common Mistakes to Avoid
- Using heavy decor that warps the hoop
- Choosing lights that are too bright and kill the mood
- Ignoring the surrounding style of the patio or porch
- Hanging it too low over seating or walkways
- Using indoor-only materials outside
- Forgetting how wind and weather affect lightweight decorations
Another common mistake is overdecorating. It is tempting to add one more ribbon, one more flower, one more dangling crystal, and then suddenly your chandelier looks like it is auditioning for a holiday parade. Restraint is powerful. Let the shape and glow do some of the work.
The Experience of Living With a Hula Hoop Chandelier Outdoors
There is something unexpectedly emotional about outdoor lighting done well. In the daytime, a hula hoop chandelier acts like a piece of floating decor. It adds shape, texture, and a little personality overhead. But when evening arrives, it changes character completely. The same object that looked playful in sunlight suddenly becomes atmospheric, almost cinematic, and the whole yard begins to feel more intimate.
One of the best experiences tied to a chandelier like this is how it changes the pace of outdoor gatherings. People do not rush off as quickly when the light is warm and flattering. Dinner stretches longer. Kids stay outside a little later. Neighbors lean on the fence to chat. Even an ordinary weeknight meal somehow feels like an event because the setting tells everyone, “Yes, this counts as quality time.”
It is also one of those rare DIY pieces that photographs beautifully without feeling fake in real life. The chandelier gives your patio a focal point during parties, but it is just as satisfying when you are outside alone with iced tea, a playlist, and exactly zero desire to answer emails. The glow overhead creates a sense of enclosure that makes open outdoor spaces feel cozy instead of exposed.
For families, it can become part of the rhythm of the season. You hang it in late spring, and suddenly that is the sign that outdoor dinners are back. Summer birthdays happen under it. Weekend brunches happen under it. Someone inevitably says, “This looks so pretty out here,” and you try to act casual even though you absolutely want credit.
For entertainers, the chandelier does a lot of heavy lifting. It makes folding chairs seem more charming, takeout look more intentional, and a simple dessert table feel styled. You do not need a magazine-perfect yard for it to work. In fact, that is part of the beauty. A hula hoop chandelier brings polish to spaces that are still wonderfully lived in. It does not erase the personality of the backyard; it highlights it.
There is also joy in how customizable the experience becomes. A floral version feels dreamy for a bridal shower. A greenery-and-lantern version feels elegant for an outdoor dinner party. A bright ribbon-and-twinkle-light version can make a child’s birthday feel enchanted without requiring a thousand-dollar party planner and a spreadsheet titled “balloon arch crisis.”
Even the little imperfections add character. Maybe one strand hangs slightly differently after a windy day. Maybe the ribbon softens over time. Maybe you swap in fresh accents with the seasons. That evolution can make the chandelier feel less like a static decoration and more like a living part of your outdoor space.
Most of all, the experience is memorable because it transforms mood, not just appearance. Good outdoor design is not only about what people see. It is about what they feel when they arrive, sit down, and look up. A hula hoop chandelier creates a tiny sense of occasion. It tells your guests, your family, and honestly your slightly frazzled weekday self that the outdoors deserves beauty too.
And that may be the real magic. Not that a hula hoop turns into a chandelier, but that a simple, affordable DIY project can turn a regular backyard into a place where people connect, relax, and make memories under a soft circle of light. That is a pretty good return on one humble plastic hoop.
Final Thoughts
If you want an outdoor DIY that is practical, beautiful, and fun to personalize, a hula hoop chandelier is hard to beat. It delivers style without demanding advanced skills, and it adds instant charm to patios, porches, pergolas, and party spaces. Whether your taste leans boho, rustic, romantic, or modern, the basic idea is flexible enough to become your own.
Start simple, choose weather-smart materials, keep the lighting soft, and let the chandelier complement the way you actually use your outdoor space. Done right, it becomes more than decor. It becomes part of the atmosphere. And when your backyard starts looking suspiciously magical, just nod modestly and pretend you always intended to become this person.
SEO Tags
Note: For permanent outdoor electrical installation or heavy ceiling mounting, use qualified hardware and consult a licensed electrician.