Note: This publish-ready article is written in original wording and synthesized from current manufacturer guidance, paint-care recommendations, and U.S. home-improvement best practices.
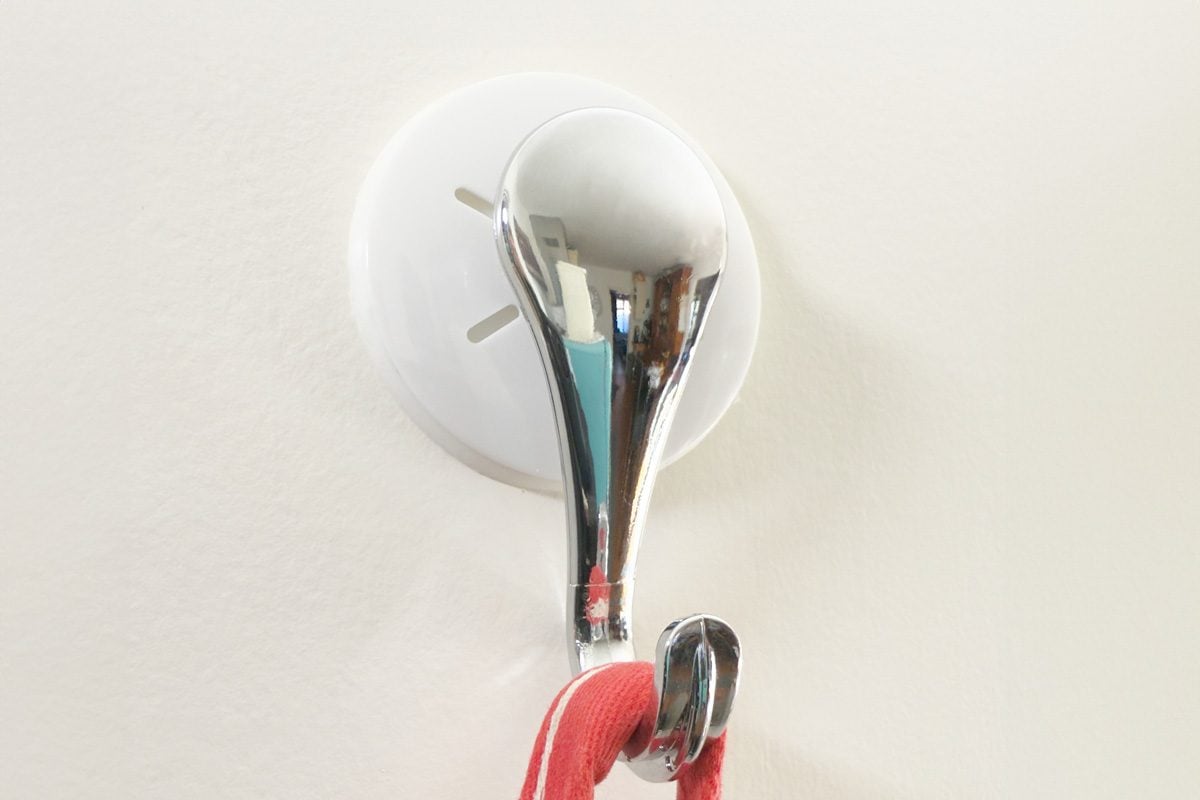
Temporary hooks are one of the tiny miracles of modern home life. They let renters decorate without requesting permission from a landlord, parents hang school calendars without turning the kitchen into Swiss cheese, and holiday enthusiasts drape garland like they personally own December. But here is the catch: “damage-free” does not mean “immune to user error.” A temporary hook can still peel paint, leave sticky residue, tear wallpaper, or launch a framed photo to the floor if it is applied to the wrong surface, overloaded, rushed, or removed with the technique of a raccoon opening a snack bag.
The good news? Most wall damage from temporary adhesive hooks is preventable. The secret is less about buying the strongest hook on the shelf and more about understanding the wall, the paint, the adhesive, the weight limit, and the removal method. Think of it as a relationship: the hook wants a clean, smooth surface, enough time to bond, reasonable expectations, and a calm breakup.
This guide explains how to prevent temporary hooks from damaging your walls, whether you are hanging keys, garland, string lights, towels, lightweight frames, dorm décor, or that one seasonal sign that says “Pumpkin Spice Headquarters.” Let’s protect your walls, your security deposit, and your dignity.
Why Temporary Hooks Damage Walls in the First Place
Temporary hooks usually damage walls for one of five reasons: the surface was not suitable, the wall was not cleaned properly, the paint was too fresh, the hook carried too much weight, or the adhesive was pulled off incorrectly. In other words, the hook is often blamed for a crime committed by impatience.
Adhesive hooks rely on a bond between the strip and the wall surface. If that surface is dusty, greasy, textured, humid, peeling, or coated with uncured paint, the adhesive may grab weak paint instead of the stable wall beneath it. Later, when the hook is removed, the paint comes along for the ride. That is not a dramatic betrayal; it is basic physics wearing a plastic hook.
Wall materials matter, too. Smooth painted drywall, finished wood, glass, tile, metal, and some painted concrete or cinder block are generally better candidates for removable adhesive hooks. Wallpaper, fabric walls, rough brick, heavily textured plaster, and fragile painted surfaces are riskier. Adhesive may not bond evenly to rough surfaces, and it may tear delicate coverings when removed.
Choose the Right Hook for the Job
The first rule of temporary wall hooks is simple: match the hook to the item, not to your optimism. If a hook says it holds three pounds, do not hang something that weighs three pounds plus a scarf, a tote bag, wet towel, or surprise gravity. Always leave a safety margin.
Check the Weight Limit
Every adhesive hook has a rated capacity. Small hooks may hold only a pound or less, while larger utility hooks may hold several pounds. Picture-hanging strips, bathroom hooks, outdoor hooks, and clear hooks also have different instructions and performance limits. Read the package before use. Yes, the tiny print is annoying. No, your wall does not care.
Weigh the item if you are unsure. A kitchen scale works for small objects, and a bathroom scale can help with heavier décor. If the item is fragile, valuable, glass, ceramic, vintage, or emotionally irreplaceable, do not rely on a temporary adhesive hook. Use proper hardware such as drywall anchors, wall studs, picture hangers, or cleats.
Use the Correct Hook Style
A hook for keys is not the same as a hook for a curtain rod, towel ring, garland, or frame. Some temporary hooks are made for indoor use, some are made for outdoor temperature swings, and some are designed specifically for bathrooms where humidity is higher. Choose products based on where they will live and what they will hold.
For holiday garland, several smaller hooks spaced across the wall or door frame can be safer than one heroic hook doing all the work. For picture frames, use picture-hanging strips rather than a general-purpose hook unless the frame hardware is designed for a hook. For towels or bathroom accessories, choose hooks made for humid spaces and install them on smooth tile or properly painted walls, avoiding grout lines when the instructions say so.
Inspect the Wall Before You Stick Anything
Before applying temporary hooks, look closely at the wall. You are searching for red flags: peeling paint, bubbling paint, chalky residue, dust, grease, moisture, rough texture, wallpaper seams, or recently patched areas. Adhesive hooks need a stable surface. If the surface is weak, the hook may remove the weak layer when it comes off.
Run a clean, dry hand over the spot. If your fingers pick up dust, the adhesive will, too. If the wall feels oily near a kitchen, entryway, or bathroom, clean it first. If the paint already has chips or cracks, avoid that area. Temporary hooks do not repair walls; they expose problems with excellent timing.
Avoid Wallpaper and Delicate Finishes
Wallpaper and removable adhesives are rarely best friends. Many wallpapers are too delicate and may tear when an adhesive strip is removed. The same is true for fabric wall coverings, grasscloth, faux finishes, limewash, venetian plaster, and older paint that has become brittle. If you must decorate these surfaces, use non-adhesive options such as tension rods, over-door hooks, suction cups on glass, freestanding displays, or hooks attached to trim rather than the finished wall.
Wait Before Applying Hooks to Fresh Paint
Fresh paint may feel dry long before it is fully cured. Dry paint is not the same as cured paint. Dry means the surface is no longer wet to the touch. Cured means the coating has hardened enough to reach its best durability. Latex and acrylic wall paints commonly need two to three weeks to cure under normal conditions, while some oil-based paints cure faster.
Many adhesive hook manufacturers recommend waiting at least seven days after painting before use, but the safest approach is to check the paint can for the manufacturer’s cure time. If you painted yesterday and are already sticking hooks on the wall today, the wall may respond by peeling like a bad sunburn.
Humidity, cool temperatures, poor ventilation, and thick paint application can slow curing. If the room was freshly painted, be patient. Your wall art can sit on the floor for a few more days. It will be fine. It may even enjoy the suspense.
Clean the Surface the Right Way
Cleaning is the boring step that prevents exciting damage later. Most removable adhesive hook instructions recommend cleaning the wall with isopropyl rubbing alcohol and allowing it to dry completely. This removes oils, dust, and residue that can interfere with adhesion.
Do not use household cleaners, soap, or spray cleaners unless the hook manufacturer specifically allows them. Many cleaners leave behind a slick film that weakens the adhesive bond. Water alone may not remove oils. On fresh paint, be careful with alcohol because it can dull or affect paint that has not cured. When in doubt, test in a hidden area first.
How to Clean Before Applying a Hook
- Dust the wall with a clean microfiber cloth.
- Lightly wipe the exact hook area with isopropyl rubbing alcohol.
- Let the surface dry fully.
- Avoid touching the cleaned spot with your fingers.
- Apply the adhesive strip according to the package instructions.
This process may seem fussy, but fingerprints contain oils, and oils are tiny sabotage artists. Clean once, stick once, and your chances of damage drop dramatically.
Apply Hooks With Firm, Even Pressure
Adhesive hooks need firm pressure to form a strong bond. Follow the specific instructions for your product, but many hooks require pressing the strip to the wall for about 30 seconds, then pressing the hook or base firmly in place. The pressure helps the adhesive make full contact with the wall surface.
Do not slap the hook onto the wall and immediately hang your winter coat on it. That is not installation; that is a dare. Many adhesive products require a waiting period, often about one hour, before adding weight. This gives the adhesive time to build strength.
Use a Level and Painter’s Tape for Placement
One hidden cause of wall damage is repositioning. You place the hook, step back, realize it is crooked, peel it off, stick it again, and repeat until the adhesive has lost its will to live. Plan first. Use painter’s tape to mark the location, check the height, and confirm spacing before removing the adhesive liner.
For gallery walls or rows of hooks, paper templates are helpful. Trace the frame or object on paper, tape the template to the wall, adjust until it looks right, then mark the hook location. This prevents extra adhesive applications and unnecessary wall contact.
Respect Temperature and Humidity
Temperature affects adhesive performance. Many indoor adhesive hooks are designed for typical room temperatures, not freezing garages, blazing sunrooms, or steamy bathrooms. Outdoor hooks are usually formulated differently to handle temperature changes, moisture, and UV exposure.
In bathrooms, laundry rooms, and kitchens, humidity can weaken adhesive over time. Use bathroom-rated hooks where appropriate and avoid placing them directly in splash zones unless the product is meant for that. Let tile, glass, or painted surfaces dry before applying hooks. Adhesive and moisture are not a cute couple.
Do Not Hang the Wrong Items
Temporary hooks are excellent for lightweight, replaceable, flexible, or seasonal items. They are not ideal for heavy mirrors, glass frames, expensive artwork, heirlooms, shelves, large clocks, loaded baskets, curtain rods with heavy drapes, or anything that could hurt someone if it falls.
As a general rule, avoid temporary hooks for:
- Heavy mirrors or glass décor
- Valuable or irreplaceable artwork
- Wood or metal frames that exceed weight limits
- Shelves, plants, or storage baskets
- Items above beds, cribs, sofas, or desks
- Objects exposed to pulling, swinging, or daily tugging
Hooks can fail gradually. Adhesive may harden, dry out, or weaken with humidity and temperature changes. If the item matters, mount it properly. A small nail hole is easier to repair than shattered glass and a wall crater shaped like regret.
Remove Temporary Hooks Slowly and Correctly
Removal is where many walls lose the battle. The most common mistake is pulling the hook outward, away from the wall. That motion can rip paint, drywall paper, or wallpaper. For many stretch-release adhesive strips, the correct method is to hold the hook or base gently and pull the exposed tab straight down, slowly, keeping it close and parallel to the wall.
Do not yank. Do not twist. Do not pull toward yourself. Do not panic. Stretch-release adhesive works by elongating until it releases from the surface. Slow stretching gives the adhesive time to let go. Fast pulling turns the strip into a paint-removal device.
Basic Removal Steps
- Remove the item from the hook first.
- If the hook has a removable cover, slide it off to expose the adhesive tab.
- Hold the hook or mounting base gently without pressing it into the wall.
- Pull the tab straight down along the wall, slowly.
- Keep pulling until the adhesive releases completely.
If the tab breaks, stop. Do not pry the hook off with a screwdriver like you are opening a paint can. Warm the adhesive gently with a hair dryer on a low or medium setting, then use dental floss or fishing line to saw carefully behind the hook. Work slowly and avoid digging into the paint. After the hook is off, remove residue with a wall-safe method tested in a hidden area.
How to Remove Sticky Residue Without Making Things Worse
Sometimes the hook comes off but leaves a gummy souvenir. Start gently. Rub the residue with your finger or a clean microfiber cloth. If that does not work, use a little isopropyl alcohol on a cloth and test first in an inconspicuous spot. Avoid soaking the wall. Too much liquid can soften paint, stain drywall, or create a bigger mess.
For glossy paint, tile, glass, or metal, residue is usually easier to remove. For flat paint, older paint, or delicate finishes, go slowly. Heat from a hair dryer can soften adhesive, but excessive heat can also affect paint. Warm, do not roast. Your wall is not a grilled cheese sandwich.
Best Alternatives When Adhesive Hooks Are Too Risky
Sometimes the smartest way to prevent temporary hooks from damaging walls is not to use them. There are plenty of renter-friendly and low-damage alternatives.
Tension Rods
Tension rods work well inside window frames, doorways, closets, and alcoves. They can hold lightweight curtains, garland, fabric panels, or small organizers without adhesive.
Over-the-Door Hooks
For towels, robes, bags, and wreaths, over-the-door hooks are often safer than adhesive hooks. Add felt pads where the hook touches the door to prevent scratches.
Suction Hooks
Suction hooks can work on glass, mirrors, glossy tile, and some smooth metal surfaces. They are useful in bathrooms and kitchens, but they need a clean, non-porous surface.
Picture Ledges
If you enjoy changing artwork often, one properly installed picture ledge can reduce the need for multiple hooks. It does require hardware, but it limits holes and makes future decorating easier.
Small Nails or Picture Hangers
This may sound shocking in an article about temporary hooks, but a tiny nail hole can sometimes be less risky than a large patch of peeled paint. For heavier items, proper hardware is usually safer and easier to repair.
Temporary Hook Checklist Before You Stick
Before installing a temporary hook, run through this quick checklist:
- Is the wall smooth, clean, dry, and stable?
- Has fresh paint cured long enough?
- Is the hook rated for more than the item’s weight?
- Is the item lightweight and replaceable?
- Is the location away from beds, cribs, and high-risk areas?
- Have you cleaned the surface with the recommended method?
- Can you wait before adding weight?
- Do you know the proper removal technique?
If you answer “no” to any of these, pause before sticking. A two-minute rethink can save you from sanding, patching, repainting, and inventing new vocabulary.
Real-Life Experience: What Actually Works When Using Temporary Hooks
After using temporary hooks in apartments, dorm-style spaces, kitchens, bathrooms, offices, and holiday setups, one lesson becomes obvious: the hook is only as good as the preparation. The installations that last and remove cleanly are almost always the boring ones. The wall is cleaned. The paint is old enough. The item is lighter than the hook limit. The hook is pressed firmly. The adhesive gets time to bond. Nobody rushes the removal. It is not glamorous, but neither is explaining a missing paint patch to a landlord.
One common mistake is hanging “light” items that become heavy in real life. A hook for a dry towel may hold at first, but a damp towel adds weight and moisture. A hook for a tote bag may be fine until someone fills the tote with books, snacks, and the emotional burden of errands. A hook near the entryway may hold keys, then gradually becomes a home for lanyards, umbrellas, dog leashes, masks, and one mysterious charger. Temporary hooks perform best when their job stays consistent.
Another useful experience is to avoid installing hooks in a hurry before guests arrive. That is when people skip cleaning, eyeball the placement, overload the hook, and hang something five minutes later. If you are decorating for a party, install hooks the day before. Let the adhesive bond properly. Your garland will look better, and your wall will not be asked to perform under emergency conditions.
Bathrooms deserve special caution. Smooth tile can be a great surface, but grout lines, steam, and wet walls can cause problems. Hooks near showers should be bathroom-rated, applied to clean dry tile, and allowed to set before use. If the hook will hold a towel, remember that wet fabric is heavier than dry fabric. When a bathroom hook fails, it rarely does so politely. It usually drops something onto the floor at 2 a.m. with the sound of a raccoon falling into a recycling bin.
Holiday decorating also teaches a valuable trick: distribute weight. Instead of hanging a thick garland from two hooks, use several hooks and add loops of floral wire, fishing line, or zip ties. This reduces stress on each adhesive strip and helps prevent sagging. Clear hooks are excellent when you want the hardware to disappear visually, but they still need the same clean surface and weight discipline.
For framed photos, picture-hanging strips can work beautifully when used correctly, especially for lightweight frames on smooth painted walls. However, heavy frames, glass-covered art, and heirlooms deserve real hardware. The question is not “Can the strip hold it today?” The better question is “Would I be calm if this fell at midnight?” If the answer is no, choose a stronger mounting method.
The biggest removal lesson is patience. Pulling the adhesive tab straight down slowly is the difference between a clean wall and a patch job. If the strip resists, slow down. If it breaks, use heat and dental floss instead of prying. A rushed removal can undo months of perfect performance in three dramatic seconds.
Finally, keep extra adhesive strips, a small level, rubbing alcohol, microfiber cloths, painter’s tape, and dental floss in a decorating kit. It sounds overly organized until the day you need them. Then you will feel like a wall-saving genius. Temporary hooks are incredibly useful, but they reward people who treat them less like magic stickers and more like small pieces of engineering. Respect the wall, respect the weight limit, and remove slowly. Your walls will stay smooth, your décor will stay up, and your future self will not be shopping for spackle at 9 p.m.
Conclusion
Temporary hooks can be a fantastic damage-free hanging solution when they are used on the right surface, with the right weight, and with the right removal method. The best way to prevent temporary hooks from damaging your walls is to slow down before you stick: inspect the wall, wait for paint to cure, clean with rubbing alcohol when appropriate, press firmly, let the adhesive bond, avoid heavy or valuable objects, and remove the strip by stretching it straight down slowly.
Think of temporary hooks as helpful assistants, not structural engineers. They are perfect for lightweight organization, seasonal décor, dorm rooms, rentals, and flexible decorating. They are not the right choice for every object or every wall. When you choose wisely, install carefully, and remove calmly, you can enjoy a decorated home without nail holes, peeled paint, sticky residue, or the tragic sound of a frame meeting the floor.