There are two kinds of people in this world: people who see a plain rectangle of paper, and people who see a future ninja star quietly waiting for its dramatic entrance. If you are in the second group, congratulations. Your desk paper is no longer safe.
Learning how to make a ninja star from rectangular paper is one of the most satisfying beginner origami projects because it looks much harder than it actually is. With one regular sheet of printer paper, notebook paper, or lightweight craft paper, you can fold a classic four-point paper shuriken using two matching rectangular strips. No glue, no tape, no fancy tools, and no ancient mountain training required.
This guide breaks the project into 13 clear steps, explains why each fold matters, and adds troubleshooting tips so your paper ninja star turns out flat, balanced, and sturdy. It is a craft, a geometry lesson, and a tiny victory over boredom all in one.
What Is a Paper Ninja Star?
A paper ninja star, often called an origami shuriken, is a folded paper model inspired by the shape of a traditional Japanese throwing star. The paper version is only a toy and should be treated like one. It is great for craft time, classroom activities, party decorations, desk fidgets, bookmarks, or colorful wall art. It is not meant to be thrown at people, pets, screens, lamps, siblings, or anything that can complain, crack, or charge you money for repairs.
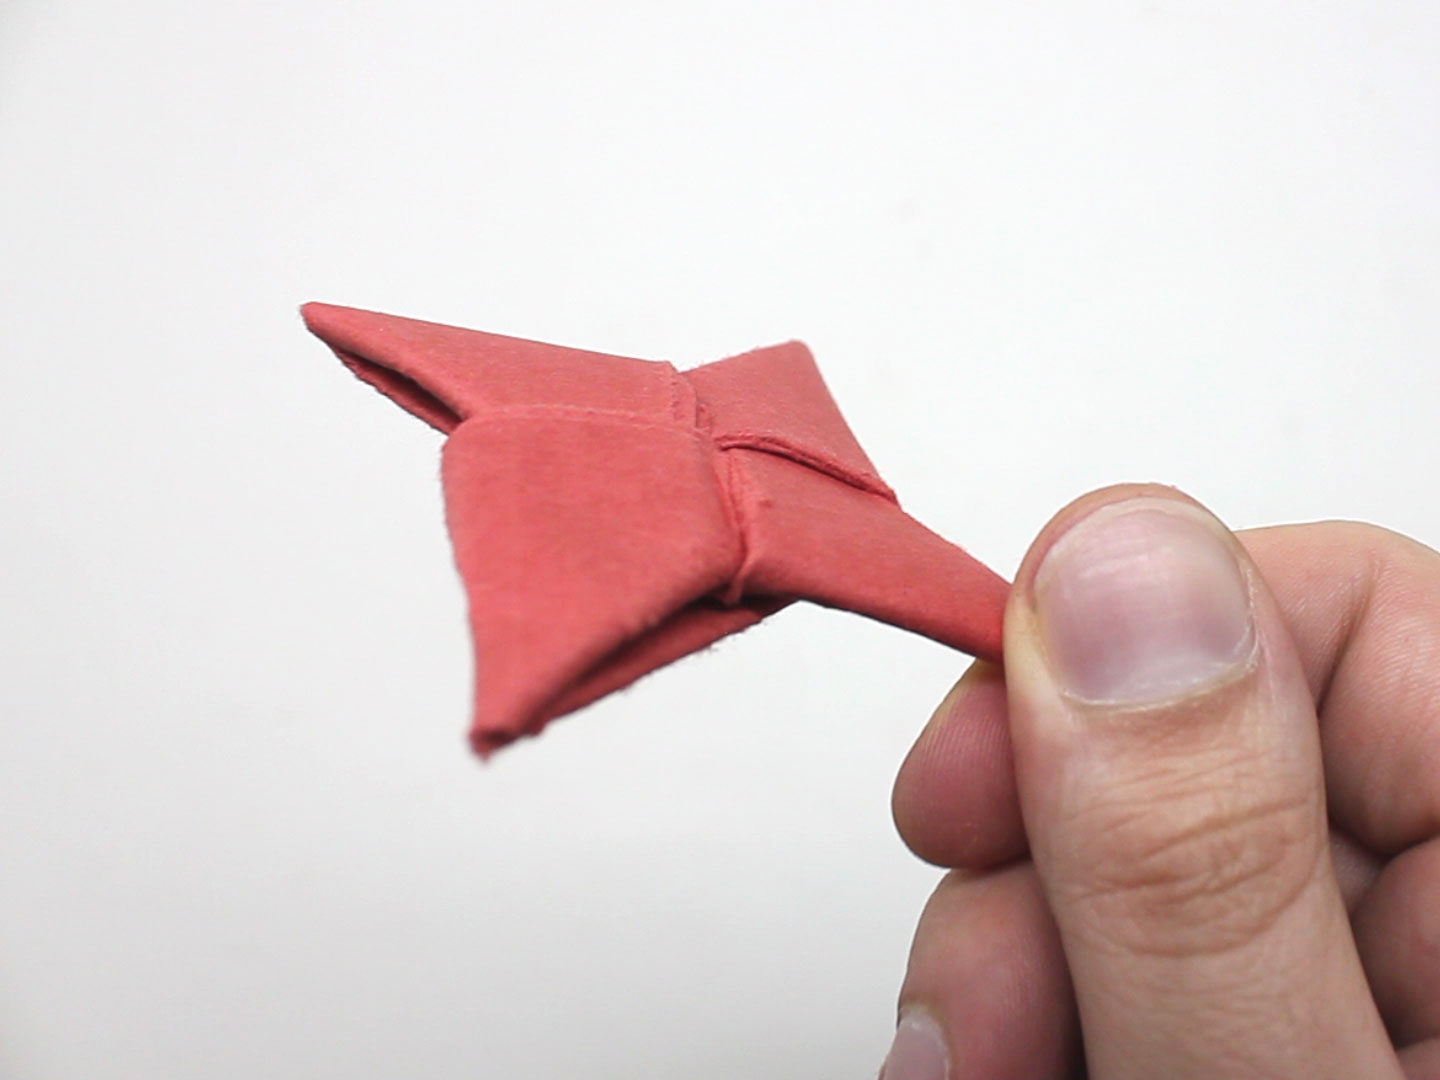
The classic design uses two folded units that lock together. Each unit forms two points, and when you tuck the flaps into the pockets, the model becomes a four-point star. The trick is symmetry. If the two pieces are folded as mirror images, the final ninja star will snap together neatly. If they are folded the same way, the result may look like a paper pretzel having an identity crisis.
Materials You Need
You only need a few simple supplies:
- One rectangular sheet of paper, such as 8.5 x 11-inch printer paper
- Scissors or careful tearing along a crease
- A flat surface for folding
- A ruler or bone folder, optional but helpful for sharp creases
- Colored markers, optional for decorating
For best results, use lightweight paper. Standard printer paper works well. Notebook paper is easy to fold, too, though it may be less crisp. Avoid heavy cardstock for your first attempt because thick paper makes the final tucks harder. Origami rewards patience, but cardstock sometimes rewards you with sore fingers.
Before You Start: Important Folding Tips
Use Two Equal Rectangles
The easiest way to make this model from rectangular paper is to fold one sheet in half lengthwise and divide it into two long, equal rectangles. Matching sizes matter because each half becomes one side of the ninja star.
Crease Firmly
Every clean fold makes the next step easier. Run your fingernail, the edge of a ruler, or a bone folder along each crease. A sharp crease is the origami version of good manners: it keeps everything in line.
Fold Slowly
Paper remembers. If you rush and crease the wrong angle, the paper may keep that mistake like a tiny grudge. Line up edges first, then press the fold only when you are sure.
How to Make a Ninja Star from Rectangular Paper: 13 Steps
Step 1: Place the Paper Horizontally
Start with your rectangular paper in landscape position, meaning the long edges run left to right. Smooth it flat on the table. If the paper has a colored side, place the colored side down so the color shows more on the finished star.
Step 2: Fold the Paper in Half Lengthwise
Bring the bottom long edge up to meet the top long edge. Align the corners carefully, then crease from the center outward. Unfold the paper. You should now have one long crease running across the middle.
Step 3: Cut or Tear Along the Center Crease
Use scissors to cut along the crease, creating two long rectangular strips. If you do not have scissors, fold the crease back and forth a few times, then tear slowly along the fold. The cleaner the edge, the cleaner the final ninja star.
Step 4: Fold Each Rectangle in Half Lengthwise
Take one rectangle and fold it in half lengthwise, bringing one long edge to the other. Crease firmly. Repeat with the second rectangle. You should now have two long, narrow folded strips.
Step 5: Create a Center Guide Crease on Each Strip
Fold each strip in half crosswise by bringing the short ends together. Crease lightly, then unfold. This creates a center guide line. Do this for both strips. That center crease will help you place the diagonal folds correctly.
Step 6: Fold the Ends of the First Strip in Opposite Directions
Place the first strip vertically in front of you. Fold the top end diagonally down toward the left so it forms a triangle-like flap. Then fold the bottom end diagonally up toward the right. The strip should now look like a stretched zigzag or lightning bolt.
Step 7: Fold the Ends of the Second Strip as a Mirror Image
Now take the second strip. Fold its top end diagonally down toward the right. Fold its bottom end diagonally up toward the left. This piece must mirror the first one. Think of the two strips as dance partners: if both go the same way, somebody steps on a paper toe.
Step 8: Fold the Outer Corners into Triangles
Look at the loose square-like ends of each folded strip. Fold each outer corner inward along the diagonal so the ends become neat triangular points. Repeat on both pieces. These triangles will become the four points of your paper shuriken.
Step 9: Sharpen All Creases
Before assembling, press every fold again. The model will soon become layered, and it is much easier to sharpen creases now than after the star is locked together. If the paper is bulging, flatten it gently with your palm.
Step 10: Place One Folded Unit Across the Other
Lay the first folded unit on the table. Place the second unit across it, forming a cross or plus sign. The pockets and flaps should face each other so the pieces can interlock. If the shape looks wildly uneven, rotate one unit or flip it over until the four points appear balanced.
Step 11: Tuck the First Two Flaps into the Pockets
Take one triangular flap from the bottom unit and tuck it into the nearest pocket of the top unit. Then tuck the opposite flap into the opposite pocket. Push gently, not aggressively. Paper is brave, but it is still paper.
Step 12: Flip the Model Over and Tuck the Remaining Flaps
Carefully turn the model over while holding the center so it does not unfold. Tuck the remaining two triangular flaps into the open pockets. This step may feel snug because several paper layers meet in the middle. Wiggle the flap slightly if needed, then press it flat.
Step 13: Flatten, Adjust, and Decorate Your Ninja Star
Press the finished ninja star under your palm to flatten it. Adjust the points so they are evenly spaced. Add stripes, symbols, initials, or comic-book-style motion lines with markers. Your rectangular paper has officially upgraded itself.
Troubleshooting: Why Your Ninja Star Looks Weird
The Star Will Not Lock Together
This usually means the two units were folded in the same direction instead of as mirror images. Compare them side by side. The diagonal folds should oppose each other. If they match exactly, refold one strip in the opposite direction.
The Center Is Too Thick
Thick paper can make the center bulky. Try thinner paper or make the starting rectangles slightly larger. You can also press the model under a heavy book for a few minutes to flatten it.
The Points Are Uneven
Uneven points happen when the starting rectangles are different sizes or when diagonal folds are not aligned. Trim the paper evenly at the beginning and line up every edge before creasing.
The Paper Rips During Tucking
You may be pushing too hard, or the paper may be too thin. Open the pocket slightly with your fingertip before sliding the flap inside. If the paper tears, do not panic. Every origami folder has made at least one tragic little paper pancake.
Safety Notes for a Paper Ninja Star
This project is designed as a craft. Even though it is made of paper, the points can still poke if folded sharply. Keep the star away from eyes and faces. Do not throw it at people or animals. If children are making this project, an adult should help with cutting and remind everyone that the star is for display, gentle play, or target practice against a soft, empty surface.
For a safer classroom or party version, use softer paper, round the points slightly, or make the ninja stars as decorations instead of flying toys. You can tape them to a bulletin board, hang them from string, or use them as themed gift toppers.
Creative Variations to Try
Two-Color Ninja Star
Use two different colored rectangles. The finished star will show both colors, making the interlocked design easier to see. Red and black looks dramatic. Blue and silver looks futuristic. Yellow and purple looks like your craft table joined a marching band, but somehow it works.
Mini Ninja Star
Use half-size paper strips to make a tiny star. Smaller models are cute but harder to tuck, so try this after you master the regular size.
Decorative Wall Stars
Make several paper ninja stars in matching colors and arrange them in a frame or on a poster board. Because the model lies fairly flat, it works well for bedroom decor, party backdrops, or craft displays.
Notebook Paper Practice Star
If you are learning, practice with notebook paper before using decorative paper. The lines can even help you align your folds. Finally, homework paper has a second career path.
Why This Origami Project Is Great for Beginners
The paper ninja star is popular because it teaches several useful folding skills in one project. You practice lengthwise folds, center creases, diagonal folds, mirror-image construction, and pocket tucking. These techniques appear in many other origami models, from boxes to animals to modular designs.
It also helps build spatial reasoning. You are not just folding randomly; you are learning how two flat pieces can become one locked shape. That is why paper folding is often used in educational settings to support geometry, sequencing, patience, and fine motor skills. In other words, you are making a cool star and secretly doing math. Do not worry. We will not tell the math.
Common Questions About Making a Ninja Star from Rectangular Paper
Can I Make a Ninja Star from One Sheet of Rectangular Paper?
Yes. One standard rectangular sheet can be divided into two equal rectangles. Those two strips become the two units needed for the star.
Do I Need Origami Paper?
No. Origami paper is nice, but printer paper, notebook paper, wrapping paper, magazine pages, or lightweight craft paper can work. The key is that both pieces must be the same size.
Can I Use Tape or Glue?
You should not need tape or glue if the folds are accurate. The flaps lock into pockets and hold the ninja star together. If you are making decorations and want extra durability, a tiny hidden piece of tape is acceptable, but the traditional folded version stays together on its own.
Why Is My Ninja Star Opening Up?
The flaps may not be tucked deeply enough. Push each triangular flap fully into its pocket and flatten the center. Stronger creases also help the model stay locked.
What Age Is This Craft Best For?
Older children, teens, and adults can usually make it independently. Younger children may need help with cutting, mirroring the folds, and tucking the final flaps.
Extra Experience: What Making Paper Ninja Stars Teaches You
The first time you make a ninja star from rectangular paper, it may feel like the paper is personally testing your patience. One flap refuses to tuck. One point looks shorter than the others. The center pops open at the exact moment you think you are finished. This is normal. Origami has a funny way of making a simple rectangle act like a tiny engineering exam.
After a few attempts, though, the process becomes surprisingly relaxing. You begin to notice the rhythm: fold, crease, flip, mirror, tuck, flatten. The project moves from confusing to almost automatic. That is one reason this craft is so enjoyable. It gives you quick feedback. If the folds are accurate, the pieces lock together. If something is off, the paper lets you know immediately, usually by refusing to cooperate like a cat near bathwater.
One helpful experience is to make your first star with two different colors. This makes it easier to see which unit is on top, which flap belongs where, and how the pockets work. Once you understand the structure, a single-color ninja star becomes much easier. You can also write small numbers on practice paper to track the flaps before trying a cleaner final version.
Another useful lesson is that paper choice matters more than beginners expect. Thin paper is easy to fold but may feel flimsy. Thick paper looks strong but can become bulky in the center. Standard printer paper is a nice middle ground. It folds cleanly, holds its shape, and is easy to replace when your first attempt becomes what scientists call “abstract modern paper sculpture.”
Making several ninja stars also teaches consistency. When you fold one star, you learn the steps. When you fold five, you learn precision. When you fold ten, you start correcting tiny mistakes before they become big ones. Your fingers remember where the diagonal should land. Your eyes notice whether the two units mirror each other. The whole process becomes faster and cleaner.
This project is also great for group crafting. At a table, one person may master the diagonal folds while another figures out the final tuck. Someone will inevitably become the unofficial “pocket-opening specialist.” The finished stars can be compared, decorated, traded, or arranged into patterns. It is low-cost, low-mess, and much quieter than glitter, which is basically craft confetti with a long-term lease.
For teachers and parents, the paper ninja star can become a simple lesson in geometry. The model uses rectangles, triangles, symmetry, angles, halves, and mirror images. Students may think they are just making something cool, but they are also practicing measurement, sequencing, and spatial thinking. That is the magic of paper crafts: learning sneaks in wearing a fun costume.
For adults, the same project can be a quick screen break. Folding paper forces you to slow down and use your hands. It is creative without needing expensive supplies. A single sheet from the recycling bin can become a finished object in minutes. There is something deeply satisfying about turning an ordinary rectangle into a crisp four-point star, especially when your inbox is full and your coffee has stopped being emotionally supportive.
The best advice is simple: make one messy ninja star first. Do not aim for perfection on the first try. Aim to understand the structure. Then make a second one. The second will almost always look better. By the third, you may find yourself looking at every scrap of paper and thinking, “You, my friend, have potential.” That is when you know the craft has worked.
Conclusion
Making a ninja star from rectangular paper is a fun, beginner-friendly origami project that turns an ordinary sheet into something clever, symmetrical, and surprisingly sturdy. The most important secrets are simple: use two equal rectangles, fold the units as mirror images, crease sharply, and tuck the flaps gently into the pockets. Once you learn the basic 13 steps, you can experiment with colors, sizes, decorations, and display ideas.
Whether you are crafting with kids, decorating a party, teaching geometry, or just rescuing a boring piece of printer paper from a dull office destiny, this paper ninja star is a satisfying project worth folding again and again.