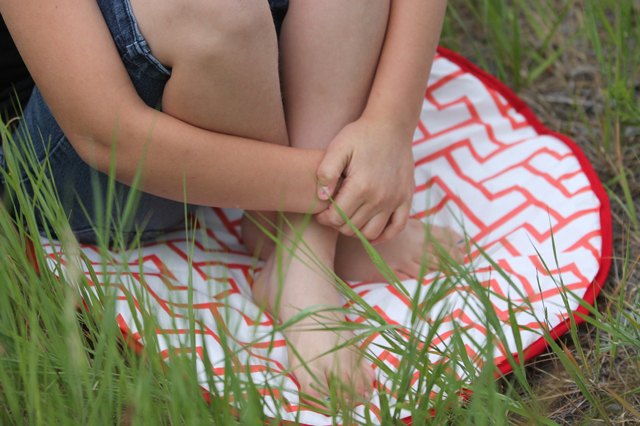
Children have an amazing ability to turn almost anything into a seat: a step, a tree stump, a patio brick, the dog’s favorite sunny spot, or that one wobbly plastic chair everyone pretends is still fine. A custom outdoor seat cushion for kids solves several problems at once. It makes hard seating more comfortable, adds color to a backyard or play area, and gives children a cozy little landing pad for reading, snacking, drawing, or dramatically announcing that they are “too tired to walk” after running in circles for 40 minutes.
The good news is that learning how to make an outdoor seat cushion for kids is not as intimidating as it sounds. You do not need to be a professional upholsterer, own a studio full of sewing machines, or speak fluent zipper. With the right outdoor fabric, kid-friendly foam, sturdy seams, and a practical design, you can create a cushion that handles sunshine, crumbs, sidewalk chalk dust, juice-box accidents, and the mysterious sticky fingerprints that appear even when nobody admits touching anything.
This guide walks you through the entire project: choosing materials, measuring the seat, cutting foam, sewing a removable cover, adding safe closures, cleaning the cushion, and customizing it for real family use. The result is a durable DIY outdoor cushion that looks cute, feels comfortable, and does not panic the moment a cloud appears.
Why Make a Kids’ Outdoor Seat Cushion Instead of Buying One?
Store-bought patio cushions are convenient, but kids’ seating often needs something more specific. Children’s chairs, benches, picnic tables, playhouses, porch steps, and reading corners are rarely the exact size of standard outdoor cushions. A DIY kids’ seat cushion lets you choose the dimensions, thickness, fabric pattern, firmness, and washability.
Making your own cushion also gives you control over the details that matter for children. You can avoid long dangling ties, choose smooth edges, use a removable cover, pick quick-drying materials, and create a cushion light enough for a child to carry without turning it into a backyard wrestling event. You can also match the cushion to a theme: dinosaurs, flowers, stripes, ocean colors, woodland animals, rainbows, or the ever-popular “whatever fabric was on sale but somehow looks adorable.”
Best Materials for a Kids’ Outdoor Seat Cushion
The best outdoor seat cushion for kids balances comfort, durability, weather resistance, and easy cleaning. Children are enthusiastic product testers. They sit, bounce, spill, drag, flip, stack, and occasionally wear cushions as hats. Choose materials that can survive the audition.
Outdoor Fabric
Look for outdoor upholstery fabric designed for patio cushions, porch furniture, or marine-style use. Good options include solution-dyed acrylic, olefin, and durable outdoor polyester. These fabrics are typically made to resist fading, moisture, mildew, and everyday abrasion better than regular cotton fabric. A cheerful print is great, but performance matters more than cuteness. If the fabric feels extremely thin, flimsy, or more like a craft cotton than upholstery fabric, save it for bunting or doll blankets, not a cushion that will live outside.
For kids, medium-weight outdoor fabric is often easier to sew than very stiff heavy-duty material. It still gives structure, but it will not fight your sewing machine like a tiny patio-themed dragon. If you are using a printed fabric, consider patterns that hide small stains: stripes, florals, dots, geometric prints, and darker backgrounds are very forgiving.
Foam or Cushion Insert
For outdoor cushions, quick-drying foam is ideal because it allows water to drain more easily. If the cushion will be used on a covered porch and stored indoors after playtime, high-density upholstery foam can also work. For a child’s seat cushion, a thickness of 1.5 to 3 inches is usually comfortable without making the seat too tall. For benches or reading nooks, 3 inches feels plush. For small chairs or stools, 1.5 to 2 inches may be safer and more stable.
Avoid overly soft foam that collapses flat after a few sits. Kids may be small, but they are not gentle clouds. A medium-firm foam gives better support and helps the cushion keep its shape. You can also wrap the foam in polyester batting to soften the edges and make the finished cushion look smoother.
Thread, Needle, and Closure
Use outdoor polyester thread or heavy-duty polyester thread. Cotton thread can weaken faster outside. A size 90/14 or 100/16 sewing machine needle usually works well for outdoor fabrics, though you should test on scraps first.
For closures, a zipper makes the cover easy to remove and clean, but hook-and-loop tape is simpler for beginners. For children’s cushions, avoid long decorative cords or dangling ties. If you need to secure the cushion to a chair, use short fabric tabs with hook-and-loop fasteners or wide elastic bands sewn securely to the back. Keep attachments short, flat, and simple.
Tools and Supplies
- Outdoor upholstery fabric
- Outdoor foam or high-density upholstery foam
- Polyester batting, optional
- Outdoor polyester thread
- Sewing machine
- Heavy-duty sewing needle
- Fabric scissors or rotary cutter
- Measuring tape
- Fabric marker or chalk
- Straight pins or sewing clips
- Ruler or straight edge
- Zipper or hook-and-loop tape
- Electric carving knife or serrated knife for cutting foam
- Spray adhesive, optional, for attaching batting
Step 1: Measure the Seat
Start by measuring the seat where the cushion will go. Measure the width from left to right and the depth from front to back. If the seat has rounded corners, trace the seat shape onto kraft paper, newspaper, or wrapping paper turned blank-side up. This paper pattern will help you cut both the foam and fabric accurately.
For a basic rectangular kids’ outdoor cushion, write down three measurements: width, depth, and foam thickness. For example, a small outdoor chair might need a cushion that is 14 inches wide, 13 inches deep, and 2 inches thick. A child-sized bench might need one that is 32 inches wide, 12 inches deep, and 3 inches thick.
Do not make the cushion hang far over the seat edge. Overhanging cushions can slide around and feel unstable. A cushion that fits neatly on the seat is safer, tidier, and less likely to become a flying saucer during playtime.
Step 2: Cut the Foam
Mark your measurements directly on the foam with a marker. Use a straight edge to keep lines clean. For a simple rectangle, cut slowly with an electric carving knife, serrated bread knife, or sharp utility knife. An electric carving knife often gives the smoothest result, and yes, it may feel odd using a kitchen-style tool on foam. Welcome to DIY, where household objects discover second careers.
If you are cutting rounded corners, place your paper pattern on top of the foam and trace the shape. Cut slightly outside the line, then trim carefully. Foam is forgiving, but jagged chunks can show through thinner fabric, so take your time.
For a softer, more professional finish, wrap the foam in polyester batting. Cut the batting large enough to cover the top, front, and sides, then use a light layer of spray adhesive to hold it in place. Do this outdoors or in a well-ventilated area and follow the product instructions. Let the adhesive dry before inserting the foam into the cover.
Step 3: Calculate and Cut the Fabric
A box-style cushion cover has a top panel, bottom panel, and side strip called boxing. The boxing gives the cushion height and structure. Here is a simple formula for a rectangular cushion:
- Top panel: cushion width plus 1 inch by cushion depth plus 1 inch
- Bottom panel: same as top panel
- Boxing strip length: cushion perimeter plus 2 inches
- Boxing strip height: foam thickness plus 1 inch
The extra inch allows for a 1/2-inch seam allowance on each side. For example, if your foam is 14 inches wide, 13 inches deep, and 2 inches thick, cut the top and bottom panels at 15 by 14 inches. The boxing strip should be about 56 inches long because the cushion perimeter is 54 inches, plus 2 inches for joining. The strip height should be 3 inches.
If your fabric has a directional pattern, such as animals standing upright or stripes running one way, double-check the direction before cutting. Nothing ruins a cute cushion faster than upside-down foxes looking like they have given up on gravity.
Step 4: Sew the Boxing Strip
If your boxing strip is longer than your fabric width, sew two strips together to create the full length. Place the short ends right sides together and sew with a 1/2-inch seam allowance. Press the seam open with a warm iron if the fabric allows it. Always check the fabric care instructions before ironing outdoor material, because some coatings do not appreciate surprise heat.
Mark the center front, center back, and side points on the top cushion panel with clips or small chalk marks. Do the same on the boxing strip. These marks help you match everything evenly and prevent the classic beginner problem: the side strip fits beautifully until the last corner, where it suddenly develops a personality.
Step 5: Attach the Top Panel
Place the top panel right side up. Pin or clip the boxing strip around the edge with right sides together. Start at the center back so the seam or closure area is less visible. Sew around the panel with a 1/2-inch seam allowance, pivoting carefully at the corners.
For square corners, stop sewing 1/2 inch before the edge, leave the needle down, lift the presser foot, turn the fabric, lower the foot, and continue. This creates a cleaner corner. For rounded corners, sew slowly and guide the fabric gently without pulling.
After sewing, clip the corner seam allowances slightly, being careful not to cut through the stitching. This reduces bulk and helps the cushion cover turn smoothly.
Step 6: Add the Bottom Panel and Closure
The easiest beginner-friendly method is to leave an opening along the back edge of the bottom panel. This opening lets you insert the foam. You can finish it with hook-and-loop tape or install a zipper for a cleaner removable cover.
To use hook-and-loop tape, hem the two back opening edges first. Then sew one side of the tape to the inside of one edge and the matching side to the outside of the other edge so they overlap neatly. This creates an envelope-style closure that is simple to open for washing.
To use a zipper, sew it into the back boxing strip before attaching the bottom panel, or place it along the back seam between the boxing and bottom panel. A zipper is excellent for frequent cleaning, but make sure the pull tab is small and not tempting for little hands to tug all afternoon.
Once your closure is ready, pin or clip the bottom panel to the remaining edge of the boxing strip, right sides together. Sew around the cushion, leaving the closure open. Turn the cover right side out and gently push out the corners.
Step 7: Insert the Foam
Fold the foam slightly and guide it into the cover through the opening. Work slowly so you do not strain the seams. Once the foam is inside, smooth the corners with your hands. If you wrapped the foam in batting, it may take a little extra patience, but the fuller look is worth it.
Close the zipper or hook-and-loop tape and place the cushion on the seat. Check that it sits flat, does not slide excessively, and does not make the chair too tall for the child. A cushion should improve comfort, not turn a tiny chair into a booster throne of questionable stability.
Kid-Friendly Safety Tips
Because this cushion is for children, safety matters as much as style. Keep the cushion appropriately sized for the seat. Avoid slippery fabrics on smooth plastic or metal chairs unless you add a secure, short attachment method. Skip long ties, cords, tassels, and loose decorative loops. Choose closures that stay flat and secure. Inspect the cushion regularly for loose seams, exposed foam, broken zipper pulls, or worn hook-and-loop tape.
If the cushion is used on a bench, playhouse platform, or raised seat, make sure the furniture itself is sturdy. Children climb, lean, twist, and test gravity with great scientific curiosity. A cushion should never be used to make unsafe furniture seem usable. If a chair wobbles without the cushion, it will still wobble with the cushion, only now it will look more cheerful while doing it.
No-Sew Option for Beginners
If sewing is not your favorite hobby, you can still make a simple outdoor seat cushion for kids. Use outdoor fabric, foam, and heavy-duty outdoor fabric adhesive or iron-on bonding tape if the fabric allows heat. Wrap the foam like a present, folding the corners neatly underneath. Bond the seams on the underside, then add a removable outdoor cushion cover later when you feel ready to sew.
This method works best for cushions used in covered areas and stored indoors when not in use. It is less durable than a sewn cover, especially with active kids, but it can be a quick solution for a reading nook, picnic bench, or playhouse seat.
How to Clean and Maintain the Cushion
A removable cover is the easiest to maintain. Shake off dirt, brush away crumbs, and spot-clean stains as soon as possible. For routine cleaning, use mild soap and water with a soft brush or sponge. Rinse thoroughly and let the cover air dry completely before putting it back on the foam.
For mildew-prone areas, keep cushions dry and store them in a deck box, closet, mudroom, or covered bin when not in use. Even outdoor fabric lasts longer when it is not left in constant rain. If the cushion gets soaked, stand it on its edge so water can drain and air can circulate. Do not store damp cushions in a sealed container unless your goal is to start a mildew farm, which is not the kind of gardening anyone asked for.
Design Ideas Kids Will Actually Like
Children love ownership. A cushion feels more special when it looks like it belongs to them. Try adding a fabric name label, choosing their favorite color, or making each child a different pattern. For a backyard reading corner, use calming colors and add a matching pillow. For a picnic table, use wipeable outdoor fabric in a pattern that hides snack evidence. For a playhouse, create a set of small square floor cushions that can be stacked when not in use.
You can also make seasonal covers. A summer cover might have bright stripes or tropical leaves, while a fall cover could use warm plaids or woodland prints. Since the foam insert can stay the same, changing the cover is an affordable way to refresh the space.
Common Mistakes to Avoid
Using Indoor Fabric
Indoor cotton may look adorable at the store, but outdoor use can fade it quickly and make cleaning harder. Choose fabric labeled for outdoor or indoor-outdoor use.
Making the Cushion Too Thick
Extra-thick cushions feel luxurious for adults, but they can make small chairs unstable for kids. Match the cushion thickness to the furniture height.
Skipping the Removable Cover
Children and washable covers belong together. A removable cover saves time, stress, and possibly your opinion of grape juice.
Forgetting Seam Allowance
Measure carefully and add seam allowance before cutting. Cutting fabric the same size as the foam usually creates a cover that is too tight.
Ignoring Storage
Outdoor does not mean indestructible. Store cushions during heavy rain, storms, and long periods of nonuse.
Cost Estimate
The cost of a DIY kids’ outdoor cushion depends on fabric quality, foam type, and size. A small chair cushion may cost around $15 to $35 if you buy fabric on sale and use a modest foam insert. A larger bench cushion may cost $40 to $90 or more, especially if you choose premium outdoor fabric and quick-dry foam. The advantage is customization: you get the exact size and style you want, instead of paying for a cushion that almost fits and then pretending “almost” is a design choice.
Hands-On Experience: What I Learned Making Outdoor Seat Cushions for Kids
The first thing you learn when making an outdoor seat cushion for kids is that children will use it in ways you did not list in the project plan. You may imagine a sweet little cushion sitting neatly on a bench while a child reads a picture book. In real life, that cushion may become a boat, a turtle shell, a picnic plate, a superhero landing mat, or the official seat of a backyard mayor who governs from the sandbox. This is why durability is not optional. It is the whole point.
One practical lesson is to make the cushion slightly structured but not overly precious. A cushion with crisp seams and a removable cover looks polished, but it should still feel casual enough that you do not gasp every time a child approaches it with a popsicle. Outdoor fabric with a busy pattern is a lifesaver. Tiny dots, stripes, leaves, or abstract shapes hide small stains much better than solid pale colors. White cushions are beautiful in magazines, but magazines do not usually feature a child eating watermelon with both hands.
Another lesson is that foam thickness matters more than expected. A thick cushion looks cozy, but on a small chair it can raise the child too high and make the seat feel awkward. For little chairs, thinner foam often works better. For benches, reading corners, or floor seating, thicker foam is wonderful because kids can lounge, kneel, wiggle, and flop comfortably. Before sewing the cover, place the cut foam on the seat and let the child test it. If they slide off, perch strangely, or immediately use it as a snowboard, adjust the size or thickness before you sew.
Closures are another area where simple wins. Zippers look neat, but hook-and-loop tape is easier for quick cleaning and easier to replace later. However, it must be sewn securely. A few weak stitches will not survive repeated opening, especially if a child discovers the delightful ripping sound and decides it is a musical instrument. Use reinforced stitching at the ends, and keep the closure on the back or underside where it is less tempting.
I also learned that storage determines how long the cushion stays nice. Even weather-resistant cushions benefit from being brought inside or placed in a deck box during storms. A cushion left outside through rain, pollen, sprinklers, and falling leaves will age faster. The best routine is simple: shake it off after use, let it dry before storing, and wash the cover when it starts looking tired. This takes only a few minutes, and it keeps the cushion from turning into the sad, flat patio pancake everyone ignores by August.
Finally, involve kids in the fun parts but not the risky parts. Let them choose between two or three fabrics, pick a label color, or decide where the cushion will live. Do the cutting, sewing, and adhesive work yourself or with age-appropriate supervision. When children help choose the design, they are more likely to use the cushion and take care of it. They may even proudly announce, “I made this,” which is only partly true, but honestly, let them have the glory. You handled the seam allowance. You know what you did.
Conclusion
Making an outdoor seat cushion for kids is a practical DIY project that combines comfort, creativity, and common sense. With outdoor fabric, supportive foam, sturdy thread, and a removable cover, you can create a cushion that fits your child’s chair, bench, playhouse, or backyard reading nook perfectly. The key is to design for real life: spills, sunshine, dirt, wiggling, and the occasional cushion-as-rocket-ship situation.
Keep the cushion safe, washable, and appropriately sized. Choose durable materials, avoid long cords or loose decorations, and store the cushion when the weather turns rough. Once you make one, you may find yourself making a whole set because kids love anything that feels made just for them. And because, let’s be honest, tiny patio cushions are ridiculously cute.