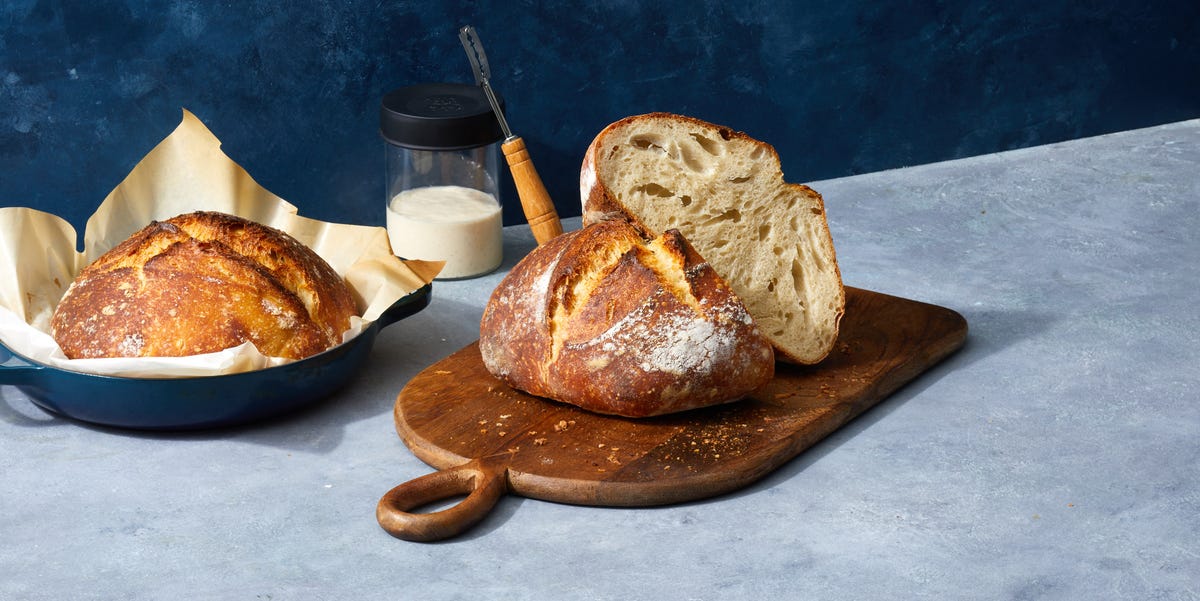
Fresh bread starts with a jar of flour, water, patience, and the tiny confidence boost of watching bubbles appear like edible fireworks. If you have ever looked at a crusty sourdough loaf and thought, “That looks delicious, but also slightly like a science project,” you are not wrong. A sourdough starter is part recipe, part routine, and part friendly kitchen pet that eats flour instead of slippers.
This beginner-friendly sourdough starter recipe shows you exactly how to create a bubbly, active starter from scratch using only flour and water. No commercial yeast, no secret bakery handshake, and no need to name it unless you want to. Though, for the record, “Bread Pitt” remains a strong choice.
What Is a Sourdough Starter?
A sourdough starter is a living mixture of flour and water that captures wild yeast and beneficial bacteria naturally present in flour and the surrounding environment. Over time, these microorganisms ferment the mixture, creating bubbles, tangy flavor, and the rising power needed to bake sourdough bread.
Unlike commercial yeast, which works fast and predictably, sourdough starter develops slowly. That slow fermentation gives sourdough bread its signature chewy texture, complex flavor, crisp crust, and gentle tang. The starter is the engine of the loaf. Treat it well, and it will reward you with bread that makes your kitchen smell like a tiny artisan bakery with better rent.
Why This Is the Best Sourdough Starter Recipe for Beginners
The best sourdough starter recipe for beginners is not the fanciest one. It is the one you can actually follow without needing a spreadsheet, a humidity-controlled bread cave, or a degree in fermentation drama. This guide uses simple measurements, a realistic feeding schedule, and clear signs so you know what is normal and what is not.
The method below creates a 100% hydration sourdough starter, which means it uses equal parts flour and water by weight. This is the most common starter style for home bakers because it is easy to feed, easy to measure, and works beautifully in most sourdough bread recipes.
What Makes This Method Beginner-Friendly?
- It uses only two ingredients: flour and water.
- It starts small to reduce waste.
- It explains what to look for each day.
- It includes troubleshooting for common starter problems.
- It gives you clear signs for when your starter is ready to bake.
Ingredients and Tools You Need
Ingredients
- Whole wheat flour or rye flour: Great for starting because whole grain flour contains more natural microorganisms and nutrients.
- Unbleached all-purpose flour or bread flour: Ideal for regular feedings once the starter is active.
- Filtered or non-chlorinated water: Chlorine can slow fermentation, so filtered water is a safer choice for beginners.
Tools
- A clean glass jar, at least 16 ounces
- A digital kitchen scale
- A spoon or small spatula
- A loose lid, cloth cover, or plastic wrap
- A rubber band or marker to track rise
A digital scale is strongly recommended. Cups can work in a pinch, but flour measurements by volume are famously moody. One person’s “cup of flour” can be another person’s “tiny flour mountain.” Weight keeps your starter consistent.
Beginner Sourdough Starter Recipe: 7-Day Schedule
This recipe uses a small starter build, which keeps flour waste low while still giving the starter enough food to grow strong. Keep the jar in a warm spot, ideally around 70°F to 78°F. If your kitchen is cool, fermentation may take longer. That is normal. Sourdough owns a clock, but it refuses to look at it.
Day 1: Mix Flour and Water
In a clean jar, mix:
- 50 grams whole wheat flour or rye flour
- 50 grams filtered water
Stir until no dry flour remains. The texture should look like thick pancake batter. Scrape down the sides of the jar, cover loosely, and leave it at room temperature for 24 hours. Place a rubber band around the jar at the starter’s level so you can track any rise.
Day 2: Look, Smell, and Feed
You may see bubbles, or you may see absolutely nothing. Both are normal. A quiet starter on Day 2 is not lazy; it is simply getting its microbial guest list organized.
Discard all but 50 grams of starter. Then feed with:
- 50 grams flour
- 50 grams filtered water
Mix well, cover loosely, and let it rest for another 24 hours.
Day 3: Expect Weird Smells
Day 3 can be dramatic. Your starter may smell fruity, cheesy, tangy, or slightly funky. It may rise quickly and then collapse. This early burst of activity does not always mean the starter is ready. It is often a temporary microbial party before the stable yeast and lactic acid bacteria take over.
Discard all but 50 grams of starter. Feed with 50 grams flour and 50 grams water. Stir, cover, and rest for 24 hours.
Day 4: Feed Twice if Activity Increases
By Day 4, you may notice more bubbles and a more pleasant sour aroma. If your starter rises and falls within 12 hours, begin feeding every 12 hours. If it is still slow, continue once-a-day feeding.
For each feeding:
- Keep 50 grams starter
- Add 50 grams flour
- Add 50 grams water
Days 5 and 6: Build Strength
Your starter should become more predictable. It may double in size, show bubbles throughout the mixture, and smell pleasantly tangy, mildly fruity, or yeasty. If it smells sharp like nail polish remover, it is hungry. Feed it and keep going.
Continue feeding once or twice daily depending on how fast it rises and falls. A warm kitchen speeds things up; a cool kitchen slows things down. Your starter is not failing just because it did not read the same blog post you did.
Day 7: Check If It Is Ready to Bake
Your sourdough starter is ready when it reliably doubles in size within 4 to 8 hours after feeding, has plenty of bubbles, and smells fresh, tangy, and slightly sweet. It should look lively, not flat and sleepy.
Some bakers use the float test: dropping a small spoonful of starter into water to see if it floats. A floating starter often means it has trapped enough gas to bake with, but the test is not perfect. The best readiness sign is consistent rising and falling after feedings.
How to Feed a Sourdough Starter
Feeding a starter means keeping a small amount of the fermented mixture and refreshing it with new flour and water. For beginners, a 1:1:1 ratio is easy and reliable. That means equal parts starter, flour, and water by weight.
Basic Feeding Formula
- 50 grams sourdough starter
- 50 grams flour
- 50 grams water
Mix until smooth, cover loosely, and let the starter ferment at room temperature. When it reaches its peak, it will look domed or bubbly on top. After peak, it begins to fall, which means it has eaten much of its food and is getting hungry again.
What Is Sourdough Discard?
Sourdough discard is the portion of starter you remove before feeding. Discarding keeps the starter at a manageable size and balances acidity. Without discarding, you would eventually own a bathtub of starter, and while that sounds like a bold lifestyle choice, it is not practical.
Once your starter is healthy and established, you can save discard in the refrigerator and use it in pancakes, waffles, crackers, muffins, banana bread, pizza dough, and quick breads. During the first few days, however, it is best to throw the discard away because the microbial balance is still developing.
Best Flour for Sourdough Starter
Whole wheat flour and rye flour are excellent choices for beginning a starter because they contain more bran, minerals, and wild microorganisms than refined flour. Rye flour is especially popular because it ferments quickly and often gives beginners visible results sooner.
Once your starter is active, you can feed it with unbleached all-purpose flour or bread flour. Many home bakers use a blend, such as half whole wheat and half all-purpose flour, to balance strength, flavor, and affordability.
Can You Use Bleached Flour?
Bleached flour may work, but it is not the best choice. Unbleached flour is more reliable for sourdough starter because it has not gone through the same bleaching treatment and tends to support fermentation better. For the easiest beginner experience, choose unbleached flour.
Best Water for Sourdough Starter
Use filtered, bottled, spring, or dechlorinated tap water. If your tap water smells strongly of chlorine, let it sit uncovered for several hours or use filtered water instead. Water temperature matters too. Lukewarm water can help fermentation in a cool kitchen, while cooler water can slow things down in a hot kitchen.
Avoid very hot water because it can damage the yeast and bacteria you are trying to cultivate. Think cozy bath, not dragon breath.
Where to Store Your Starter While It Grows
A sourdough starter likes warmth, but not heat. Keep it away from direct sunlight, cold drafts, and hot appliances. A cabinet, pantry shelf, or countertop corner usually works well. In cooler months, some bakers place the jar near a warm appliance or inside an oven with the light on. If you do this, leave a big reminder note so nobody preheats the oven and accidentally bakes your starter into the saddest biscuit in history.
Room Temperature vs. Refrigerator
While you are building a new starter, keep it at room temperature and feed it regularly. Once it is strong and established, you can store it in the refrigerator if you do not bake every day. A refrigerated starter usually needs feeding about once a week. Before baking, take it out, feed it, and let it become bubbly and active again.
How to Know Your Sourdough Starter Is Healthy
A healthy sourdough starter should show several clear signs. It should rise after feeding, develop bubbles throughout, and smell pleasantly sour, yeasty, fruity, or lightly tangy. The texture should be thick but stirrable, like a loose batter.
Good Signs
- It doubles in size after feeding.
- It has bubbles on the sides and surface.
- It smells tangy, fruity, or bread-like.
- It rises and falls on a predictable schedule.
Warning Signs
- Mold: Throw it away and start over.
- Pink or orange streaks: Discard the starter and begin again.
- Rotten smell: Start over for safety.
- No activity after many days: Try warmer storage, whole grain flour, or more consistent feeding.
Common Sourdough Starter Problems and Easy Fixes
My Starter Is Not Bubbling
Give it more time. New starters often move slowly, especially in cool kitchens. Try using whole wheat or rye flour for a few feedings and place the jar somewhere warmer. Consistency is more important than panic-feeding it every time you feel suspicious.
My Starter Smells Like Alcohol or Nail Polish
This usually means the starter is hungry or has fermented too long between feedings. Discard and feed it with fresh flour and water. If the smell improves after one or two feedings, you are back on track.
There Is Liquid on Top
A grayish liquid called hooch can form when starter is hungry. Pour it off or stir it in, then feed the starter. If hooch appears often, feed more frequently or use a higher feeding ratio, such as 1 part starter to 2 parts flour and 2 parts water.
My Starter Rose Once, Then Stopped
This is common in the first few days. Early activity can be misleading. Keep feeding on schedule. A stable starter usually takes about 7 to 10 days, and sometimes longer depending on flour, water, and room temperature.
My Starter Is Too Runny
Use slightly less water at the next feeding or switch to a stronger flour such as bread flour or whole wheat flour. The starter should be thick enough to hold bubbles but loose enough to stir.
How to Use Your Starter in Bread
Use your starter when it is at or near peak activity. That means it has risen, looks bubbly, and has not yet collapsed completely. Most sourdough bread recipes call for active starter, flour, water, and salt. A basic beginner loaf often uses 100 to 150 grams of active starter for one loaf, though exact amounts vary by recipe.
If your bread turns out dense, the starter may not have been strong enough yet, or the dough may not have fermented long enough. Sourdough baking is less like flipping a light switch and more like learning a musical instrument. The first loaf may be humble. The second loaf may be better. By the fifth loaf, you may start casually saying things like “crumb structure” in public.
Beginner Tips for Better Results
- Use a scale: It makes feeding easier and more accurate.
- Mark the jar: A rubber band helps you see how much the starter rises.
- Keep it warm: Fermentation works best in a cozy environment.
- Do not seal the jar tightly: Gas needs room to escape.
- Be patient: Some starters need more than 7 days to become strong.
- Smell it daily: Aroma is one of the best clues to starter health.
- Feed consistently: A predictable schedule builds a stronger starter.
Beginner Experience Notes: What Making a Starter Really Feels Like
Making a sourdough starter for the first time is exciting, confusing, and occasionally suspicious. On Day 1, it looks like wet flour. On Day 2, it may still look like wet flour, but now you are emotionally invested. By Day 3, it may bubble wildly and smell like apples, yogurt, or a mysterious sock. This is where many beginners either celebrate too early or panic too soon.
The biggest lesson is that sourdough starter does not develop in a straight line. It may rise one day and seem sleepy the next. It may smell sweet in the morning and sharply sour by night. It may double while you are not looking, because apparently starters enjoy secrecy. None of this means you are failing. It means fermentation is alive, variable, and influenced by temperature, flour type, water quality, feeding ratio, and time.
One helpful beginner habit is to keep notes. You do not need a fancy bread journal with watercolor wheat illustrations, although nobody is stopping you. Just write down the day, feeding time, flour used, room temperature, smell, and rise. After a few days, patterns appear. Maybe your starter rises faster after a rye feeding. Maybe it slows down when the kitchen is cold. Maybe it peaks overnight, leaving only streaks on the jar as evidence, like a tiny flour-based raccoon passed through.
Another real-world tip: do not make the starter too large. Many beginners follow recipes that create a lot of discard, then feel guilty throwing it away. A small starter is easier, cheaper, and less intimidating. Once it is mature, you can always build more starter for a recipe. Until then, small feedings keep the process manageable.
Also, resist the urge to change everything at once. If your starter is slow, do not switch flour, water, jar, feeding ratio, location, and life philosophy all on the same day. Change one thing at a time. Move it somewhere warmer. Try whole grain flour. Feed consistently. Give the starter a chance to respond before declaring it a lost cause.
Finally, remember that your first starter teaches you how fermentation behaves in your kitchen. That knowledge is more valuable than perfection. Once your starter becomes predictable, you will understand when it is hungry, when it is peaking, and when it is ready to lift a loaf of bread. The process may feel strange at first, but soon the jar on your counter becomes familiar. You feed it, it bubbles, and eventually it helps you bake bread that tastes like effort, patience, and just enough kitchen magic.
Conclusion
The best sourdough starter recipe for beginners is simple: mix flour and water, feed consistently, keep it warm, and learn the signs of healthy fermentation. A strong starter does not happen instantly, but it also does not require professional equipment or bakery-level expertise. With a clean jar, a digital scale, unbleached flour, filtered water, and a little patience, you can build a reliable starter that becomes the foundation for crusty sourdough bread, pancakes, crackers, waffles, pizza dough, and more.
If your starter bubbles, rises, smells pleasantly tangy, and doubles after feeding, you are ready to bake. If it takes longer than seven days, keep going. Sourdough is wonderfully old-fashioned that way: it rewards attention, not rushing. Feed the starter, trust the process, and prepare for the dangerous possibility that you will become the person who brings homemade bread to gatherings “just because.” Honestly, there are worse reputations.
Note: This article is original, publish-ready HTML body content synthesized from established sourdough baking practices and beginner-friendly fermentation guidance; source links are intentionally omitted per request.