Some home projects politely ask for your weekend. Others barge in, steal your Saturday, and somehow leave glitter in the dog’s water bowl. Thankfully, DIY no sew blue sky curtains belong to the first category: cheerful, budget-friendly, beginner-approved, and surprisingly polished when you do them right. You do not need a sewing machine, a design degree, or a grandmother who can hem pants in 11 seconds flat. You need fabric, a little patience, and the courage to say, “Yes, my window deserves to look like a soft summer morning.”
Blue sky curtains are exactly what they sound like: light, airy curtain panels inspired by soft clouds, pale blue gradients, breezy fabric, and sunny-day calm. They work beautifully in craft rooms, nurseries, kids’ rooms, breakfast nooks, sunrooms, dorm spaces, creative studios, and anywhere that could use a little more “open the windows and pretend the laundry folded itself” energy.
This guide walks you through how to make no sew blue sky curtains from scratch, how to choose the right fabric, how to measure properly, how to create the sky effect, how to hang the panels, and how to avoid the classic DIY mistakes that make curtains look like two napkins having a crisis. At the end, you will also find a practical experience section with real-world lessons, styling ideas, and troubleshooting tips.
Why Make DIY No Sew Blue Sky Curtains?
Store-bought curtains are convenient, but custom-looking curtains often come with a price tag that makes your wallet whisper, “Please don’t.” A no sew curtain project gives you control over the color, length, fullness, texture, and overall mood of the room. Instead of settling for generic panels, you can create something that feels playful, personal, and completely tailored to your space.
The “blue sky” style is especially charming because it brings visual lightness into a room. Soft blue fabric can make a window feel bigger, while cloud-like white areas add movement without making the curtains too busy. If you use sheer or semi-sheer fabric, sunlight filters through the panels and turns the design into a glowing backdrop. In other words, your window becomes a gentle mood board for optimism.
Best Rooms for Blue Sky Curtains
These curtains are ideal for spaces where you want brightness rather than heavy drama. They are perfect for a child’s room with an aviation, rainbow, nature, or cloud theme. They also look lovely in a craft room because the design encourages imagination without visually crowding the space. In a small apartment, a soft blue panel can make a room feel more open. In a reading corner, the curtains create a calm background that says, “Yes, you may absolutely ignore your inbox for one chapter.”
Project Overview
This project uses a no sew method, meaning the seams and hems are made with iron-on hem tape, washable fabric glue, or fabric fusion tape instead of stitching. The sky effect can be created in several ways: by using pale blue fabric, applying diluted fabric paint, dip-dyeing the lower or upper section, or gently blending blue and white tones for a cloud-inspired look.
For the easiest version, start with lightweight white or off-white cotton gauze, voile, muslin, linen-look fabric, or inexpensive curtain panels. Then add a blue ombré effect using fabric paint or dye. Finish the sides and bottom with hem tape or fabric glue, clip the top with curtain rings, and hang. The result looks custom, but the process is friendly enough for beginners.
Materials You Will Need
- Lightweight white or natural fabric, such as cotton gauze, voile, muslin, linen-blend, or sheer curtain panels
- Blue fabric dye, fabric paint, or acrylic paint mixed with textile medium
- White fabric paint for soft cloud effects, if desired
- Iron-on hem tape, fabric fusion tape, or washable fabric glue
- Sharp fabric scissors
- Measuring tape
- Iron and ironing board
- Parchment paper or pressing cloth
- Curtain rod, tension rod, or café rod
- Curtain clip rings or drapery clips
- Drop cloth or plastic sheet to protect your work surface
- Spray bottle, sponge brush, or soft paintbrush for blending color
If you are using a hot iron, work on a heat-safe surface and be careful around steam. If you need to install a rod above the window, use a sturdy step stool and ask for help rather than attempting a heroic balancing act. Curtains are nice. Gravity is undefeated.
Step 1: Measure Your Window the Smart Way
The difference between “custom-looking curtains” and “fabric rectangles having a rough day” often comes down to measurement. Start by deciding where your curtain rod will go. For a taller, more designer-inspired look, place the rod several inches above the window trim, or close to the ceiling if the room allows it. Extending the rod wider than the window also helps the panels frame the glass instead of blocking precious light.
For width, aim for curtain fabric that totals about two times the width of the window or rod. If your window is 36 inches wide, two panels that are each around 36 inches wide will create soft fullness. For sheers, you can go even fuller because lightweight fabric looks best when it gathers generously.
For length, measure from the rod or clip-ring position down to where you want the curtains to end. Floor-kissing curtains should just touch or barely skim the floor. Café curtains can stop at the sill or halfway down the window. For a relaxed craft-room look, a little movement is fine, but avoid awkwardly short panels unless that is the intentional style.
Step 2: Choose the Right Fabric
The best fabric for DIY no sew blue sky curtains depends on how much light and privacy you want. Cotton gauze creates a dreamy, soft, floating effect. Voile and sheer cotton let sunlight pour through. Muslin is affordable, easy to paint, and has a casual handmade look. Linen-blend fabric hangs more elegantly but may cost more. Drop cloth can work for rustic curtains, although it is heavier and less cloud-like.
For a true blue sky effect, lighter fabric is usually better. Heavy upholstery fabric can look stiff, and the sky design may feel more like a mural than a breezy window treatment. If privacy matters, use a double-layer approach: a sheer blue sky panel in front and a plain white or blackout liner behind it. That way, you get the pretty daytime effect without feeling like the entire neighborhood has been invited to your pajama routine.
Step 3: Pre-Wash and Iron the Fabric
Pre-washing is not glamorous. It will not get applause. Nobody will walk into your home and say, “Wow, these curtains have clearly been responsibly pre-washed.” But it matters. Cotton, linen, muslin, and gauze can shrink, and you want that shrinkage to happen before you measure, hem, and hang.
Wash and dry the fabric according to its care instructions. Then iron it flat before cutting or applying hem tape. Wrinkles can throw off your measurements and create uneven hems. Think of ironing as giving the fabric a small pep talk before its big window debut.
Step 4: Cut the Curtain Panels
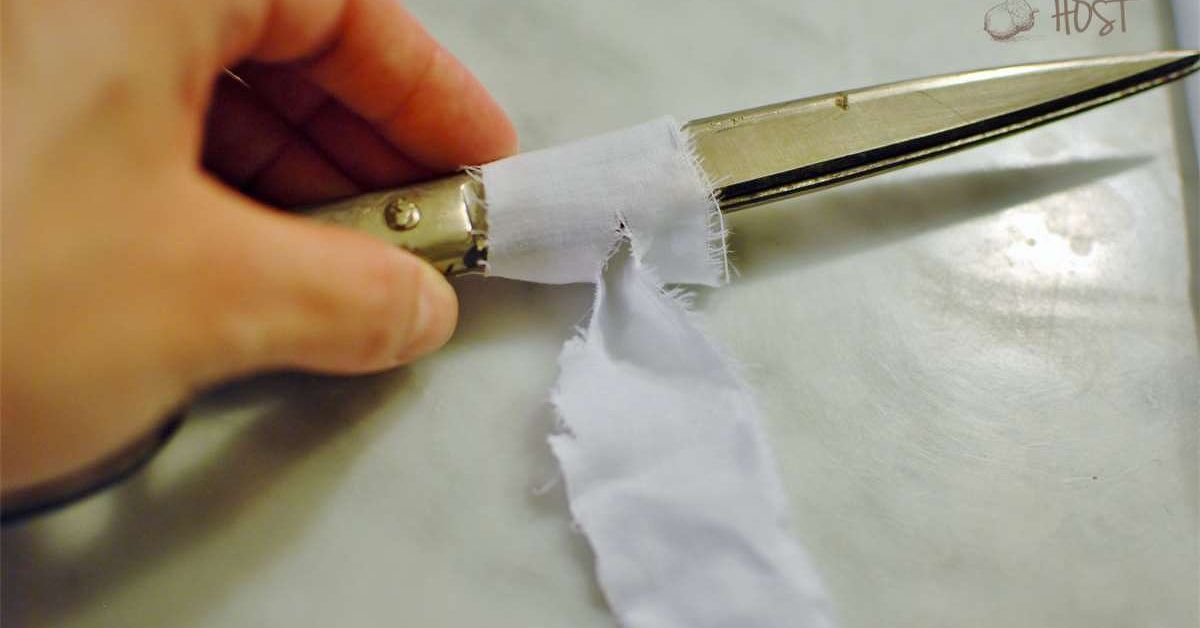
Lay the fabric on a clean floor or large table. Measure each panel carefully and mark the cutting line with tailor’s chalk, washable pencil, or small pins. Add extra length for the bottom hem and top fold if you plan to create a rod pocket. If you are using clip rings, you can keep the top simpler because the clips attach directly to the fabric edge or folded header.
For beginners, clip rings are the easiest option. They also make the curtains look relaxed and modern. A rod pocket can look nice, but it requires a wider top fold and more accurate bonding. Clip rings forgive small imperfections, which is why they deserve a tiny round of applause.
Step 5: Create the Blue Sky Effect
Now for the fun part: turning plain fabric into sky-inspired curtains. There are three beginner-friendly methods.
Option 1: Soft Blue Ombré
Mix blue fabric paint with water or use fabric dye according to the product instructions. Start with a very diluted blue. Apply the color more strongly at the top or bottom of the panel, then gradually fade it toward white. A spray bottle creates a misty look, while a sponge brush gives more control. Keep the color soft at first; you can always add more blue, but removing a dramatic paint blob is a much less relaxing hobby.
Option 2: Wispy Cloud Painting
After the blue layer dries, use a dry brush or sponge to dab white fabric paint in loose, cloud-like shapes. The trick is restraint. Clouds are soft and uneven, not perfect marshmallows lined up for inspection. Use a light hand, blend the edges, and step back often. If the clouds look too bold, lightly mist them with water and blot with a clean cloth.
Option 3: Pale Blue Fabric with White Accents
If painting feels intimidating, start with pale blue fabric and add only small white cloud details. You can also leave the blue fabric plain and let the gathered folds create movement. This version is fast, elegant, and harder to mess up. Sometimes the best DIY decision is knowing when to stop before enthusiasm turns into chaos.
Step 6: Let the Fabric Dry Completely
Drying time depends on the fabric, paint, dye, humidity, and how generously you applied color. Lay the panels flat or hang them somewhere safe where they will not stick to themselves. Do not rush this stage. If you fold damp painted fabric, you may accidentally create abstract modern art in places you did not request.
Once dry, heat-set the paint if the product instructions require it. Many fabric paints need heat-setting with an iron to become washable. Use a pressing cloth or parchment paper between the painted surface and the iron. Always follow the paint manufacturer’s directions because different products behave differently.
Step 7: Make the No Sew Hems
Fold the side edges toward the back of the curtain and press them flat. Place hem tape or fabric fusion tape inside the fold, cover with a pressing cloth, and apply heat according to the instructions. If using fabric glue, run a thin, even line inside the fold, press it flat, and let it cure fully.
Repeat the process on the bottom hem. A double-fold hem looks more finished because it hides the raw edge. For lightweight sheers, keep the hem narrow so it does not look bulky. For muslin or linen-blend panels, a slightly wider bottom hem helps the curtain hang better.
Check each bonded seam after it cools. If any section lifts, press it again or add a tiny amount of fabric glue. Do not drag the iron back and forth aggressively. Press, lift, and move. Treat the curtain like fabric, not grilled cheese.
Step 8: Finish the Top Edge
If you are using clip rings, fold the top edge once or twice, bond it with hem tape, and clip the rings evenly across the panel. Space clips about 4 to 6 inches apart for soft folds. More clips create a neater drape; fewer clips create a relaxed look.
If you prefer a rod pocket, fold the top edge down wide enough to fit the curtain rod, then bond the lower edge of the fold with hem tape or fabric glue. Make sure the pocket is not too tight. A curtain rod should slide through easily, not require a wrestling match.
Step 9: Hang and Adjust
Hang the panels and step back. This is the moment when the project either sings or politely asks for a few edits. Check the length first. If the curtains puddle too much, mark the extra fabric and re-hem. If they are slightly uneven, adjust the clips before cutting anything. Clip rings are great because they let you cheat the height by a small amount.
Next, check the fullness. If the panels look flat, move the clips closer together or add another panel. If the blue design feels too faint, you can add more color later, but do it carefully and remove the panels first. Painting while curtains are hanging may sound efficient, but so does eating soup while jogging.
Styling Ideas for DIY Blue Sky Curtains
Blue sky curtains look beautiful with white walls, natural wood furniture, rattan baskets, pale yellow accents, soft gray bedding, cloud pillows, brass hardware, and plants. In a child’s room, pair them with airplane art, rainbow wall decals, moon-and-star bedding, or a reading tent. In a craft room, use them with white shelving, colorful supplies, and a bright worktable.
For a grown-up version, keep the cloud pattern subtle and use linen-blend fabric. Choose matte black, brushed brass, or warm wood curtain rods to make the project feel intentional. If your room already has a lot of pattern, let the curtains stay mostly blue with only a whisper of white. If the room is very plain, you can make the cloud design more expressive.
Common Mistakes to Avoid
Using Too Little Fabric
Curtains need fullness. Panels that are exactly the width of the window can look flat and skimpy. Use extra width so the fabric gathers naturally.
Skipping the Test Swatch
Paint and dye can behave differently on different fabrics. Test your blue mixture on a scrap before touching the real panels. The color may dry lighter, darker, greener, or more intense than expected.
Making the Clouds Too Perfect
Real clouds are irregular. Avoid identical cloud shapes. Blend edges, vary sizes, and leave plenty of open blue space.
Ignoring the Back Side
If your curtains are visible from outside, check how the back looks. Light fabric can show paint bleed-through. A liner can solve this while adding privacy.
Not Letting Glue Cure
Fabric glue may feel dry on the surface before it reaches full strength. Let it cure according to the package instructions before washing or tugging on the hems.
Cleaning and Maintenance
Care depends on the fabric and paint you use. If the fabric paint is washable and properly heat-set, gentle washing may be possible. Use cold water, mild detergent, and a delicate cycle when allowed. Air drying is usually safer than high heat. If you used fabric glue, check whether it is washable before cleaning.
For routine care, shake the curtains outdoors, use a lint roller, or vacuum them gently with a brush attachment. Sheer and gauze curtains collect dust but are easy to refresh. Avoid harsh bleach, especially on painted areas, unless you are trying to create a “storm cloud after laundry disaster” effect.
Budget Breakdown
DIY no sew blue sky curtains can be very affordable. Lightweight fabric may cost less than custom curtain panels, especially if you shop sales or use flat sheets, gauze fabric, or thrifted white curtains. Hem tape, fabric glue, and clip rings are usually modest expenses. The biggest variable is fabric quality. If you want a polished living-room look, spend a little more on the fabric. If you are decorating a playroom or creative studio, inexpensive cotton or muslin can work wonderfully.
A simple budget version may include thrifted white panels, blue fabric paint, hem tape, and clip rings. A higher-end version may include linen-blend fabric, quality curtain hardware, and a separate privacy liner. Both can look good if the proportions are right and the color work is soft.
of Real-World Experience: What This Project Teaches You
The first thing you learn while making DIY no sew blue sky curtains is that fabric has opinions. It stretches, shifts, wrinkles, absorbs color unevenly, and occasionally behaves like it has never met a straight line in its life. That is not a failure; it is part of the handmade charm. The best approach is to work slowly, measure twice, and accept that soft, airy curtains do not need military-level precision to look beautiful.
One of the most useful experiences is learning how much color changes after drying. Wet blue paint often looks stronger and brighter than it will later appear on fabric. Beginners may panic and think they added too much, only to find the final result is gentle and faded. On the other hand, concentrated dye can grab quickly, especially on cotton. That is why a test swatch is not optional if you care about the final shade. A pale sky blue is usually more forgiving than a bold turquoise.
You also learn that clouds are easier when you stop trying so hard. The first instinct is to paint fluffy cartoon clouds with clear outlines. But the prettiest curtain clouds usually come from tapping, blotting, and blending. Use very little paint, keep the brush almost dry, and build the shape slowly. If a cloud looks too obvious, soften it with a damp cloth. If it looks too faint, add a tiny highlight. The secret is not perfection. The secret is movement.
Another practical lesson is that hanging the curtains before making final length decisions can save you from regret. Floors are not always level, rods may sit slightly higher on one side, and clip rings add length. Hang the unfinished or lightly finished panels first, then mark the bottom. This step feels fussy, but it prevents the dreaded “one panel is waving at the floor while the other is avoiding it” problem.
Clip rings are a beginner’s best friend. They make the curtains easy to hang, easy to adjust, and easy to remove for cleaning or repainting. They also create casual folds that suit the sky theme. If you want a more polished look, use more clips and space them evenly. If you want a breezy studio look, fewer clips can work.
The biggest emotional reward of this project is how quickly it changes the mood of a room. A plain window becomes softer. Harsh afternoon light becomes diffused. A basic craft room suddenly feels intentional. The curtains do not have to be expensive or technically perfect to make the space feel happier. They simply need good proportions, a soft palette, and enough patience to let each step dry, cool, or cure before rushing ahead.
Finally, this project teaches confidence. Once you make one set of no sew curtains, you start seeing possibilities everywhere: painted café curtains for the kitchen, drop cloth panels for the dining room, gauze sheers for a reading nook, or seasonal panels for a kid’s room. The blue sky version is a perfect first project because it is forgiving, cheerful, and full of personality. Even small imperfections tend to look like part of the design. Conveniently, the sky has never been famous for straight hems either.
Conclusion
DIY no sew blue sky curtains are a simple way to add brightness, softness, and handmade personality to your home without dragging out a sewing machine. With the right fabric, careful measurements, no sew hemming tape or fabric glue, and a gentle blue-and-white color palette, you can create window treatments that feel custom, creative, and wonderfully light. Whether you are decorating a craft room, nursery, bedroom, or cozy reading corner, these curtains bring the calm of a sunny day indoorsminus the bugs, sunscreen, and suspicious lawn mower noises.
The key is to keep the design airy, measure generously, test your paint or dye, and let the fabric do what fabric does best: move, glow, and soften the room. This is not just a curtain project. It is a small home makeover with a big mood boost.