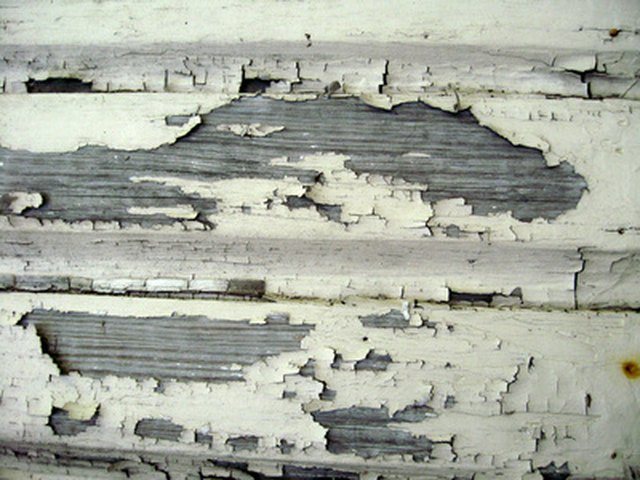
Note: This article is written for general home-improvement publishing. Paint removal can create dust, fumes, and mess, so readers should test first, work carefully, and treat older painted surfaces with extra caution.
Removing paint from wood sounds simple until the first stubborn layer laughs at your scraper like it pays rent. Maybe you found an old wooden chair at a yard sale, inherited a table with “farmhouse charm” that is actually five coats of mystery paint, or discovered that someone painted your beautiful trim with the enthusiasm of a toddler holding a frosting spatula. The good news is that a home remedy for removing paint from wood can help with many small projects, especially drips, thin latex paint, and lightly painted furniture.
The honest news? Not every paint job will surrender to vinegar and a polite request. Some old oil-based coatings, thick enamel layers, and heavily painted architectural trim may need a stronger approach. Still, before reaching for aggressive chemicals, there are several safer, low-cost methods worth trying: warm vinegar, gentle scraping, mild soap, careful sanding, steam-softening for limited cases, and a little patiencethe least glamorous tool in the toolbox, but often the most important one.
This guide explains how to remove paint from wood using household-friendly methods, when those methods work best, when they do not, and how to avoid turning a weekend project into a tragic episode of “Why Is the Floor Sticky?”
Before You Start: Know What Kind of Painted Wood You Are Dealing With
Before choosing any paint removal method, look closely at the wood surface. A small paint drip on a sealed hardwood floor is very different from an antique dresser buried under several coats of paint. Painted trim in a home built before 1978 also deserves special caution because older paint may contain lead. Sanding, scraping, or heating lead-based paint can create hazardous dust or fumes, so testing and professional help may be the safest route for older homes.
Ask yourself four simple questions:
- Is the wood solid, veneer, or engineered wood?
- Is the paint fresh, thin, thick, peeling, or old and hard?
- Do you want to repaint the wood or restore the natural grain?
- Was the item or house built before 1978?
If the goal is repainting, you may not need to remove every speck of paint. Often, scraping loose areas, sanding smooth edges, cleaning, and priming are enough. If the goal is staining or restoring natural wood, you will need a more complete removal process because leftover paint in the grain will show like spinach in someone’s teeth.
Best Home Remedy for Removing Paint From Wood: Warm Vinegar and Scraping
White vinegar is one of the most popular home remedies for paint removal because it is inexpensive, easy to find, and useful for softening small paint spots. Vinegar does not magically dissolve thick paint like a commercial stripper, but it can loosen latex paint, paint splatters, and thin layers enough to make scraping easier.
How to Use Vinegar to Remove Paint From Wood
- Warm white vinegar in a microwave-safe bowl or small pot until hot, not boiling.
- Dip a clean cloth into the warm vinegar.
- Press the cloth onto the painted area for 10 to 15 minutes.
- Use a plastic putty knife or scraper to gently lift the softened paint.
- Wipe the area with a damp cloth and dry it completely.
A plastic scraper is usually safer than a metal scraper for delicate wood because it is less likely to gouge the surface. Work with the grain, not against it. Wood grain is like traffic: going the wrong direction leads to damage and regret.
This method works best on paint drips, overspray, small furniture areas, and sealed wood surfaces. It is not the best choice for heavy paint buildup, detailed carvings, or old enamel paint that has bonded firmly to the wood.
Soap, Warm Water, and a Plastic Scraper for Fresh Paint
If the paint is fresh latex paint, start with the gentlest method possible: warm water, mild dish soap, and a cloth. Many DIYers make the mistake of attacking fresh paint with harsh tools when the paint has not fully cured yet. Sometimes the solution is less “chemical warfare” and more “wipe it before it becomes a permanent resident.”
Simple Fresh Paint Removal Method
- Mix warm water with a few drops of mild dish soap.
- Dampen a microfiber cloth, but do not soak the wood.
- Rub the paint spot gently in small circles.
- Use a plastic scraper for raised paint edges.
- Dry the wood right away with a clean towel.
Avoid flooding wood with water. Too much moisture can raise the grain, stain the surface, or damage veneer. If the wood starts to look swollen or cloudy, stop and let it dry before trying another method.
Baking Soda Paste: Good for Small Spots, Not Full Furniture Stripping
Baking soda is mildly abrasive, which makes it helpful for tiny paint marks on durable sealed wood. It is not powerful enough to strip an entire dresser, but it can help remove small smears after the paint has softened with warm water or vinegar.
To use it, mix baking soda with a little water until it forms a paste. Apply the paste to the paint spot, wait a few minutes, and rub gently with a soft cloth. Keep the pressure light. Baking soda can dull glossy finishes if you scrub like you are trying to erase a parking ticket.
After cleaning, wipe the area with a damp cloth and dry it completely. Test this method in a hidden area first, especially on stained wood, antique furniture, or glossy finishes.
Use Gentle Heat Carefully
Heat can soften paint and make it easier to scrape from wood. For small home projects, some people use a hair dryer as a gentler heat source. It will not work as quickly as a heat gun, but it is less aggressive and less likely to scorch the wood.
Hair Dryer Paint Softening Method
- Set the hair dryer to high heat.
- Hold it a few inches from the painted area.
- Move it slowly back and forth; do not hold it in one spot.
- When the paint softens, lift it with a scraper.
- Let the wood cool before sanding or cleaning.
A heat gun can be effective, but it also increases fire risk and can scorch wood. It is not a casual tool for old painted surfaces, especially if lead paint is possible. For older homes, windows, trim, and doors, do not use high heat unless the surface has been tested and the method is appropriate.
Scraping: The Old-School Method That Still Works
Scraping is simple, cheap, and strangely satisfying when the paint comes off in ribbons. The key is using the right scraper and the right pressure. A dull scraper can skip across the surface and leave chatter marks. A sharp metal scraper can remove paint quickly but may gouge soft wood. A plastic scraper is safer for delicate surfaces but slower.
For flat furniture, start with a plastic putty knife. For tougher areas, use a pull scraper or a scraper with a rounded edge. On trim and grooves, use contour scrapers or old toothbrushes for loosened paint. Avoid wire brushes on soft wood unless you are intentionally going for the “a raccoon restored this” texture.
Scrape in the direction of the grain whenever possible. If the paint resists, soften it first with warm vinegar, mild heat, or a safer paint remover rather than forcing the tool deeper into the wood.
Sanding: Useful, but Not Always the First Choice
Sanding removes paint by abrasion, which means it also removes a little wood. That is fine when smoothing a surface for repainting, but risky when restoring fine furniture or thin veneer. Sanding also creates dust, so it should be done with care, especially on older painted surfaces.
For modern, non-lead paint on sturdy wood, use sandpaper after scraping the loose paint. Start with medium grit, such as 120, then move to finer grit, such as 180 or 220, for smoothing. Do not begin with extremely coarse sandpaper unless the surface is rough and you are prepared to repair scratches.
If the wood might have lead-based paint, do not dry sand it. Lead dust is dangerous, and ordinary dust masks are not enough protection. Test first and follow lead-safe guidance.
Steam and Moisture: Use With Caution on Wood
Steam can soften some paint, but wood and moisture have a complicated relationship. A small amount of controlled moisture may help with stubborn spots, while too much can warp wood, loosen glue, lift veneer, or raise the grain. Steam is especially risky on antique furniture, thin veneer, and wood with unknown finishes.
If you try a moisture-based approach, keep it brief and controlled. Use a warm damp cloth rather than blasting the surface with a steam cleaner. Afterward, dry the wood thoroughly and let it rest before sanding or refinishing.
What About Citrus-Based or Soy-Based Paint Removers?
Although they are not exactly “home remedies,” citrus-based and soy-based paint removers are often considered gentler alternatives to traditional harsh strippers. They can be helpful when vinegar and scraping are not strong enough, especially on furniture with several paint layers.
Even low-odor removers are still chemical products, so read the label, wear gloves and eye protection, and work with good ventilation. Do not assume “smells like oranges” means “safe enough to bathe in.” Orange scent can be charming; chemical exposure is not.
A safer remover may be a practical middle ground for large projects, but always test in a hidden area. Some products can darken wood, soften old finishes unevenly, or leave residue that affects staining or repainting.
Paint Removal Methods by Project Type
For Painted Furniture
Start by removing hardware, drawers, and loose parts. Try warm vinegar on small areas, then scrape gently. If the paint is thick, use a safer paint remover or careful sanding after most paint is lifted. For carved details, a toothbrush, wooden skewer, or contour scraper can help reach grooves without chewing up the design.
For Wood Trim
Trim is tricky because it often has layers of old paint in corners and profiles. If the home is older, test for lead first. For modern paint, soften small sections at a time and use a scraper that matches the shape of the molding. If repainting, focus on removing loose paint and smoothing edges rather than stripping everything to bare wood.
For Hardwood Floors
Paint drips on sealed hardwood floors can often be softened with warm water, mild soap, or vinegar. Use a plastic scraper and keep moisture low. Avoid aggressive sanding on one spot because it can create a visible dip or dull patch. For widespread paint on floors, professional refinishing may be the cleaner option.
For Doors and Cabinets
Remove knobs, hinges, and hardware first. Lay the door or cabinet front flat when possible. A flat working surface makes scraping easier and reduces runs if you use a remover. For cabinets, be careful with veneer panels and edges because aggressive sanding can expose the core material underneath.
Safety Tips You Should Not Skip
Paint removal is not just about getting the wood pretty again. It is also about protecting your lungs, skin, eyes, floors, pets, and sanity. Work in a ventilated area. Wear safety glasses. Use gloves. Put down a drop cloth. Keep children and pets away from the work zone. Clean up chips and dust carefully.
Be extra cautious with old paint. In the United States, homes built before 1978 may contain lead-based paint. If you suspect lead, test first and consider hiring a certified professional. Avoid dry sanding, uncontrolled scraping, or high heat on suspected lead paint.
Also avoid old-fashioned paint strippers containing methylene chloride. Consumer sales for paint and coating removal have been restricted because of serious health risks. Modern alternatives exist, and for many small projects, household methods are safer places to start.
Step-by-Step Home Remedy Method for Small Paint Removal Projects
Here is a practical workflow for removing paint from wood using home-friendly methods:
- Test the surface. Choose a hidden spot and try your method before working on the visible area.
- Clean first. Wipe away dust and grime so you are treating paint, not a historic layer of household mystery.
- Soften the paint. Use warm vinegar, warm soapy water, or gentle heat.
- Scrape gently. Use a plastic scraper and move with the wood grain.
- Repeat as needed. Several light passes are safer than one angry pass.
- Detail the corners. Use a soft brush, toothpick, or contour tool for grooves.
- Sand lightly. Once paint is mostly gone, smooth the surface with fine-grit sandpaper if appropriate.
- Clean and dry. Remove residue, then let the wood dry fully before painting, staining, or sealing.
Common Mistakes When Removing Paint From Wood
The first common mistake is using too much force. Wood is softer than most people think, especially pine, cedar, and veneer. If the paint is not moving, soften it more instead of digging harder.
The second mistake is using too much water. A wet cloth is useful; a soaked surface is asking for swelling, staining, and finish damage.
The third mistake is skipping the lead question. If the item is old or the home was built before 1978, do not guess. Testing is faster than worrying afterward.
The fourth mistake is expecting vinegar to perform like a commercial stripper. Vinegar helps with light paint removal, not archaeological excavation through seven decades of enamel.
The fifth mistake is sanding too early. Scrape and soften first, then sand. Sandpaper loads up quickly when paint is thick, and it can smear softened paint across the surface.
When a Home Remedy Is Not Enough
A home remedy for removing paint from wood is best for small, manageable jobs. If the paint is thick, old, glossy, or layered, household methods may only get you halfway there. That does not mean you failed; it means the paint came prepared.
Consider a safer commercial remover for multiple paint layers, detailed furniture, or surfaces you want to stain. Consider a professional for large areas, valuable antiques, historic trim, old windows, or any suspected lead paint. Professional help costs more, but replacing damaged woodor dealing with unsafe dustcan cost far more.
Extra Experience: What Real DIY Paint Removal Teaches You
After working through a few paint removal projects, one lesson becomes clear: the best method is usually a combination, not a single miracle trick. Warm vinegar may loosen the first layer. A scraper may remove the softened top coat. A detail brush may clean the corners. Light sanding may finish the surface. Paint removal is less like flipping a switch and more like convincing a stubborn cat to leave a chair. You need patience, strategy, and sometimes snacks.
On small furniture, the biggest win often comes from preparation. Removing knobs, hinges, drawer pulls, and cushions makes the job cleaner and faster. Many beginners try to work around hardware, but paint hides around screw heads and under edges. Once the hardware is off, the piece suddenly becomes easier to handle. A flat tabletop can be scraped evenly. A drawer front can be turned toward the light. Small parts can be cleaned separately. This one step can make the difference between “restored vintage charm” and “I gave up and bought a tablecloth.”
Another experience-based tip: let the remedy do the work. Whether using warm vinegar, a damp cloth, or a safer remover, dwell time matters. People often apply a solution and start scraping immediately. That is like putting pasta in cold water and wondering why dinner is crunchy. Give the paint time to soften. Reapply if needed. Covering a dampened area briefly with a cloth can help keep it active, especially on small spots.
Lighting also matters more than expected. Paint residue hides in shadows, especially on carved furniture and trim. Move a lamp across the surface at a low angle, and you will see bumps, ridges, and leftover patches that were invisible from above. This trick is especially useful before repainting because uneven edges can show through new paint.
For old wooden chairs, patience around joints is essential. Too much water can weaken glue joints, and aggressive scraping can damage curved legs. Use smaller tools, lighter pressure, and more time. A wooden skewer or old toothbrush can help remove softened paint from grooves without leaving metal scratches.
For painted trim, the best experience is often restraint. If you are repainting, stripping every inch to bare wood may be unnecessary. Scrape loose paint, sand ridges smooth, clean thoroughly, prime, and repaint. The finished result can look excellent without turning your living room into a restoration museum staffed by one tired person.
Finally, always plan cleanup before starting. Paint chips travel. Dust sneaks into corners. Scraped paint clings to socks with suspicious determination. Use a drop cloth, keep a trash bag nearby, and vacuum carefully with the right equipment after the surface is dry. A clean work area makes the project safer and keeps the satisfaction level high.
Conclusion
A home remedy for removing paint from wood can be a smart first step for light paint, small drips, and gentle furniture restoration. Warm vinegar, mild soap, careful scraping, baking soda paste, and light sanding can solve many common problems without harsh chemicals. The secret is matching the method to the project. Use gentle methods for delicate wood, stronger options for stubborn layers, and professional help when lead paint or valuable antiques may be involved.
Paint removal rewards patience. Go slowly, test first, protect the wood, and remember that several gentle passes usually beat one dramatic scrape. Your wood has survived years of paint, dust, and questionable decorating choices. Treat it kindly, and it might just reward you with a beautiful second life.