A plain lamp shade is perfectly functional, but “perfectly functional” is also how people describe filing cabinets and beige waiting rooms. With a stencil, a little metallic paint, and a free afternoon, you can turn that forgettable shade into a glowing Moroccan-inspired accent filled with geometric pattern, warm color, and handcrafted personality.
This DIY Moroccan lamp shade project begins with an existing, commercially manufactured hardback shade. That approach is easier and safer than attempting to build or wire an entire fixture from scratch. You will decorate only the exterior while leaving the fitter, frame, lining, socket, and electrical components unchanged.
Moroccan-inspired interiors often combine vivid color, carved or perforated metal lighting, natural materials, layered textiles, and repeating geometric motifs. These elements can also work beautifully in modern, Scandinavian, industrial, bohemian, or eclectic rooms, so your home does not need to resemble a Marrakech riad before this lamp feels welcome.
What Makes a Lamp Shade Look Moroccan?
The secret is not simply painting everything gold and hoping for the best. A convincing Moroccan-style lamp shade usually depends on four coordinated design choices:
- Repeating geometry: Stars, diamonds, arches, quatrefoils, rosettes, and interlocking lines create rhythm.
- Warm metallic accents: Antique gold, brass, bronze, and copper suggest traditional metal lanterns.
- Rich or earthy color: Cobalt blue, turquoise, saffron, terracotta, emerald, burgundy, ivory, and charcoal all work well.
- Textural finishing: Narrow braid, soutache cord, tassels, beads, or patterned ribbon can give the shade a collected, handcrafted appearance.
Traditional Moroccan architecture frequently combines zellij mosaic tile, carved plaster, cedar woodwork, and star-based ornament. Repetition is important, but tiny variations keep the result from feeling mechanically printed. That slight human irregularity is not a flaw; it is what prevents your lamp from looking as though it escaped from a spreadsheet.
Materials and Tools
The following supplies are suitable for a painted hardback drum, empire, bell, square, or hexagonal lamp shade. Drum shades are generally easiest for beginners because their relatively straight sides make stencil alignment less complicated.
- One clean, undamaged hardback lamp shade
- Moroccan geometric stencil
- Low-tack painter’s tape or repositionable stencil adhesive
- Acrylic craft paint or fabric-compatible paint
- Metallic acrylic paint in antique gold, bronze, copper, or brass
- Dense stencil brush or cosmetic sponge
- Small artist’s brush
- Ruler or flexible measuring tape
- Chalk pencil or removable fabric marker
- Scrap paper or cardboard for testing
- Paper towels and a shallow paint tray
- Optional decorative braid, narrow ribbon, or lightweight tassel trim
- Adhesive specifically recommended for lamp shades or the materials being joined
- A compatible low-wattage LED bulb
Lamp shades are available in round, bell, square, dome, rectangular, hexagonal, and novelty forms. Patterned, embroidered, pleated, and embellished finishes are commonly used to make a shade a decorative focal point. Choose a form that complements the lamp base rather than competing with it.
Safety and Planning Before You Begin
Use an Existing Shade in Good Condition
Inspect the shade before decorating it. Do not use one with scorched lining, cracked backing, loose frame rings, damaged wiring, or a fitter that no longer sits securely. A craft makeover cannot fix an electrical or structural defect, no matter how persuasive your gold paint may be.
Keep the Electrical Components Untouched
Unplug the lamp and remove the shade before working. This project does not require rewiring, opening the socket, changing the cord, or installing a ceiling fixture. Electrical work should begin only after power has been disconnected and verified as off; complicated repairs are better handled by a qualified professional.
Respect the Lamp’s Maximum Wattage
Never exceed the wattage marked on the lamp or fixture. A compatible LED is usually a sensible choice because LEDs create light far more efficiently than incandescent bulbs, which release most of their consumed energy as heat. The LED still produces heat, particularly around its base and heat sink, so adequate clearance and ventilation remain necessary.
Use certified bulbs and keep paint, glue, ribbon, tassels, and other decorations on the exterior of the shade. Nothing should hang inward toward the bulb or block the open top of a shade designed to vent heat.
How to Make a DIY Moroccan Lamp Shade
Step 1: Choose Your Design Direction
Decide whether you want a subtle neutral lamp or a dramatic jewel-toned statement piece. Three reliable combinations are:
- Modern desert: Ivory background, terracotta pattern, and antique gold trim
- Blue courtyard: White background, cobalt pattern, and brass details
- Moody lantern: Charcoal background, bronze pattern, and black braid
Limit yourself to two main colors and one metallic accent. Moroccan decor can happily mix several patterns, but a small lamp shade can become visually crowded faster than a kitchen drawer full of mystery cables.
Step 2: Clean and Prepare the Shade
Remove the shade from the lamp. Dust it with a clean microfiber cloth or a soft brush attachment on a vacuum set to low suction. If the manufacturer allows light cleaning, wipe small marks carefully and let the surface dry completely.
Do not soak a paper-backed or hardback shade. Water can loosen adhesive, warp the backing, or create stains that appear when the light is switched on.
Place the shade on a protected work surface. Mark the back seam with a tiny piece of painter’s tape so you always know where the pattern should begin and end.
Step 3: Measure the Pattern Repeat
Measure the circumference of the shade around its widest section. Then measure your stencil motif. Divide the circumference by the motif width to estimate how many repeats will fit.
If the numbers do not divide evenly, do not force a cramped partial motif into the final inch. Slightly adjust the spacing between repeats or position the least noticeable irregularity at the back seam.
For tapered empire or bell shades, horizontal spacing changes between the top and bottom. Use separate guide marks along both edges and allow the stencil to follow the shade’s taper. A forgiving allover motif is much easier than a rigid checkerboard pattern on a curved surface.
Step 4: Test the Paint
Test your paint and stencil on a scrap of material with a similar texture. This reveals how much paint the surface absorbs and whether the color remains visible when applied thinly.
Metallic acrylic paint may need two light coats for an even finish. Thick paint can bleed beneath the stencil and produce blurry edges, so use less paint than you think you need. A stencil brush should feel almost dry before it touches the shade.
Step 5: Secure the Stencil
Position the first stencil at the back seam. Hold it with low-tack painter’s tape or use a light application of repositionable stencil adhesive. Make sure the stencil lies flat without stretching or distorting the shade.
Mark several registration points with a removable pencil or tiny tape tabs. These guides will help you reposition the pattern consistently as you work around the shade.
Stencil techniques commonly rely on applying a small amount of paint through a secured template, allowing it to set, and shifting the stencil using visible placement guides. Working methodically produces cleaner repeats than trying to paint the entire surface at once.
Step 6: Apply the Base Pattern
Dip a dense stencil brush or sponge lightly into the paint. Blot most of it onto a paper towel. Apply the remaining paint with gentle tapping motions rather than sweeping side to side.
Start at the outer edges of the stencil and work inward. This helps reduce bleeding. Lift the template straight away from the surface while the paint is still slightly wet.
Repeat the design around the shade, checking your alignment after every second or third section. Wipe excess paint from the back of the stencil whenever buildup appears. Allow the first coat to dry before adding another.
Step 7: Add Metallic Details
Once the base pattern has dried, use a small artist’s brush to add metallic highlights. You might outline every second star, paint small dots at intersections, or emphasize the central shape within each repeat.
A restrained metallic layer usually looks more sophisticated than complete gold coverage. The goal is to catch warm light, not to make the lamp visible from the International Space Station.
For an aged appearance, mix a tiny amount of brown or black acrylic paint into the metallic color. Test the mixture before using it. Uneven stippling can imitate softly weathered brass without requiring specialty finishing products.
Step 8: Finish the Top and Bottom Edges
A narrow border makes the shade look finished and can disguise minor spacing differences. Paint a thin metallic band along the upper and lower edges, or attach lightweight decorative braid to the exterior rim.
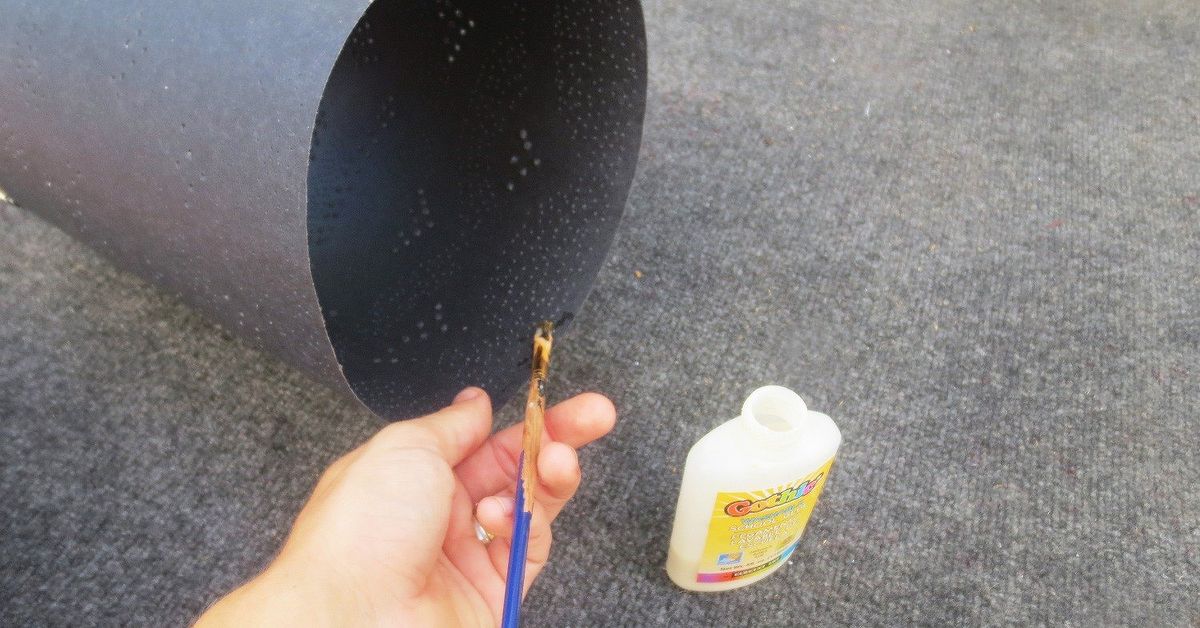
Apply adhesive sparingly and according to its label. Keep glue away from the fitter, lining, socket, vents, and bulb. Avoid heavy beading or long tassels that might pull the shade out of shape or drift toward the light source.
Recovering, painting, wrapping, embroidering, and trimming existing shades are established ways to update lighting without replacing the entire lamp. The most successful makeovers generally keep embellishments proportional to the original shade.
Step 9: Let Everything Cure
Allow the completed shade to dry and cure for the full period recommended by the paint and adhesive manufacturers. A surface that feels dry may still be soft underneath.
Do not reinstall the shade while paint or glue remains tacky. Place it in a clean, ventilated area where dust, pets, and curious fingers cannot reach it. Cats, in particular, seem to believe every drying craft project has been arranged for their personal inspection.
Step 10: Reassemble and Test the Lamp
Install a compatible LED bulb without exceeding the lamp’s maximum wattage. Replace the shade securely and check that it sits straight, clears the bulb on every side, and does not wobble.
Turn the lamp on and observe it for a few minutes. Look for unexpected shadows, visible paint gaps, loose trim, unusual odors, or excess heat. Switch it off immediately if anything appears unsafe.
Three Moroccan Lamp Shade Variations
Minimalist White and Brass
Use a white drum shade and apply a single repeating brass star pattern. Skip fringe and add only a narrow painted border. This version works well in contemporary rooms where a fully colorful lantern might feel too theatrical.
Jewel-Toned Bohemian Shade
Paint alternating motifs in turquoise, cobalt, and emerald, then add restrained gold dots. Finish the lower edge with a short, lightweight tassel trim. Pair it with a simple wood or ceramic base so the pattern remains the star.
Terracotta Desert Shade
Stencil warm terracotta onto an ivory or oatmeal-colored shade. Add bronze accents and a narrow natural-fiber braid. The result pairs easily with linen curtains, leather furniture, woven baskets, and warm wood.
Common Problems and Easy Fixes
The Paint Bleeds Under the Stencil
You are probably using too much paint or moving the brush sideways. Blot the tool thoroughly and apply paint with vertical tapping motions. Make sure the stencil is flat against the shade.
The Pattern Does Not Meet at the Back
Turn the mismatch into a deliberate feature. Paint a vertical metallic stripe over the seam, attach a narrow braid, or place a single decorative medallion at that point.
The Metallic Paint Looks Flat
Add a second thin coat after the first has dried. Metallic pigments reflect light best when the layer is even but not heavy. You can also combine two close shades, such as antique gold and bronze, for more depth.
The Design Looks Too Busy
Stop adding details. Let the existing paint dry, reinstall the shade temporarily, and view it from across the room. A pattern that looks intense from six inches away may appear balanced at normal viewing distance.
The Shade Looks Better Unlit Than Lit
Some paints appear more translucent or reveal brush marks when illuminated. Apply another thin coat to inconsistent sections, or accept the slight variation as part of the handmade finish. Always test the result with the bulb you intend to use.
How to Style Your Finished Moroccan Lamp Shade
Place the lamp where its pattern can contribute to the room without competing with several other dominant objects. A bedside table, reading corner, console, entryway cabinet, or quiet section of a living room works especially well.
Repeat one color from the lamp elsewhere in the room through a pillow, throw, book cover, vase, or framed print. You do not need a perfectly matched Moroccan theme. In fact, patterned metal lighting and handcrafted Moroccan accents are often used successfully in otherwise modern or eclectic interiors.
Layer the lamp with other light sources instead of asking it to illuminate the entire room. Table lamps, floor lamps, sconces, and soft ambient lighting create more depth and flexibility than relying on one harsh overhead fixture.
Care and Maintenance
Dust the shade regularly with a soft, dry brush or clean microfiber cloth. Support the shade gently from the inside frame rather than pressing against the decorated surface.
Do not saturate it with water or household cleaner. Spot-test any cleaning method in an inconspicuous place. Inspect glued trim periodically and remove the shade from service if the backing, frame, fitter, or lining becomes damaged.
My Experience Making a DIY Moroccan Lamp Shade
The first time I attempted this project, I began with the dangerous confidence that appears whenever a tutorial includes the words “easy afternoon craft.” I bought a plain ivory drum shade, a geometric stencil, copper paint, and enough decorative trim to outfit a very small theater company.
My original plan was elaborate: three paint colors, two metallic finishes, a double border, and dangling beads. Fortunately, I tested the design on cardboard before touching the shade. The sample looked less like a refined Moroccan lantern and more like a casino carpet having an emotional crisis.
I simplified the palette to terracotta and antique gold. That single decision improved everything. The warm colors suited the ivory background, and the metallic paint became an accent instead of a full-volume announcement.
The most important lesson was learning to remove paint from the stencil brush. At first, blotting away most of the paint felt wasteful. Then my first motif bled under the template and emerged looking as though it had melted in the sun. After that, I used an almost-dry brush and built the color gradually. The edges became dramatically cleaner.
Alignment was the next challenge. I had assumed I could simply follow the previous motif, but a tiny spacing error becomes surprisingly obvious after it has been repeated eight times. Measuring the shade and adding registration marks took only a few minutes and prevented the pattern from slowly climbing toward the upper rim.
I also discovered that the back seam is your friend. It provides a natural starting point and a convenient location for any imperfect join. My last pattern repeat did not fit perfectly, so I covered the meeting point with a narrow vertical stripe of antique gold. It looked intentional, which is one of the most valuable phrases in the DIY vocabulary.
Once the main pattern dried, I added tiny gold dots at the intersections. This was the moment the shade began to feel special. The dots caught the light without overpowering the terracotta design. I briefly considered adding beads, remembered my original casino-carpet sample, and wisely put them back in the drawer.
The finished shade looked good in daylight, but the real test came after sunset. With a warm-white LED bulb, the ivory background developed a soft amber glow while the painted motifs became darker and more defined. The gold details reflected just enough light to suggest aged brass.
I monitored the lamp during its first use and checked that the shade remained stable, well ventilated, and clear of the bulb. Nothing smelled unusual, loosened, or became excessively warm. That simple test reinforced why decorating an intact commercial shade is preferable to improvising the electrical parts.
The project also changed how I evaluate inexpensive secondhand lamps. A plain shade is no longer a deal-breaker; it is an invitation. Thrifted bases can become much more cohesive when paired with a custom shade, and a small amount of paint can connect an otherwise mismatched lamp to the colors already in a room.
Most importantly, the handmade irregularities became part of the appeal. One star is slightly wider than the others. A gold dot sits a fraction too low. Nobody has ever noticed, and the lamp looks warmer and more personal because it is not factory-perfect.
My practical advice is to begin with a restrained plan, test every material, use thin paint, mark your repeats, and stop decorating sooner than your excited crafting brain recommends. You can always add one more detail tomorrow. Removing seventeen tassels is a less joyful activity.
Conclusion
A DIY Moroccan lamp shade offers a manageable way to bring color, geometric pattern, warm metallic detail, and handcrafted character into a room. Starting with a sound commercial shade keeps the project approachable, while careful measuring and light stencil coats produce a much cleaner finish.
The final design can be bold and jewel-toned, calm and neutral, or somewhere pleasantly in between. Keep the electrical components unchanged, follow the lamp’s wattage limits, use an appropriate LED bulb, and place all embellishments safely on the exterior. Then switch on your newly decorated lamp and enjoy the fact that an ordinary shade now looks considerably more traveled than you are.
Note: This tutorial covers decorative modification of an existing lamp shade only. Follow all manufacturer instructions, maintain proper bulb clearance and ventilation, and consult a qualified electrician when a lamp, socket, cord, plug, or fixture requires repair.