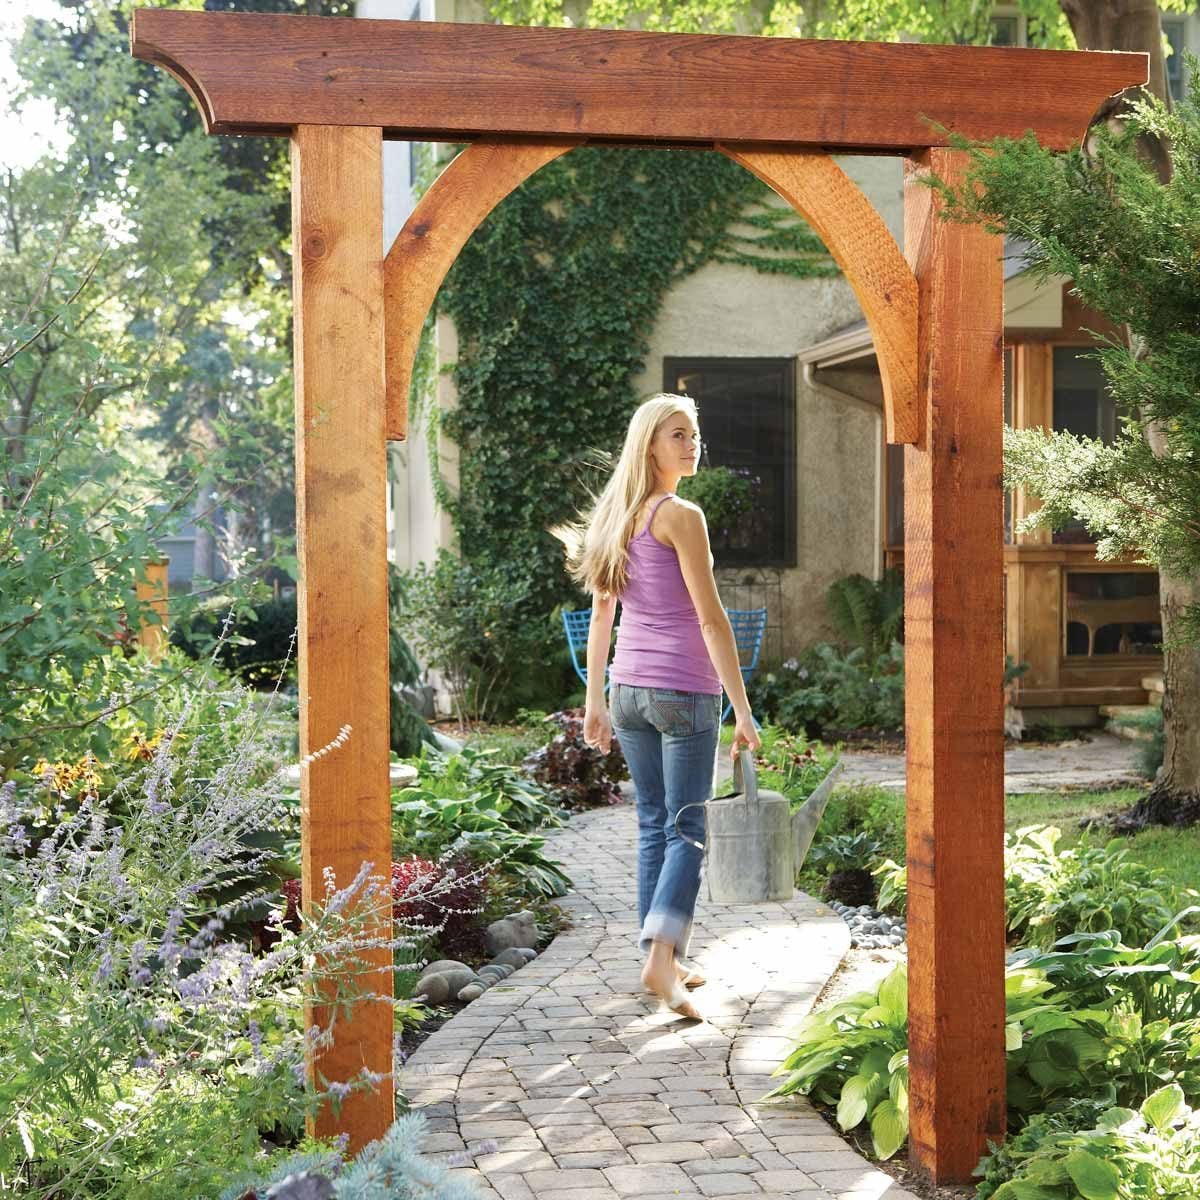
A garden arch frames a path, marks an entrance, adds height to a flat landscape, and gives cucumbers somewhere to go besides directly into your personal space. Better still, you do not need cabinetmaker-level skills to build one.
This DIY garden arch combines four wood posts, simple trellis sides, and a curved galvanized livestock panel. The wood creates a polished, permanent frame; the flexible steel grid forms a smooth arch without steam-bending lumber or cutting complicated curves. The finished opening is about 48 inches wide, 30 to 36 inches deep, and roughly 8 feet high at the center.
Why This Garden Arch Design Works
Traditional wooden arbors are beautiful, but shaping a strong curved roof can require laminated strips, templates, or careful jigsaw work. A galvanized panel bends into a consistent curve, provides many attachment points for climbing plants, and visually disappears as foliage fills in.
The side frames carry the structure. Ground-contact posts resist decay near the soil, exterior rails keep everything aligned, and knee braces reduce wobble. The steel panel forms the arch and supports plants, making this project manageable for a confident beginner.
Project Size, Time, and Skill Level
- Clear opening: About 48 inches wide
- Side depth: 30 to 36 inches
- Overall height: Approximately 7 feet 8 inches to 8 feet
- Working time: One day, plus footing and finish drying time
- Skill level: Beginner to intermediate
Keep at least 36 inches of walking width. A 42- to 48-inch opening feels better once leaves start leaning into the aisle like tiny green toll collectors.
Materials and Tools
Materials
- Four 4×4 posts, 8 or 10 feet long depending on the required footing depth
- Four 2×4 rails sized to the depth of the side frames
- Four 2×4 knee braces, approximately 16 to 20 inches long
- Two exterior lattice panels or enough 1×2 strips for side trellises
- One galvanized livestock-panel section, about 72 inches long and 30 to 36 inches wide
- Exterior structural screws and corrosion-resistant lattice fasteners
- Galvanized pipe straps, heavy fence staples, or clips sized for the panel wire
- Gravel and concrete mix or compactable crushed stone
- Exterior stain, paint, or clear finish
- Soft plant ties or garden clips
Tools
- Tape measure, pencil, stakes, string, level, and framing square
- Posthole digger or auger
- Circular saw or miter saw
- Drill/driver and bits
- Bolt cutters or an angle grinder with a metal-cutting wheel
- Clamps, shovel, wheelbarrow, safety glasses, and heavy gloves
Choose straight lumber with minimal twist. Cedar and redwood are naturally decay resistant; ground-contact pressure-treated lumber is usually the practical choice for buried posts. Use hot-dip galvanized or stainless-steel fasteners compatible with treated lumber and wet outdoor conditions.
How to Build a Garden Arch Step by Step
1. Choose the Location and Confirm the Size
Select a reasonably level site where the arch frames a path rather than interrupts it. Check nearby shrubs, gate swing, irrigation, roof runoff, and access for wheelbarrows. Contact 811 before digging so underground utilities can be marked. Check local rules if the arch will be unusually large, attached, gated, or close to a property line.
Mark four post locations as a rectangle with a 48-inch clear opening and 30 to 36 inches from front to back. Measure both diagonals; equal diagonals mean the layout is square. This prevents an arch that appears to be politely leaving the garden.
2. Build the Side Frames
Cut the upper and lower rails to span each front-and-back post pair. On a flat surface, position the upper rail about 72 inches above finished grade and the lower rail 12 to 18 inches above grade. Square the assembly, predrill near board ends, and fasten with exterior structural screws.
Add a knee brace near each upper corner, then repeat for the second frame. Building flat is easier than holding boards level in midair while mosquitoes provide management feedback.
3. Add the Side Trellises
Cut exterior lattice to fit between the posts and rails, leaving clearance above the soil. Fasten it with corrosion-resistant hardware, or make a custom pattern from 1×2 strips. Thin slats suit clematis and other vines that wrap tendrils or leaf stems around narrow supports.
Keep the pattern open for airflow, pruning access, and lower wind resistance.
4. Dig and Prepare the Postholes
Dig four holes suitable for the posts, soil, wind, and climate. Decorative arbors often use 24- to 36-inch-deep footings, but cold regions may require installation below the local frost depth. Loose or wet soil can also require deeper or wider holes. Add 4 to 6 inches of compacted gravel for drainage.
Use a level reference string so the two side frames finish at the same height; yards rarely volunteer to be perfectly flat.
5. Set the Side Frames
Place the first frame in its holes, brace it temporarily, and check both posts for plumb. Set the second frame, verify the clear opening, and confirm that the upper rails are level with each other.
Add concrete or compacted stone using your chosen footing method. If using concrete, slope its top away from the wood. Recheck plumb, width, depth, and diagonals before the footing sets, then allow it to cure as directed.
6. Prepare the Metal Panel
Cut the galvanized panel to roughly 72 inches long and the same width as the side-frame depth. Wear eye protection, long sleeves, and heavy gloves; cut wire is sharp, and a bent panel stores spring energy. File rough points or cap exposed ends.
Use a heavy welded-wire panel for vigorous vines or fruiting crops. Lightweight poultry wire can sag under mature squash, grapes, or rain-soaked foliage.
7. Bend and Fasten the Arch
With a helper, place one short end of the panel on the upper rail of the first side frame. Bend it gradually until the other end reaches the opposite rail. Center the panel and clamp both ends before fastening.
Secure each end with multiple galvanized straps, heavy staples, or approved clips spaced along the rail. Each fastener should capture a full panel wire. Adjust the curve before final tightening; one lonely screw at each corner is not a structural plan.
8. Finish the Structure
Sand sharp edges, treat cut ends when required, and apply a finish compatible with the lumber. Fresh pressure-treated wood may need drying time before coating, so follow the product directions rather than trying the “paint now, regret later” method.
Collect metal offcuts and stray screws. Never burn pressure-treated scraps, and keep mulch away from the post bases so the wood can dry after rain.
Choosing Plants for Your DIY Garden Arch
Match plants to the climate and their climbing method. Grapes and many clematis varieties prefer thin wire or narrow lattice. Twining vines such as pole beans wrap stems around supports. Climbing roses are ramblers and usually need loose ties.
For quick seasonal coverage, consider pole beans, cucumbers, nasturtiums, black-eyed Susan vine, or another locally suitable annual. For long-term flowers, choose a regionally adapted clematis or climbing rose and check local invasive-plant guidance.
Design for mature weight. Grapes become heavy, kiwifruit needs a strong permanent support, and dense wisteria can overwhelm a light arch. Upgrade posts, braces, footings, and connectors for vigorous perennial vines.
Maintenance That Keeps the Arch Standing
- Inspect yearly for loose hardware, rust, split wood, and movement at the soil line.
- Prune vines so weight stays balanced across both sides.
- Replace tight plant ties before they constrict growing stems.
- Touch up exposed end grain and worn finish.
- Check the arch after severe wind, heavy snow, or rain-soaked crops.
Common Garden Arch Mistakes to Avoid
Shallow Footings
A tall, vine-covered structure catches wind. Posts set only a few inches into loose soil may lean even when the carpentry is perfect.
Indoor Fasteners
Drywall screws and uncoated hardware belong indoors. Use exterior structural screws, hot-dip galvanized hardware, or suitable stainless steel.
Underestimating Mature Vines
A delicate arch may carry annual flowers but not mature grape or kiwifruit vines. Design for eventual mass, not the charming nursery pot.
Too Little Headroom
Measure the lowest point of the curved panel and allow extra clearance for foliage hanging below it.
Conclusion
Learning how to build a garden arch is mainly an exercise in careful layout, solid footings, and outdoor-rated materials. Square two side frames, set them plumb, bend a galvanized panel into a smooth roof, and secure every connection with corrosion-resistant hardware.
The result can define an entrance, support vegetables, display flowering vines, or turn an ordinary path into a destination. Build for the mature plant and leave comfortable width and headroom. Once foliage fills the grid, the hardware fades from view and the arch looks as though it always belonged there.
Experience-Based Lessons From Real-World Garden Arch Projects
The most useful lesson from repeated DIY garden arch builds is that scale is difficult to judge on paper. A four-foot opening sounds wide until two mature vines lean inward, a wheelbarrow arrives, and someone tries to walk through while carrying a tray of seedlings. Mark the full footprint with stakes and string, then physically walk through it before digging. Carry the widest garden tool you expect to use. That simple rehearsal often leads builders to add several inches of width, and those inches are rarely regretted.
Another recurring lesson is to assemble as much as possible on a flat surface. Side frames built on a patio, driveway, or pair of sawhorses are easier to square and far easier on the shoulders. Temporary diagonal braces may look unnecessary while the frame is lying down, but they are wonderfully persuasive once the wind begins pushing the structure during installation. Leave those braces in place until the footings are fully stable.
The metal panel is usually the most entertaining part of the project, provided “entertaining” includes wrestling a large springy rectangle. Builders consistently have a better experience with two people, several clamps, gloves, and a slow bend. Fastening one end permanently before controlling the other can make the panel twist. Clamping both ends first allows the curve to be centered and corrected. It also reduces the chance that the panel will launch itself into a shrub with the confidence of a poorly trained trampoline.
Finishing decisions matter less than drainage and fasteners. A beautiful coat of paint cannot rescue a post that sits in a water-filled hole, and decorative screws will not help if they corrode inside pressure-treated lumber. Long-lasting builds tend to have boring but effective details: gravel under posts, water shedding away from the base, protected end grain, and hardware chosen for exterior exposure. Those details disappear when the project is finished, which is precisely why people are tempted to skip them.
Plant selection also changes the experience. Annual vines provide fast gratification during the first summer and are useful while slower perennials establish. Pole beans and flowering annuals can make a new arch look intentional within weeks. A climbing rose or clematis may take longer, but it rewards patient training. Soft ties should be checked through the season because stems thicken quickly. Leaving one side accessible for pruning prevents future maintenance from becoming a leafy obstacle course.
Finally, successful builders expect the arch to evolve. Wood changes color, vines choose their own routes, and the first planting plan is rarely the last. An arch that looks bare on installation day often looks balanced once plants fill the grid. Resist crowding both sides with several vigorous species. Start with one or two compatible climbers, observe how sunlight and wind move through the site, and adjust next season. A garden arch is not merely a weekend object; it becomes living architecture, and its best version usually appears gradually.