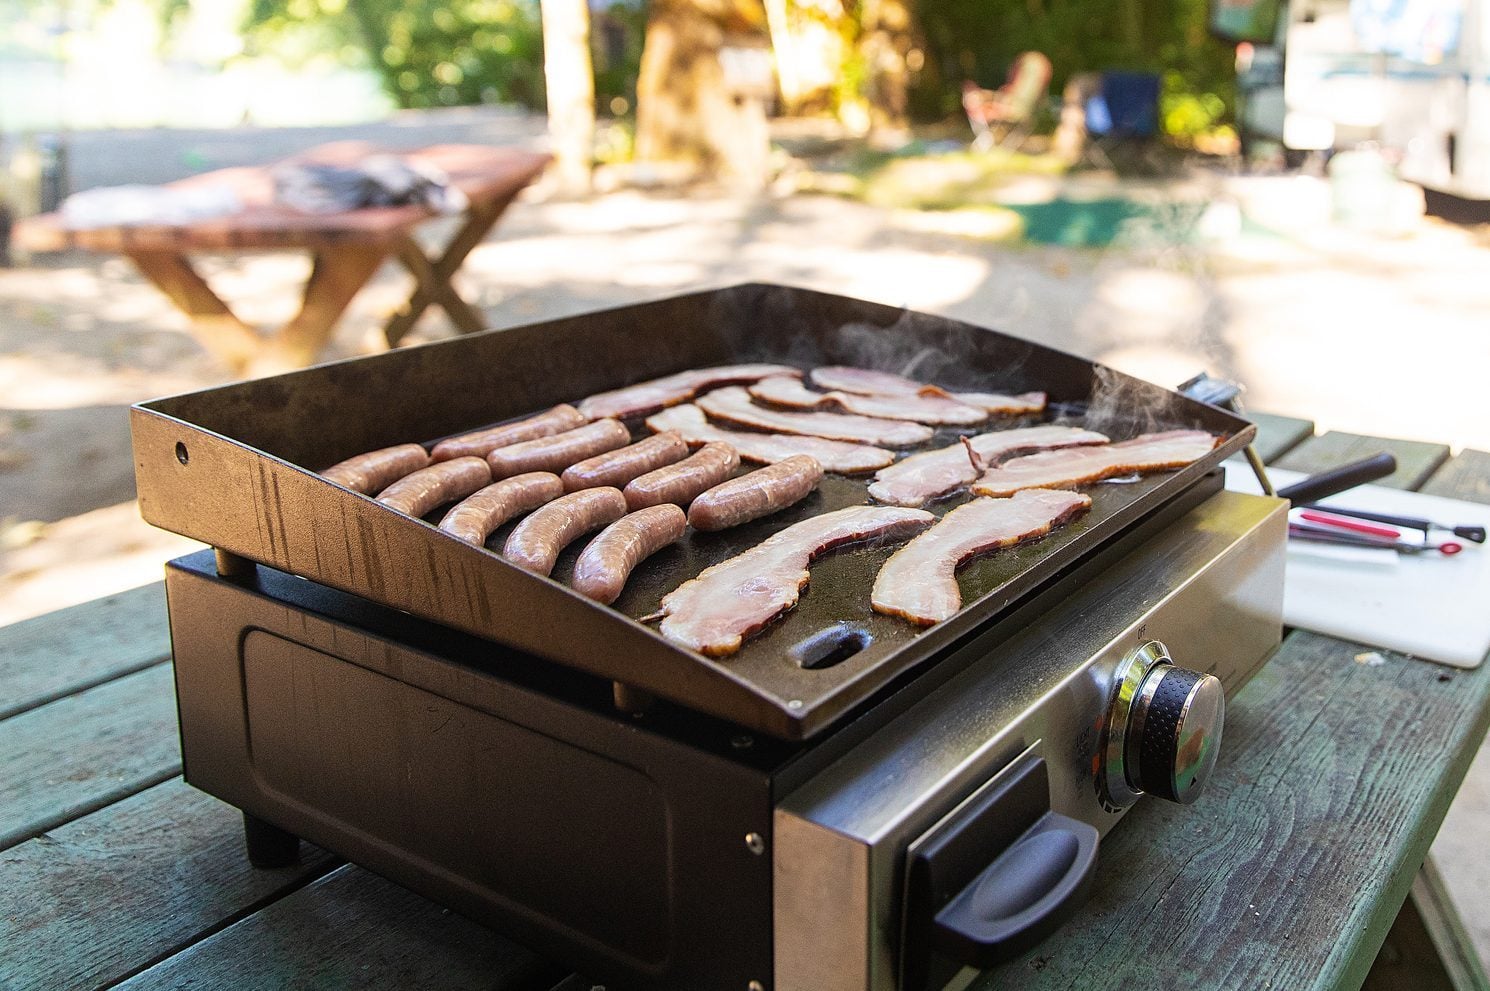
A new Blackstone griddle arrives looking impressively clean, shiny, and ready for a mountain of smash burgers. Unfortunately, that silvery cooking surface is not quite ready for its first close-up. Before food touches the steel, the griddle needs several thin layers of baked-on oil to create a durable, easy-release finish.
Learning how to season a Blackstone griddle is not complicated, but small details matter. Too much oil creates a sticky swamp. Too little heat leaves the coating soft. Skipping the edges invites rust to move in like an unwanted houseguest who brought three suitcases.
The best method is simple: clean the new cooktop, dry it completely, preheat it, apply an extremely thin coat of suitable oil, and heat that oil until it stops smoking. Repeat the process several times. This guide explains every step, including which oil to use, how to avoid common mistakes, and how to maintain the seasoning after every cook.
What Does Seasoning a Blackstone Griddle Mean?
Seasoning does not mean sprinkling the cooktop with salt, pepper, and a suspiciously large amount of garlic powder. In griddle care, seasoning is the process of heating a thin film of oil until it transforms into a hardened coating bonded to the steel.
This transformation is called polymerization. When the right oil receives enough heat, its molecules link together and form a firm, water-resistant layer. Repeated coats gradually darken and smooth the cooking surface. The finished seasoning helps food release more easily and separates the steel from moisture that could cause rust.
A properly seasoned Blackstone is not identical to a factory-made synthetic nonstick pan. Eggs may still require a little cooking oil, and cheese can still stage a rebellion if left unattended. However, the surface becomes noticeably easier to cook on, clean, and protect over time.
Why a New Blackstone Griddle Needs Seasoning
Most traditional Blackstone steel cooktops require initial seasoning before cooking. A new griddle may contain dust, manufacturing residue, or protective material left from shipping. The bare steel is also vulnerable to moisture once that temporary protection is removed.
Initial seasoning provides three important benefits:
- Improved food release: Thin polymerized layers fill microscopic irregularities in the steel.
- Rust protection: Seasoning creates a barrier between the metal, oxygen, and moisture.
- Better long-term performance: Regular cooking and maintenance strengthen the surface rather than wearing it out.
Always check the manual for your exact model before beginning. Griddle materials and factory treatments can vary, especially as manufacturers introduce preseasoned or rust-resistant cooktops.
What You Need to Season a Blackstone Griddle
Gather everything before lighting the burners. Seasoning is a smoky, high-heat job, and this is not the ideal moment to discover that your paper towels are still inside beside the sleeping dog.
- Warm water
- A small amount of mild dish soap for the initial cleaning
- A clean cloth or nonabrasive sponge
- Paper towels, lint-free towels, or blue shop towels
- Long metal tongs
- Heat-resistant gloves
- A high-heat cooking oil or griddle seasoning conditioner
- A squeeze bottle, if available
- A griddle scraper for future maintenance
Work outdoors in an open, well-ventilated location. The oil must smoke during seasoning, so performing the process in an enclosed garage can quickly turn an ordinary afternoon into an accidental smoke-machine demonstration.
What Is the Best Oil for Seasoning a Blackstone Griddle?
Blackstone’s seasoning and cast-iron conditioner is the most straightforward choice because it is formulated specifically for griddle maintenance. It contains a blend of oils, shortening, and wax designed to create a protective cooking surface.
However, you do not need a specialty product to obtain good results. Canola oil, vegetable oil, grapeseed oil, and other neutral oils can create durable seasoning when applied correctly. Blackstone’s own instructions emphasize that thin, repeated layers are more important than obsessing over one supposedly magical oil.
| Seasoning Option | Advantages | Considerations |
|---|---|---|
| Blackstone conditioner | Convenient, easy to spread, and designed for griddles | Costs more than ordinary cooking oil |
| Canola oil | Affordable, neutral, and widely available | Must be applied in very thin coats |
| Vegetable oil | Inexpensive and forgiving for beginners | Different blends may perform slightly differently |
| Grapeseed oil | Neutral flavor and suitable for high-heat use | Usually more expensive than canola oil |
| Avocado oil | Handles high cooking temperatures well | More expensive and unnecessary for basic seasoning |
| Melted shortening | Easy to control and commonly used on iron cookware | Must be buffed carefully to prevent a thick coating |
Lodge recommends high-smoke-point options such as vegetable oil, melted shortening, or canola oil for reseasoning iron cookware. Other griddle manufacturers similarly recommend canola or grapeseed oil and stress the importance of covering the cooktop, walls, and edges evenly.
Oils and Fats to Avoid for Initial Seasoning
Butter is excellent for finishing pancakes but poor for building the first seasoning layers because it contains water and milk solids. Bacon grease can also leave an inconsistent coating due to its salt, flavoring, and other residues. Save both for cooking after a stable foundation has formed.
Extra-virgin olive oil is not the most practical first choice. Although some Blackstone instructions list olive oil as usable, neutral refined oils are generally easier to work with at sustained griddle temperatures. Expensive oil does not automatically create expensive-looking seasoning. Technique wins this contest.
How to Season a Blackstone Griddle Step by Step
Step 1: Inspect and Assemble the Griddle
Confirm that the griddle is properly assembled, the grease-management components are installed, and the cooktop is seated correctly. Place the appliance on a level, noncombustible surface with plenty of open space around it.
Check the propane connection according to the manufacturer’s instructions. Do not begin seasoning while packaging, tools, food, or cleaning supplies are sitting on the cooktop.
Step 2: Wash the New Cooktop
Mix warm water with a small amount of mild dish soap. Wipe the entire cooking surface to remove dust and residue from manufacturing, storage, and shipping. Clean the corners and sidewalls rather than concentrating only on the large center area.
Rinse away all soap with clean water. This initial wash is specifically recommended for a new traditional Blackstone cooking surface. Routine cleaning after cooking usually relies on scraping, water, and wiping rather than a full soapy wash.
Step 3: Dry the Griddle Completely
Dry the surface with clean towels, then light the burners briefly to evaporate moisture hiding in corners and along the edges. Do not leave standing water on bare steel. Even a small wet patch can begin oxidizing surprisingly quickly.
Step 4: Preheat the Griddle
Turn the burners to high and allow the empty surface to heat. Blackstone advises heating a new griddle for approximately 10 to 15 minutes, during which the steel may begin changing from silver-gray to bronze or brown.
Color changes are normal. The surface may develop circles, stripes, or uneven patches above the burners. Backyard griddles naturally contain hotter and cooler zones, so a perfectly uniform color should not be expected during the first few minutes.
Step 5: Apply a Very Thin Coat of Oil
Reduce or turn off the burners briefly if necessary for safer application. Add a small amount of oil to the cooktop. For a full-size 36-inch griddle, manufacturer guidance commonly calls for only a few tablespoonsnot a swimming pool with burner knobs.
Grip folded paper towels or a lint-free cloth with long tongs. Spread the oil across the entire cooking surface, sidewalls, corners, and upper edges. Continue wiping until the steel looks lightly polished but not visibly wet.
The best rule is to behave as though you accidentally added oil and are desperately trying to wipe it all away. If you see puddles, streaks, or droplets, the coating is too thick. Blackstone warns that heavy coats can produce sticky buildup and may eventually chip.
Step 6: Heat the Oil Until It Stops Smoking
Turn the burners back up. The oil will begin smoking as it reaches the temperature required for polymerization. Keep heating the griddle until the visible smoke largely stops.
Do not add another layer while the current one is still wet or smoking heavily. Each coat needs enough heat and time to harden before the next application. A sticky finished surface usually means too much oil was used, insufficient heat was applied, or the coat did not receive enough time to finish bonding.
Step 7: Repeat the Thin-Coat Process
Apply another extremely thin coat and heat it until the smoking ends. Repeat the cycle until you have completed approximately three or four rounds. Blackstone’s full seasoning guide recommends multiple rounds and describes a dark-brown cooktop as the desired result.
The griddle may not become uniformly jet-black during its first seasoning session. That is not a failure. Early seasoning can appear amber, brown, bronze, or mottled. Regular cooking gradually fills lighter areas and strengthens the layers.
Step 8: Cool and Add a Protective Film
After the final coat has finished smoking, turn off the burners and close the propane valve. Let the griddle cool until it is safe to handle but still slightly warm.
Apply one final whisper-thin film of oil or conditioner. This last application is primarily for storage protection, so it does not need to be heated until it smokes. Wipe away excess oil, allow the cooktop to cool completely, and then close the hood or install the cover.
How to Tell When the Blackstone Is Properly Seasoned
A usable initial seasoning should have the following characteristics:
- The cooktop is dry rather than greasy or tacky.
- Much of the steel has changed from silver to bronze, brown, or black.
- No thick oil pools remain around the corners or grease opening.
- A clean paper towel does not pick up wet, gummy residue.
- The surface has a subtle sheen rather than a glossy varnish-like coating.
A patchy appearance does not automatically indicate poor seasoning. Both Lodge and experienced griddle guidance note that early coats can be uneven because heat zones and cooking patterns differ. Continued use helps those overlapping layers join together.
What Should You Cook First?
Choose a first meal that uses a moderate amount of oil and covers several parts of the cooktop. Sliced onions, hash browns, sautéed vegetables, burgers, and breakfast potatoes are practical options. Moving food around encourages oil to reach lighter sections and begins the natural maintenance process.
Onions are frequently recommended as an early griddle cook because they spread easily, absorb loose residue, and provide a convenient way to work across the surface. Their alleged seasoning superpowers are debated, but caramelized onions are rarely a disappointing consolation prize.
For the first few sessions, avoid making delicate eggs the only test of success. Even excellent seasoning works best when the griddle is preheated and the food is cooked with an appropriate amount of oil or butter.
How to Clean and Maintain a Seasoned Blackstone
Good seasoning is maintained through small habits after every meal rather than occasional acts of heroic scrubbing.
- While the griddle is still warm, scrape food particles and grease toward the collection opening.
- Add a small amount of water to stubborn residue so the resulting steam loosens it.
- Wipe the surface clean with paper towels or a griddle-safe cloth held in tongs.
- Allow remaining moisture to evaporate completely.
- Spread a very thin protective coat of cooking oil across the surface.
- Empty the grease container after its contents have cooled.
- Store the griddle beneath a hood and weather-resistant cover.
Blackstone recommends scraping, using water for stuck-on food, drying the surface, and adding oil between uses. Keeping the cooktop dry is especially important in humid or coastal environments, where exposed steel can rust quickly.
Seasoning does not replace food-safety practices. Keep utensils that touched raw meat separate from cooked food, clean surrounding preparation surfaces, and use a food thermometer when cooking meat or poultry.
Common Blackstone Seasoning Problems and Solutions
The Surface Feels Sticky
Sticky seasoning is almost always caused by excess oil or incomplete heating. Turn on the griddle and heat it until the remaining oil stops smoking. If the surface remains gummy, clean away the soft residue and rebuild the seasoning with thinner coats.
Do not solve stickiness by adding more oil. That is like fixing an overflowing bathtub by opening a second faucet.
The Seasoning Looks Patchy
Patchiness is common on a new cooktop because the areas directly above burners heat faster than the perimeter. Continue cooking across the entire surface and maintain it with light oil applications. The color should become more consistent over time.
The Coating Is Flaking
Black flakes may be carbonized food residue rather than seasoning. Clean the surface thoroughly and inspect it. If thick seasoning is genuinely peeling, remove loose material with a scraper or abrasive griddle pad, smooth the affected area, and apply several thin replacement coats.
Polymerized seasoning is bonded to the metal and is more durable than many people assume. Thick layers of half-hardened grease are much more likely to peel than properly applied micro-thin coats.
Rust Appears on the Cooktop
Minor rust does not mean the griddle is ruined. Apply a little cooking oil and scrub the affected area with steel wool, medium-grit sandpaper, or an appropriate griddle stone until the rust is removed. Clean away the residue, dry the steel thoroughly, and reseason the exposed section.
For widespread rust, strip and restore the entire cooking surface rather than covering corrosion with fresh oil. Seasoning works best when it bonds directly to clean metal.
Frequently Asked Questions
How many times should a new Blackstone be seasoned?
Three to four thin coats create a reliable starting foundation for most traditional Blackstone steel griddles. Additional cooking sessions will continue building and improving the surface.
How long does seasoning take?
Plan on at least an hour, and potentially longer for a large model. The exact time depends on the weather, burner output, cooktop size, oil, and number of coats. Do not rush a layer simply because the neighbors have started asking whether the smoke means dinner is ready.
Can you use soap on a Blackstone?
Use mild soapy water for the initial cleaning of a new, unseasoned Blackstone unless the model manual says otherwise. For everyday maintenance, Blackstone generally recommends scraping, water, wiping, drying, and re-oiling the cooktop.
Modern mild dish soap does not instantly dissolve fully polymerized seasoning, but frequent soaking, harsh chemicals, and poor drying are unnecessary risks. Following the instructions for your particular griddle remains the safest approach.
Should you season the bottom of the griddle plate?
Season the cooking surface, sidewalls, corners, and exposed upper edges unless the manual provides different instructions. The underside sits close to the burners and is not normally maintained like the food-contact surface.
How often should a Blackstone be reseasoned?
A complete reseasoning is not required on a fixed weekly schedule. Apply a protective film after each cook and continue using the griddle regularly. Perform a deeper reseasoning when food begins sticking unusually, bare gray steel appears, rust develops, or damaged coating has been removed.
Real-World Experience: What the First Seasoning Session Usually Feels Like
The first experience of seasoning a Blackstone often begins with confidence and quickly turns into unnecessary suspicion. The owner washes the cooktop, lights the burners, and waits for the smooth silver surface to become uniformly black. Instead, large bronze circles appear over the burners while the corners remain stubbornly gray. This is normally the moment someone reaches for a phone and searches, “Did I ruin my new Blackstone?”
Usually, nothing is wrong. The middle of the griddle receives stronger direct heat, while the edges warm more slowly. A first coat may darken in rings, clouds, or stripes. The cooktop can look like a weather map predicting a 90% chance of pancakes. Those patterns become less noticeable after repeated coats and several real cooking sessions.
Another common experience involves using far too much oil. A few tablespoons do not look sufficient for such a large surface, so the enthusiastic new owner adds another generous squeeze. The griddle becomes glossy, the smoke grows dramatic, and the finished cooktop feels tacky after cooling. The important lesson is that visible oil is usually excess oil. The goal is not to paint the steel but to leave behind the thinnest possible molecular building material.
Seasoning also produces more smoke than some beginners expect. The first cloud can look alarming, but smoke is part of heating the oil through its transformation. Outdoor airflow and open space make the process manageable. Standing directly over the cooktop to inspect it every six seconds is not necessary and is a fine way to make your clothes smell like a county fair.
The second or third coat is typically when the process begins making sense. The surface darkens, the oil spreads more easily, and dry areas become easier to identify. The owner also gets better at controlling the folded towel with tongs. The first attempt may leave tiny paper fibers on the steel; switching to lint-free cloths or sturdy shop towels often makes later coats cleaner.
The first cooking session provides another reality check. A newly seasoned surface may handle onions and potatoes beautifully but still hold onto an egg if the griddle was not preheated or lubricated properly. Seasoning helps food release, but temperature control remains equally important. A cold griddle with perfect seasoning is still a cold griddle.
After several meals, maintenance becomes surprisingly fast. Scrape while warm, steam away stubborn residue, wipe the surface dry, and add a tiny protective coat. The cooktop gradually develops a deeper color and smoother feel without another elaborate ceremony. Frequent cooking becomes part of the seasoning process, which is excellent news for anyone willing to protect expensive outdoor equipment by making more cheesesteaks.
The most useful experience-based lesson is to stop chasing cosmetic perfection. A working griddle may have lighter corners, darker burner zones, spatula marks, or subtle color differences. What matters is that the surface is clean, dry, smooth, protected from rust, and improving with use. Season it carefully, cook on it regularly, and let time handle the final polishing.
Conclusion
The best way to season a Blackstone griddle is to focus on thinness, heat, and repetition. Wash a new traditional steel cooktop, dry it thoroughly, preheat it, and apply a nearly invisible film of canola oil, vegetable oil, grapeseed oil, or griddle conditioner. Heat each coat until the smoke stops, repeat the process three or four times, and finish with a light protective film.
After that, regular cooking does much of the work. Clean the griddle while it is warm, remove all moisture, oil it lightly, and protect it from weather. The cooktop may not resemble a polished black mirror immediately, but it should become darker, smoother, and easier to use with every batch of burgers, onions, and breakfast potatoes.