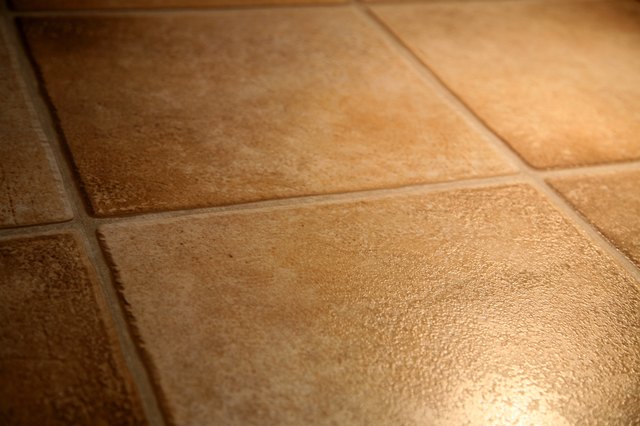
Glossy tile floors can look crisp, clean, and just a little smug. That shine is great when you want a polished bathroom or kitchen, but it becomes a problem when you want to paint, refinish, coat, or improve traction. New coatings do not love slick surfaces. They slide around, peel early, and behave like a toddler told to wear shoes. That is where deglossing comes in.
Deglossing tile flooring means dulling the shiny surface so primer, paint, epoxy, floor coating, or anti-slip treatment can grip better. The goal is not to grind your tile into dust or erase the glaze completely. Instead, you create a clean, lightly abraded, bond-friendly surface. Done correctly, deglossing helps prevent peeling, fish-eyes, bubbling, and patchy adhesion. Done poorly, it gives you a floor that looks refreshed for three days and then starts shedding like a nervous golden retriever.
This guide explains how to degloss tile flooring safely and effectively, including when to sand, when to use a liquid deglosser, how to clean grout, what mistakes to avoid, and how to know the surface is ready for the next step.
What Does It Mean to Degloss Tile Flooring?
To degloss tile flooring is to reduce the shine on ceramic, porcelain, stone, or previously sealed tile so another product can adhere. Glossy tile is often nonporous, especially glazed ceramic and porcelain. That nonporous surface is fantastic for resisting stains and moisture, but not so fantastic when you want primer or paint to stick.
Think of glossy tile like a freshly waxed car. Beautiful? Yes. Easy to coat without preparation? Absolutely not. Deglossing creates microscopic scratches or chemical dulling that gives the new coating “tooth.” That tooth is what lets bonding primer, tile paint, epoxy, or sealer hold on instead of sitting on top like a fancy sticker.
When Should You Degloss Tile Floors?
You should degloss tile flooring before painting tile floors, applying a tile refinishing kit, installing certain peel-and-stick products, adding some anti-slip coatings, or recoating a previously sealed surface. It is especially important in kitchens, bathrooms, laundry rooms, mudrooms, and entryways where moisture and foot traffic test every shortcut you were tempted to take.
You may not need full deglossing if you are only cleaning tile for normal maintenance. Regular ceramic tile cleaning should preserve the surface, not rough it up. Deglossing is a preparation step for a finish change, not a weekly chore. Please do not attack your floor with sandpaper every Saturday. The floor has done nothing to deserve that.
Before You Start: Know Your Tile Type
Ceramic and Porcelain Tile
Glazed ceramic and porcelain tile are the most common surfaces homeowners want to degloss. They are durable, dense, and often shiny. These tiles usually need thorough cleaning followed by light sanding, abrasive pad scuffing, or a tile-safe deglossing product before primer or paint.
Natural Stone Tile
Marble, travertine, slate, limestone, and granite require more caution. Many stones are porous, acid-sensitive, or already sealed. Harsh chemical deglossers, acidic etching products, and aggressive sanding can permanently damage natural stone. If your stone floor is expensive, sentimental, or both, test in a hidden area or call a stone-care professional before experimenting.
Previously Painted or Sealed Tile
If the tile has old paint, wax, acrylic sealer, or a topical coating, deglossing alone may not be enough. Peeling paint and wax must be removed, not politely scuffed and ignored. A new coating is only as strong as the layer beneath it, so loose material must go first.
Tools and Materials You May Need
Gather your supplies before you begin so you do not end up walking across a half-prepped floor looking for gloves. That is how footprints become part of the design.
- Broom or vacuum
- Mop and clean buckets
- Degreasing cleaner or TSP substitute
- Nylon scrub brush for grout lines
- Painter’s tape and plastic sheeting
- Safety glasses and chemical-resistant gloves
- Dust mask or respirator for sanding
- 220-grit to 400-grit sandpaper or sanding screens
- Orbital sander or floor buffer with abrasive pad for larger areas
- Microfiber cloths
- Liquid deglosser or tile etching product, if suitable for your tile
- Clean water for rinsing
- Bonding primer, tile paint, epoxy, or coating for the next step
Step-by-Step Guide: How to Degloss Tile Flooring
Step 1: Inspect the Floor First
Start by checking the tile and grout. Look for cracked tiles, loose pieces, missing grout, deep chips, wax buildup, greasy zones, and old coatings. If tiles are loose or hollow-sounding, fix them before deglossing. Deglossing will not magically reattach a tile that has already emotionally moved out.
For painted tile floors, scrape away loose or peeling paint. If the previous paint is failing badly, you may need to strip it rather than simply scuff it. For waxed tile, remove wax with an appropriate wax stripper before sanding or priming.
Step 2: Clean Like You Mean It
Deglossing dirty tile is like putting sunscreen over mud. It may technically touch the surface, but it will not do its job. Sweep or vacuum the floor thoroughly. Then wash the tile with a degreasing cleaner, TSP substitute, or manufacturer-recommended cleaner. Focus on kitchen grease, soap scum, hair spray residue, pet messes, and mystery stickiness near the fridge.
Scrub grout lines with a nylon brush because grime loves grout. Rinse the floor with clean water and allow it to dry completely. If cleaner residue remains, primer or coating may not bond well. When in doubt, rinse twice.
Step 3: Protect Nearby Surfaces
Use painter’s tape along baseboards, cabinets, tubs, toilets, thresholds, and walls. If you are using a liquid deglosser or etching product, cover nearby surfaces with plastic sheeting. Some products can dull metal, damage finishes, or leave marks where you do not want them. Degloss the floor, not the vanity, the dog bowl, or your favorite slippers.
Step 4: Choose Your Deglossing Method
There are three common ways to degloss tile flooring: mechanical sanding, abrasive pad scuffing, and chemical deglossing. The best choice depends on your tile type, floor size, and what you plan to apply afterward.
Mechanical Sanding
Light sanding is one of the most reliable ways to dull glossy ceramic or porcelain tile. Use 220-grit sandpaper for general scuffing or 400-grit for a gentler finish. The goal is to remove shine, not carve trenches. For small bathrooms or laundry rooms, a hand sanding block or orbital sander may work. For larger tile floors, a floor buffer with the proper abrasive pad can save time and arm muscles.
Move evenly across the tile. Do not linger too long in one area, especially on decorative tile. Grout lines should be cleaned and lightly scuffed, but avoid grinding them down. After sanding, the tile should look dull and slightly cloudy rather than glossy.
Abrasive Pad Scuffing
Abrasive pads are useful when you want controlled dulling without the bite of sandpaper. They work well around corners, edges, grout lines, and textured tile. Use a hand pad for small sections or a machine pad for larger floors. This method is often enough when paired with a high-quality bonding primer, especially if the floor is already clean and only moderately glossy.
Chemical Deglossing
Liquid deglossers, sometimes called liquid sandpaper, can reduce gloss and help coatings adhere to certain surfaces. Some products are designed for painted or varnished surfaces, while others are made specifically for porcelain, ceramic, or glass. Read the label carefully. A general paint deglosser is not always a substitute for physically scuffing glossy tile.
If you use a chemical deglosser or etching paste, ventilate the area, wear gloves and eye protection, and follow the manufacturer’s timing exactly. Do not assume “more time equals better results.” With chemicals, more time sometimes equals a floor with regrets.
Step 5: Sand or Apply Deglosser in Sections
Work in manageable sections, such as 3-by-3 feet or 4-by-4 feet. If sanding, overlap your passes so the dulling is consistent. If using liquid deglosser, apply it evenly with a lint-free cloth, sponge, or pad as directed. Keep track of dwell time and do not let products dry in random puddles unless the instructions specifically allow it.
Pay extra attention to high-traffic lanes, glossy edges, and areas around sinks or appliances. These spots often contain invisible oils and residue that cause coatings to fail first.
Step 6: Remove Dust and Residue
After mechanical deglossing, vacuum thoroughly using a brush attachment or shop vacuum with good filtration. Then wipe the floor with a damp microfiber cloth. Repeat until the cloth comes up clean. Sanding dust is tiny, sneaky, and surprisingly determined to ruin your finish.
After chemical deglossing, rinse or neutralize according to the product label. Some products require a clean water rinse; others do not. Never skip the label directions. If residue remains, it can interfere with primer, paint, epoxy, or topcoat adhesion.
Step 7: Let the Floor Dry Completely
Tile and grout can hold moisture longer than they appear to. Let the floor dry fully before applying primer or coating. Grout lines are especially important because trapped moisture can lead to peeling, cloudy finishes, or bubbling. If the room is humid, use fans or a dehumidifier. Avoid blowing dust across the floor after all that careful cleaning.
Step 8: Test Adhesion Before Committing
Before coating the entire floor, test a small hidden area. Apply the primer, paint, or coating you plan to use. Let it dry and cure as directed, then test adhesion with painter’s tape or a light scratch test. If it peels easily, the floor needs more cleaning, more deglossing, a different primer, or a new life plan.
How to Tell If Tile Is Properly Deglossed
Properly deglossed tile should no longer reflect light like a mirror. It should look evenly dull, slightly hazy, or softly matte. When you run your hand over it, it may feel faintly textured, but not gouged. Water may spread a bit more evenly instead of beading aggressively, though this is not a perfect test for every tile type.
Look across the floor from a low angle. Shiny patches mean missed spots. Those glossy islands can become peeling islands later. Touch them up before moving to primer or coating.
Common Mistakes to Avoid
Skipping the Deep Clean
The most common mistake is sanding over dirt, grease, soap scum, or wax. This spreads contamination across the tile and embeds it into tiny scratches. Always clean first, degloss second, clean again.
Using the Wrong Chemical Product
Not every liquid deglosser works on tile. Some are intended for painted woodwork, cabinets, or varnished surfaces. For ceramic and porcelain, choose a product labeled for those materials or use mechanical scuffing with a bonding primer system.
Oversanding Decorative Tile
Patterned, handmade, encaustic-look, metallic, or printed tile may have delicate surface designs. Aggressive sanding can damage the pattern. Test first and use the gentlest method that creates enough adhesion.
Ignoring Safety
Sanding creates dust, and chemical deglossers can irritate skin, eyes, and lungs. Wear protection, ventilate the room, and keep children and pets away from the work area. If your home was built before 1978 and painted surfaces may be disturbed nearby, use lead-safe practices or consult a certified professional.
Painting Too Soon
Dry does not always mean cured. Primer, paint, and topcoats need time before they can handle foot traffic, rugs, water, or furniture. Follow the product label for recoat and cure times. Your patience will be rewarded with a finish that does not peel the first time someone walks in wearing sneakers.
Best Products to Use After Deglossing Tile
Deglossing is only preparation. The next product determines how durable the finished floor will be. For tile floors, choose a high-adhesion bonding primer, epoxy primer, urethane primer, or a tile-specific coating system. Standard wall paint is not made for floors and will not enjoy being stepped on repeatedly.
For high-traffic rooms, consider epoxy floor coatings, porch and floor enamel rated for interior floors, or dedicated tile refinishing kits. For bathrooms and laundry rooms, moisture resistance matters. For entryways, abrasion resistance matters. For kitchens, grease and cleaning resistance matter. In other words, pick the finish for the room’s real life, not its best behavior on photo day.
Can You Degloss Tile Without Sanding?
Yes, sometimes. A tile-safe chemical deglosser or etching product may reduce shine without traditional sanding. A high-quality bonding primer may also reduce the need for heavy sanding on some clean glossy surfaces. However, many glossy ceramic and porcelain tile floors still benefit from light mechanical scuffing because floor coatings face more abuse than wall coatings.
If you want the best chance of long-lasting adhesion, combine thorough cleaning, light scuffing, residue removal, and the correct primer. It is not glamorous, but neither is repainting a floor because the first version peeled in dramatic little flakes.
How Long Does Deglossing Tile Flooring Take?
A small powder room may take a few hours of cleaning, sanding, wiping, and drying time. A kitchen or large entryway can take most of a day, especially if grout is dirty or the tile is extremely glossy. Add more time if repairs, wax removal, or adhesion testing are needed.
The actual sanding or deglossing is not always the longest part. Cleaning, drying, taping, and dust removal often take more time than expected. Build that into your plan so you are not applying primer at midnight while whispering, “This was supposed to be easy.”
Maintenance After Deglossing and Refinishing
Once the floor has been deglossed and refinished, treat it gently during the cure period. Avoid rugs, wet mopping, furniture dragging, and heavy traffic until the coating has fully cured. After that, clean with mild soap and water or the coating manufacturer’s recommended cleaner. Avoid abrasive scrubbers unless the finish allows them.
Use felt pads under furniture, mats near exterior doors, and soft cleaning tools. Painted or coated tile floors can look beautiful, but they are not the same as factory-fired tile glaze. They need a little kindness. Not dramatic kindness. Just “don’t drag the refrigerator across it” kindness.
Experience Notes: What Deglossing Tile Flooring Is Really Like
The first thing most people learn while deglossing tile flooring is that “shiny” is stubborn. From standing height, a floor may look lightly dulled after a quick pass with sandpaper. Then you crouch down, tilt your head, and notice half the tiles are still reflecting the window like tiny bathroom mirrors. The lesson is simple: inspect from multiple angles. Gloss hides when you look straight down.
Another real-world lesson is that grout determines the mood of the whole project. Tile faces may clean quickly, but grout lines hold years of cleaner residue, body oil, cooking film, pet dust, and whatever that gray stuff is near the back door. A stiff nylon brush and patience make a big difference. If the grout stays dirty, the finished floor may look uneven even if the tile itself is beautifully prepared.
In small bathrooms, hand sanding can be manageable, but it feels slower than expected. Around toilets, vanities, and corners, an abrasive pad is often easier than a power sander. Power tools are helpful on open floors, but they cannot magically reach every edge. The edges are where peeling often begins, so do not skip them. A good rule is to treat corners like they are secretly judging the whole job.
Chemical deglossers can be helpful, but they are not all the same. Some work beautifully on old glossy paint but barely affect glazed porcelain. Others are made for ceramic, porcelain, and glass and can noticeably dull the surface. The label matters. So does ventilation. Even low-odor products deserve respect because floors are large surfaces and you are working close to them.
The biggest success factor is not brute force; it is sequence. Clean, rinse, dry, degloss, remove dust, wipe, dry again, then test. People who rush from sanding straight to painting often trap dust under the finish. The floor may look fine at first, but adhesion suffers. A microfiber cloth should come up clean before primer touches the floor.
One surprisingly useful trick is to mark your exit path before starting primer or coating. Deglossing itself does not trap you, but the next step can. Work from the farthest corner toward the door. Keep tools, trash bags, clean cloths, and water on the exit side. Many DIY floor projects become comedy scenes because someone carefully paints themselves into a corner and has to perform a barefoot escape worthy of reality television.
Finally, expect deglossed tile to look worse before it looks better. A properly scuffed floor can appear cloudy, scratched, and frankly rude. That is normal. You are preparing the surface, not creating the final look. Once the bonding primer and finish go down, all that dull preparation becomes the invisible reason the coating stays put. In home improvement, the boring steps are often the heroes. Deglossing tile flooring is one of those heroes, wearing safety glasses and covered in sanding dust.
Conclusion
Learning how to degloss tile flooring is really learning how to help a new finish stick. Glossy tile resists stains, moisture, and unfortunately, many coatings. By cleaning thoroughly, choosing the right deglossing method, dulling the shine evenly, removing every trace of dust or residue, and testing adhesion before coating the entire floor, you give primer, paint, epoxy, or sealer the best possible chance to perform.
The process is not complicated, but it rewards patience. Do not skip cleaning. Do not guess with chemicals. Do not assume one quick sanding pass is enough. A properly deglossed tile floor should look evenly dull, feel clean, and be fully dry before the next layer goes on. Put in the prep work now, and your finished floor is far more likely to survive foot traffic, moisture, cleaning days, and the occasional dropped shampoo bottle.
Note: This article is written for general DIY guidance. Always follow the specific instructions on your cleaner, deglosser, primer, paint, epoxy, or coating product, and test in a hidden area before treating the entire tile floor.