If your iPhone sounds a little tiny, tinny, or tragically underpowered when you are trying to play music in the kitchen, bedroom, or dorm room, there is good news: you do not need an app, Bluetooth pairing ritual, or a wallet with superhero powers. You can make a simple paper cup iPhone speaker at home with a few cheap materials and about as much engineering confidence as it takes to cut a straight-ish line with scissors.
Now, let’s be honest for one second. A paper cup iPhone speaker is not a “real” speaker in the electronic sense. It is a passive amplifier. That means it does not use batteries, wires, charging cables, or mysterious blinking lights. Instead, it redirects and boosts the sound your phone already makes by guiding the audio through a chamber, funnel, or tube. In plain English, it helps your iPhone sound louder and fuller using shape, air movement, and a bit of acoustic magic.
In this guide, you will learn three easy ways to make paper cup iPhone speakers, how each design works, which one sounds best, and how to improve the results without turning your desk into a craft-supply crime scene. You will also get practical tips, troubleshooting advice, and a longer experience section at the end so you know what these DIY phone amplifiers are actually like in real life.
Why a Paper Cup iPhone Speaker Works
Your iPhone’s built-in speaker is small, which means it cannot move a huge amount of air on its own. That is where cups, tubes, and cone shapes come in. When you place the phone so its sound is directed into a paper cup setup, the cups help channel the sound waves instead of letting them scatter in every direction. Some designs also create a resonating space, which can make the audio seem louder, warmer, or more focused.
Think of it like yelling into an empty hallway versus yelling into your hoodie. One of those gives your voice room to travel. The other gives you muffled regret. Paper cup speaker designs work because the shape of the structure helps sound move more efficiently through air.
What You Can Expect
A DIY paper cup phone speaker can make voices clearer, boost podcasts, and add a little more presence to music. It will not replace a good Bluetooth speaker, and it will not suddenly give your iPhone nightclub bass. What it can do is make casual listening more fun, more audible, and much more satisfying than balancing your phone in a cereal bowl and hoping for the best.
Before You Start: Materials and Safety Tips
Most of these methods use things you probably already have at home. Gather a few of the following:
- Paper cups
- Scissors or a craft knife
- Tape
- A cardboard tube, like a paper towel roll or toilet paper roll
- Marker or pencil
- Ruler
- Cardboard or thick paper
- Optional decorations like stickers, markers, or colored tape
Important iPhone-Friendly Tips
- Remove bulky cases if they block the speaker opening.
- Do not tape anything directly over the speaker grille.
- Make slots snug, but not so tight that they scratch the phone.
- If your speaker opening is dusty, clean it gently before testing.
- If your iPhone is wet, let it dry fully before using any DIY amplifier.
Method 1: The Single Paper Cup Horn
This is the simplest design and the best one for beginners. It works like a mini megaphone for your phone, and yes, that is as dramatic as it sounds.
What You Need
- 1 large paper cup
- Scissors or craft knife
- Marker
How to Make It
- Take a paper cup and place it on its side.
- Near the narrower end of the cup, mark a horizontal slot just wide enough for the edge of your iPhone.
- Carefully cut the slot.
- Slide your iPhone into the slot so the phone’s speaker end points into the cup.
- Play audio and rotate the phone slightly until the sound projects forward.
Why It Works
The cup acts as a horn. Instead of the sound escaping in all directions, it is pushed outward through the wider opening. This can make spoken audio surprisingly clearer and can add a little extra punch to songs with strong vocals.
Best Use Case
This method is great for podcasts, voice notes, YouTube clips, and quick desk listening. It is also the fastest build, which makes it perfect for impatient makers and people who believe “crafting” should be over before their coffee gets cold.
Method 2: The Two-Cup Tube Speaker
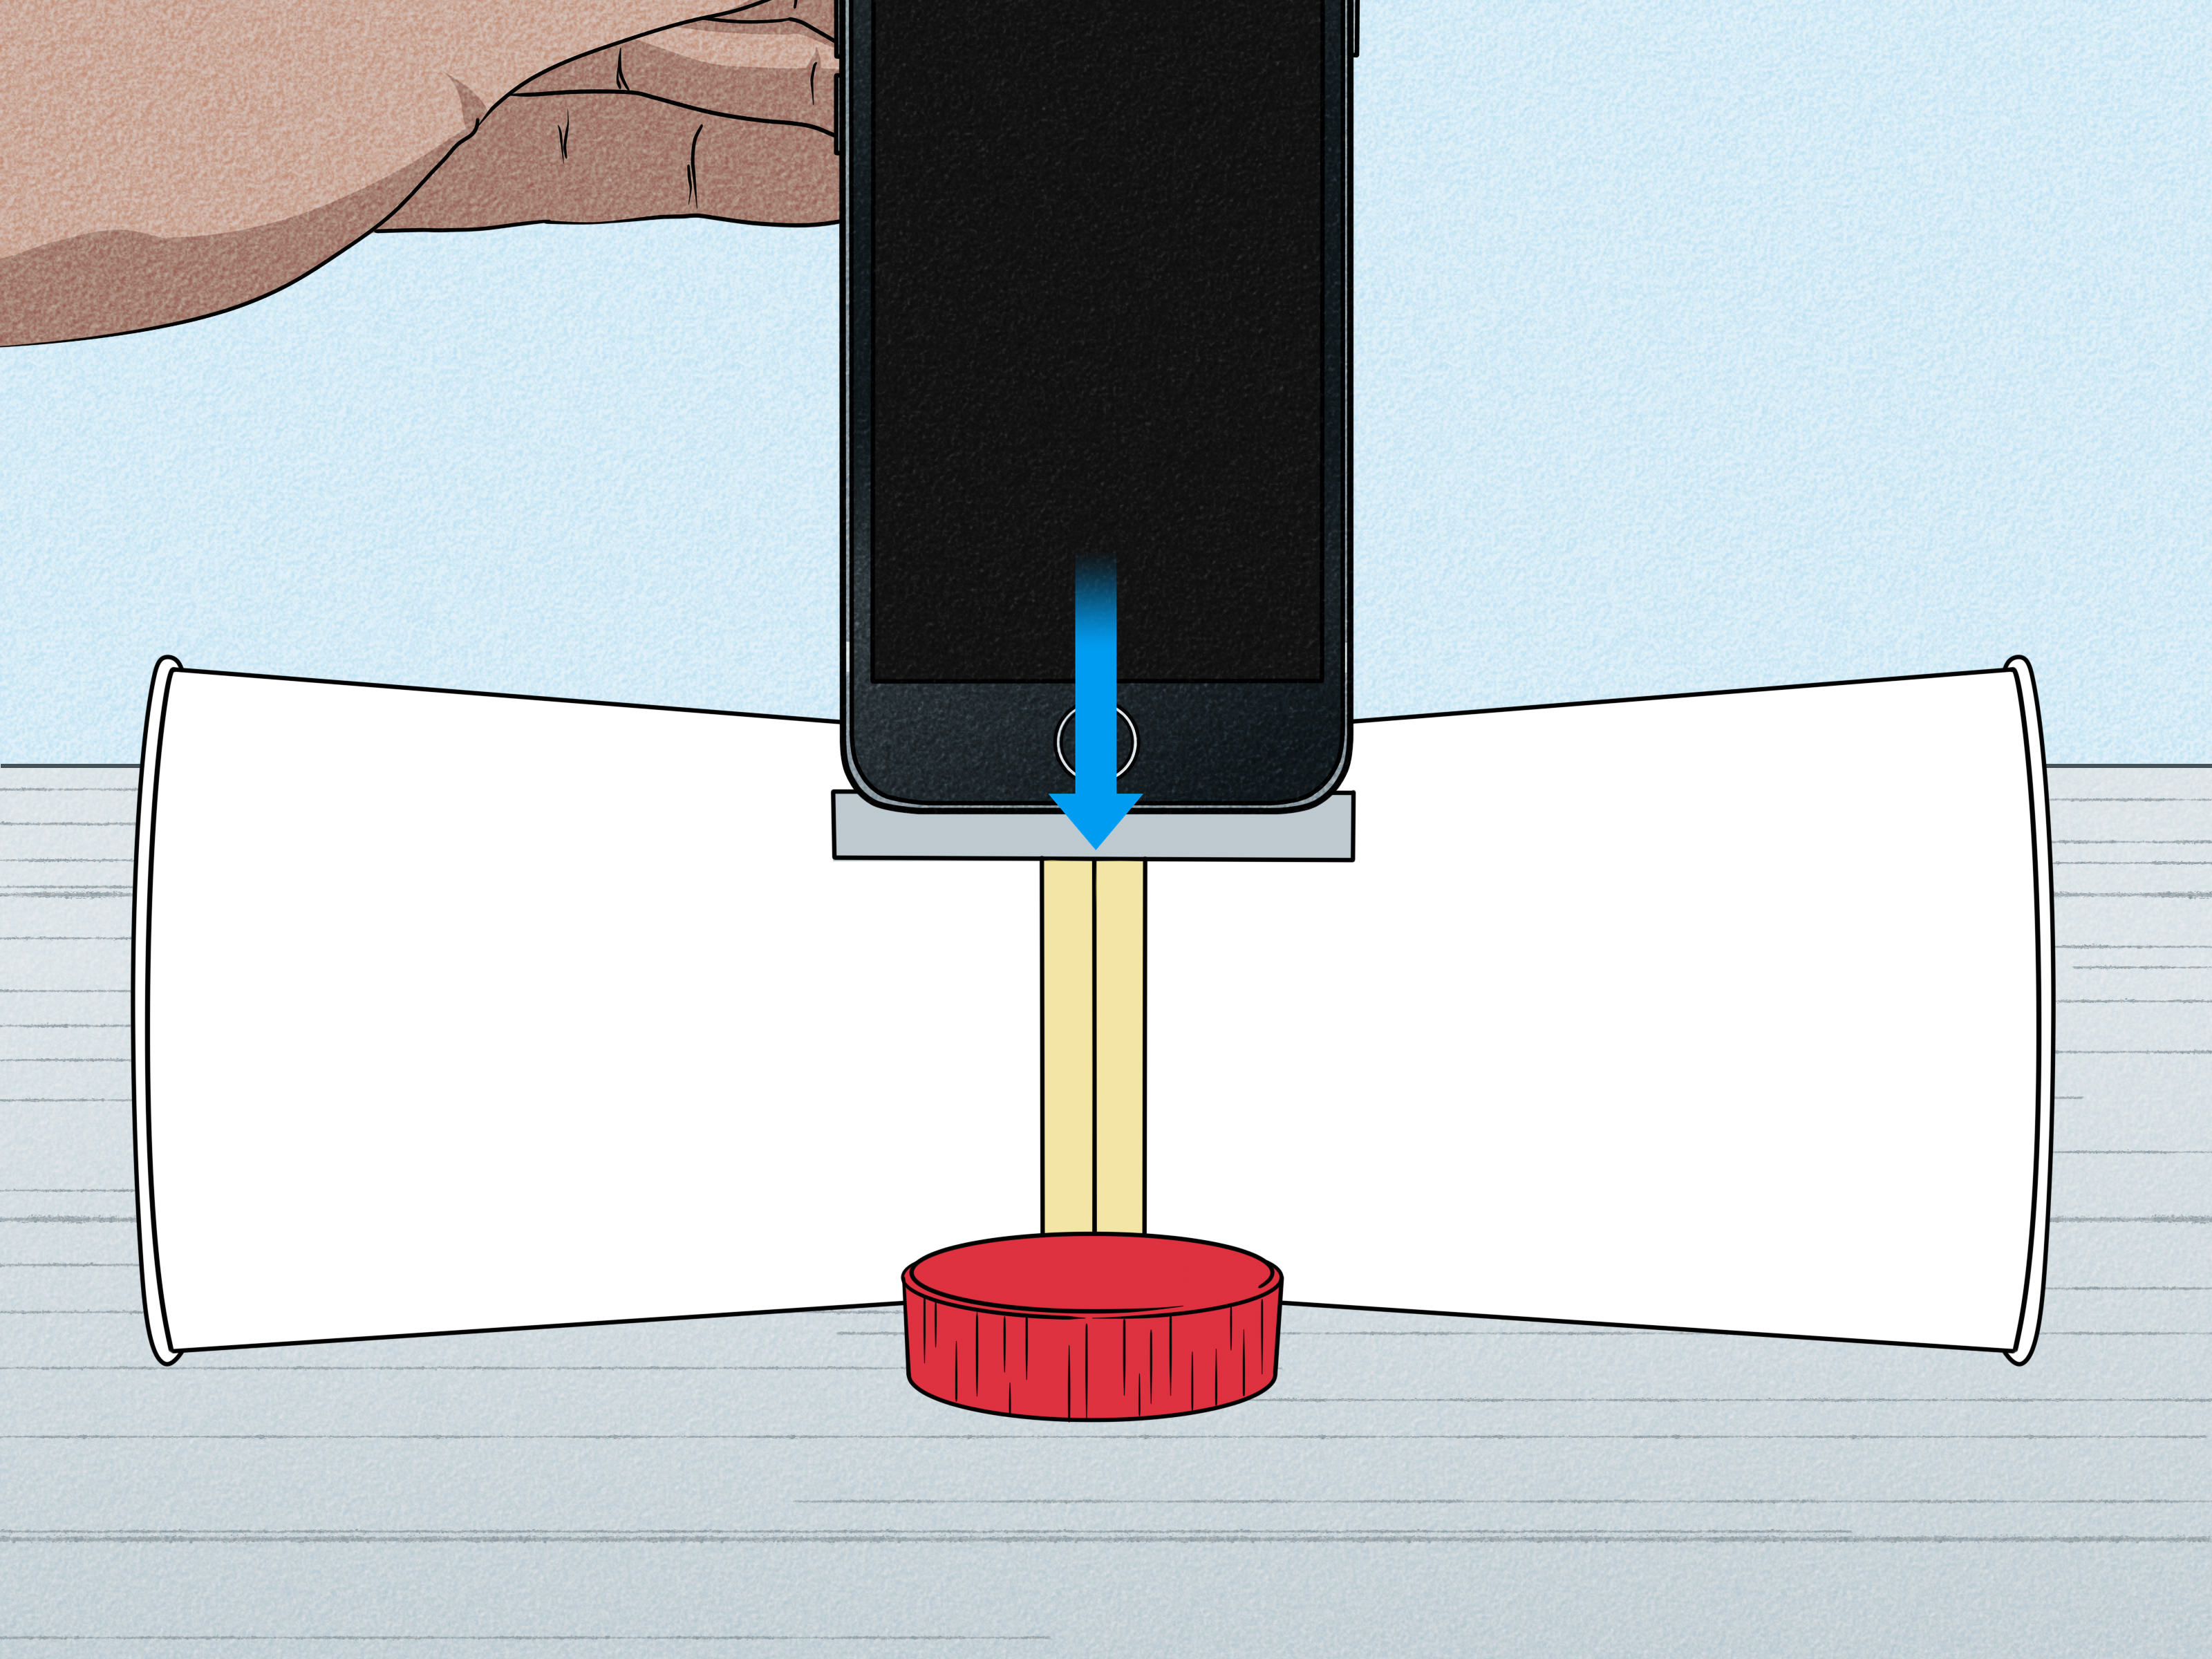
If you want the classic DIY phone amplifier look, this is the winner. It uses two paper cups and a cardboard tube to create a more balanced, louder sound. It is also the design most people picture when they hear “paper cup iPhone speaker.”
What You Need
- 2 paper cups
- 1 cardboard tube
- Scissors or craft knife
- Tape
- Marker
How to Make It
- Place the cardboard tube flat on a table.
- Mark a slot on the top center of the tube, long enough for your iPhone to sit securely.
- Cut the slot carefully.
- At the side of each paper cup, cut a circular hole just big enough for the ends of the cardboard tube to fit through.
- Insert one end of the tube into each cup.
- Use tape if needed so everything fits snugly and does not wobble.
- Slide your iPhone into the top slot with the speaker end facing into the tube.
- Play audio and place the setup on a flat surface.
Why It Works
The tube channels sound from the phone, while the two paper cups act like expansion chambers. Together, they help spread the sound in a broader and often louder way than the single-cup version. The better the seal between the cups and the tube, the better your results tend to be.
How to Improve It
- Use larger cups for bigger sound projection.
- Keep the slot only slightly wider than your phone.
- Try a thicker cardboard tube for fuller sound.
- Test the setup on wood, a desk, or a shelf to hear how surfaces affect the sound.
If Method 1 is the casual weekend project, Method 2 is the overachieving cousin who color-codes their notes and somehow makes it look effortless.
Method 3: The Cup-and-Cone Desk Speaker
This version is part paper cup speaker, part acoustic experiment, and part “wow, that actually looks kind of cool.” It uses one paper cup and a paper cone to funnel sound more intentionally.
What You Need
- 1 paper cup
- 1 piece of thick paper or light cardboard
- Tape
- Scissors
- Marker
How to Make It
- Roll the paper into a cone shape and tape the seam.
- Cut the narrow tip off the cone so there is a small opening.
- Cut a slot near the wider end of the cone for your iPhone.
- Insert the wide end of the cone into the mouth of the paper cup.
- Tape around the connection so the cone stays in place.
- Slide the iPhone into the slot so the speaker faces into the cone.
- Play audio and point the open cup toward your listening area.
Why It Works
The cone collects and redirects sound before it reaches the paper cup, which then helps project it outward. This design can create a more directional sound, meaning it may seem louder when you sit directly in front of it.
When to Use It
This is a smart choice for a desk, study area, or kitchen counter where you want the sound aimed at one spot. It also tends to look a bit more deliberate than the basic cup method, which matters if you are trying to impress friends, siblings, or the one person in the room who always says, “That’s nice, but does it actually work?”
Which Paper Cup iPhone Speaker Sounds Best?
If you only want one answer, here it is: the two-cup tube speaker usually gives the best all-around result. It is often louder than the single-cup horn and less finicky than the cone design. It also feels more stable, especially if you make the slot carefully.
That said, the “best” design depends on what you want:
- Fastest to build: Single paper cup horn
- Best overall sound boost: Two-cup tube speaker
- Best directional listening: Cup-and-cone desk speaker
How to Make Your DIY iPhone Speaker Sound Better
Use Sturdier Cups
Flimsy cups can absorb some of the vibration instead of helping project it. Slightly thicker paper cups usually perform better than very soft, bendy ones.
Keep the Openings Snug
If the tube is loose in the cups or the phone slot is too wide, sound can leak out before it reaches the chamber. A neat fit matters more than fancy decorations.
Point the Speaker Toward You
These designs are not magic domes of perfect audio. They are directional. If the opening faces a wall, the wall gets the concert.
Try Different Cup Sizes
Large cups can create more volume, while smaller cups may sound tighter and more focused. Testing both is part of the fun.
Start With Clean iPhone Speakers
If the phone’s speaker opening is blocked by lint, dust, or a bulky case, your DIY setup is working with a handicap. Clean and clear audio at the source leads to better results at the cup.
Common Mistakes to Avoid
- Cutting the phone slot too large so the iPhone slips or leaks sound
- Using cups that collapse under the weight of the tube
- Blocking the wrong side of the phone instead of directing sound into the chamber
- Assuming louder always means better; clarity matters too
- Using wet or damaged cups that distort the structure
The biggest mistake, though, is expecting a paper cup speaker to sound like premium hardware. This is a fun acoustic hack, not a tiny paper nightclub.
Conclusion
Making a paper cup iPhone speaker is one of those rare DIY projects that is cheap, easy, educational, and genuinely useful. You can build one in minutes, test different shapes, and hear the effect right away. Better yet, the project teaches a simple lesson in acoustics: sound changes dramatically when you guide it through the right shape.
If you want the easiest build, make the single cup horn. If you want the strongest sound boost, try the two-cup tube speaker. If you want something a little more creative and directional, build the cup-and-cone desk version. None of them cost much, all of them are fun to test, and at least one of them will probably make you say, “Okay, that is way cooler than it has any right to be.”
Hands-On Experiences With Paper Cup iPhone Speakers
Once you actually start building these paper cup iPhone speakers, the experience becomes half science experiment and half personal obsession. At first, it seems almost too simple to work. You cut a cup, drop in a phone, play a song, and expect disappointment. Then the sound changes just enough to make you pause. It is not earth-shaking, but it is noticeable. Voices sound more direct. A podcast host suddenly feels less like they are whispering from the bottom of a backpack. Even that tiny improvement is enough to make you start tweaking the design like a very low-budget sound engineer.
The single-cup version usually gives people their first “aha” moment. It is the easiest to build, and because it takes only a couple of minutes, the reward feels immediate. It is especially satisfying with speech-heavy audio. If you listen to a news clip, an audiobook, or a video tutorial, the cup horn often makes the sound seem more forward and easier to hear. Music can improve too, though the results depend on the song. Acoustic tracks, vocals, and lighter instrumentals often benefit more than bass-heavy songs, which can still sound thin because, well, you are listening through a paper cup and not a miracle.
The two-cup tube design is where the project starts to feel more legitimate. It looks like a real object instead of a rushed kitchen hack, and it often performs better because the sound has more structure to travel through. People who try this version often notice that placement matters a lot. Put it on a wooden desk, and the sound can feel fuller. Put it on a soft bedspread, and it may lose a little projection. Turn the cups slightly, and the sound shifts again. That is part of the fun. You are not just making a gadget; you are learning how space, surfaces, and materials change the way sound behaves.
The cone-and-cup version tends to surprise people in a different way. It can feel more directional, almost like a tiny desktop announcer. Sit right in front of it, and the sound feels stronger. Move off to the side, and the effect drops. That makes it useful for personal listening while studying or cooking, especially when you want the audio aimed at you instead of bouncing around the whole room. It also wins points for creativity. Even if the sound improvement is modest, the design looks inventive enough that people usually want to try their own version.
Another common experience is realizing that small build choices make a big difference. A neat cut sounds better than a sloppy one. A snug fit beats a loose opening. A thicker cup often works better than a flimsy one. Many people start with whatever cups are in the kitchen and then end up testing several sizes just to hear the difference. That trial-and-error process is part of what makes the topic so engaging. It is practical, but it also invites curiosity.
Perhaps the best part is that this project feels accessible. You do not need expensive tools, advanced skills, or any knowledge of electronics. You can make one alone, with siblings, with classmates, or as a quick weekend craft. It is cheap enough to redo, simple enough to teach, and useful enough that you might actually keep the best version on a desk for casual listening. For a project made of paper cups and cardboard, that is a pretty impressive résumé.