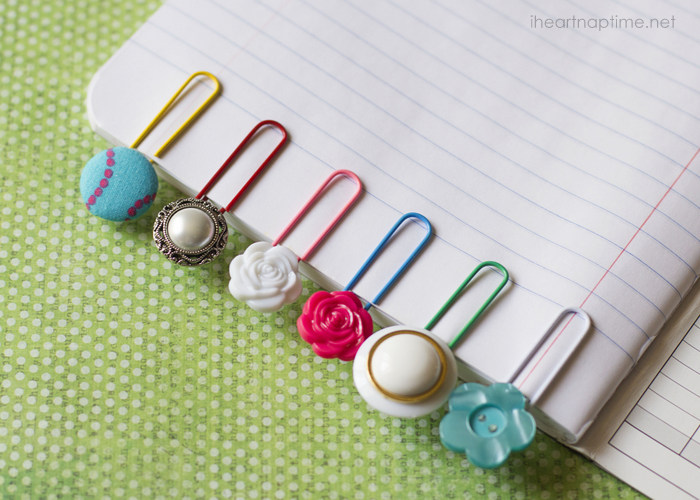
Buttons are tiny circles of possibility. To adults, they are the mysterious objects hiding in junk drawers, sewing boxes, and that one kitchen container nobody is allowed to throw away. To kids, buttons are treasure: shiny, colorful, stackable, sort-able, glue-able, and perfect for making art that looks impressive without requiring a degree in glitter engineering.
These 10 easy button crafts for kids are designed for parents, teachers, homeschool families, babysitters, and anyone who has ever looked at a pile of spare buttons and thought, “Surely these can become something other than clutter.” The projects below use simple supplies like cardstock, glue, craft sticks, paper plates, yarn, markers, and recycled materials. They are fun enough for a rainy afternoon, simple enough for beginners, and flexible enough for preschoolers, elementary-age kids, and older children who like adding their own flair.
Before the fun begins, a quick safety reminder: buttons are small parts. These crafts are best for children who no longer put objects in their mouths, and they should always be done with adult supervision. Keep buttons away from babies and toddlers under age 3, avoid button batteries completely, and use child-safe glue instead of hot glue unless an adult is handling the hot glue gun. Craft time should end with a masterpiece, not a dramatic living-room search party for a swallowed purple button.
Why Button Crafts Are Great for Kids
Button crafts are more than cute refrigerator decorations. They also help kids practice fine motor skills, hand-eye coordination, color sorting, pattern recognition, counting, creative planning, and patience. Picking up small buttons, choosing where to place them, squeezing glue, and arranging designs all require careful finger movement. That kind of hands-on practice supports everyday skills like writing, drawing, tying shoes, buttoning coats, and using scissors.
Another benefit is that button art is wonderfully forgiving. A button flower can have six petals, seven petals, or one petal that wandered off to become “abstract.” A button rainbow does not need perfect lines. A button monster can have three eyes and still be considered emotionally complete. This makes button crafts ideal for open-ended art, where kids get to make choices instead of simply copying an adult’s sample.
Basic Supplies for Easy Button Crafts
You do not need a fully stocked craft room to make these projects. A small button stash and a few common supplies will carry you through most of the ideas below.
Helpful Materials
- Assorted buttons in different colors and sizes
- Cardstock, construction paper, or cardboard
- Washable school glue, tacky glue, or glue dots
- Markers, crayons, colored pencils, or watercolor paint
- Craft sticks, pipe cleaners, yarn, ribbon, or string
- Paper plates, cupcake liners, recycled lids, or cereal boxes
- Child-safe scissors
- Small bowls, muffin tins, or trays for sorting buttons
Safety Tips Before You Start
- Use large buttons for younger kids and save tiny buttons for older children.
- Supervise closely, especially with preschoolers.
- Never use button batteries as craft supplies.
- Keep buttons off the floor and away from pets and younger siblings.
- Use non-toxic glue and washable art materials.
- Let projects dry flat so buttons stay attached.
10 Easy Button Crafts for Kids
1. Button Flower Cards
Button flower cards are cheerful, simple, and perfect for Mother’s Day, birthdays, teacher gifts, spring crafts, or “I made this because I found glue” moments. Kids can use buttons as flower centers and draw petals around them, or they can build the whole flower from layered buttons.
What you need: cardstock, colorful buttons, green markers or craft sticks, glue, and optional cupcake liners.
How to make it: Fold a piece of cardstock in half to create a card. Glue one button near the top as the flower center. Draw petals around it, or glue smaller buttons around the center to make button petals. Add a green stem with marker, a craft stick, or a strip of paper. For a 3D effect, glue a cupcake liner behind the button before attaching it to the card.
Kid-friendly twist: Ask your child to make a “garden card” with three different button flowers. They can name each flower something silly, such as the Polka-Dot Daisy, the Rainbow Fluff Bloom, or the Extremely Fancy Buttonicus.
2. Button Rainbow Art
A button rainbow is a beautiful color-sorting activity disguised as art. Kids sort buttons by color, arrange them into curved rows, and create a bright wall-worthy picture.
What you need: white cardstock, pencil, glue, buttons in rainbow colors, and cotton balls for clouds.
How to make it: Lightly draw rainbow arcs on the paper. Let your child sort buttons into red, orange, yellow, green, blue, and purple groups. Glue the buttons along each arc, working one color at a time. Add cotton balls at the bottom for clouds.
Learning bonus: This craft supports color recognition, sequencing, and planning. Younger kids can make a mini rainbow with only three colors, while older kids can create a full rainbow with careful spacing.
3. Button Tree Collage
A button tree collage is one of the most classic button craft ideas for kids. It looks fancy, but the steps are easy. The tree trunk can be drawn, painted, or made from torn paper, and the buttons become leaves, fruit, or blossoms.
What you need: cardstock or canvas board, brown marker or paint, buttons, glue, and optional tissue paper.
How to make it: Draw or paint a simple tree trunk with branches. Once dry, glue buttons around the branches as leaves. Use green buttons for summer, orange and red buttons for fall, pink and white buttons for spring blossoms, or mixed colors for a magical candy tree. No judgment. Candy trees deserve representation.
Variation: Make a four-season button tree by dividing the page into four sections. Kids can decorate each section with seasonal button colors: pink for spring, green for summer, orange for fall, and blue-white for winter.
4. Button Caterpillar Craft
This adorable button caterpillar is ideal for preschool and early elementary kids. It uses buttons to create body segments and gives children practice arranging objects in a line.
What you need: large buttons, cardstock, glue, googly eyes or paper eyes, marker, and pipe cleaners.
How to make it: Glue buttons in a curved line across the paper to form the caterpillar’s body. Use a larger button or paper circle for the head. Add eyes, a smile, and pipe cleaner antennae. Draw grass, flowers, or a leaf underneath.
Skill builder: Ask kids to create a pattern, such as red-blue-red-blue or big-small-big-small. Pattern play makes this simple kids button art activity feel like a tiny math lesson wearing a costume.
5. Button Picture Frame
A button picture frame is a great handmade gift and a fun way to decorate a favorite family photo, school picture, or drawing. It also helps kids think about borders, spacing, and design.
What you need: craft sticks or cardboard frame, buttons, glue, paint or markers, and a photo or drawing.
How to make it: Create a square or rectangle frame from craft sticks, or cut one from cardboard. Paint or color the frame first. Once dry, glue buttons around the border. Let kids choose a color theme: ocean blues, rainbow mix, black-and-white, sports team colors, or “whatever came out of the button jar first.” Add a photo or drawing behind the frame.
Tip: For younger kids, use glue dots or tacky glue so buttons stick faster. School glue works too, but it may need more drying time.
6. Button Animals
Button animals are wonderfully creative because there is no single right way to make them. A big button can become a turtle shell, a small button can become a bird’s eye, and a row of buttons can become fish scales.
What you need: buttons, construction paper, markers, glue, scissors, and optional googly eyes.
How to make it: Choose an animal, then decide which parts can be made with buttons. For a turtle, glue a large green button as the shell and draw the head, legs, and tail. For a fish, draw the body and glue small buttons as scales. For an owl, use two large buttons as eyes and triangle paper pieces for the beak and ears.
Creative challenge: Invite kids to invent a brand-new animal. Maybe it is a Buttonosaurus, a Sparkle-Finned Wobblefish, or a Polka-Dot Snailicorn. This encourages storytelling along with art.
7. Button Snowman Card
A button snowman card is a cozy winter craft that works for holiday cards, classroom projects, or snowy-day fun when the actual snow outside has turned into gray sidewalk soup.
What you need: white buttons in different sizes, blue cardstock, glue, markers, orange paper, and ribbon or yarn.
How to make it: Glue two or three white buttons vertically to make a snowman. Add a paper carrot nose, marker eyes, and a ribbon scarf. Draw snowflakes, a hat, arms, or a snowy ground. Kids can write a message inside if they are making a card.
Variation: Use black buttons for coal, tiny buttons for falling snow, or a bright button as a sun peeking through the cold sky.
8. Button Name Art
Button name art turns a child’s name into a colorful design. It is a simple personalized craft for bedroom doors, desks, cubbies, or classroom bulletin boards.
What you need: cardstock, pencil, marker, buttons, and glue.
How to make it: Write the child’s name in large bubble letters. Let the child trace the letters with buttons or fill the inside of each letter with buttons. For younger kids, start with one initial instead of the full name. Older kids can create color patterns, ombré designs, or themed letters.
Learning bonus: This craft combines literacy, fine motor practice, and personal expression. Children are often extra motivated when the project includes their own name, because nothing says “important artist” like seeing your name covered in buttons.
9. Button Bracelet or Necklace
Button jewelry is a wearable craft that kids love because they can actually use the finished project. It is best for older children who can safely handle stringing materials and understand that buttons are not snacks.
What you need: large buttons with big holes, yarn, elastic cord, ribbon, or pipe cleaners.
How to make it: Cut a length of yarn, ribbon, or elastic cord. Thread buttons onto it one by one. Tie the ends securely to make a bracelet or necklace. For beginners, use pipe cleaners because they are stiff and easier to guide through buttonholes.
Design idea: Kids can sort buttons by size before stringing them, create repeating patterns, or make friendship bracelets in favorite colors. This is also a helpful activity for practicing patience, because threading buttons requires focus and a steady hand.
10. Button Monster Collage
Button monsters are perfect for Halloween, rainy days, or any afternoon when children want permission to be delightfully weird. The best part? Monsters do not have to look realistic. In fact, the less realistic, the better.
What you need: construction paper, buttons, glue, markers, yarn, scrap paper, and googly eyes.
How to make it: Cut or draw a monster body. Glue buttons on as eyes, spots, teeth, belly buttons, or mystery bumps. Add yarn hair, paper horns, marker arms, and a goofy smile. Let kids decide whether their monster is scary, friendly, sleepy, fancy, or just misunderstood.
Story prompt: Ask your child to name the monster and describe what it eats. Accept all answers, even if the monster eats socks, homework, or only blue pancakes on Tuesdays.
Extra Button Craft Ideas for Different Ages
For Preschoolers
Choose projects with large buttons, simple shapes, and limited steps. Button flowers, caterpillars, rainbows, and name initials work especially well. Pre-draw shapes for children to fill in, and place buttons in shallow trays so they are easy to grab. Keep sessions short and celebrate effort over neatness.
For Kindergarten and Early Elementary Kids
Kids in this age range can handle more planning. Try button trees, picture frames, snowman cards, and button animals. Encourage them to sort by color, compare sizes, count buttons, and create patterns. This turns an easy craft into a playful STEAM activity without making it feel like homework in disguise.
For Older Kids
Older kids may enjoy more detailed designs such as button mosaics, jewelry, seasonal cards, and mixed-media canvas art. Give them more control over the design and materials. They can sketch a plan first, test layouts before gluing, and combine buttons with fabric scraps, paint, embroidery floss, or recycled cardboard.
How to Make Button Crafts Less Messy
Button crafts are easier to manage when each child has a small tray or paper plate. Pouring the entire button jar onto the table may feel exciting for three seconds, but then you are basically hosting a tiny plastic avalanche. Use muffin tins or small bowls to sort colors and sizes. Place a washable mat or newspaper under the project. Keep wipes nearby for gluey fingers. And if you are crafting with a group, write each child’s name on the back of the paper before the glue comes out. Once every project is covered in buttons, identifying ownership becomes advanced detective work.
Common Mistakes to Avoid
Using Too Much Glue
Kids often believe glue works better when applied in pudding-sized amounts. It does not. A small dot of tacky glue usually works better than a lake of school glue. Teach children to use “just a dot, not a lot.” Repeat this phrase until it becomes part of your household culture.
Choosing Buttons That Are Too Small
Tiny buttons can be difficult for younger children to handle and may create safety concerns. Use larger buttons whenever possible, especially with preschoolers. Save the miniature buttons for older kids or adult-assisted details.
Skipping Drying Time
Button projects need time to dry flat. If a child proudly waves a freshly glued button rainbow through the air, the rainbow may become weather. Let projects sit overnight when possible.
Expecting Perfect Results
The goal of easy crafts for kids is not perfection. It is creativity, exploration, and the joy of making something with their own hands. Crooked buttons, unusual color choices, and surprise glue blobs are part of the charm.
Real-Life Experiences With Button Crafts for Kids
Button crafts have a special kind of magic because they meet children exactly where they are. Some kids immediately start sorting buttons by color like tiny inventory managers. Others pile every button into one mountain and announce that it is “done.” Both approaches are valid, and both tell you something interesting about how children think, explore, and make decisions.
In a home setting, button crafts are especially useful on days when everyone needs a quiet activity but nobody wants another worksheet. A simple button flower card can turn into a 45-minute creative session if you give kids enough choices. One child might carefully choose five matching pink buttons for a neat flower. Another might glue one giant red button in the middle and call it a “volcano flower.” The second child is not wrong. Nature is full of surprises.
In classrooms, button crafts work well because they can be adapted for different skill levels. A preschool teacher might pre-cut paper shapes and let children add large buttons. A first-grade teacher might ask students to create patterns around a picture frame. A second-grade teacher might connect button art to math by having kids count, sort, graph, or compare button groups before using them in a craft. The same jar of buttons can support art, math, language, and sensory play.
Parents often notice that button crafts slow children down in a good way. Unlike coloring a page quickly, arranging buttons takes more intention. Kids test one button, move it, replace it, compare it with another, and eventually glue it down with great ceremony. This process builds patience. It also gives adults a chance to ask open-ended questions: “Why did you choose that color?” “What happens if the big buttons go first?” “How many buttons do you need to finish the wing?” These questions encourage thinking without turning craft time into a quiz show.
Another experience many families share is the pride children feel when a button craft becomes a gift. A handmade button card for Grandma or a button picture frame for Dad feels personal because kids can point to every piece and say, “I put that there.” The project becomes more than paper and glue. It becomes a story: the button that rolled away, the flower that needed extra petals, the monster with twelve eyes because “he sees everything, even snacks.”
Storage is part of the experience too. A button jar can become a family craft tradition. Save spare buttons from old shirts, thrift-store finds, sewing kits, or broken garments. Wash and dry them before adding them to the craft stash. Over time, kids begin to see ordinary objects as creative materials. That mindset is powerful. It teaches resourcefulness, reduces waste, and helps children understand that art does not always come from expensive kits. Sometimes it comes from a jar of forgotten buttons and a little imagination.
The best experience tip is simple: set expectations before starting. Tell children where buttons should stay, how much glue to use, and what to do when they finish. Then step back enough to let them create. Adults can guide safety and setup, but the real joy comes when children take ownership. Their button rainbow may not look like the sample. Their button caterpillar may be suspiciously shaped like a pickle. Their button monster may have more personality than most people at the grocery store. That is the point. Button crafts give kids permission to experiment, laugh, problem-solve, and make something wonderfully their own.
Conclusion
These 10 easy button crafts for kids prove that simple materials can lead to big creativity. With a handful of buttons, paper, glue, and imagination, children can make flower cards, rainbow art, tree collages, caterpillars, picture frames, animals, snowmen, name art, jewelry, and silly monsters. Along the way, they practice fine motor skills, color recognition, sorting, planning, storytelling, and creative confidence.
The key is to keep projects safe, age-appropriate, and flexible. Use large buttons for younger children, supervise closely, avoid button batteries, and let kids make artistic decisions. A button does not have to become what an adult expects. In a child’s hands, it can become a flower, an eye, a wheel, a planet, a cookie, a snowball, or the official belly button of a monster named Kevin. And honestly, Kevin sounds delightful.
Note: This article synthesizes practical craft ideas and child-safety principles from reputable U.S. craft, parenting, child-development, and safety resources, including guidance from CPSC, CDC, HealthyChildren/AAP, NAEYC, PBS KIDS for Parents, Zero to Three, Michigan State University Extension, Crayola, The Best Ideas for Kids, Fun Learning for Kids, Made To Be A Momma, The OT Toolbox, Parents, and KidsHealth. Always supervise children during button crafts and keep small parts away from children under age 3.